- Blogs
- Paso a paso
- How to Make a Subscriber Into an Admin on WordPress?
Paso a paso / 5 min de lectura
How to Make a Subscriber Into an Admin on WordPress?

While it’s not the most common situation, at some point, you may find yourself needing to make a Subscriber into an Admin on your WordPress site.
Maybe you need to perform a role that requires Administrator privileges, or maybe your site’s been hacked, and you need a new Admin account to take control back.
Regardless of your intentions, let’s explore the methods you can use to turn a Subscriber into an Admin in WordPress.
Key Takeaways
- You can turn a Subscriber into an Admin by using WordPress’s user management features in Users > All Users.
- Alternatively, a more advanced method is using database management software to manually edit the role of your Subscriber.
Why Make a Subscriber an Admin in WordPress?
The main reason why you’d upgrade a user to the Admin or Administrator role is because you need them to perform a role that requires Admin permissions.
Admins have the most control over a WordPress site and have total freedom to modify it, install or uninstall themes or plugins, adjust sitewide configuration settings, and more.
Another reason why you may want to upgrade a Subscriber, the role with the lowest permissions, to an Admin is because your site has been hacked, and you need to access it using a different account than your usual one, which may have been maliciously modified or deleted.
2 Methods to Make a Subscriber an Admin on WordPress
There are multiple ways to change user roles in WordPress, but we’ll focus on 2: using WordPress’s built-in user management features and editing the database to manually modify user roles.
Method 1: Use WordPress’s User Management Features
WordPress has built-in user management features you can use to quickly change a user’s role within your site.
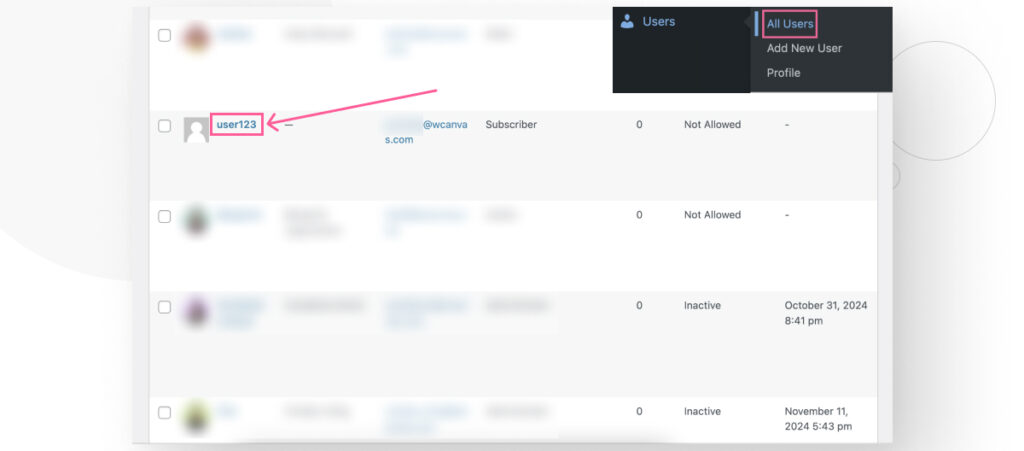
To use these features, log in to your site and go to Users > All Users. You will see a list of all registered users on your site. Click on any user with a Subscriber role that you want to turn into an Administrator.
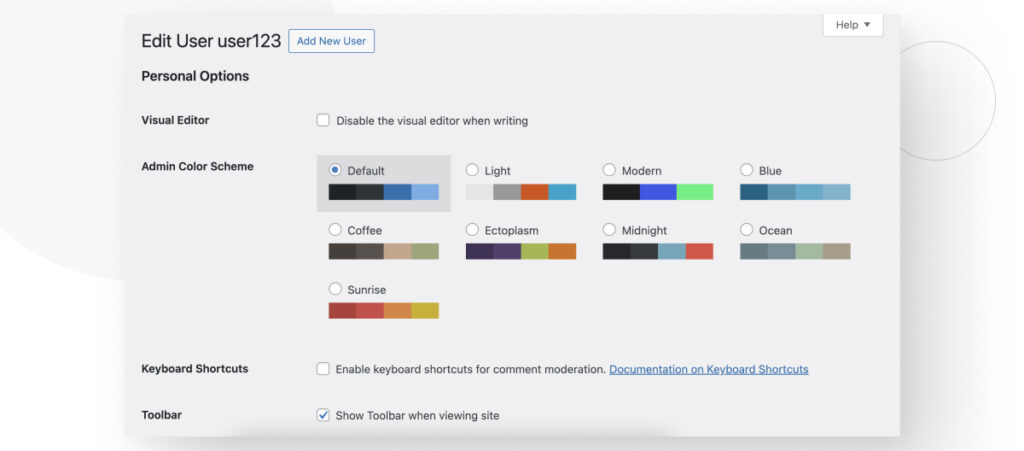
On the following screen, you will see various options related to that user.
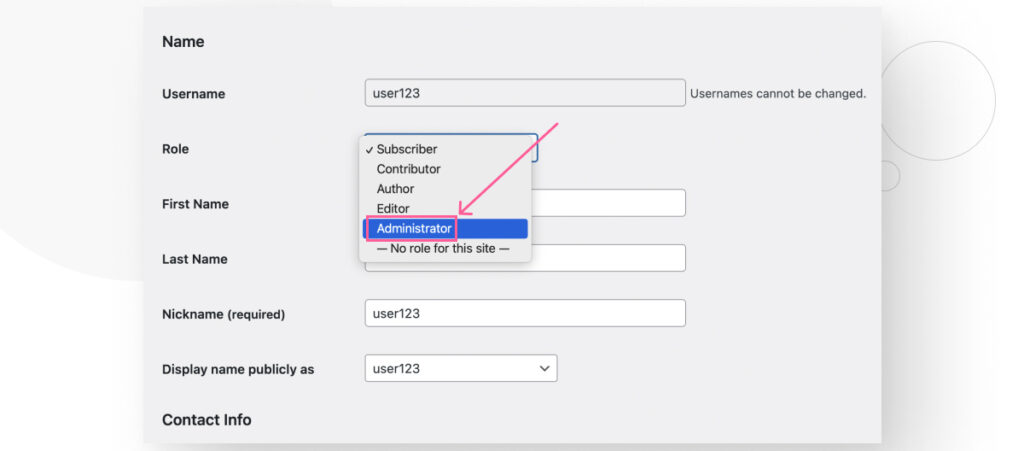
Scroll down until you see the Role field. It reads Subscriber, so click on it and select Administrator from the dropdown menu.
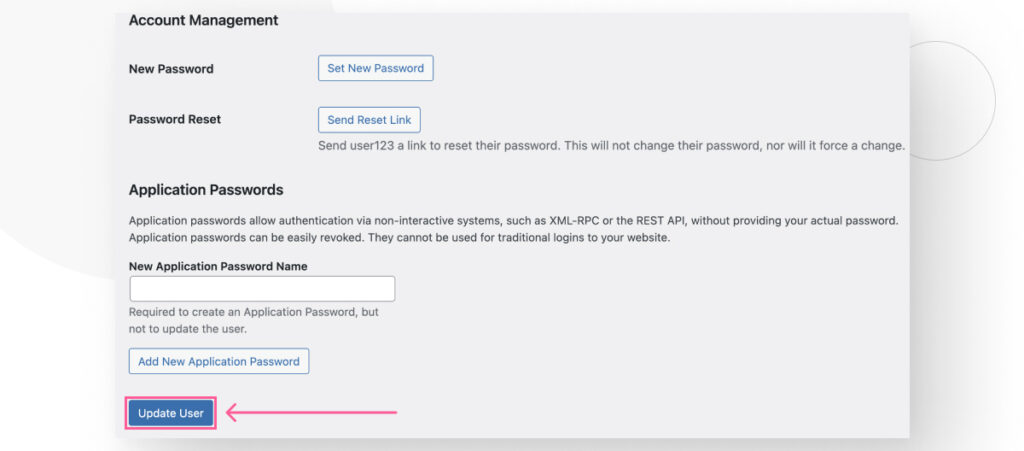
Finally, scroll down to the bottom of the page and click on Update User.
Method 2: Modify a Subscriber Using a Database Management Tool
This method is a bit more complicated if you have no experience managing databases, but it can be a valuable tool if your site is ever hacked and the hackers change your user’s role to something other than Admin.
It can also be useful if the hackers delete your account because you can turn any account into an Admin and use it to log back in, provided that you know the password for this second account.
Regardless, you can access your database using various methods, one of them being cPanel. If your hosting provider doesn’t use cPanel, they may use a similar hosting control panel, such as Hostinger’s hPanel. Otherwise, contact them and explore your options.
Step 1: Access cPanel
To access cPanel, all you have to do is visit your site’s domain but append the :2083 port at the end of the URL. For example: https://your-domain.com:2083.
Enter your cPanel username and password.
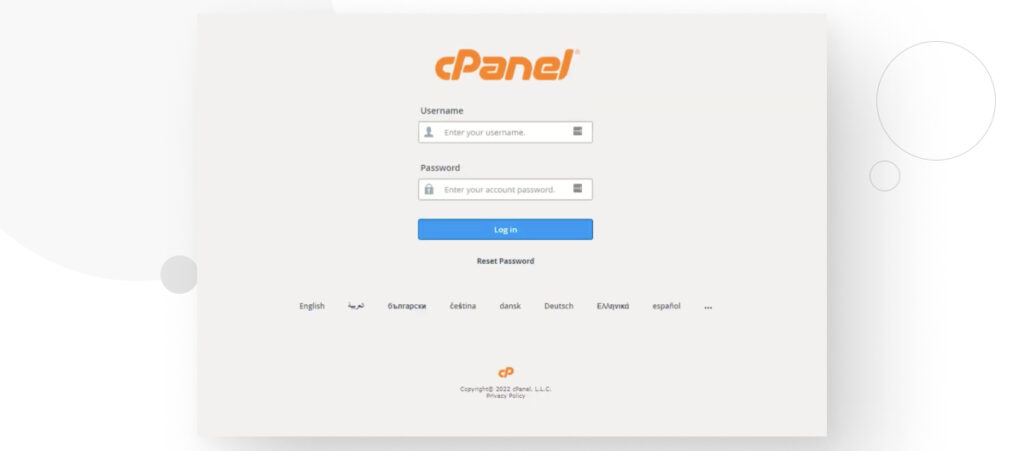
Step 2: Access phpMyAdmin
You will see cPanel’s main interface with various options for managing your server files and more. Search for and click on phpMyAdmin, which is a database manager.
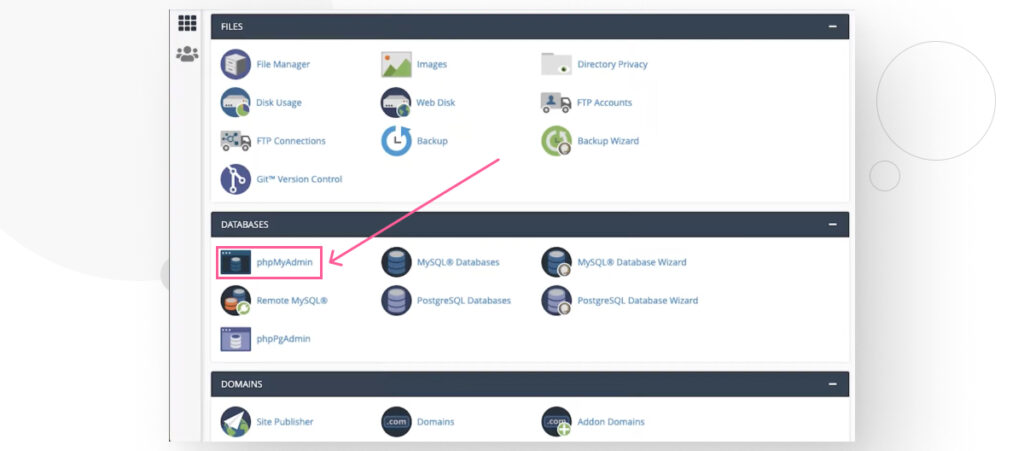
Step 3: Access Your WordPress Database
On the left sidebar, you’ll see a list of the installed databases. Choose the one where your WordPress database is.
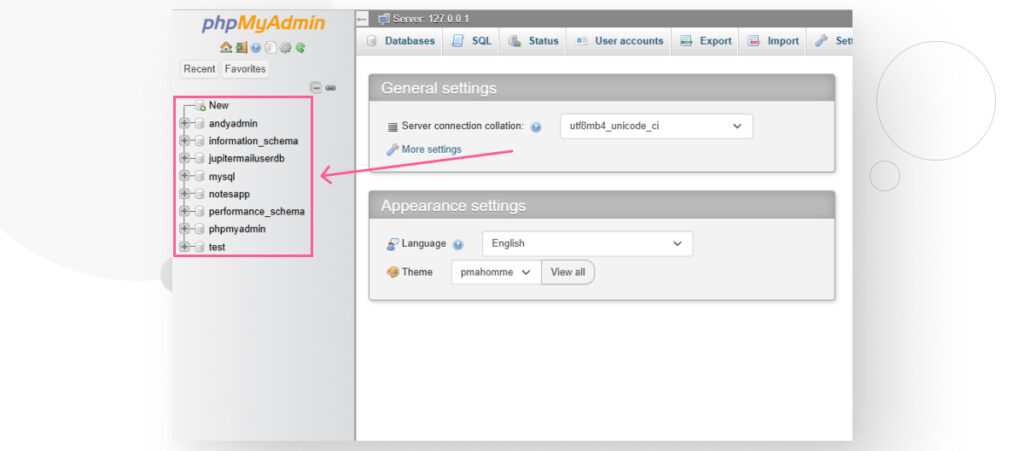
If you don’t know which database contains your WordPress database, you can go back to the main cPanel interface and click on Files > File Manager.
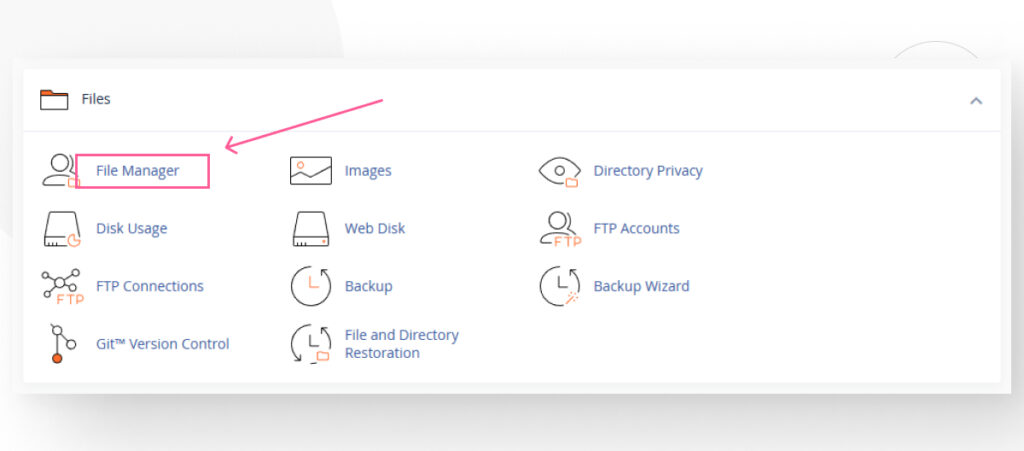
Go to the public_html folder, which is the main installation folder for your site. In some cases, it may have a different name, such as / or root, public, root_html, or your website’s name.
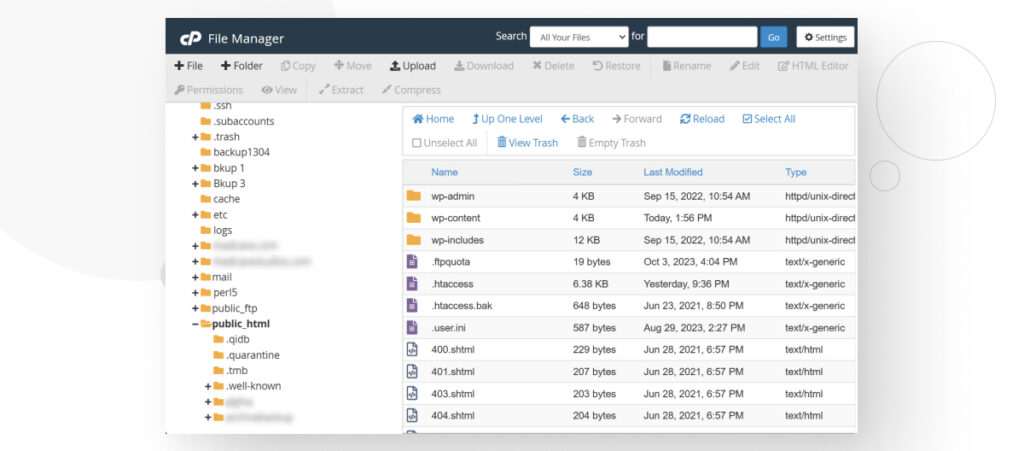
Among the files in this folder, you will find wp-config.php. Right-click the file and select View/Edit. Browse the contents of the file until you see the line that defines the database your site is using. It will look like this:
define('DB_NAME', 'your-database-name-goes-here');Once you know which database to look for, go back to phpMyAdmin and select that database from the left sidebar.
Step 4: Search for and Modify Your User
Search for the wp_usermeta table. This is the table that contains all the information about every user on your site.
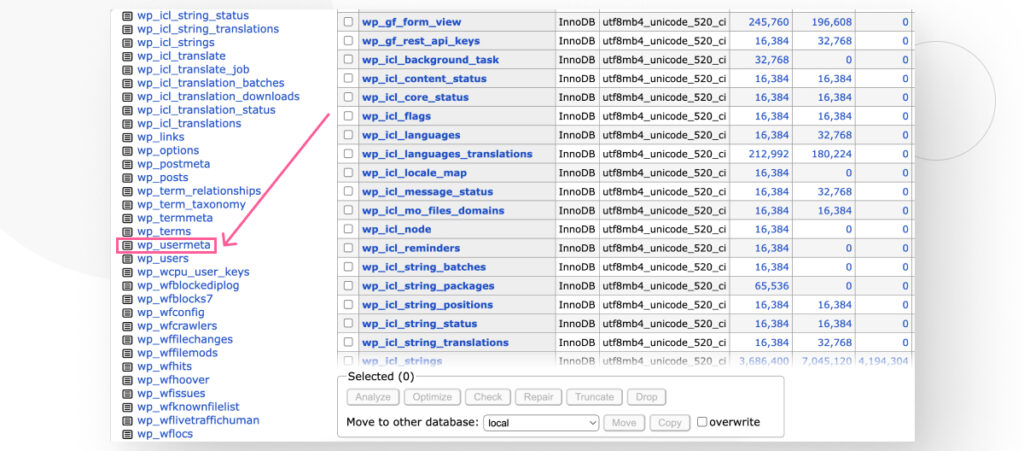
Once on the wp_usermeta table, you have to browse until you find the user you’re looking for. You can search by the nickname field. In our case, we’re looking for a user with the nickname “Andy.”
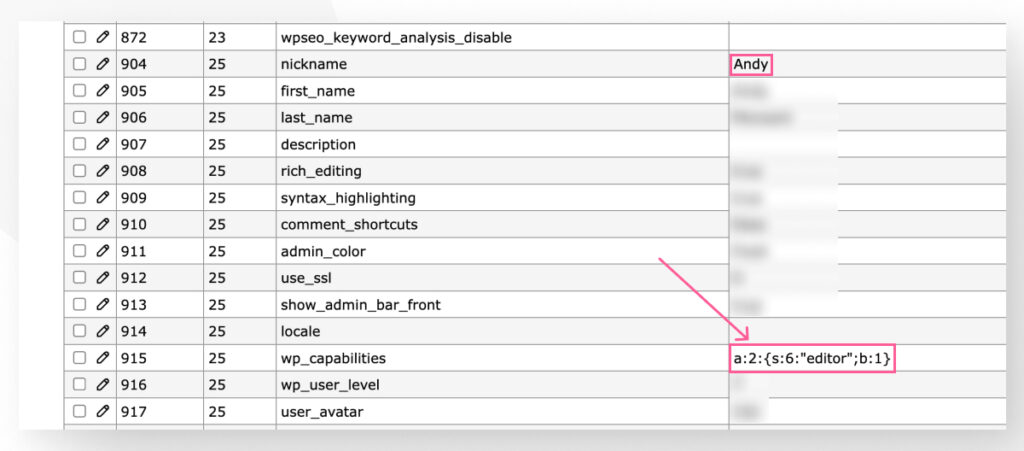
Several fields below the username, you will see the wp_capabilities field, which specifies the user’s role. Edit the field to make it as follows: a:1:{s:13:"administrator";b:1;}.
After making this change, the user will be an Admin.
Start Adjusting User Roles on Your WordPress Sites
As you can see, there are multiple ways to make a Subscriber an Admin on WordPress, from the platform’s built-in features to manually modifying the database.
Hopefully, with this information, you can take control of your site’s user roles and ensure all users have the permissions they need to perform their duties.
If you found this post useful, read our blog and developer resources for more insights and guides!
Artículos relacionados

Perspectivas de la Industria / 11 min de lectura
Perspectivas de la Industria / 11 min de lectura
Do You Need a Web Developer to Build a WordPress Site?
If you’re building a WordPress site or considering building one, you wonder whether you need a web developer to create it or you can do it yourself. The answer can…
Leer más
Paso a paso / 6 min de lectura
Paso a paso / 6 min de lectura
How to Change the Bottom Padding Dimensions on WordPress Blocks
If you're learning to modify your WordPress site's layouts and design, you may be wondering how to change the bottom padding dimensions of some of its elements. If that's the…
Leer más
Paso a paso / 3 min de lectura
Paso a paso / 3 min de lectura
¿Cómo enganchar la salida de código después del contenido en WordPress?
Cuando estás personalizando tu sitio de WordPress, puede que en algún momento necesites enganchar la salida de algún código personalizado para que aparezca después del contenido de tu publicación. Por…
Leer más