- Blogs
- WordPress SEO
- How to Disable Google Indexing on a WordPress Site
WordPress SEO / 3 min de lectura
How to Disable Google Indexing on a WordPress Site

Whether you want your invite-only website to stay private or you’re testing your web development skills and want to avoid traffic, there are various reasons for wanting to disable Google indexing on your WordPress site.
This article will explore the 2 easiest and most straightforward methods for doing so.
2 Methods to Disable Google Indexing on a WordPress Site
There are 2 main methods for disabling Google indexing on your WordPress site: using the built-in feature in Settings > Reading and editing the robots.txt file manually. Let’s explore both.
Method #1: Configure the Reading Settings
The most straightforward way to prevent Google from indexing your site is to go to Settings > Reading. Once there, check the box that reads Discourage search engines from indexing this site.
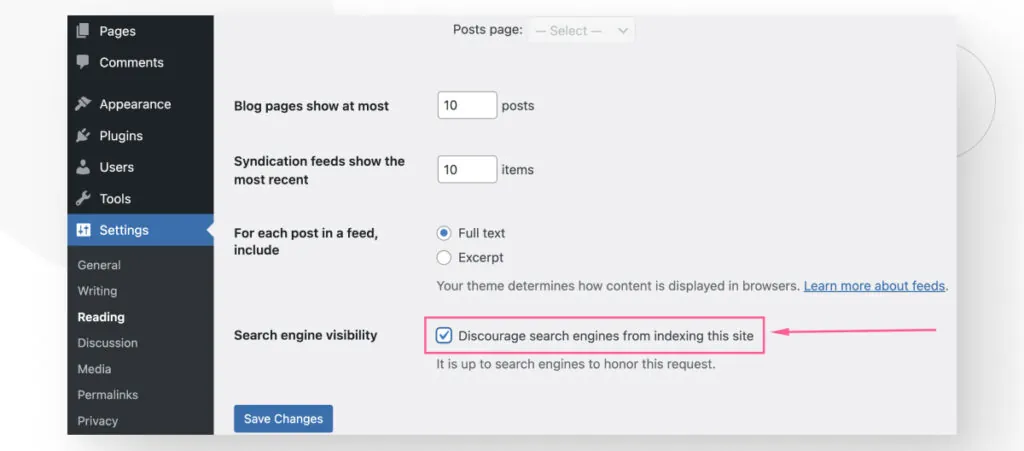
After checking the box, remember to click the Save Changes button.
Method #2: Edit the robots.txt File
robots.txt is a text file available in your website’s folders. You use it to issue commands that tell search engine crawlers (such as Google’s Googlebot) which of your site’s resources they can access.
The robots.txt file allows you to specify which directories, subdirectories, URLs, or files you don’t want the search engines to crawl. Additionally, you can use it to prevent Google from indexing your entire site.
There are multiple ways to edit robots.txt, but we believe the simplest ones are accessing your installation path with FTP or cPanel and using Yoast SEO. Let’s explore both.
Edit robots.txt With Yoast SEO
If you already have Yoast SEO installed, the easiest way to edit robots.txt is through this plugin.
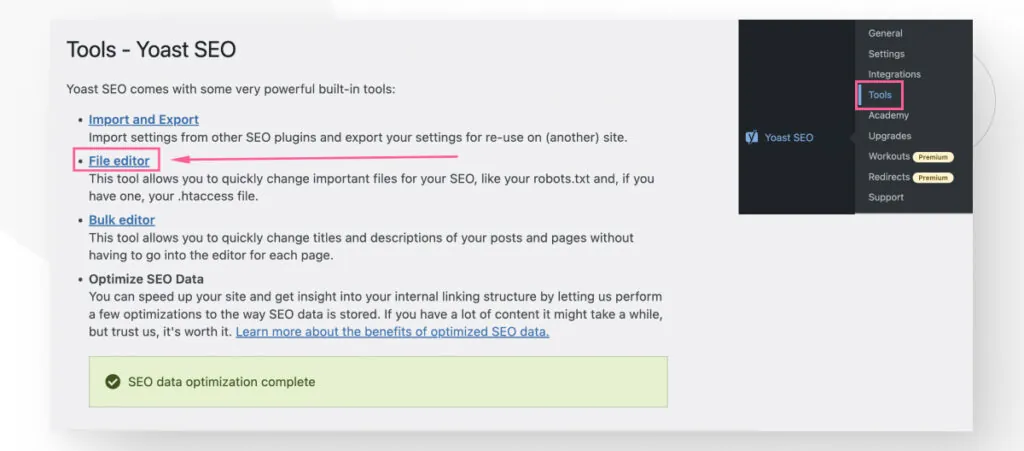
Go to Yoast SEO > Tools and click on File Editor.
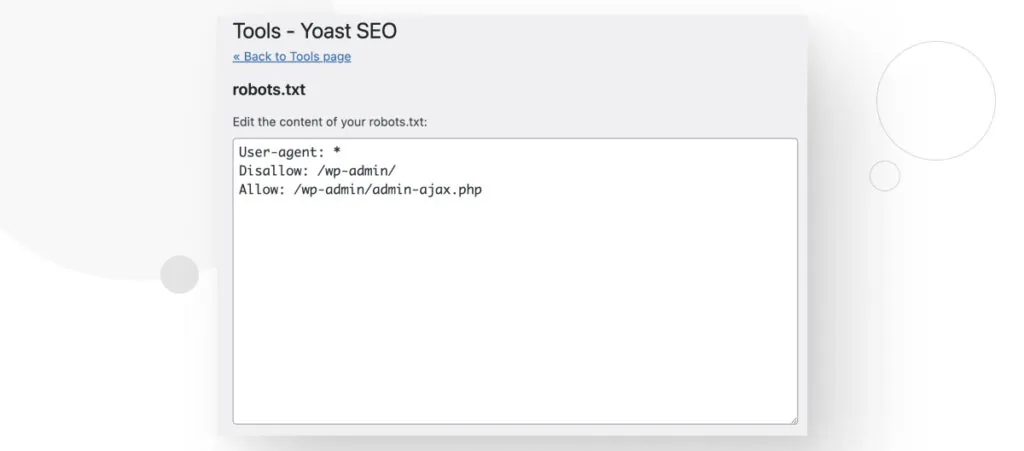
Once in the File Editor feature, you should see a textbox with the contents of the robots.txt file.
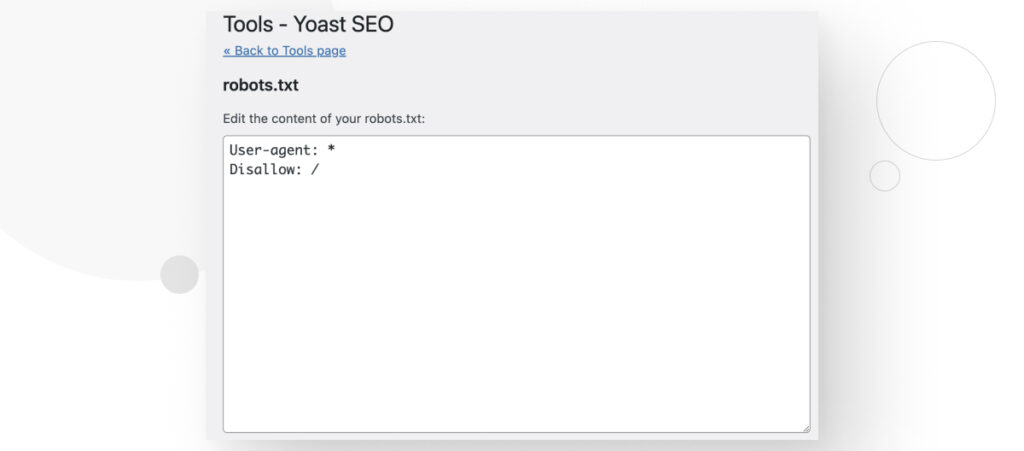
If you want all search engines to avoid indexing your site, you should include the following commands:
User-agent:     *
Disallow: /
This code tells all search engine crawlers (including Google’s) to avoid indexing your site. After you edit the file, it should look something like this:
Edit robots.txt With an FTP Client or cPanel
If you don’t have Yoast SEO, the alternative is to use cPanel or FTP.
You can either connect to your web server using your FTP credentials (your hosting account should provide them) or via cPanel. To log into your cPanel account, do it from your hosting account’s dashboard or go to your-domain-name.com/cpanel.
Regardless of the tool you use, navigate to your server’s public_html folder (sometimes named simply public).
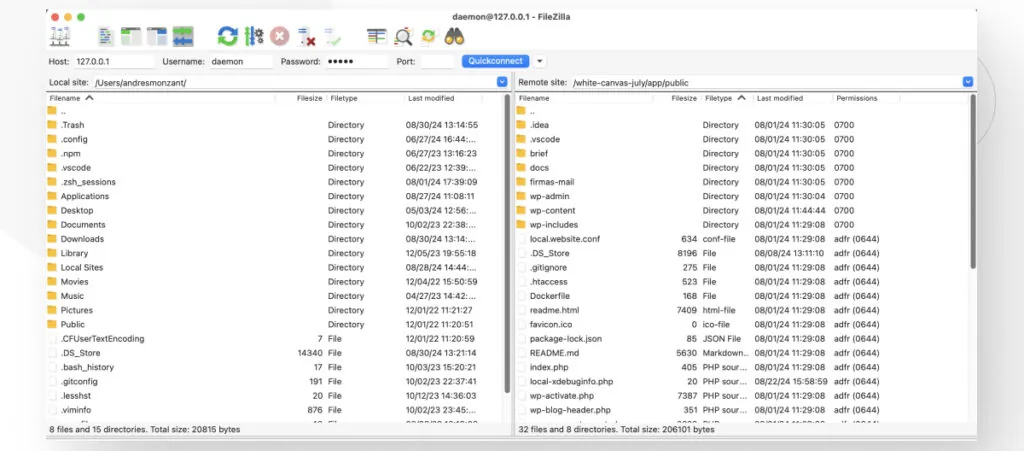
Once in the public_html folder, look for the robots.txt file. Right-click on it and select View/Edit to edit the file.
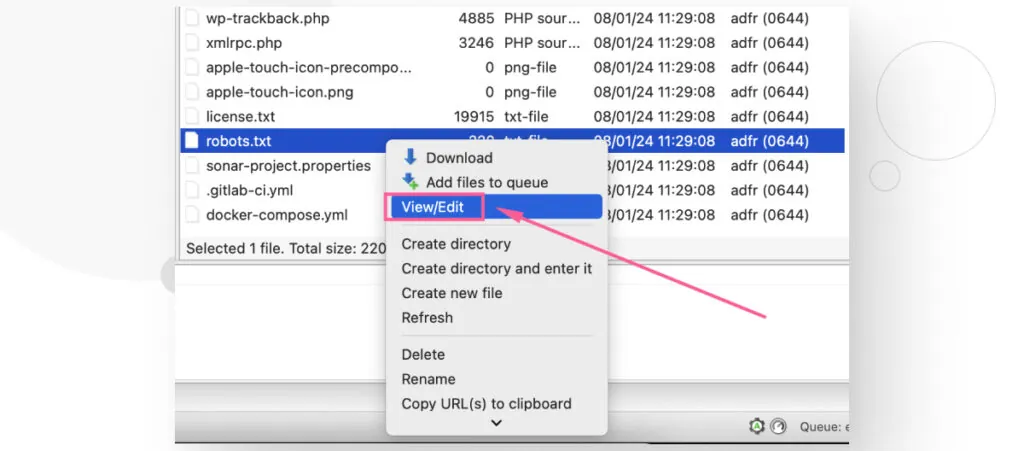
You need to add the following commands to the robots.txt file to disable Google indexing on your WordPress site.
User-agent:     *
Disallow: /
If you want more information on the robots.txt file, read our blog post about it.
Why Disable Google Indexing on Your WordPress Site?
The main reason why you’d want to disable Google indexing on your website is that it is unfinished. When you’re still testing the website, you don’t want anyone but your team to have access to it.
Additionally, you may have an invite-only website that you don’t want to be public, or you may have just created a website to test your web development skills and want to keep it private for some time.
Disable Google Indexing on Your WordPress Site Today
Whether it is to protect your site’s privacy or because you’re just testing your web development skills, there are various reasons why you may want to prevent your site from being indexed.
In this article, we explored several methods for disabling Google indexing on your site, from the built-in feature on Settings > Reading to manually editing your robots.txt file. They all achieve the same result, so it’s just a matter of which one you find the easiest.
If you found this post useful, read our blog and resources for more insights and guides!