
How to Increase Font Size in WordPress: 3 Easy Methods

WordPress font sizes depend on the setting of the themes you’re using. So, what happens when you start to use a theme and think the font size is too small? When that happens, you may look for answers, and that’s what we’re here for: to help you learn how to increase the font size in WordPress.
Let’s explore why you’d want to increase font size on your WordPress site and 3 methods you can use to get the job done.
Key Takeaways
- Increasing the font size to meet the recommended sizes can make your content more readable.
- You can increase the font size by modifying Typography settings in the Gutenberg editor, using the Advanced Editor Tools plugin, and adding custom CSS via the Theme Customizer.
Why Increase Font Size in WordPress?
Depending on the current font sizes you use on your WordPress website, increasing the font size can significantly enhance the readability and accessibility of your content. Larger fonts make reading and engaging with your content easier for all visitors, including those with visual impairments.
However, sizes that are too large can also reduce readability and make the content jarring due to how large the font is. In general, your font size should be responsive to the device from which the user is accessing your website.
The font size for paragraphs on mobile devices should be around 12 to 16px. For tablets, it should be around 15 to 19px. Finally, for desktops, the font size for paragraphs should be around 16 to 20px. As an example, our website currently uses a font size of 20px for the desktop version.
For headers, WordPress themes typically use a hierarchy of font sizes to distinguish between different levels of headings (H1, H2, H3, etc.).
The H1 header, which is usually the largest, might have a default size ranging from 30px to 36px, while H2 headers could be around 24px to 30px, and H3 headers might be slightly smaller, around 18px to 24px.
While these aren’t hard and fast rules, staying within these ranges is usually a good idea.
3 Methods to Change Font Size in WordPress
There are multiple methods to increase font size in WordPress. We’ll share the 3 methods we consider the most straightforward, easy, and accessible for the most WordPress users.
Method # 1: Increase Font Size Using the Typography Options in Gutenberg
If you want to change the font size of paragraphs and headings, you can quickly do so using the Gutenberg editor you already use to edit content.
First, go to Posts > All Posts or Pages > All Pages to access the post or page where you want to increase the font size. Once on the Gutenberg editor, click over any paragraph, and you’ll see the Typography menu on the right-hand sidebar.
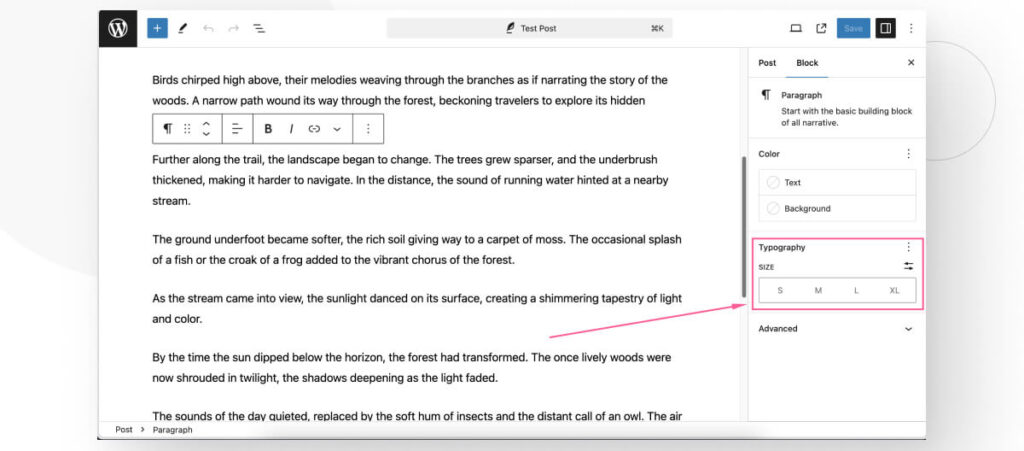
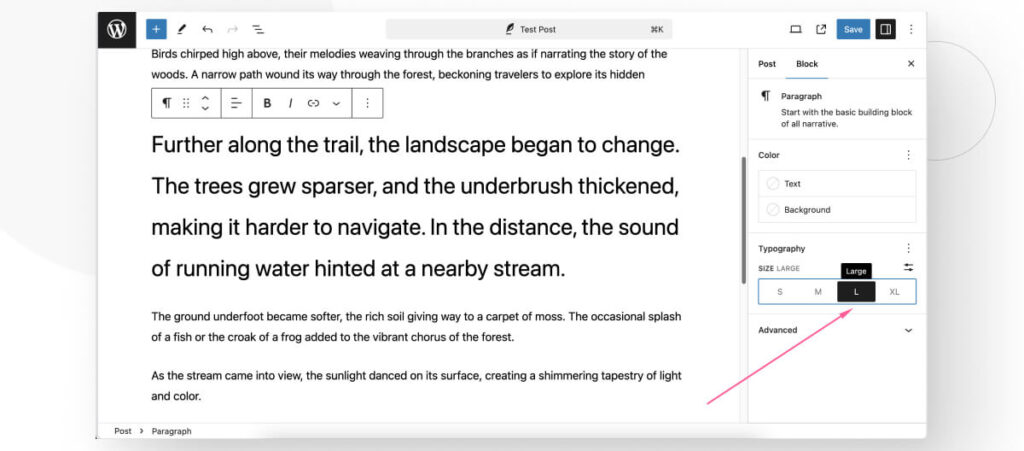
You can select from the pre-established Small, Medium, Large, and Extra-Large sizes.
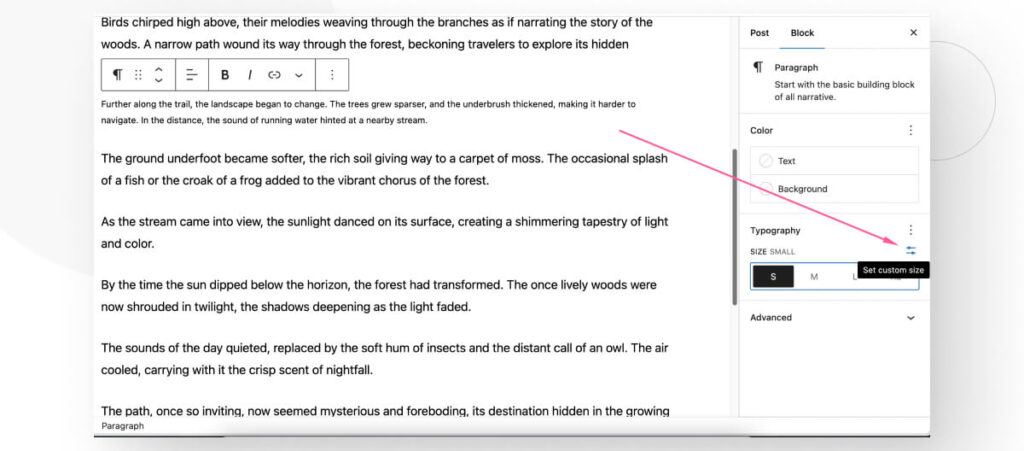
Additionally, you can set a specific font size by clicking on Set custom size.
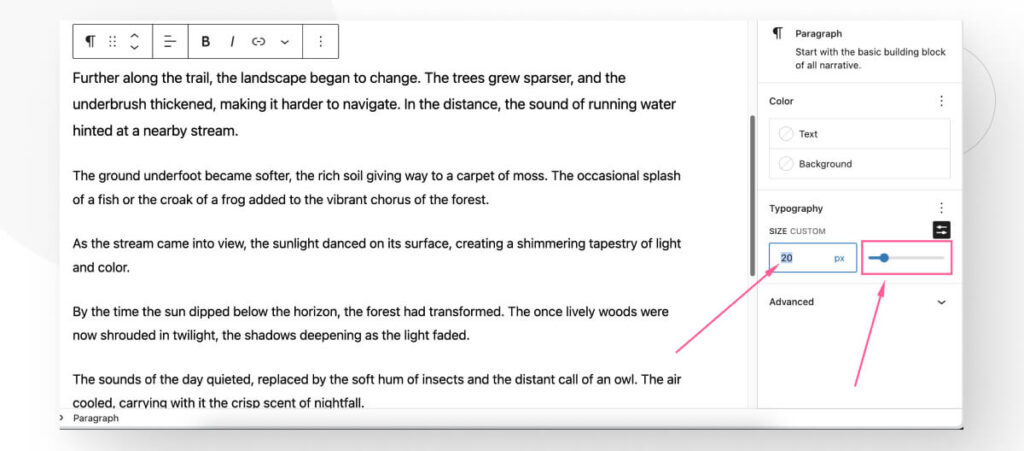
You can input a specific font size or use the slider to increase or decrease the font size.
You can use this same method to increase the font size of your headings, too.

Method #2: Increase Font Size Using the Advanced Editor Tools Plugin
Advanced Editor Tools is a plugin that extends and enhances the Gutenberg and classic editors, giving you more tools to edit your content. These extra tools include settings to increase the font size.
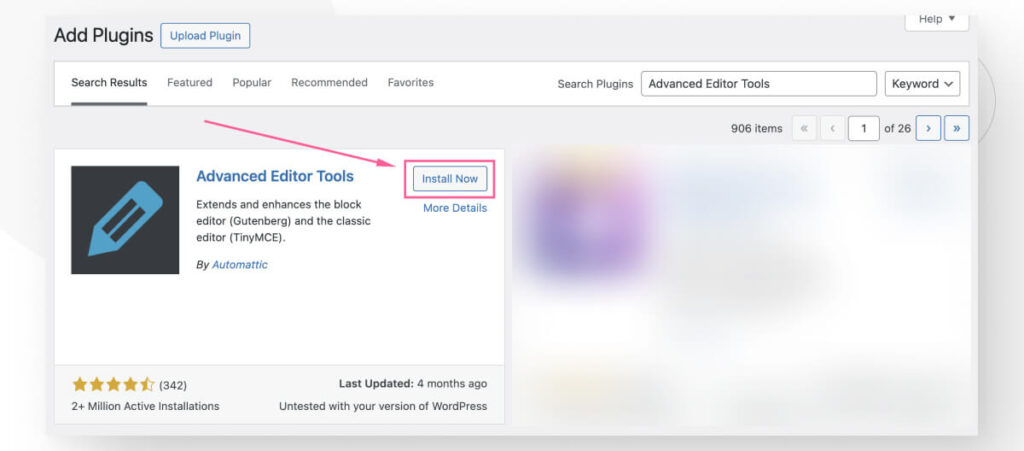
To start using Advanced Editor Tools, go to Plugins > Add New Plugin and search for “Advanced Editor Tools.” Then click on Install Now and Activate.
Once installed and active, go to Settings > Advanced Editor Tools. You will see 2 tabs, one for the Block Editor (the Gutenberg editor) and one for the Classic Editor. In this case, we’ll make changes to the Gutenberg editor, but you can repeat these changes on the Classic Editor tab if you prefer the Classic Editor.

Scroll down until you see the Unused Buttons section.
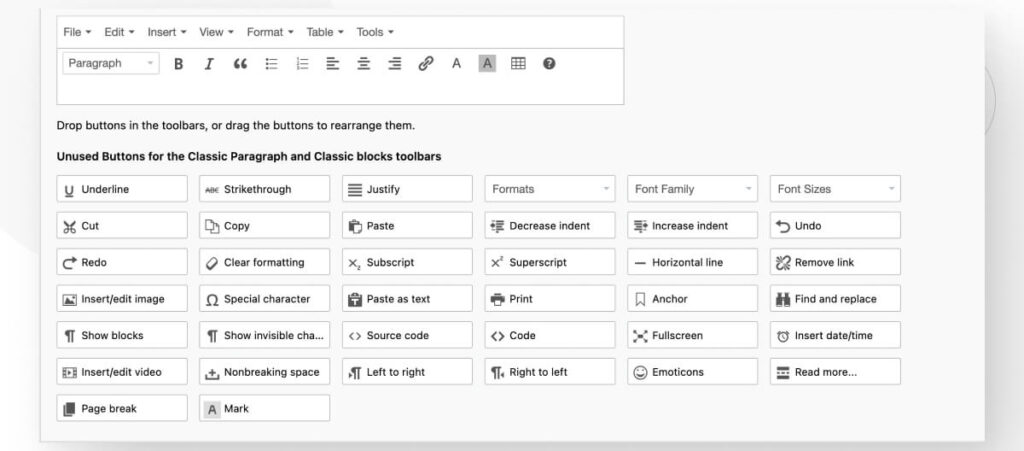
In this section, you drag any of the unused buttons into the toolbar at the top. Every button you drag into the toolbar will appear in the Gutenberg editor as part of the tools available in the Classic Paragraph block. The Advanced Editor Tools plugin introduces the Classic Paragraph block.
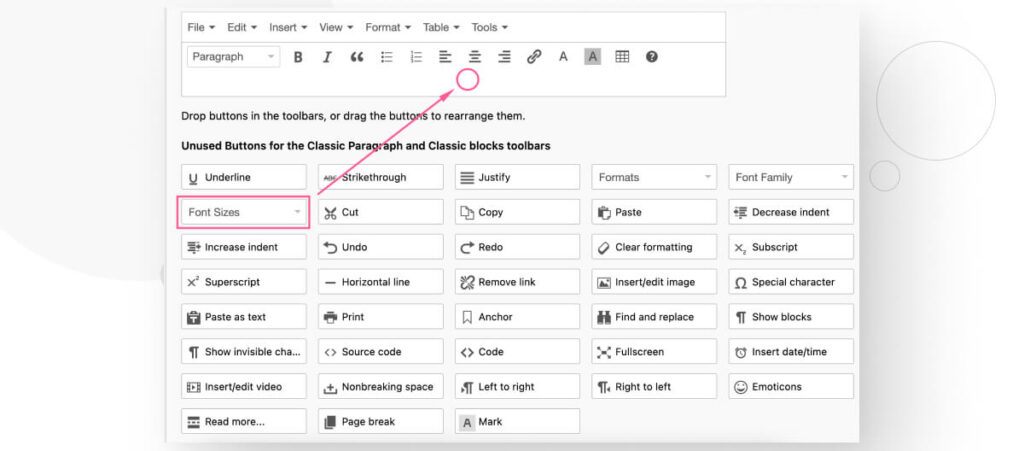
Look for the Font Sizes button and drag it into the toolbar.
After dragging the Font Sizes button to the toolbar, scroll down and check the Font Sizes checkbox.
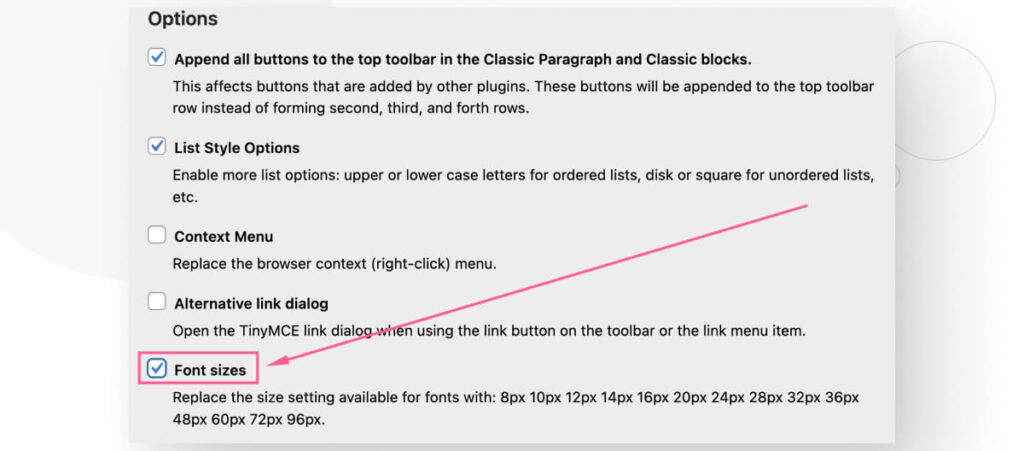
You can add other buttons if you want, but once you’re done adding buttons, remember to scroll up and click the Save Changes button.
After saving the changes, head to any post or page where you want to test the new font size features. Click on the button to add a new block and search for “Classic Paragraph.”
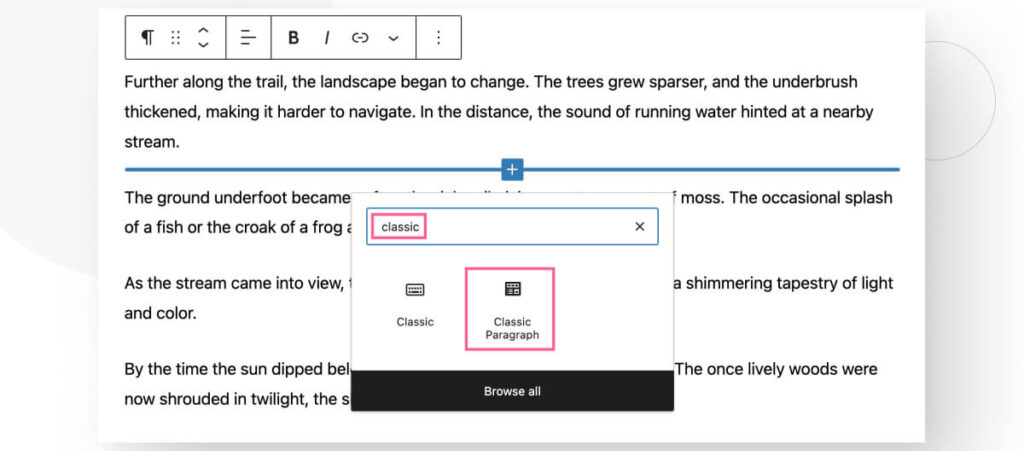
Add the new Classic Paragraph block, and you will see a new toolbar with any settings you may have added to it, including the Font Sizes setting. With this new block, you can take more precise control of the font size for all your paragraphs.

Method #3: Increase Font Size Using Custom CSS
Note: This method only works for classic themes. That means it will not work if you’re using a default WordPress theme like Twenty Twenty-Four or Twenty Twenty-Three.
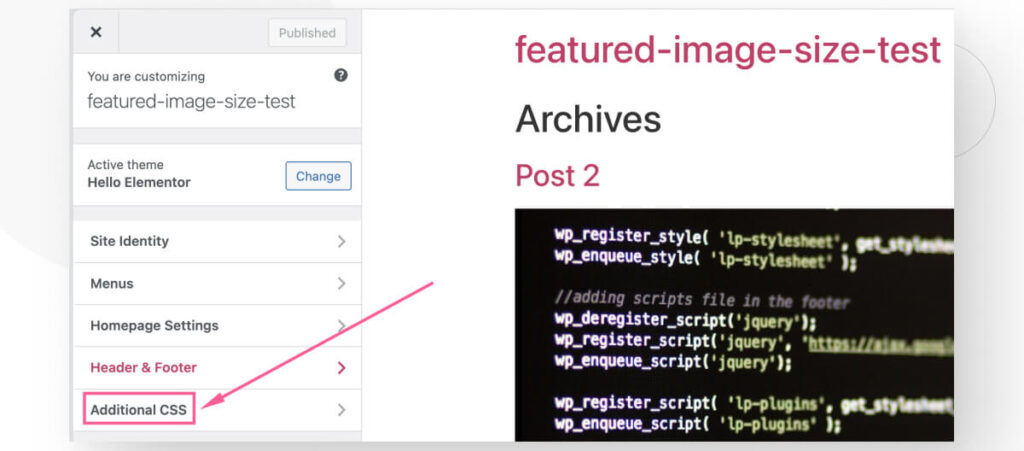
Another method for increasing the font size on your WordPress site is the Theme Customizer, a feature that allows you to change various settings related to your theme.
To access the Theme Customizer, go to Appearance > Customize. Scroll down until you see the Additional CSS option and click on it.
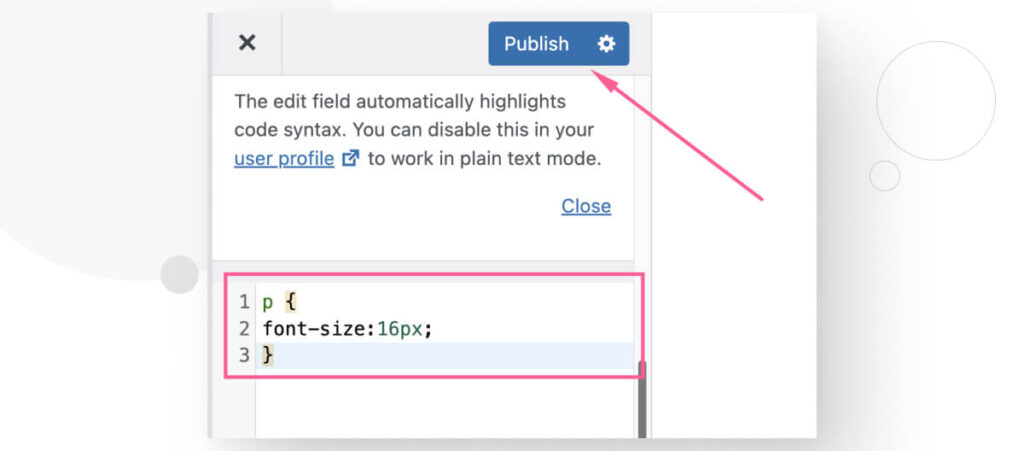
On the following screen, you will see a text box to add custom CSS. Add the following CSS snippet:
p {
font-size:16px;
}
Remember to click on Publish after adding the snippet.
Here’s how the paragraph font size looked when it was at the default value.

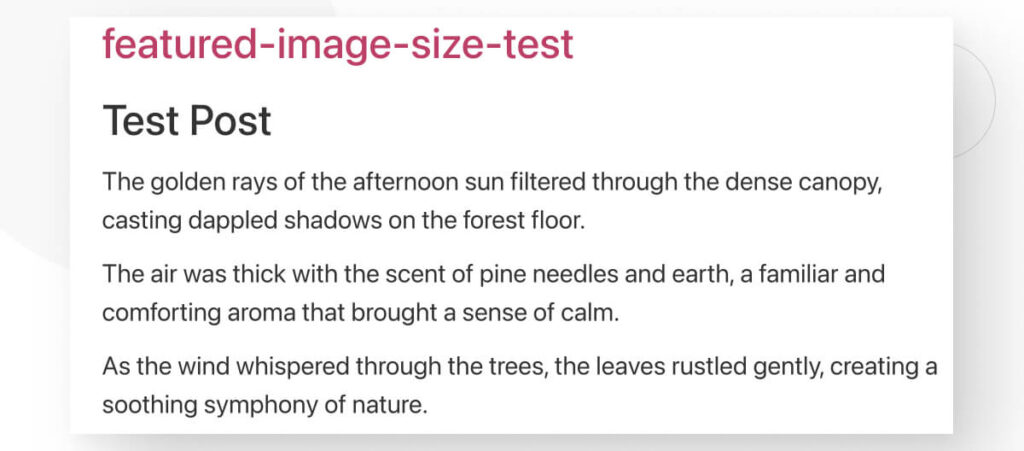
And here’s how it looks after increasing the size with CSS.
Increase the Font Size on Your WordPress Site
Increasing the font size on your WordPress site to the recommended text size can make your text more readable and improve the user experience. In this article, we explored 3 easy and accessible methods for increasing the font size on your site.
Hopefully, you can use this knowledge to take more control of your site’s look and feel, which will ultimately benefit your users’ experiences.
If you found this post useful, read our blog and resources for more insights and guides!
📬 Get WordPress updates to your inbox
Sign up for WC Blog updates and never miss a post!
Related Articles

How to Make a Subscriber Into an Admin on WordPress?

How to Grant Secure Access to a Not Live WordPress Site During Development

Do You Need a Web Developer to Build a WordPress Site?

How to Change the Bottom Padding Dimensions on WordPress Blocks