
How to Add Custom Fields to Your WordPress Media Library
If you’re learning to edit your WordPress site to truly make it your own, you may be wondering how to add a custom field to the WordPress Media Library so you can add personalized data to your uploads.
There are multiple ways to do that, but in this post, we will explore the 2 methods that we find the most user-friendly for most users.
Key Takeaways
- You can add custom fields to the Media Library using the Advanced Custom Fields plugin or the Add Custom Fields to Media plugin. The process is fast and user-friendly on both.
Why Add Custom Fields to the WordPress Media Library?
There are a few benefits to adding unique custom fields to your media uploads.
The first and most obvious benefit is that it allows you to organize your media more effectively. Metadata such as the photographer’s name and copyright information can help you easily search and filter through your media library.
However, remember that if you want to filter your uploads based on custom fields, you’ll likely need a plugin for that since WordPress’s default media filtering features are limited.
Another benefit is improving content management, especially if your site hosts content from multiple creators. For example, you can add fields for source credits or licensing details.
How to Add Custom Fields to Your WordPress Media Library
WordPress has built-in features for creating custom fields and adding them to media uploads, but they’re not very user-friendly. As a result, most users and developers prefer using plugins that make the process faster and easier.
Let’s explore 2 of the plugins you can use to add custom fields to your WordPress media.
Method #1: Add Custom Fields to Your Media Library With the Plugin “Advanced Custom Fields”
Advanced Custom Fields (ACF) is the most popular plugin for creating and displaying custom fields. We’ll use it for this example because it has a large community, and you can ask for support if anything goes wrong.
Here’s the process.
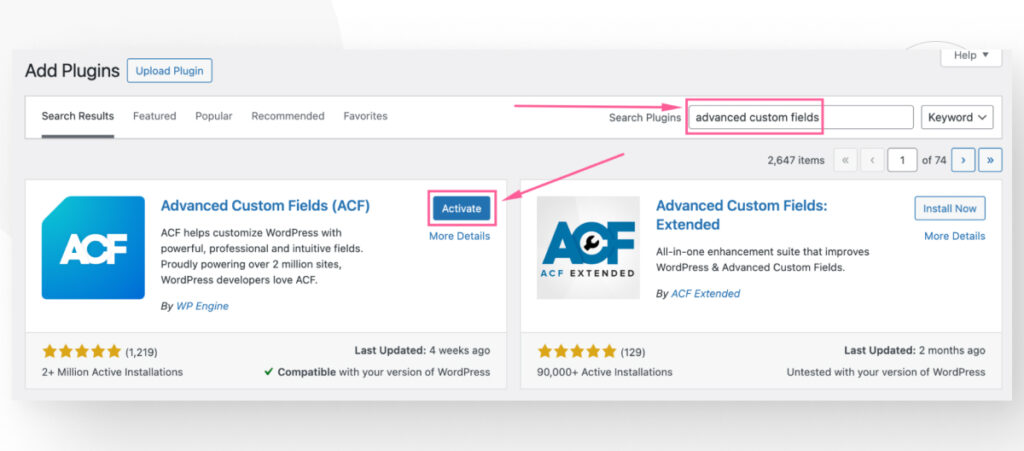
Step #1: Install Advanced Custom Fields
To install ACF, go to Plugins > Add new plugin from your admin dashboard. Search for “advanced custom fields” and install and activate the one titled Advanced Custom Fields (ACF).
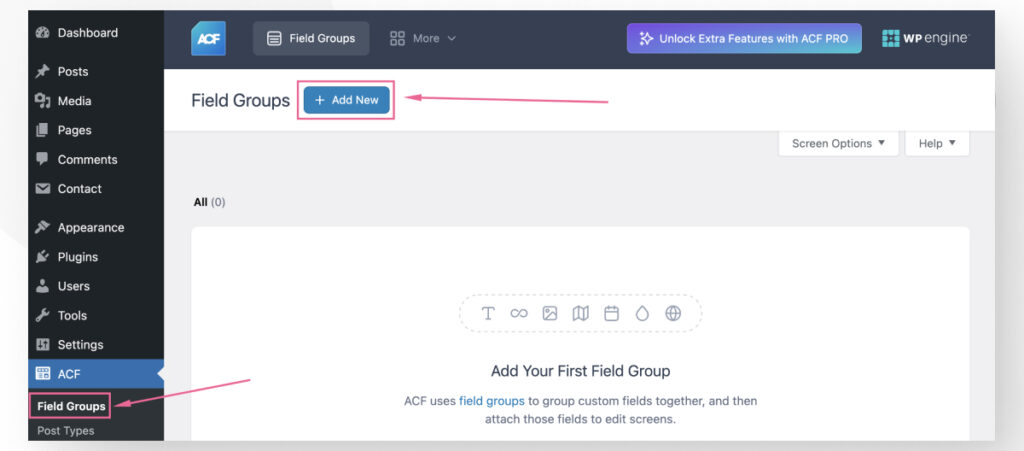
Step #2: Create a New Field Group
After ACF is activated, go to ACF > Field Groups from the WordPress dashboard. Click on Add New to add a new field group. You can use field groups to add multiple custom fields at the same time instead of having to add each individually.
First, name your field group something descriptive, like “Custom Media Attachment Fields.”
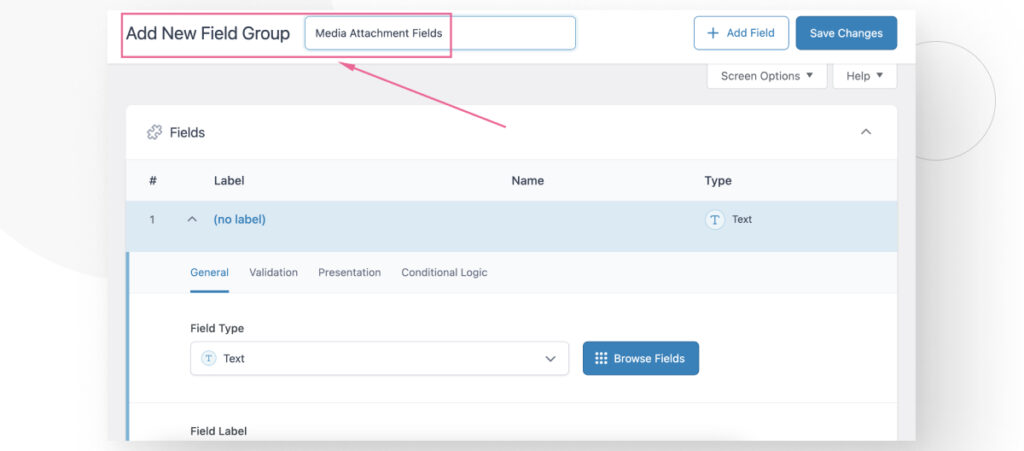
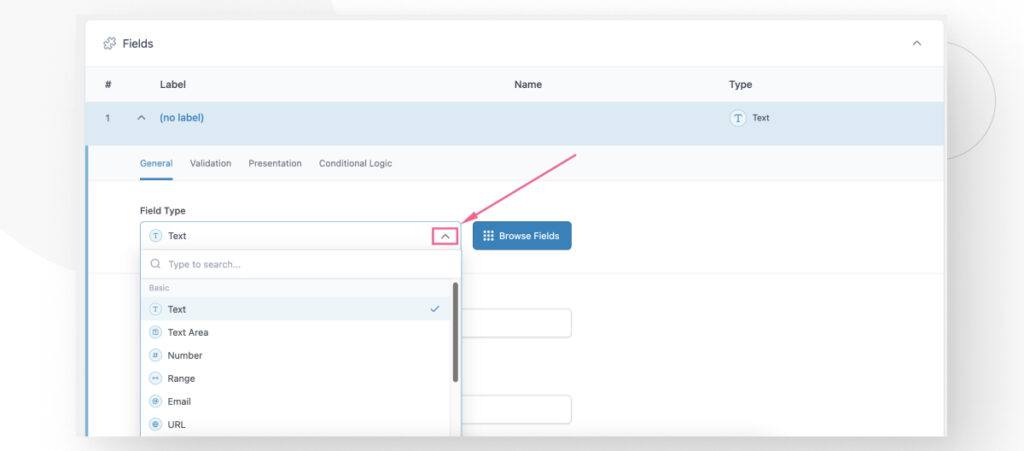
Scroll down until you see the options for your custom field. Click on the Field Type dropdown menu to select the type of field you want to add. In our case, we chose a Text field.
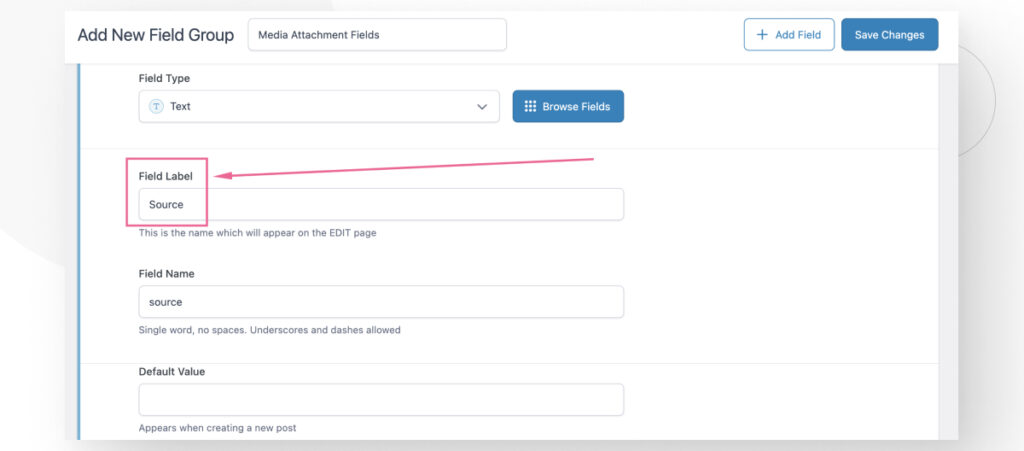
Now label this specific field a name in the Field Label text box. You will notice that the Field Name text box fills automatically with the text you added to the Field Label. Field Name is the name that ACF uses internally to identify your new field. You can modify it but most users leave the default value.
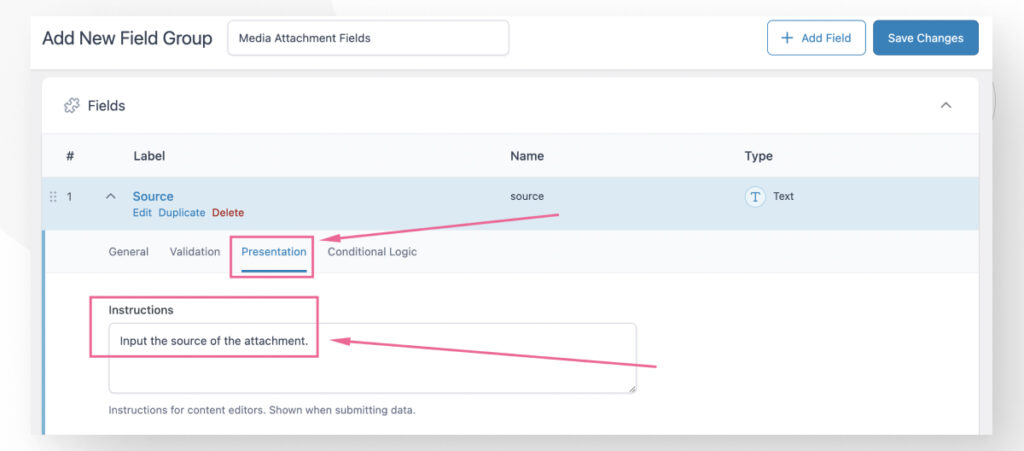
Now go to the Presentation tab to add a Description for your new field.
You can modify the rest of the settings for your new field, but you already have everything you need for the field to be usable.
However, we wanted to add yet another field to exemplify how field groups make it easy to bundle multiple groups and apply them all at once. To add a new field to the group, click on +Add Field.

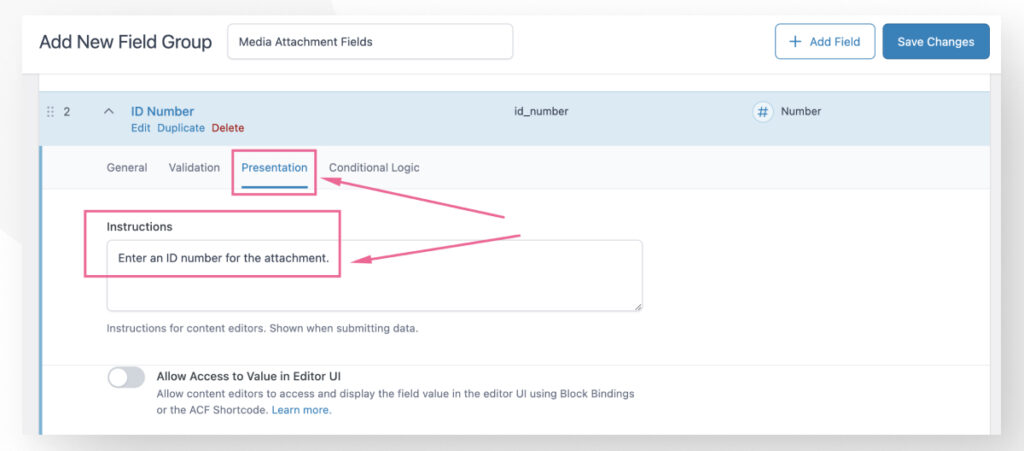
Select the type of field and input a label for the newest field. In our case, it’s a Number field labeled ID Number.
Go to the Presentation tab and add Instructions for the newest field.
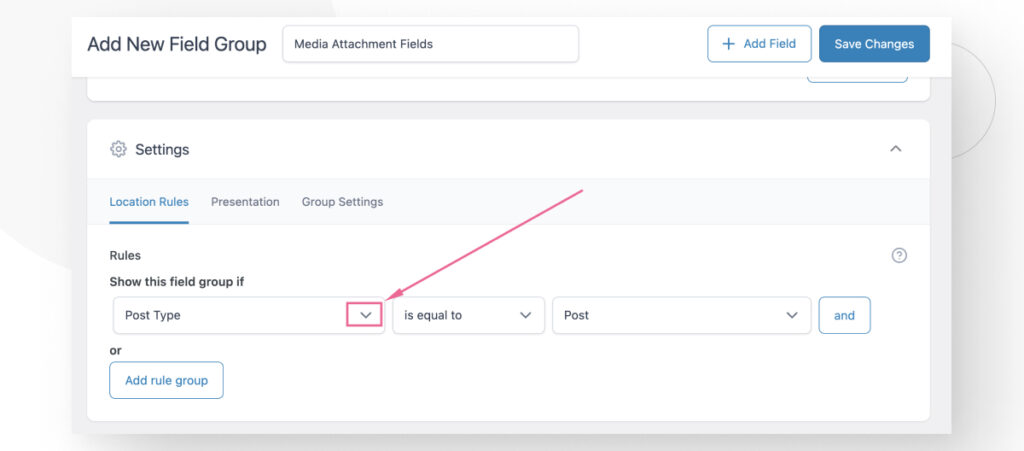
Step #3: Associate Your New Field Group With Media Files
Now that we’ve created 2 custom fields for the group, scroll down to the Settings section. In this section, you will assign this field group to a type of content. Click on the Show this field if dropdown menu.
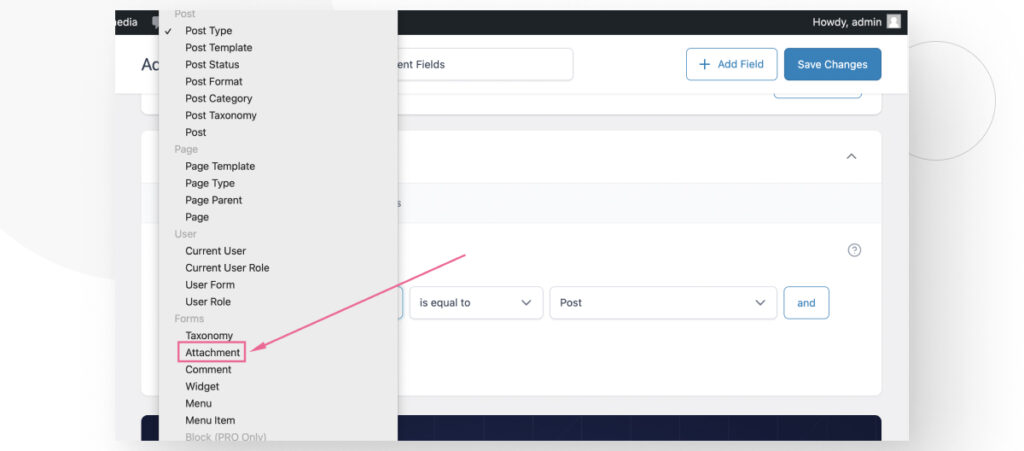
Select Attachment.
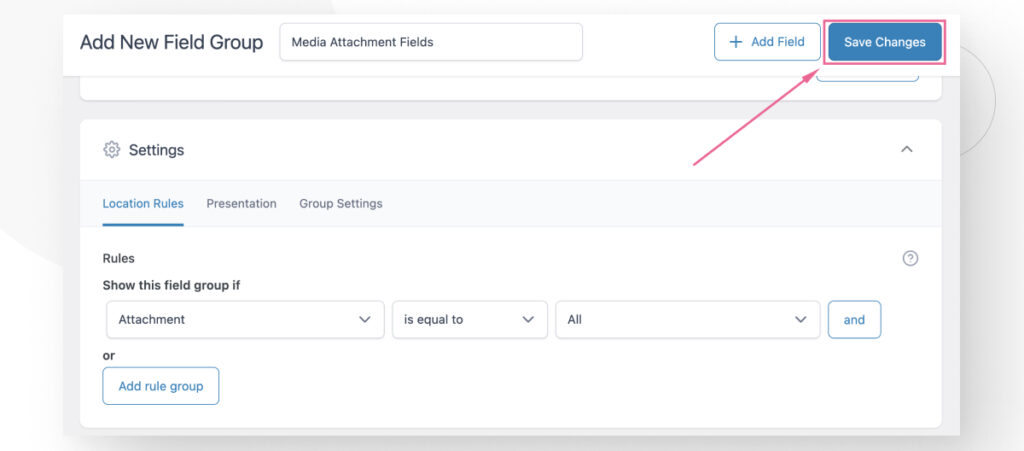
We’re done! Click on Save Changes.
Step #4: Verify the New Custom Field on Your Media Files
Now, you can go to Media > Library and explore your media files. You will notice that the newly added fields appear at the bottom of the metadata section.
Method #2: Add Custom Fields With the Plugin “Add Custom Fields to Media”
While ACF is the most popular plugin for custom fields, you may want an alternative. One such alternative is Add Custom Fields to Media. As the title indicates, it helps you create custom fields for media uploads like images.
Go to Plugins > Install New Plugin and search for “Add Custom Fields to Media.” Install it and activate it.
Once activated, using it is very quick and easy. Go to Settings > Media Custom Fields. You will see text boxes for entering your custom field’s Unique ID, Title, and Help.
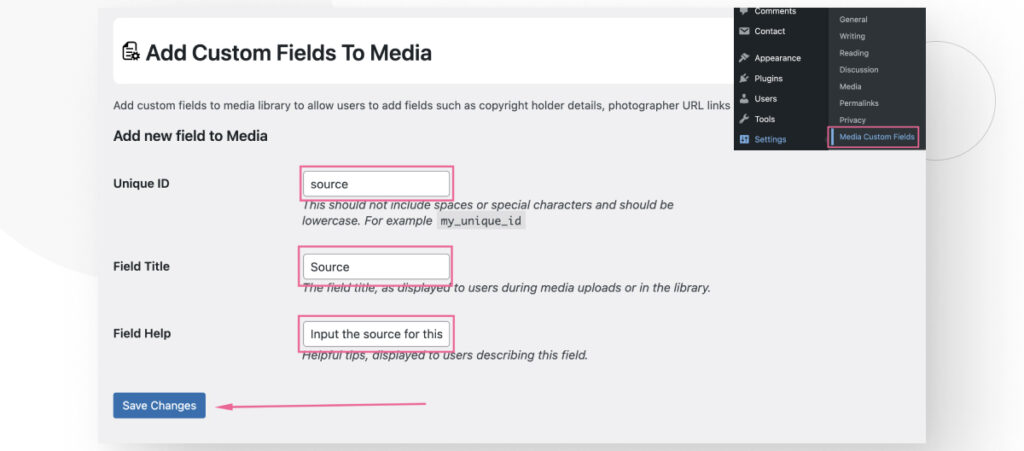
Unique ID is an internal identifier. It should be lowercase and contain no special characters, only letters and underscores, such as my_unique_id.
Title is the title you want your field to have on the Media Library.
Help is a description that will remind you what the field is for.
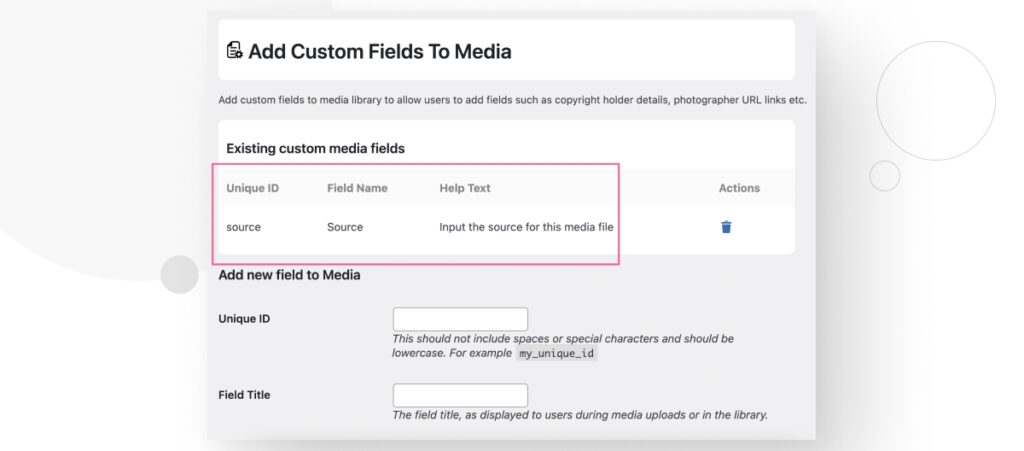
Once you’ve filled out all these fields, click on Save Changes. After creating a custom field, its data will be added to a table at the top of the page.
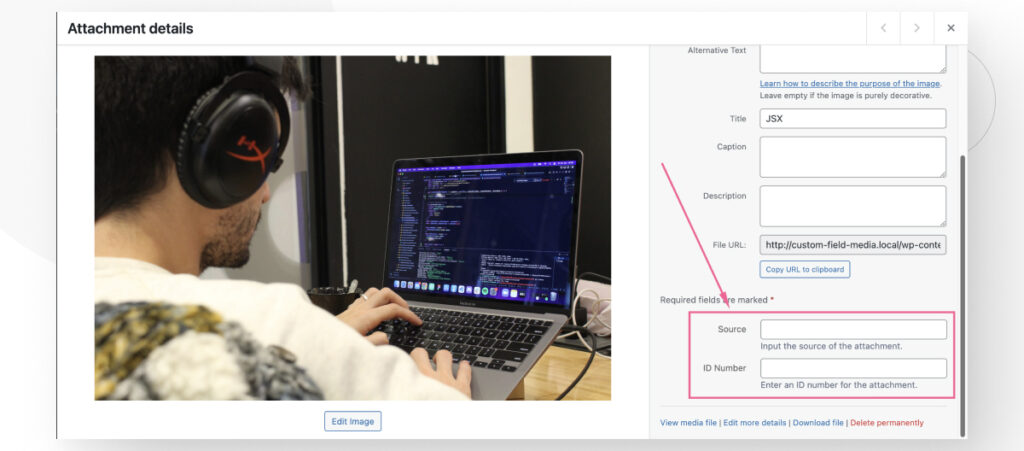
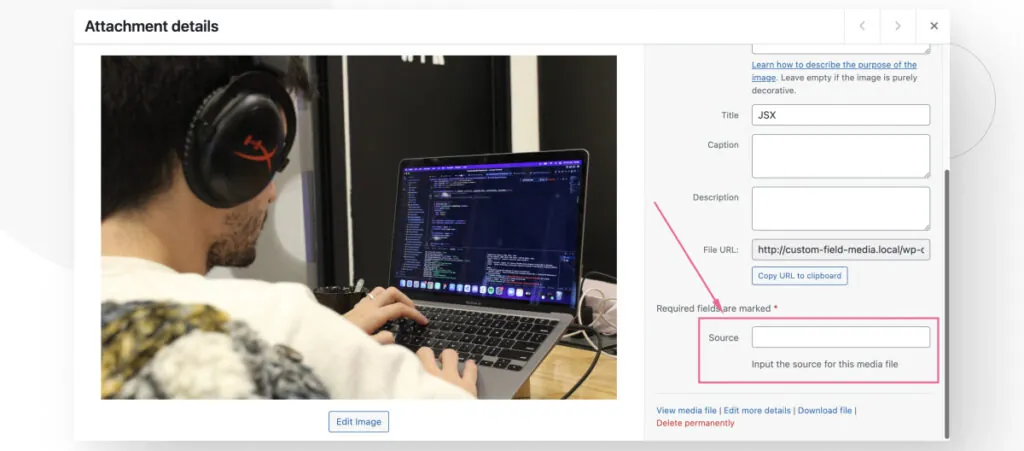
After adding a new custom field, you can go to Media > Library and see it on each upload’s metadata.
Add Custom Fields to the WordPress Media Library Today
Learning to add custom fields to your WordPress Media Library is a great way to customize your site and include data that is meaningful to you but is not available on WordPress by default.
In this post, we explored 2 quick and user-friendly ways to add new custom fields to your Media Library using plugins. Hopefully, this guide will help you start making your WordPress site more unique and customizable.
If you found this post useful, read our blog and developer resources for more insights and guides!
📬 Get WordPress updates to your inbox
Sign up for WC Blog updates and never miss a post!
Related Articles

How to Make a Subscriber Into an Admin on WordPress?

How to Grant Secure Access to a Not Live WordPress Site During Development

Do You Need a Web Developer to Build a WordPress Site?

How to Change the Bottom Padding Dimensions on WordPress Blocks