How to Add a Search Bar to Your WordPress Blog Archive

If you want your readers to navigate your WordPress site easily, it makes sense to learn how to add a search bar to your blog archive. It would allow them to look for specific topics you may have covered, boost engagement, and more.
However, if you’re new to WordPress or have no coding experience, adding a search bar may seem like a tall order. But that isn’t the case, and there are actually many ways to easily add a search to almost any page on your site, including blog archives.
Let’s explore 3 methods that will allow you to add a search bar to your WordPress blog archive.
Key Takeaways
- The 3 main ways to add a search bar to your WordPress blog archive are using built-in widgets, a plugin, and the Site Editor feature to modify the archive’s template.
3 Methods to Add a Search Bar to Your WordPress Blog Archive
Keep in mind that not every method works on every type of theme (block themes or classic themes). We’ll clarify which method works for which themes as we explain them.
Method 1: Use Widgets (Classic Themes)
One of the easiest ways to add a search bar is using widgets. Widgets are content elements users can add to headers, footers, sidebars, and anywhere else on your site that isn’t the main content of a page.
Using widgets essentially comes down to applying Gutenberg blocks to these areas of the site, just like you would if you were writing a blog post.
Let’s explore how to add widgets to your archive page.
Step 1: Access the Widgets Configuration Page
To access your theme’s widgets, go to Appearance > Widgets from your admin dashboard.
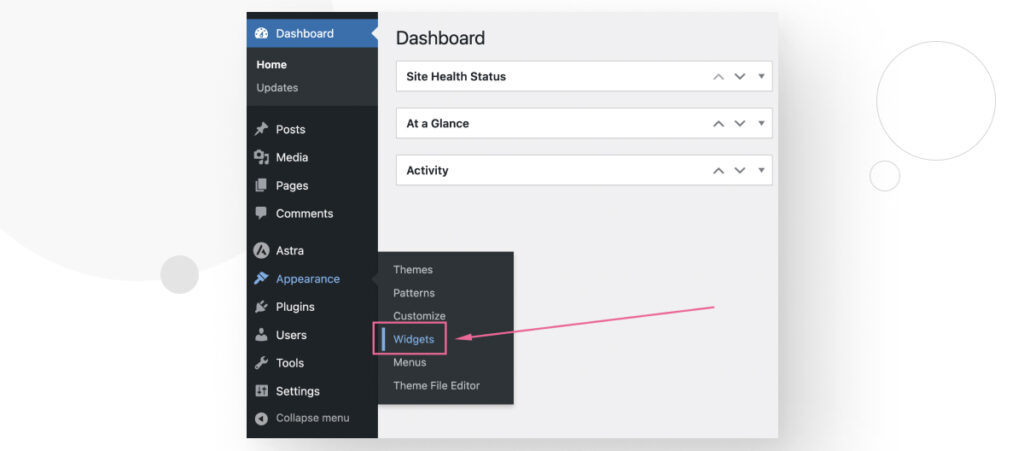
Note: The Widgets menu is only available in classic themes (themes created using HTML, CSS, PHP, and JavaScript). If the Appearance > Widgets option is unavailable, you likely have a block theme. Block themes are created with preexisting Gutenberg blocks and are incompatible with widgets.
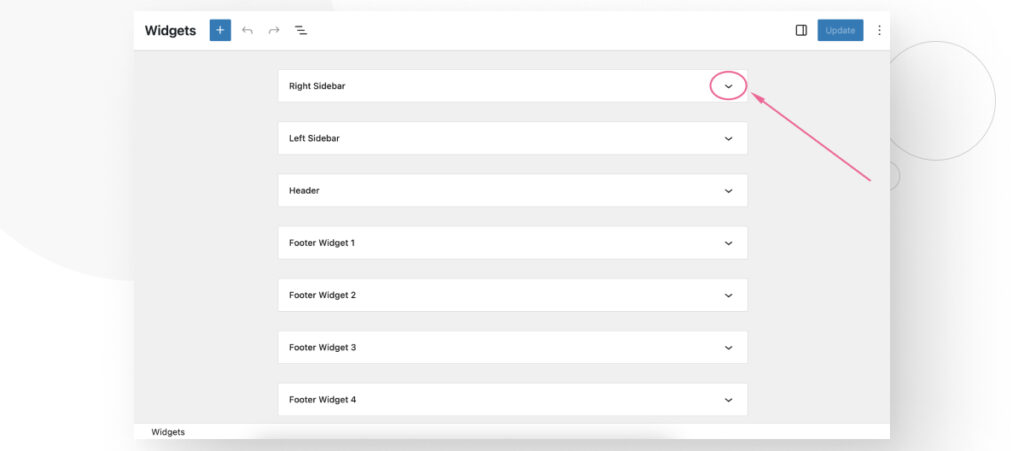
Step 2: Select the Location of the Search Bar
As mentioned above, widgets are content elements you can add to headers, footers, sidebars, etc. So you must choose in which of these areas you would like your search bar to be.
Unfortunately, the widgets menu doesn’t let you add a search to the footer, header, or sidebar, only on selected pages. So, if you decide to add a search bar to one of these areas, it will appear on every page of your site that contains a footer, header, etc.
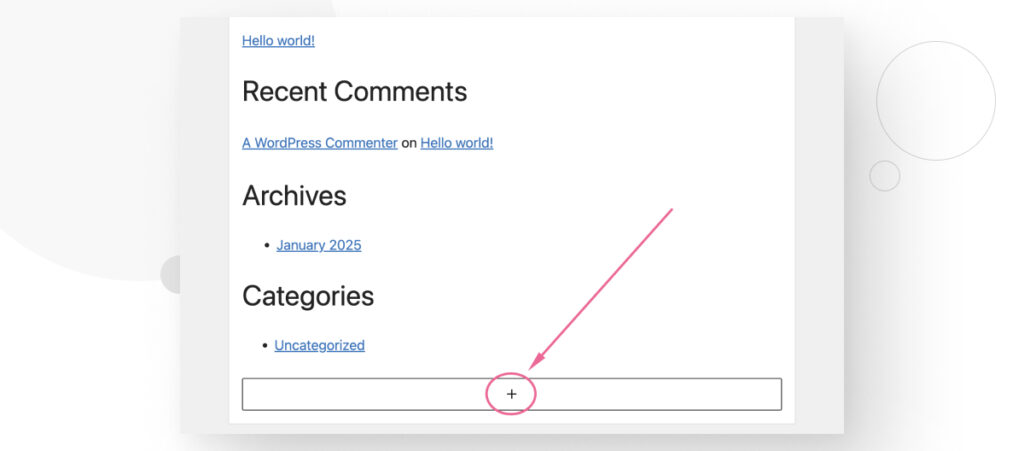
For example, if you decide you would like to add your search bar to the sidebar, first click on the Sidebar dropdown menu. In this case, we are using the GeneratePress theme, which has multiple sidebars, and we chose the right sidebar.
Click the + (Add block) button.
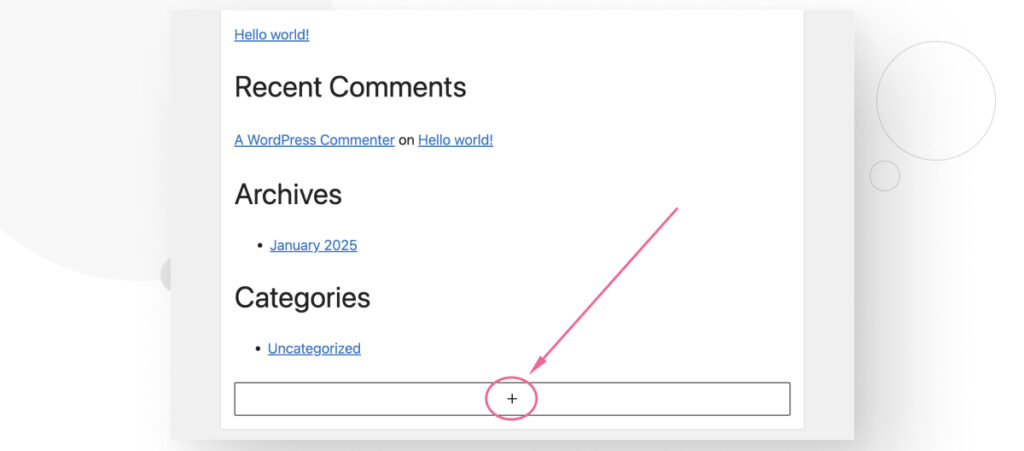
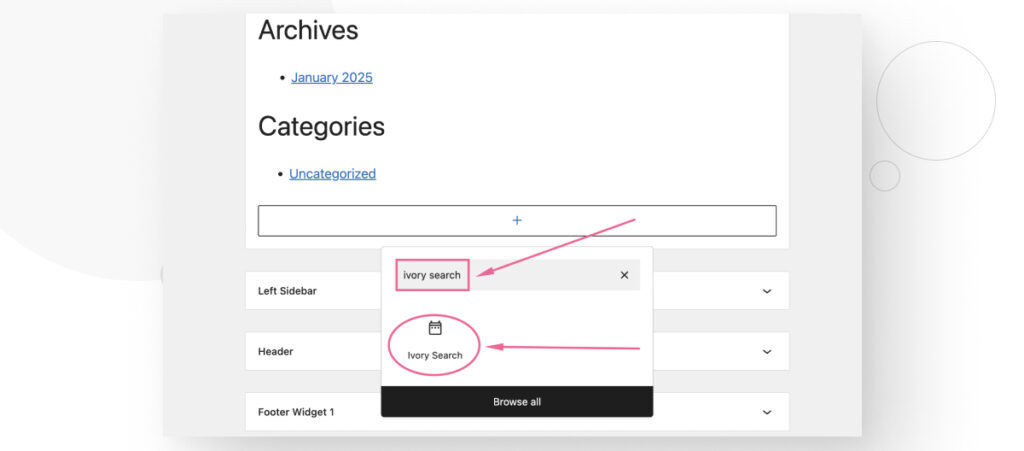
A new menu will appear, letting you select or search for any block you want. Type “search” and click the Search block.
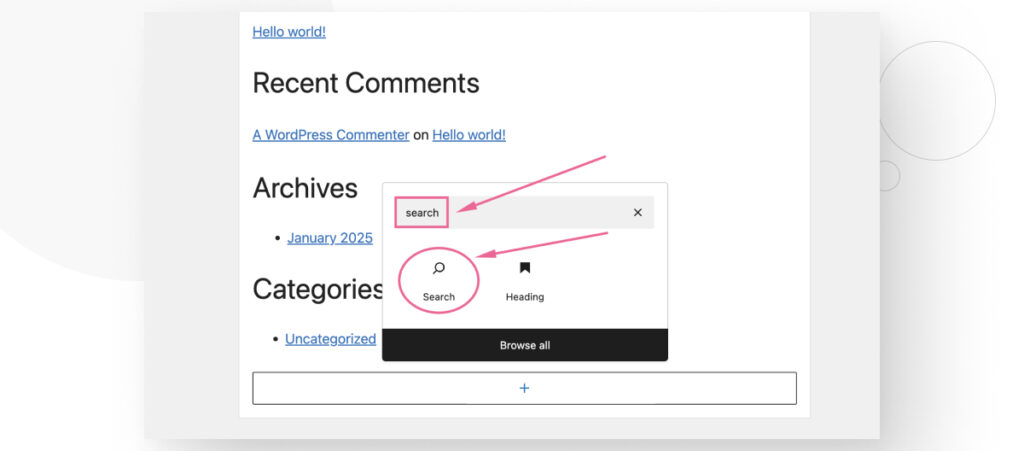
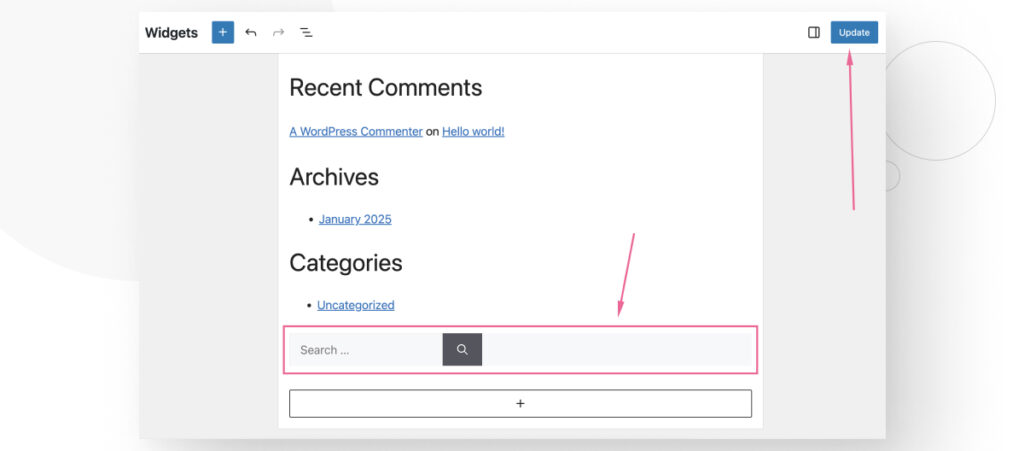
You just added a Search block to your sidebar as a widget. After adding it, click Update to save the changes to your site.
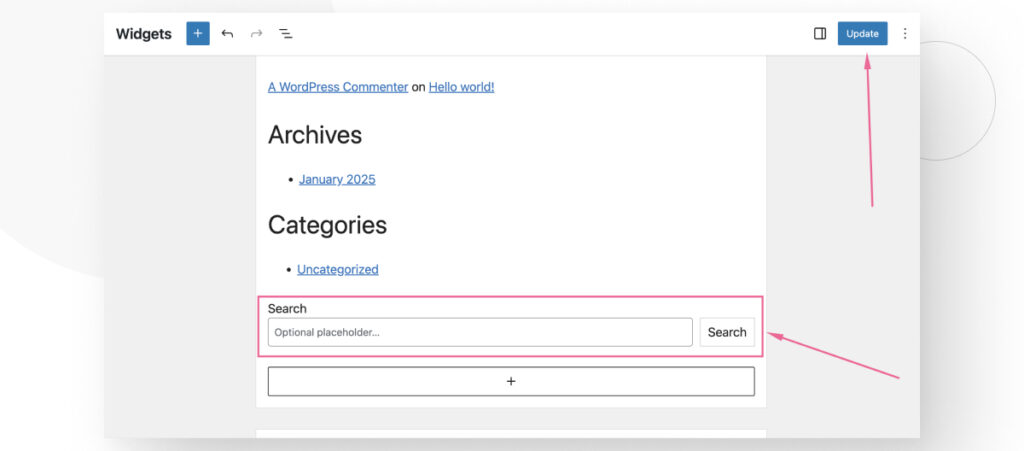
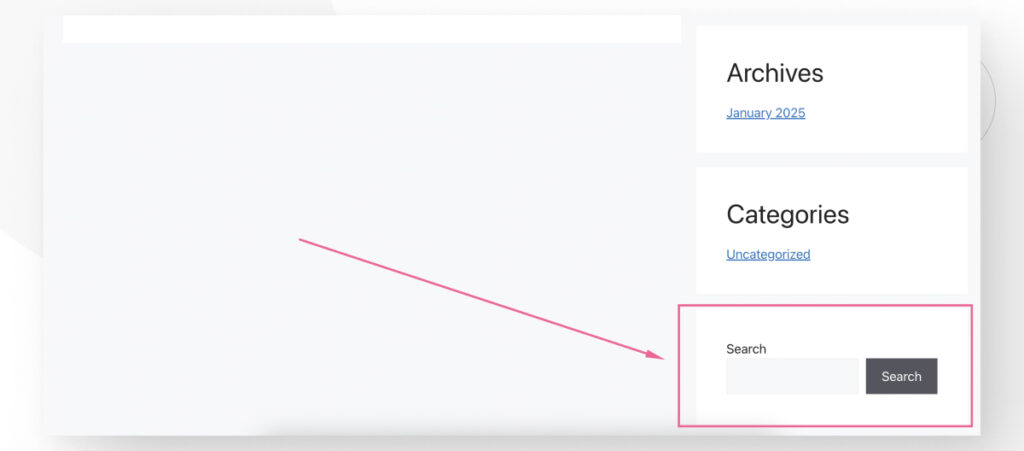
Now, if you scroll down to the bottom of your sidebar on archive pages, you will see the new search bar.
If you want to modify the location of your search bar, go back to Appearance > Widgets and delete the current search bar. Then, add the Search block to a different location.
Finally, remember that this search bar will be visible on every page of your site that has a sidebar, not only on your blog archive page.
Method 2: Use a Plugin (All Themes)
The following method uses a plugin called Ivory Search to easily add a search bar to your site.
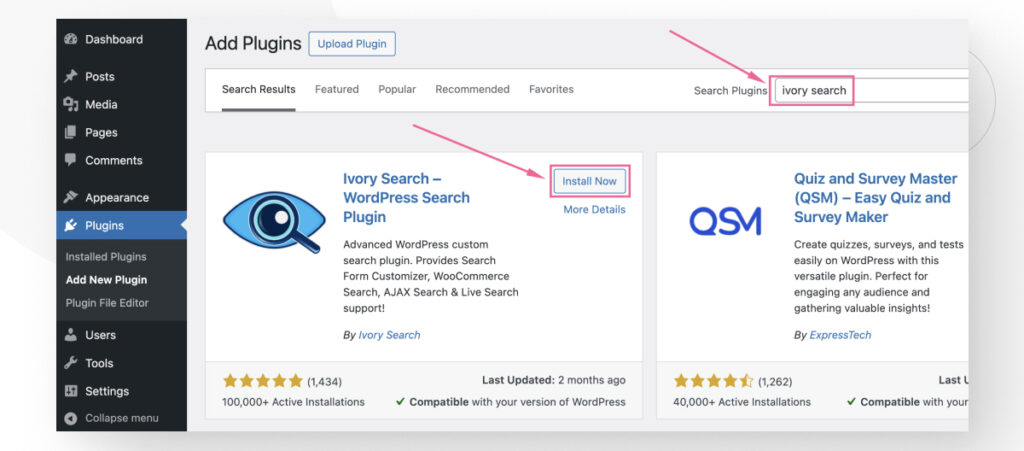
Step 1: Install Ivory Search
Go to Plugins > Add a New Plugin. Type “ivory search” in the search bar.
Click Install and Activate on the “Ivory Search – WordPress Search Plugin” result.
Step 2: Display the Search Box
Ivory Search allows you to display a search box without needing to configure it at all. To display it, you have several options:
- As a widget.
- In your header or footer.
- In a custom location.
Displaying the Search Box as a Widget
Head over to Appearance > Widgets (remember that some themes don’t support widgets, so this option won’t be available for those).
Select where you want to place your search bar (sidebar, header, footer, etc.) and click the + (Add block) button.
Search for the “Ivory Search” block and click it.
Now you’ve added Ivory Search’s default search bar to your site. Click Update to save the changes to your site.
Now, the search bar should appear in the location where you placed the widget (header, footer, sidebar, etc.).
Displaying the Search Box in the Footer or Header
Using the widget method we described above, you can add the plugin’s search bar to any area of your site that supports widgets. This method works for themes that don’t support widgets.
Note: This method uses the wp_head hook. Some themes don’t use or support this hook. If this method doesn’t work for you, there’s a good chance your theme doesn’t support it.
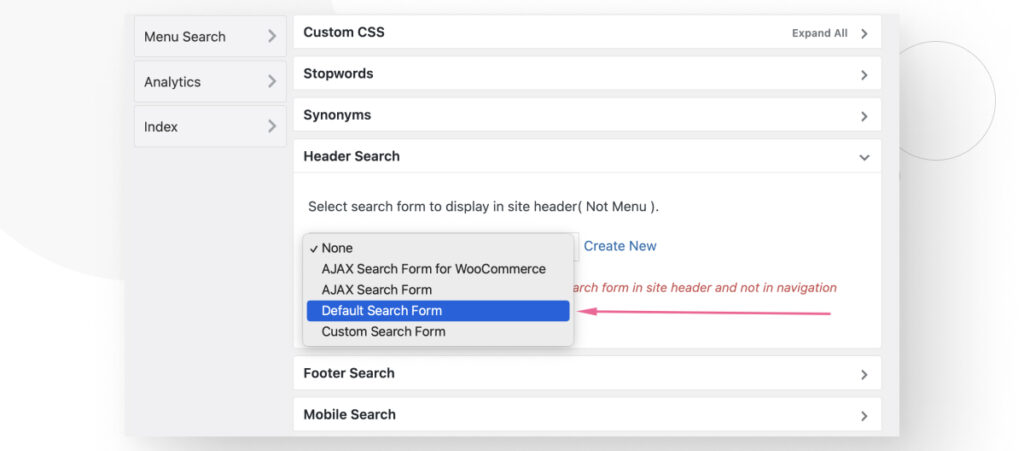
Go to Ivory Search > Settings. Click the Header or Footer dropdown menu.
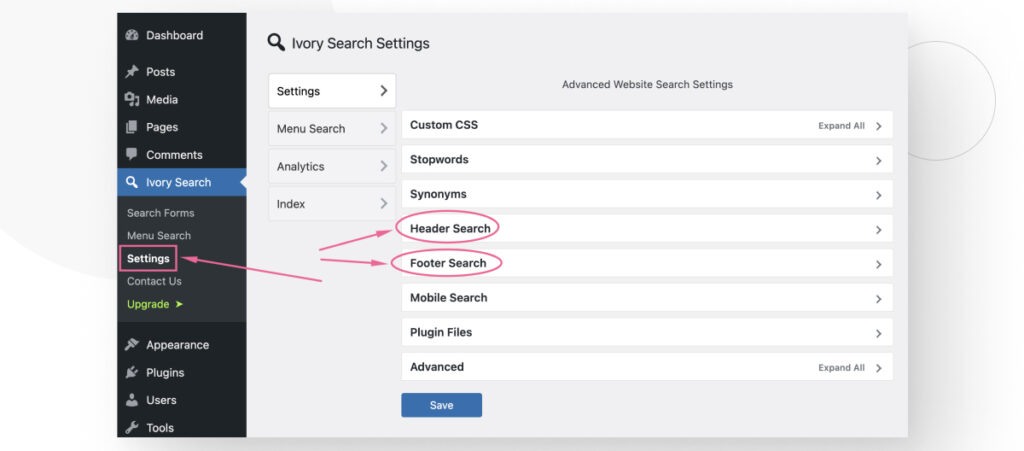
On the dropdown menu “Select search form to display in site header( Not Menu ),” select the search form you want to use. At first, using the Default Search Form is enough. You can learn about other search forms and their uses later. Scroll down and click Save to save the changes.
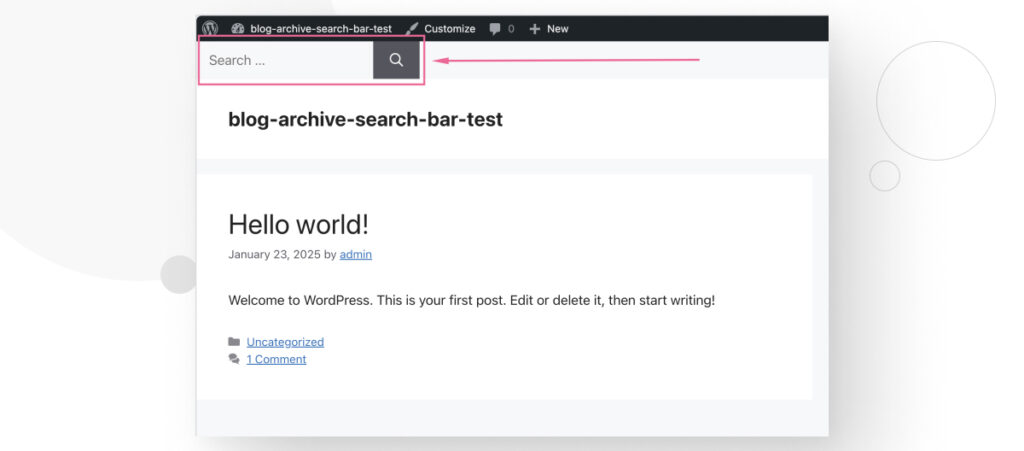
After that, your search bar should appear wherever you place it. However, the placement is awkward, and you may need to use custom CSS (which this plugin supports in Ivory Search > Settings > Custom CSS) to give it a better look and positioning.
For example, here’s how it looks if you place it in the header.
Displaying the Search Bar in a Custom Location
Finally, this plugin allows you to place the search bar anywhere on your site by using a shortcode. Shortcodes are a feature that allows you to introduce a custom functionality into any post or page without writing code.
You need to add the following PHP snippet to your child theme or any of your custom plugins.
echo do_shortcode( '[ivory-search id="your-search-form-ID-goes-here"]' );However, to do that, you would need greater knowledge on how WordPress works than the average user who only manages plugins and basic configurations.
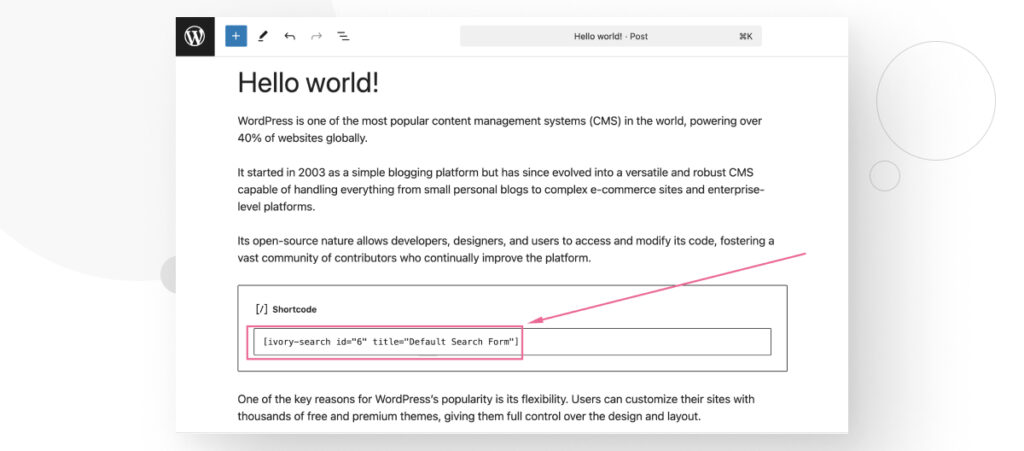
Finally, you can also place search bars on the content itself if you wish. For example, you could use the Shortcode block on a blog post to add any of your search forms, like this:
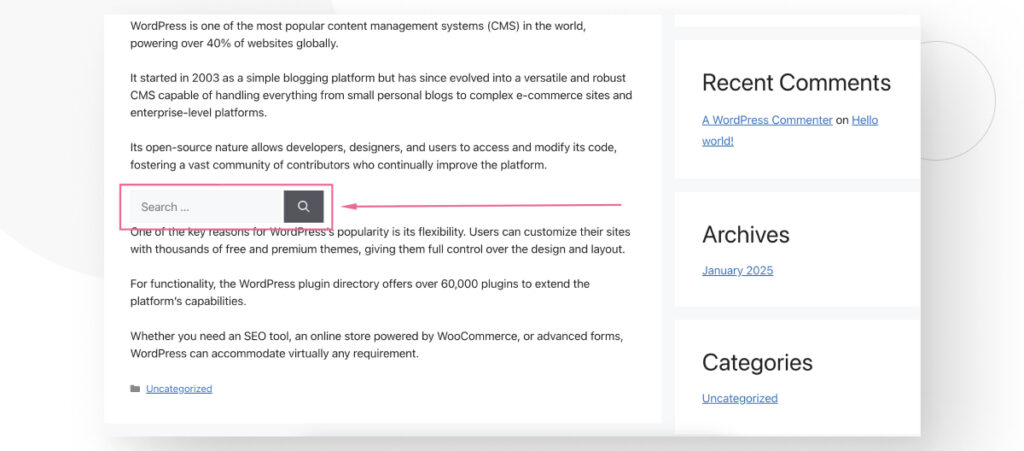
The result is that you can place the search bar wherever you want in your site.
Method 3: Use the Site Editor (Block Themes)
Finally, you can use the Site Editor feature to add a search bar to your site. This feature is reserved for block themes like WordPress’s official Twenty Twenty line and third-party block themes you can find in the theme directory.
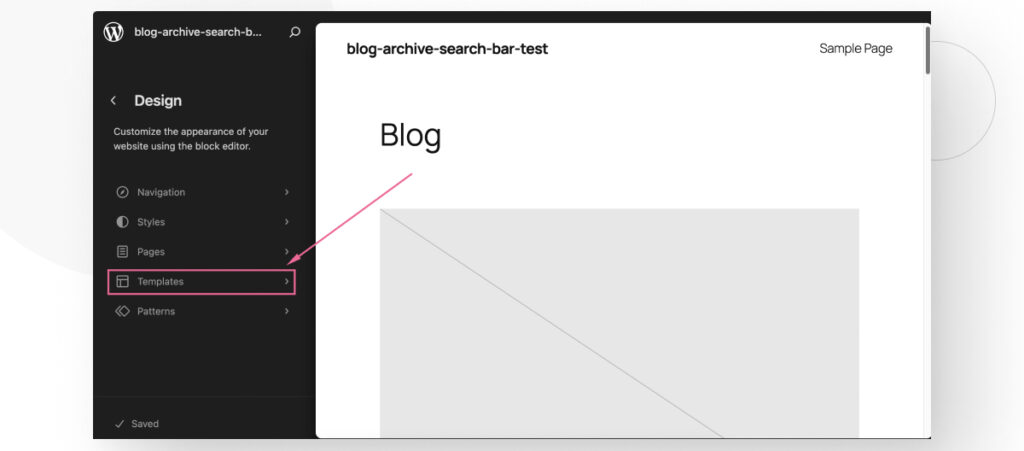
Step 1: Access the Site Editor
Go to Appearance > Editor. Once in the Site Editor, go to Templates.
Templates are files that contain the structure for each of the types of posts and pages on your site (individual blog posts, archive pages, etc.).
Step 2: Access Your Blog Archive’s Template
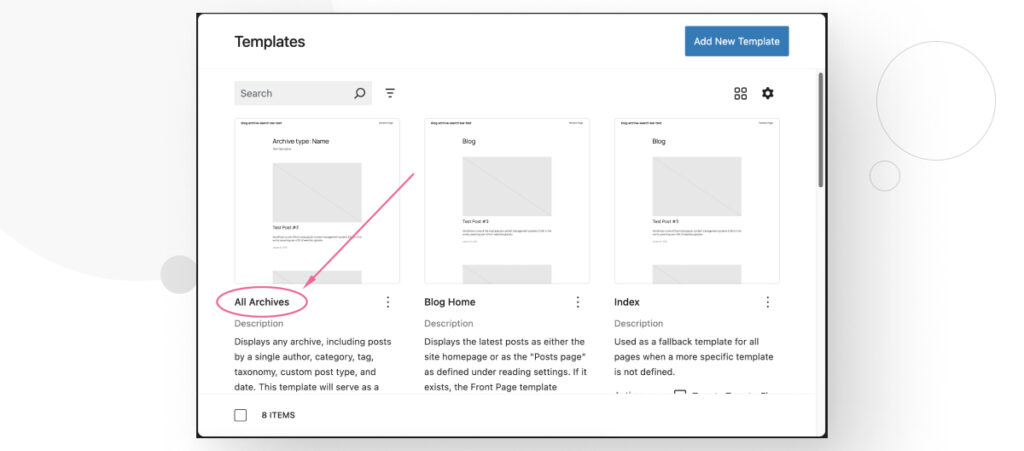
Now, you need to access the template that structures your blog’s archive page.
The name of this template may change from one theme to another, so you may need to use the theme’s documentation to know which template to access.
In the Twenty Twenty-Five theme, the template that structures your blog’s archive page is titled All Archives. From the templates menu, select it (or your theme’s equivalent) to access the template editor.
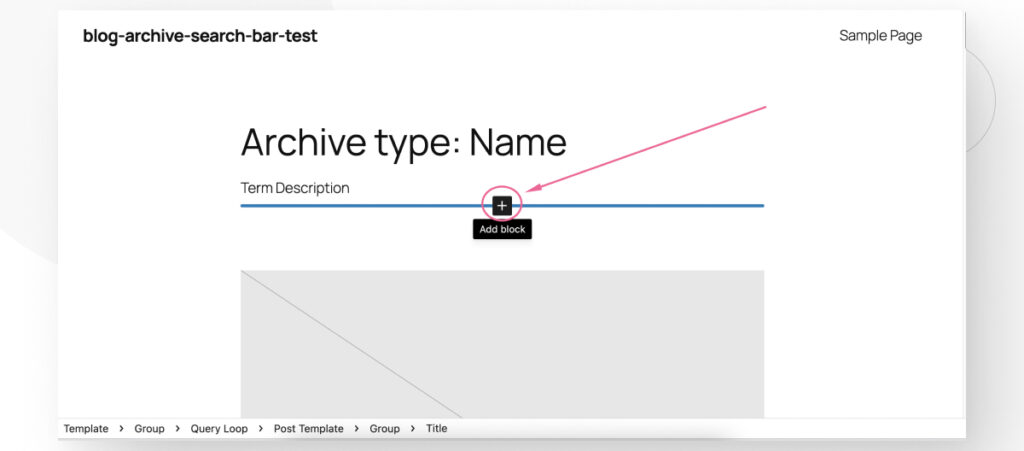
Step 3: Edit Your Blog Archive Template
Now, that you are in the template editor, you can easily add a Search block wherever you want on the template.
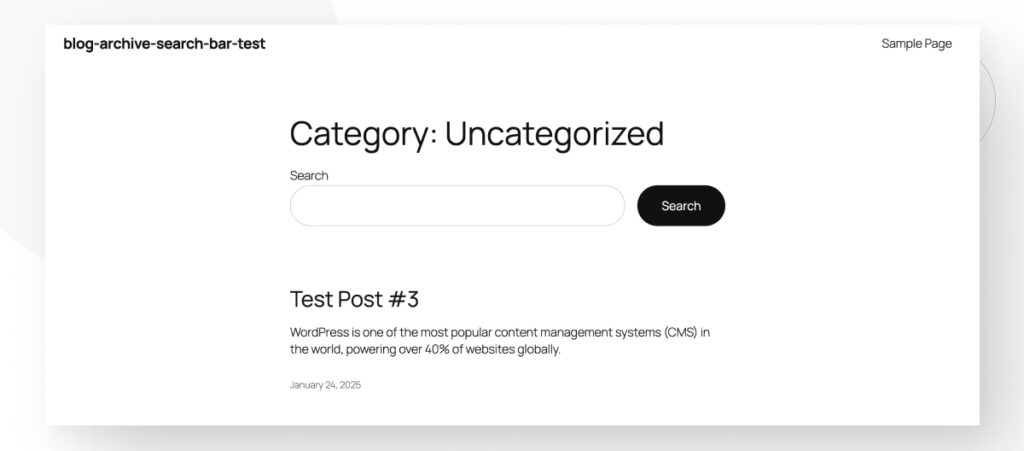
For example, you could add it right below the main heading.
Type in “search” and add the resulting Search block. Click Save on the top right-hand corner to save the changes.
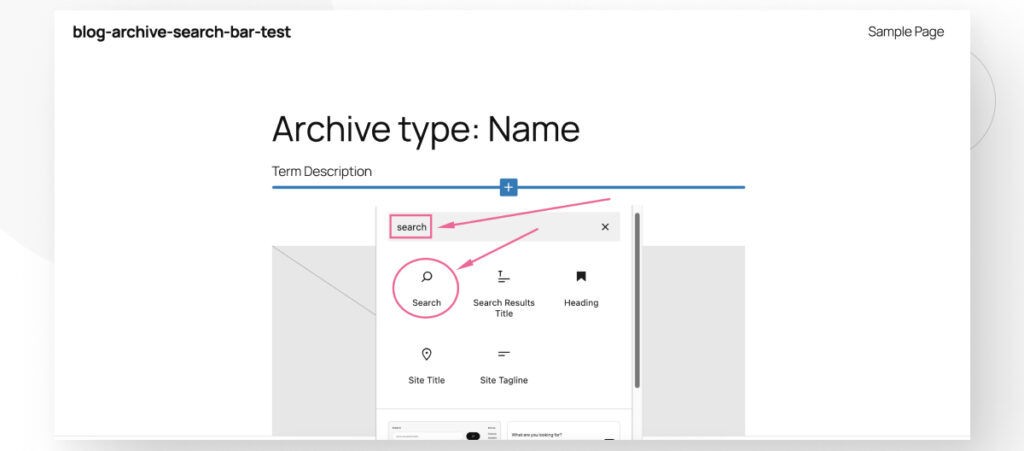
Now, all your archive pages will have a search bar right under the main heading.
Take Control of Your Blog Archive Layouts
Adding a search bar to your WordPress blog archive is not hard at all! You really only need the basic computer skills necessary to use WordPress and you’re good to go.
Use this new knowledge to take control of your site’s layout and improve the experience for your visitors.
If you found this post useful, read our blog and developer resources for more insights and guides!
📬 Get WordPress updates to your inbox
Sign up for WC Blog updates and never miss a post!
Related Articles

How to Grant Secure Access to a Not Live WordPress Site During Development

Do You Need a Web Developer to Build a WordPress Site?

How to Change the Bottom Padding Dimensions on WordPress Blocks

How to Disable the “Similar Posts” Section in WordPress Blogs