
How to Change or Edit Your WordPress Footer

If you’re starting to dive deeper into your WordPress site, you may be wondering how to change or edit the contents of your footer. After all, it’s the part of your site that effectively wraps up all the information your users need to contact you and access various useful links.
Let’s explore 5 methods for changing or editing your WordPress footer.
Key Takeaways
- The footer is the section at the bottom of your site that displays various links and useful information, such as contact details, an “About Us” page, etc.
- You can change your footer content and design via multiple methods, including widgets, the Theme Customizer, the Menus settings, and more.
What Is the Footer and Why Change It?
The footer is the bottom section of your WordPress website that appears on every page. It typically contains important information like copyright notices, privacy policies, contact details, or links to other parts of your site.
It’s essentially the area that wraps up your website and provides a point of reference for visitors who may not know exactly where to find what they’re looking for.
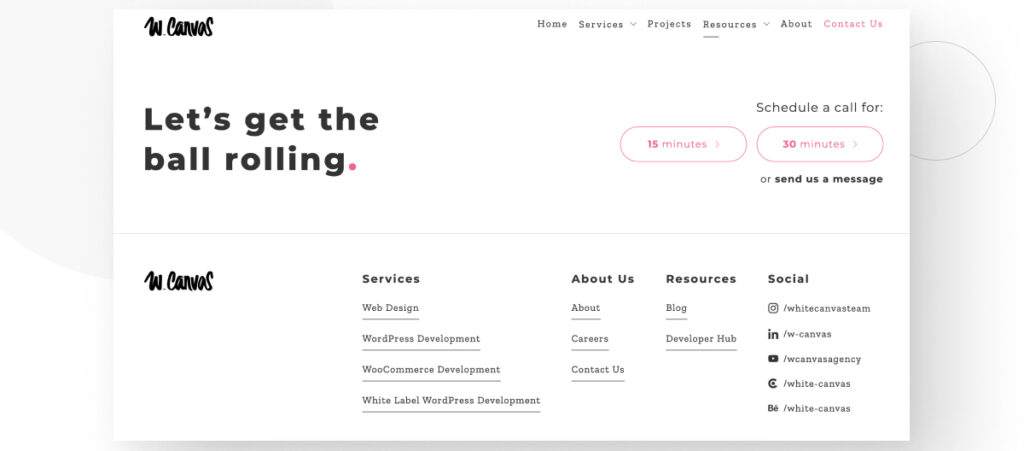
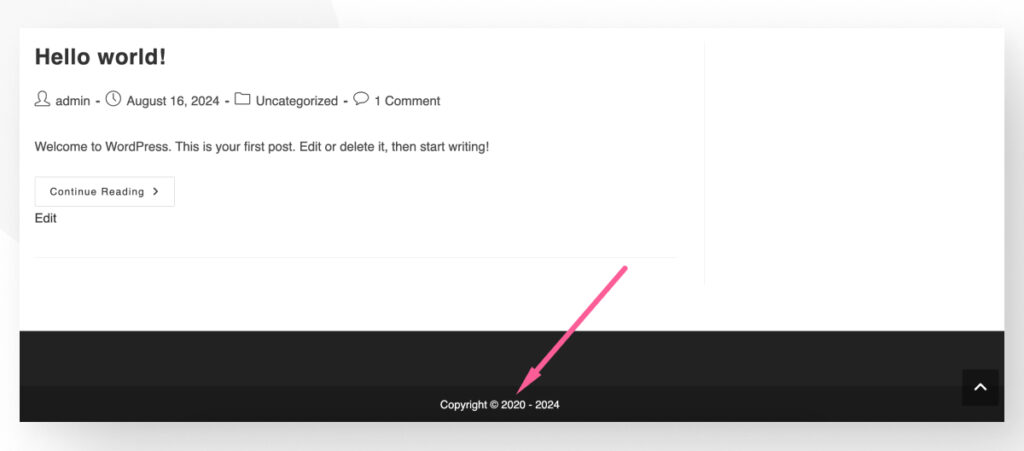
This is our website’s footer. It contains contact information and links to our services and resources. It’s pretty straightforward to navigate.
Once you start learning the ropes and gain more experience designing and modifying your site, you may want to start experimenting with your footer. It makes sense; it’s a great place to display some of the most important information about your site, and it also allows you enough creative freedom to make it your own while also being functional for users.
You may want to change or edit your footer to match your branding and add or remove links and information to make it more helpful to users.
Regardless of why you may want to edit the footer, there is a bit of a learning curve, and there are many methods for editing it, so it is important to find the one that works best for your skills and goals.
5 Methods to Change or Edit Your Footer
Since there are many methods for changing your footer, this article will explore some of the most common ones to help you find one that works best for you.
Let’s explore 5 methods to change and edit your WordPress footer.
Method #1: Edit Your Footer With Widgets
One of the easiest and most accessible ways to edit your footer is using widgets. However, keep in mind that not every theme supports widgets, so you’ll have to determine whether yours supports them by trial.
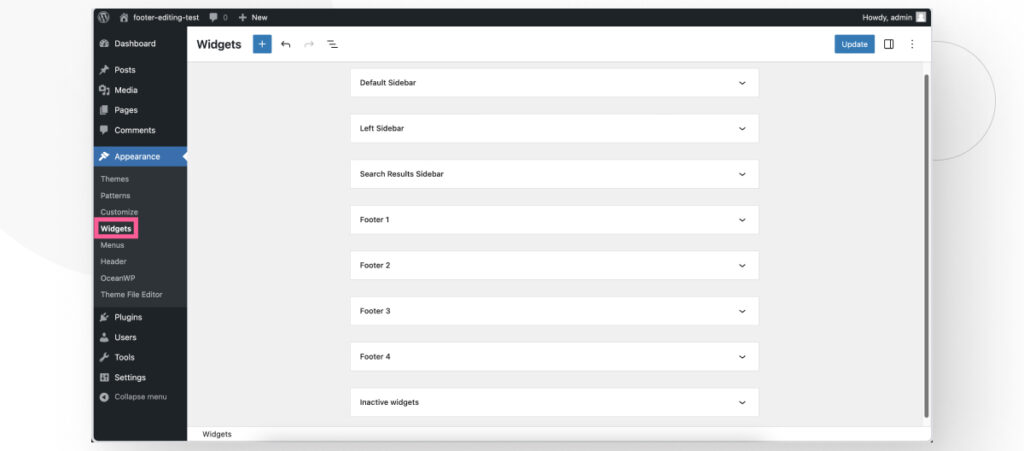
To access widgets, go to Appearance > Widgets. If you don’t see the Widgets option, your current theme doesn’t support widgets. For example, none of the current default WordPress themes support widgets, but you can use other methods to modify the footer in these themes.
We’re using the OceanWP theme for this test, and it has various sidebar and footer sections available.
To add a new footer widget, select one of the widget sections and click on the Add Block button.
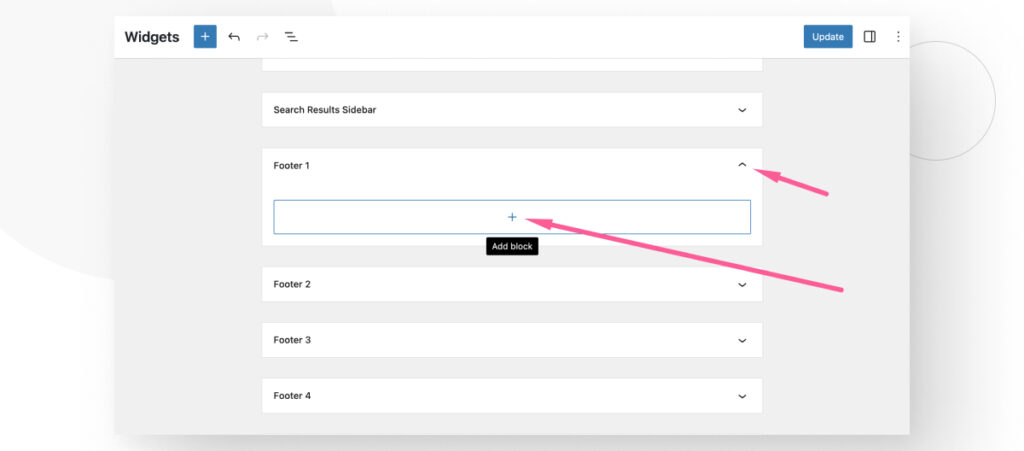
You can add any block you want, but let’s keep it simple and add a new paragraph.

Add some text and click on Update.
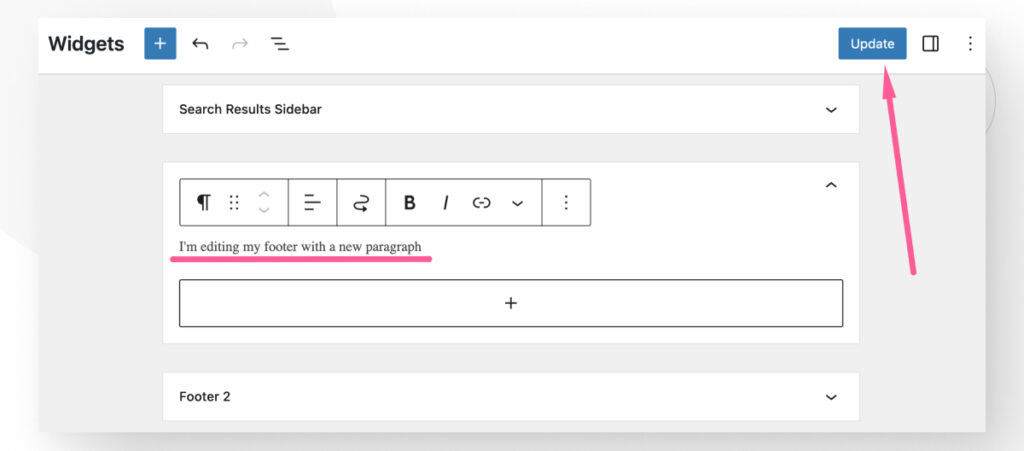
Here’s what the new paragraph looks like on the live site’s footer.
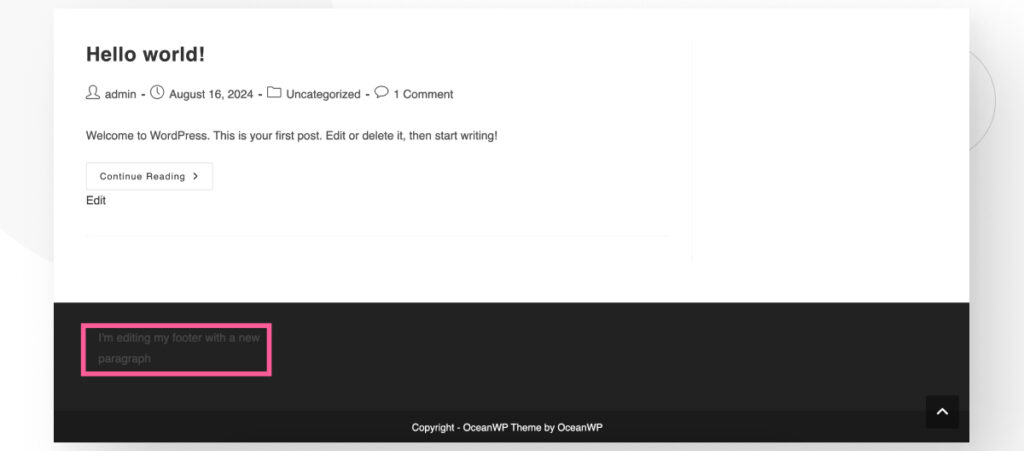
This is a very simple example, but it shows you can easily add various types of content to your WordPress footer by simply using the built-in Widgets settings. However, keep in mind that some themes can be tricky when it comes to widgets.
We also tested adding a paragraph block as a widget in the Astra theme, and it didn’t display it. So, if this method doesn’t seem to work for your theme, delete the changes and consider using a different method.
Method #2: Edit Your Footer Using the Theme Customizer
Another easy way to modify your footer is using the Theme Customizer feature, which lets you quickly modify various settings related to your theme.
However, as with other methods, the Theme Customizer has some limits. For example, block themes like the default WordPress themes don’t allow access to the Customizer because they’re designed to be edited from the Site Editor. However, classic themes like Astra and OceanWP do enable the Customizer. Keep these limitations in mind.
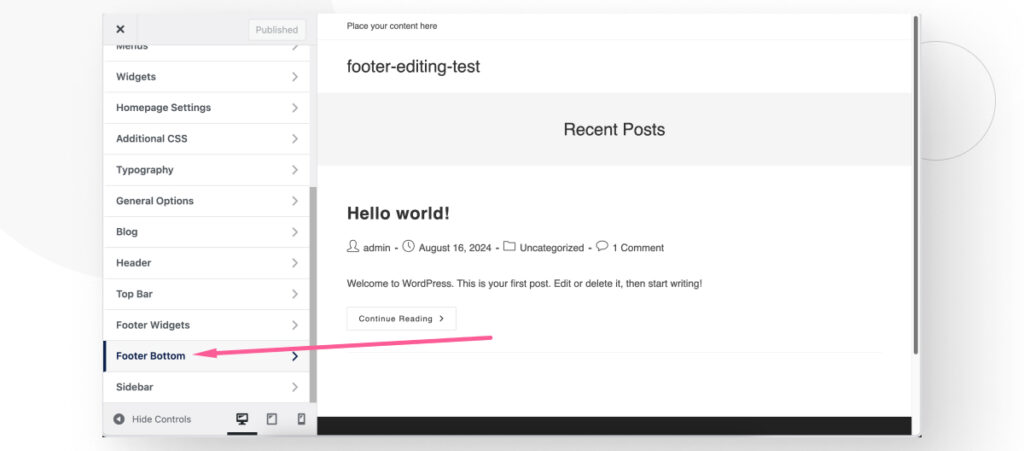
To access the Customizer, go to Appearance > Customize. Since every theme distributes settings differently, you’ll have to find the section to edit footers by exploring the menus.
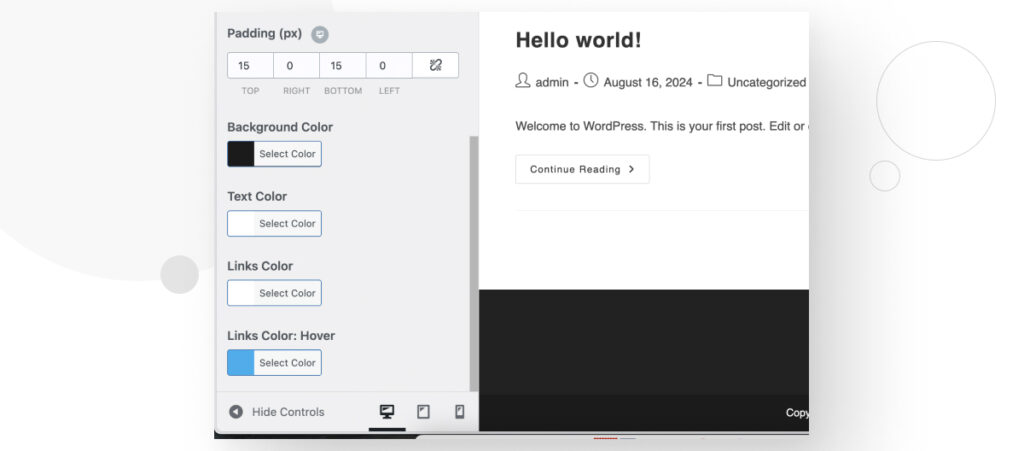
For example, in OceanWP, you can access the footer customization via the Footer Bottom menu.
The Footer Bottom menu allows you to edit the text that appears at the very bottom of your site.
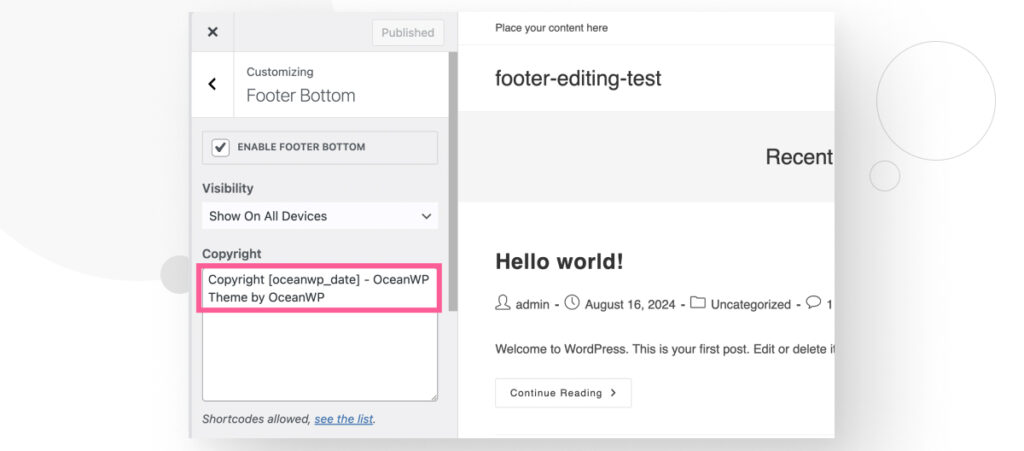
For example, you could modify these texts to include only the current year and the site’s title by adding the following text: Copyright 2020 - 2024.
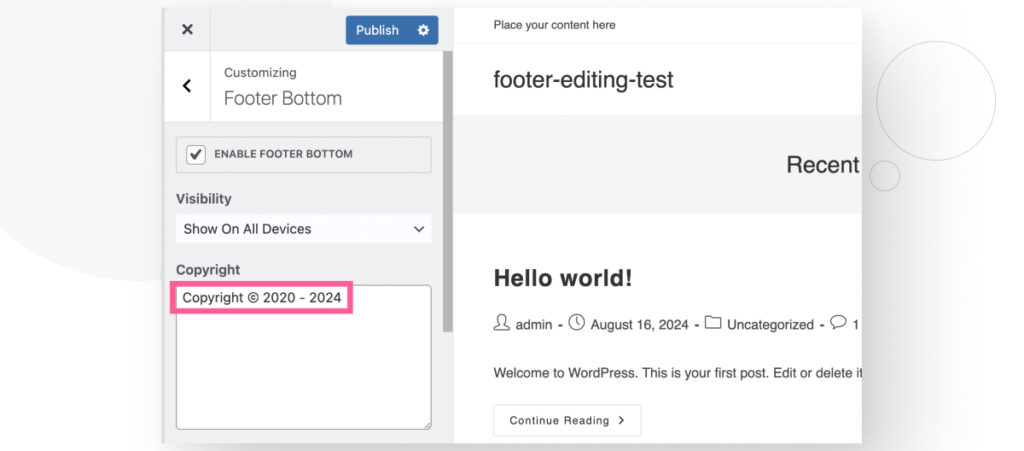
Click on Publish and go back to your site to see the changes.
OceanWP also allows you to edit text, background, and link colors for the bottom footer.
The options available change depending on your theme, so you’ll have to explore the Customizer and determine which settings are available.
Method #3: Edit Your Footer With the Menus Settings
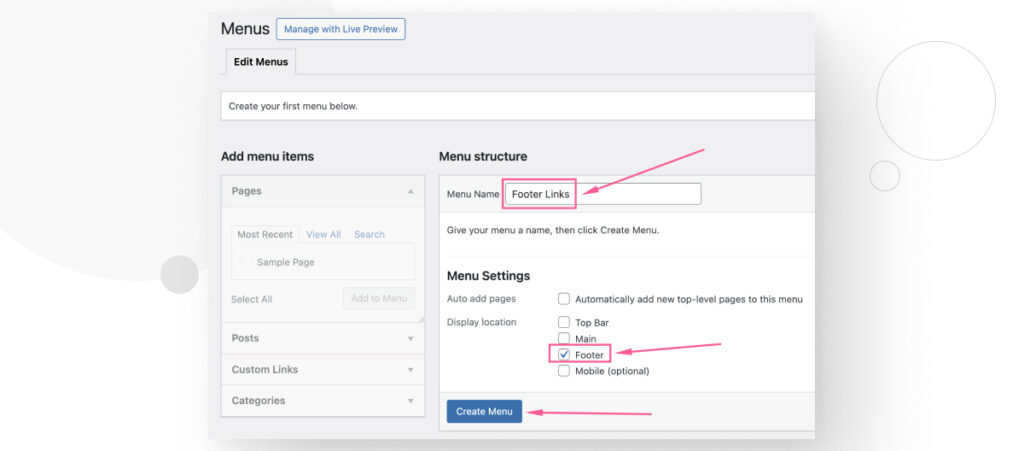
The Menus settings allow you to create navigation menus and place them at different locations on your site, including the footer. To access it, go to Appearance > Menus. If you haven’t created a menu before, you will land on the Edit Menus tab and will be able to create it from scratch.
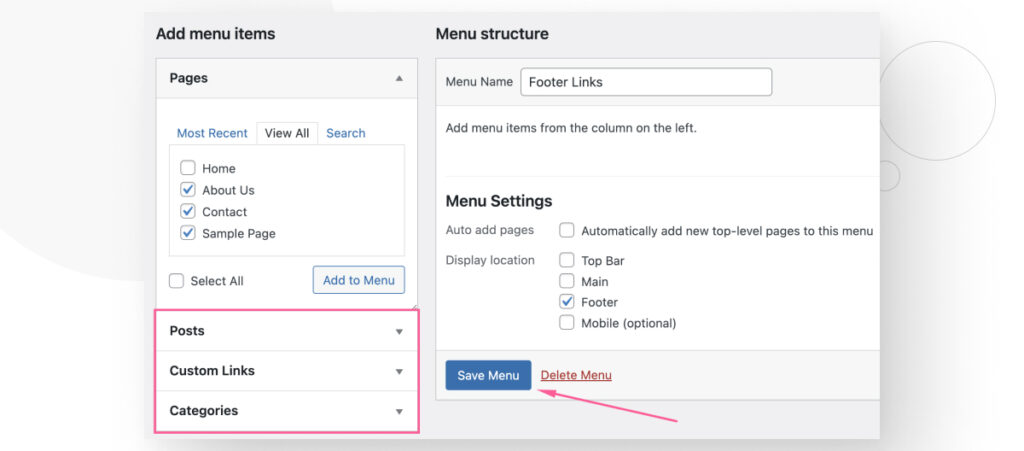
First, give your menu a unique name, check the Footer checkbox on the Display location section, and click Create Menu.
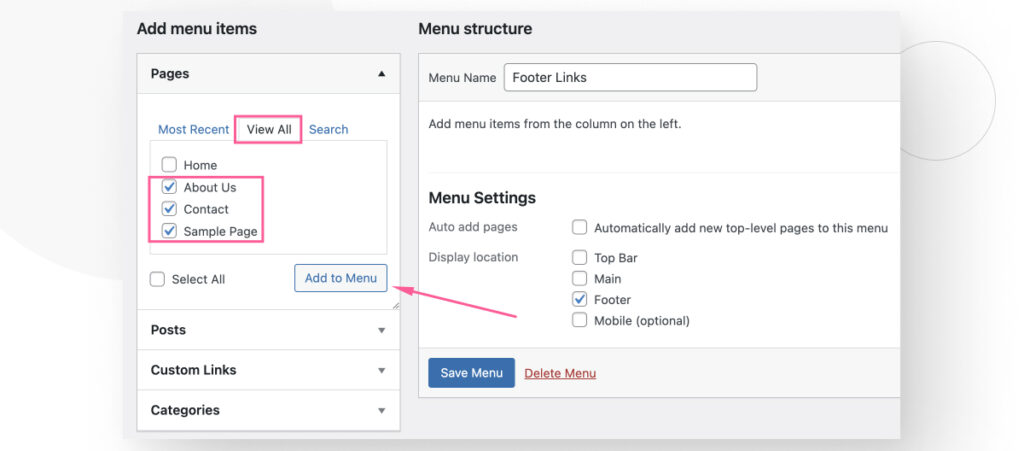
Now that your footer menu exists, it’s time to add the pages you want your users to access from it. On the Add menu items section to the left, click the View All tab and check the pages you want to add to your menu. We added the About Us, Contact, and Sample Page pages.
Once you’ve selected all the pages you want on your menu, click Add to Menu.
You can repeat this process on the Posts, Custom Links, and Categories sections. Once you’ve added all the menu elements you want, click Save Menu.
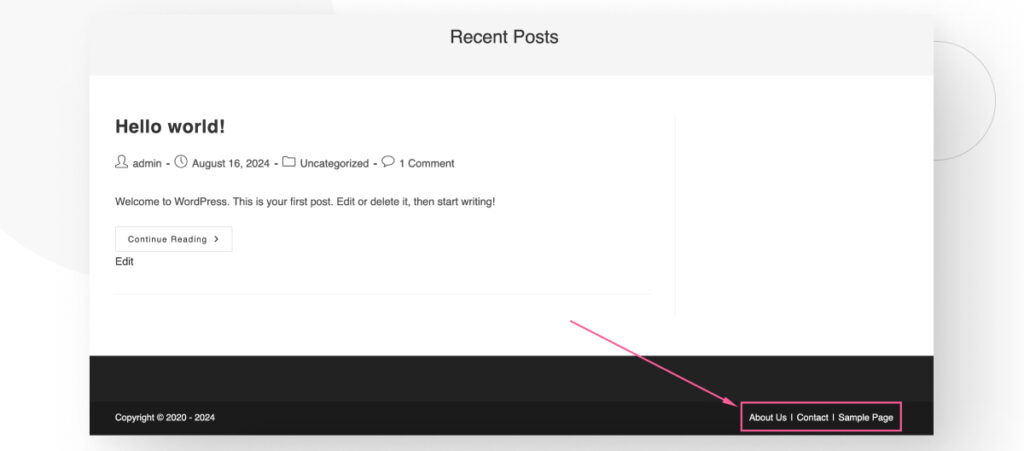
After that, your new footer menu will be live on your site. You can see it here on the front page of our test site.
Method #4: Edit the Footer With a Page Builder
Page builders are plugins that allow users and developers to quickly create WordPress sites without code. As a result, they are an excellent resource for people with limited technical skills, especially when creating sites like a blog or a simple informational business site.
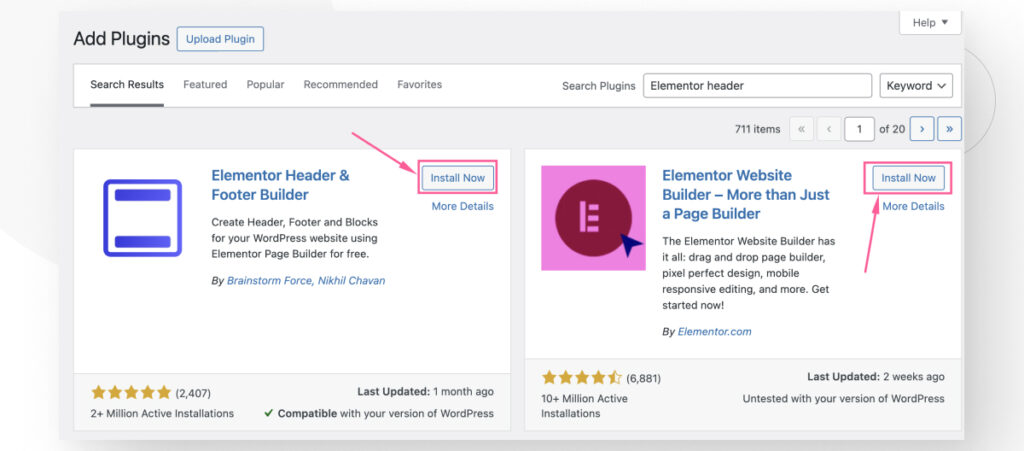
There are many page builders out there, but Elementor is one of the most popular ones, so we’ll use it in this example. You’ll need 2 plugins for this method: Elementor and Elementor Header and Footer Builder.
Step #1: Install Elementor and Elementor Header and Footer Builder
First, go to Plugins > Add new plugin and install and activate both Elementor and Elementor Header and Footer Builder.
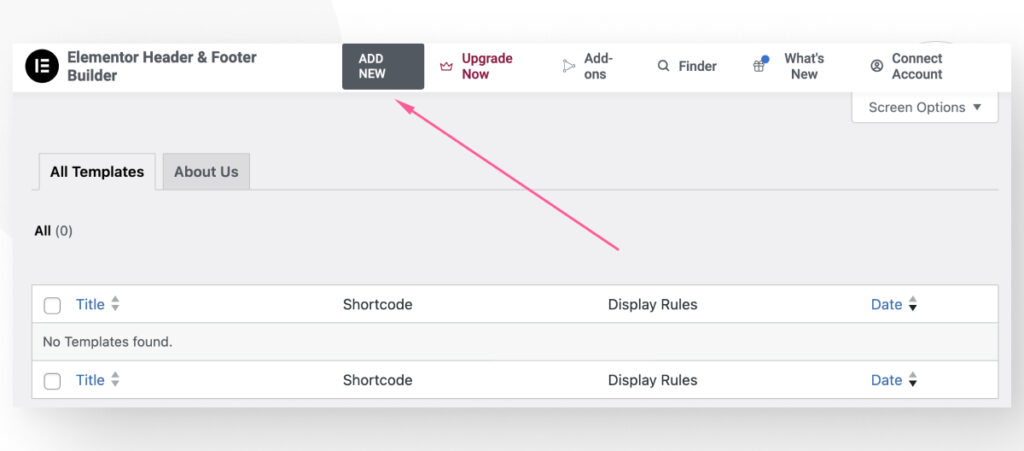
Step #2: Create a New Footer
With both plugins active, let’s create a simple footer. Go to Appearance > Elementor Header and Footer Builder. At first, there won’t be any footers, so let’s create one. Click on Add New.
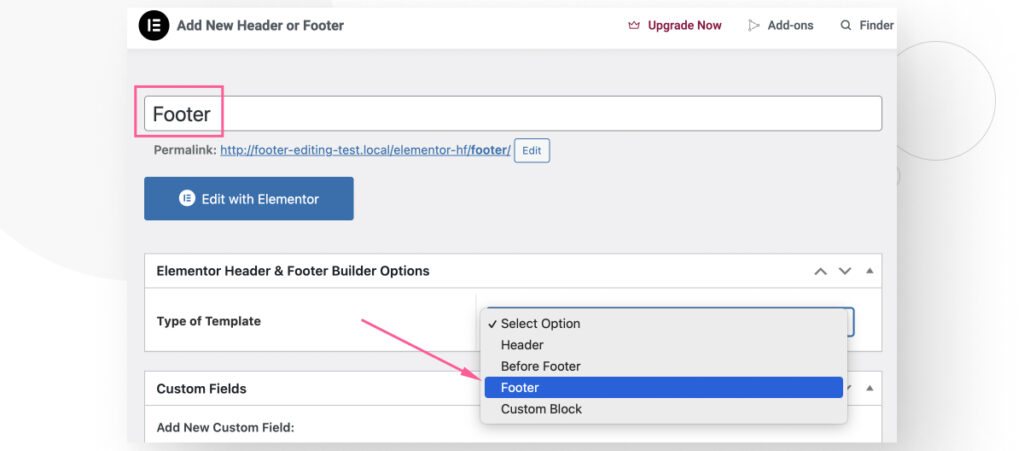
On the following screen, give your footer a unique name. Further down, on the Type of Template section, select Footer from the dropdown menu.
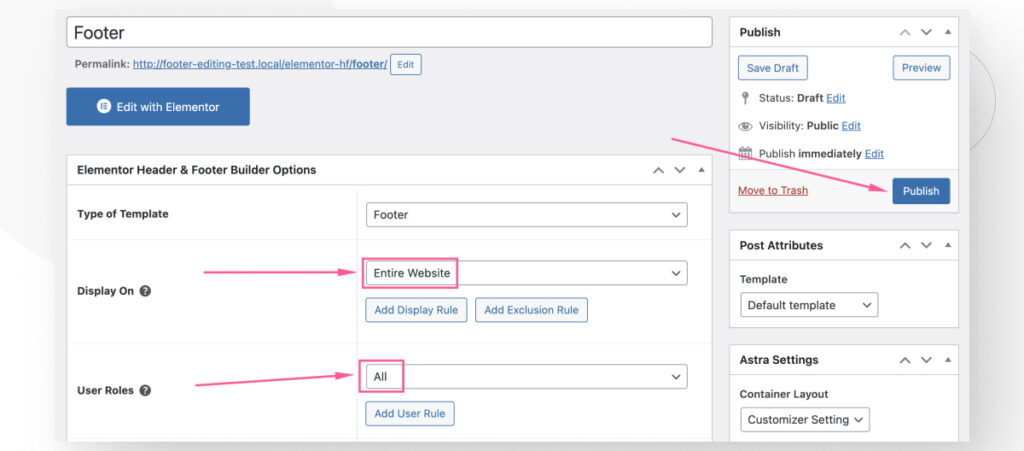
After selecting Footer in the Type of Template section, 2 new sections will appear: Display On and User Roles.
In the Display On section, select Entire Website, and in the User Roles section, select All. Finally, click on Publish.
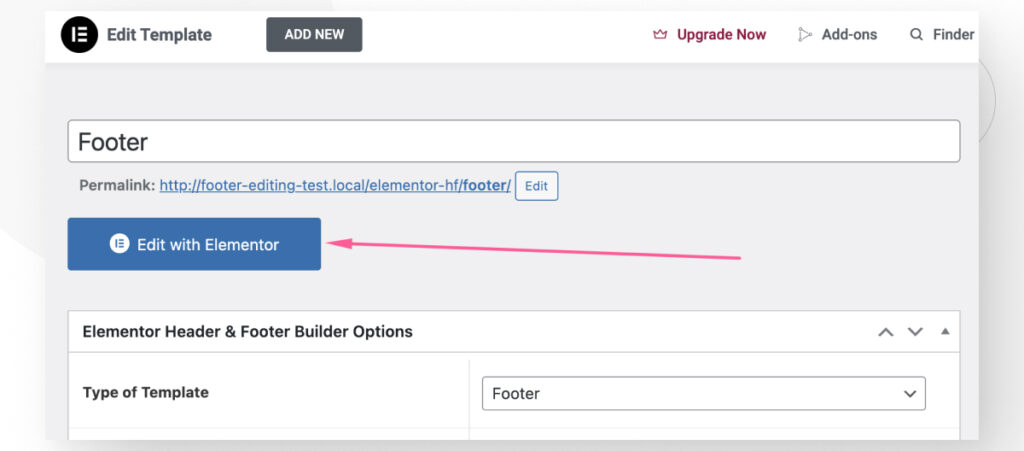
As of right now, your footer is still empty. So, after publishing it, it’s time to customize. Click on Edit with Elementor.
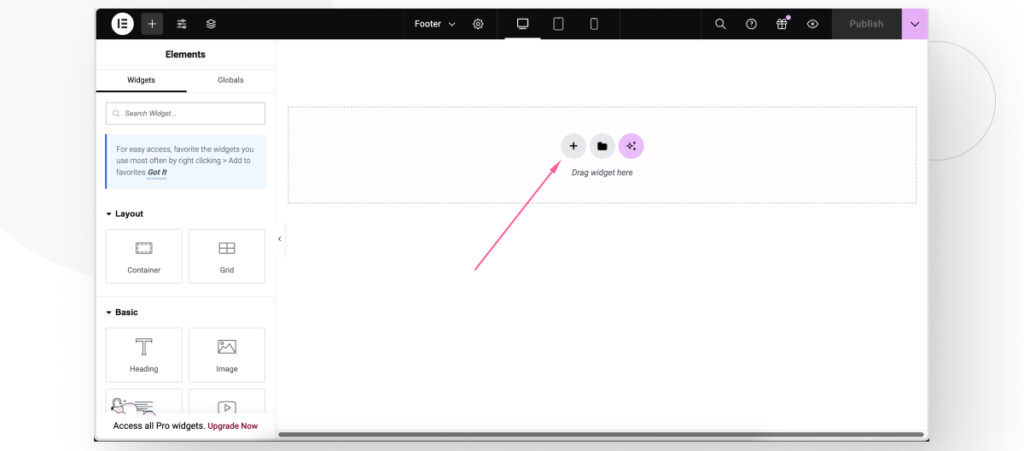
Step #3: Edit Your Footer
Let’s create a simple footer with 2 columns. Click on Create new container.
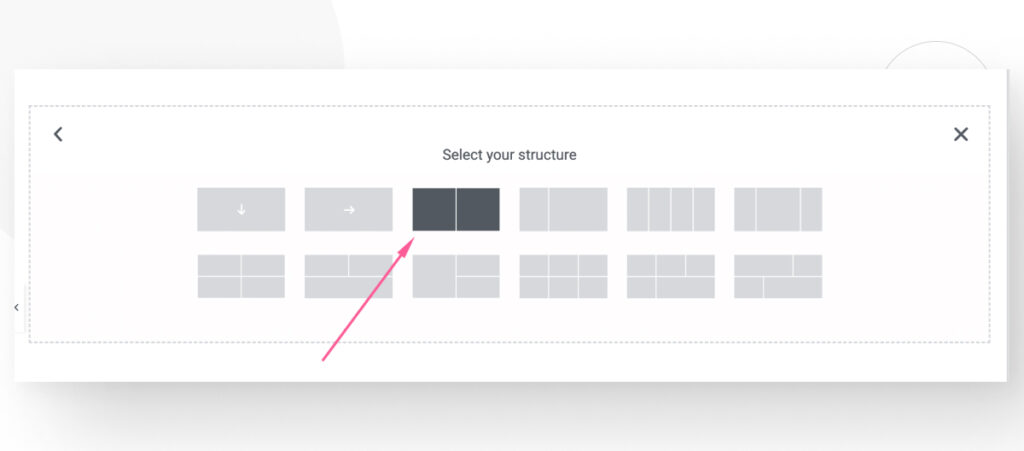
Select the type of layout you want to use. We used Flexbox.

Select the structure. In our case, we selected the left-right structure.
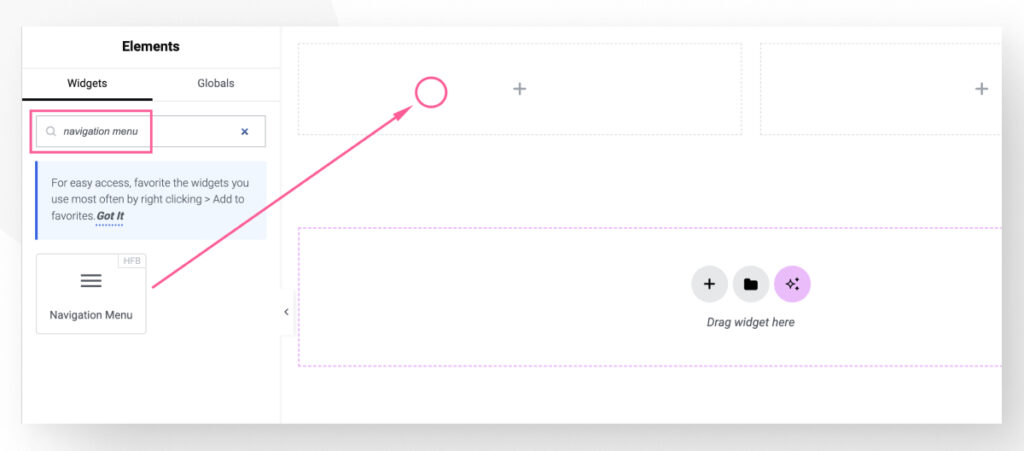
Now, let’s add a navigation menu to the left column. Search for “navigation menu” and drag it into the left column on the Widgets tab on the sidebar.
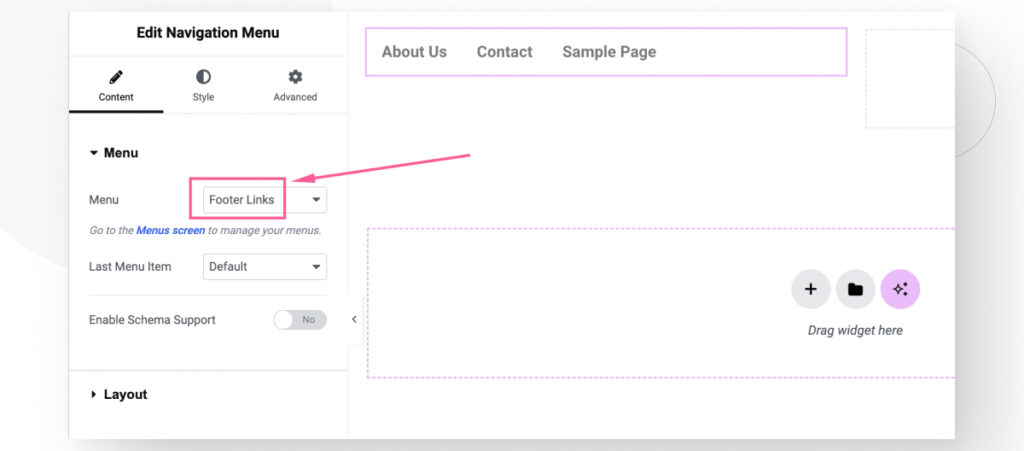
Elementor will populate the menu with any existing menu, so choose one of your current menus or create a new one and it will appear in the Elementor interface. We had already created a “Footer Links” menu with 3 links on it.
If you don’t have any existing menus, you can create them by following the third method on this post: editing your footer with the Menus settings.
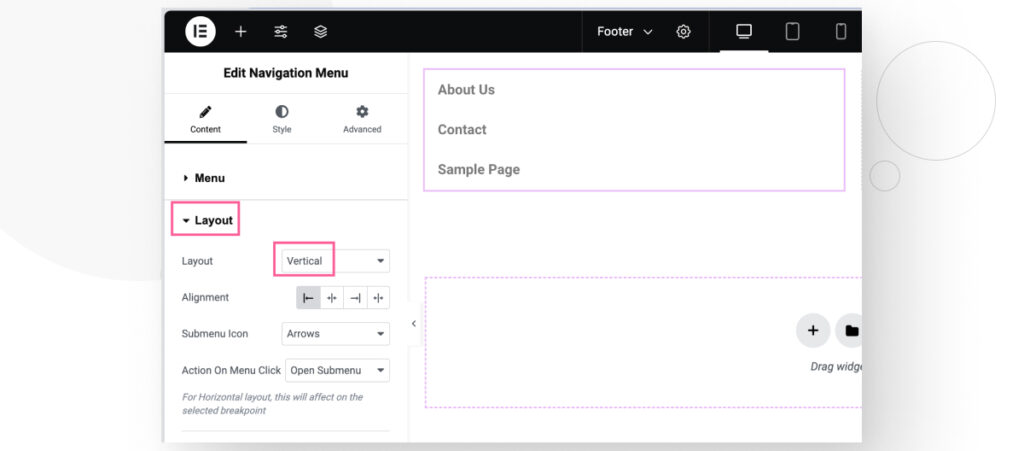
Now click on the Layout section on the sidebar and you will be able to change various settings. We selected a Vertical layout.
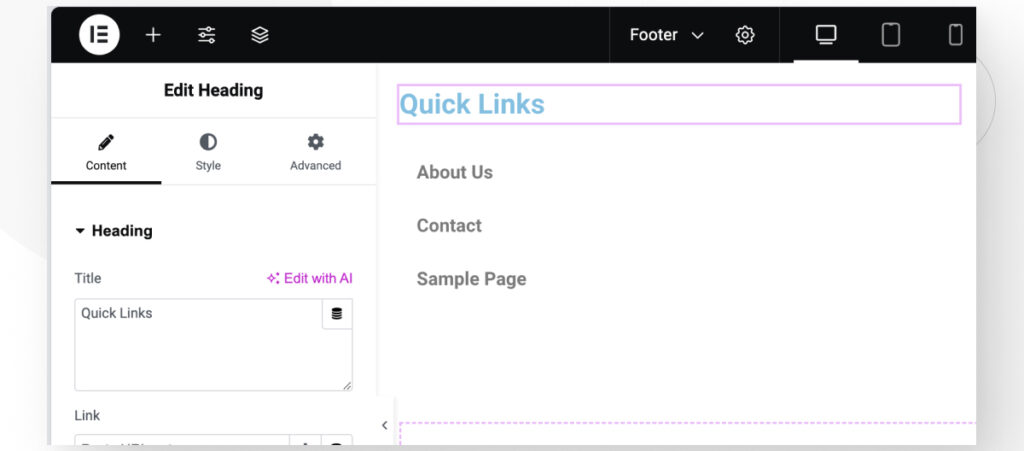
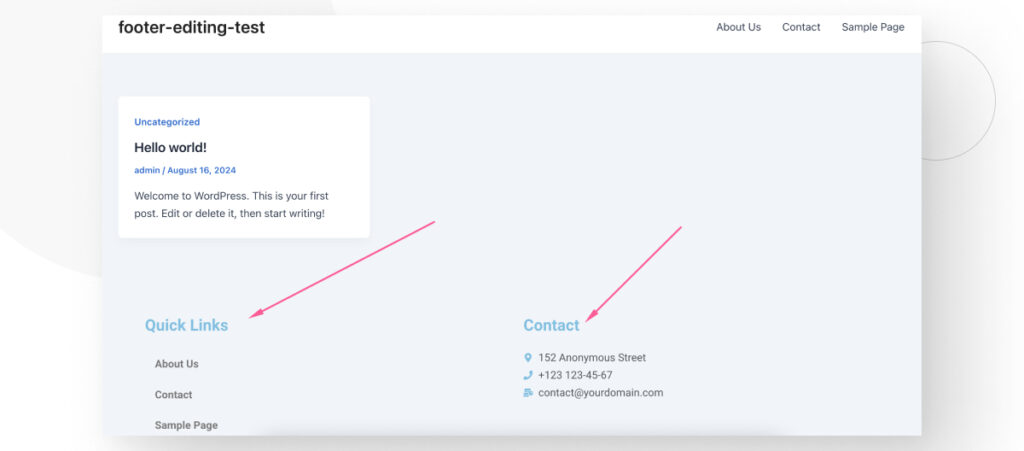
Now add a Heading block above the navigation menu.
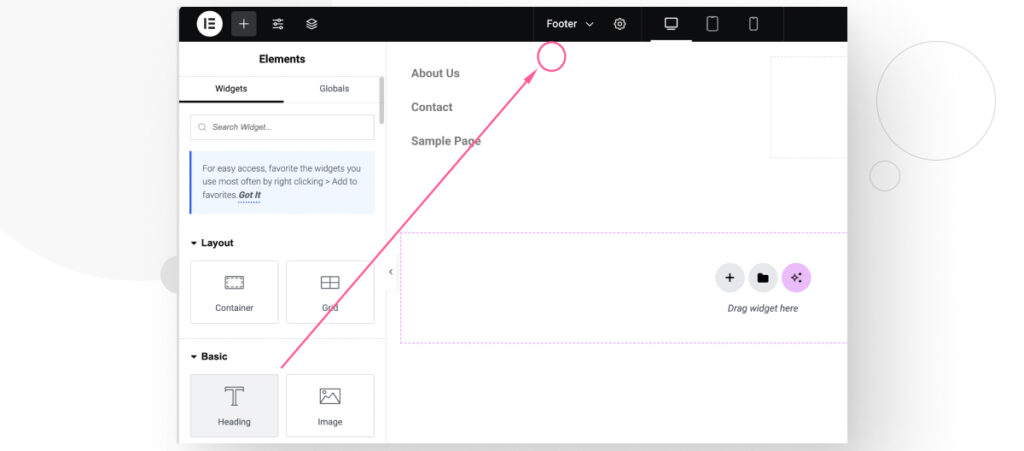
Give it a name like “Quick Links.”
Our navigation menu is now done, so let’s use the right column to add some contact information. Drag a Heading and Icon List block to the container on the right column.
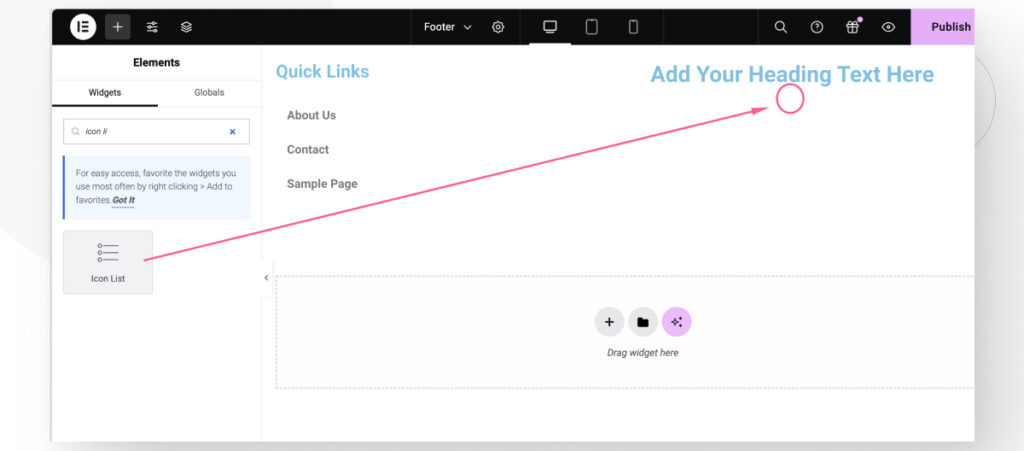
Name the Heading block “Contact” and add the contact information below.
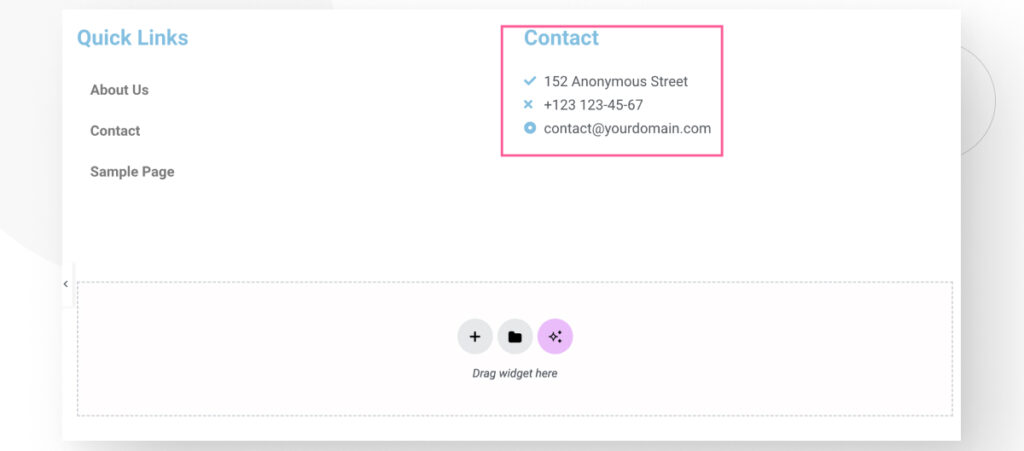
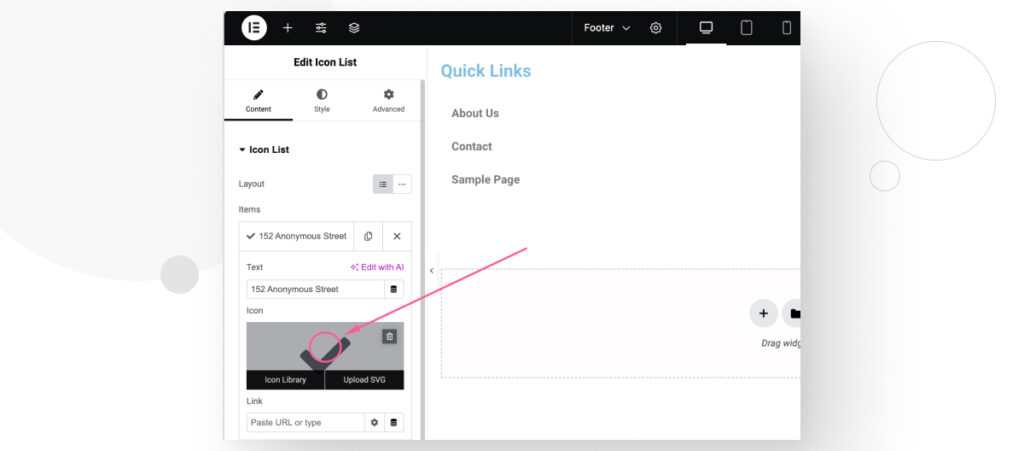
Now, let’s modify the icons so they match the information. Click on the elements of the Items section on the sidebar.
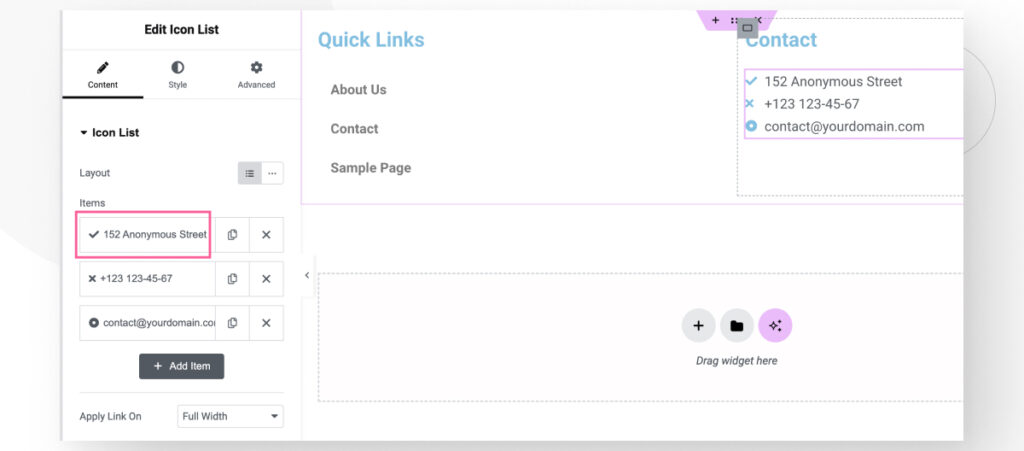
Now click on the Icon section for each element.
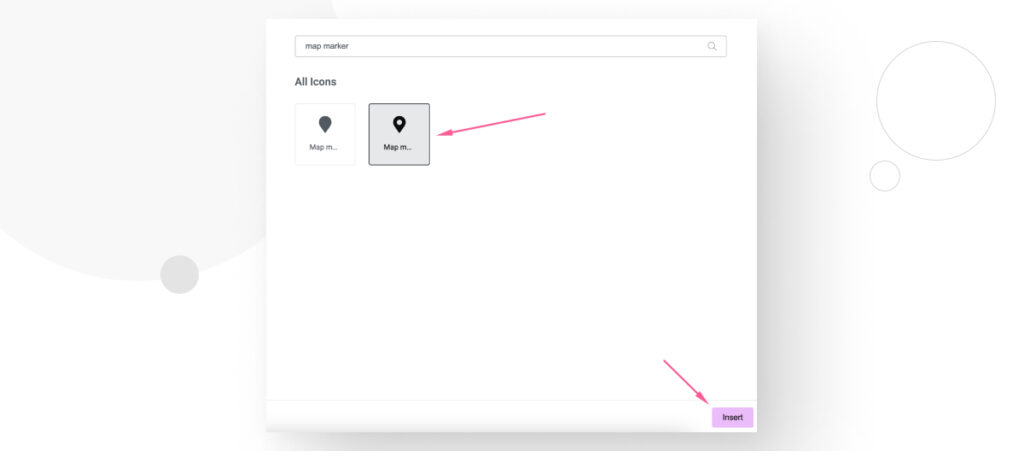
Now, search for an appropriate icon for each piece of information. For example, you could use the Map Marker icon on the bullet point with your address. Click on the icon and click on Insert.
Repeat this process for every element (phone number and email address, in our case), and click on Publish to save all changes.
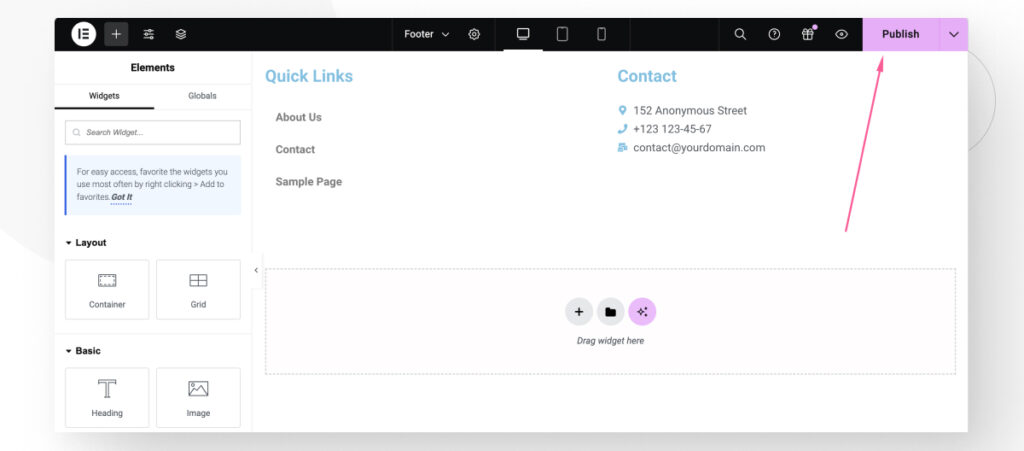
After publishing, your new footer will appear on your live site!
Method #5: Edit the Footer With a Plugin
In the WordPress ecosystem, there’s a plugin for pretty much everything and footers are no exception. There are multiple plugins for adding footers, but we’ll use the Insert Headers and Footers plugin, since it’s one of the most popular.
First, go to Plugins > Add new plugin and install and activate Insert Headers and Footers.
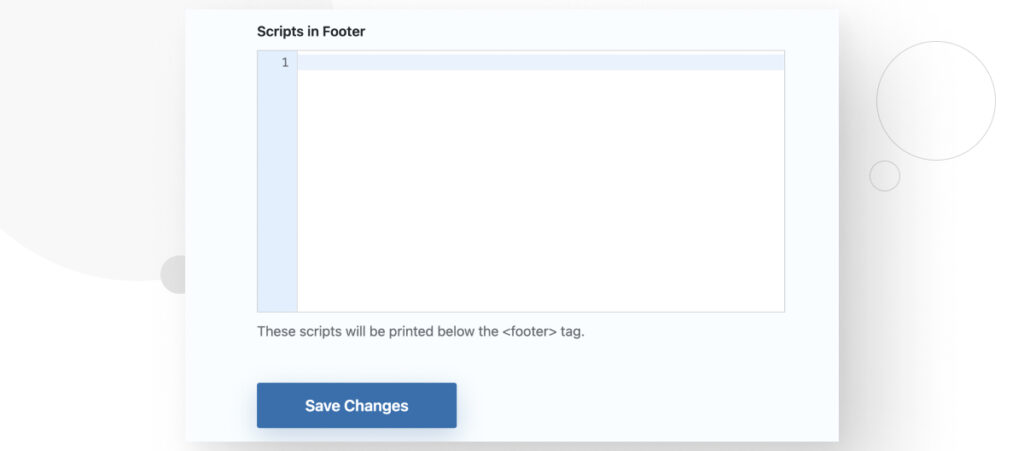
To add content to the footer, go to Settings > WP Headers and Footers and scroll down to the section titled Scripts in Footer. You will see a code block where you can add HTML snippets and scripts.
You can add a simple navigation menu with the following HTML snippet:
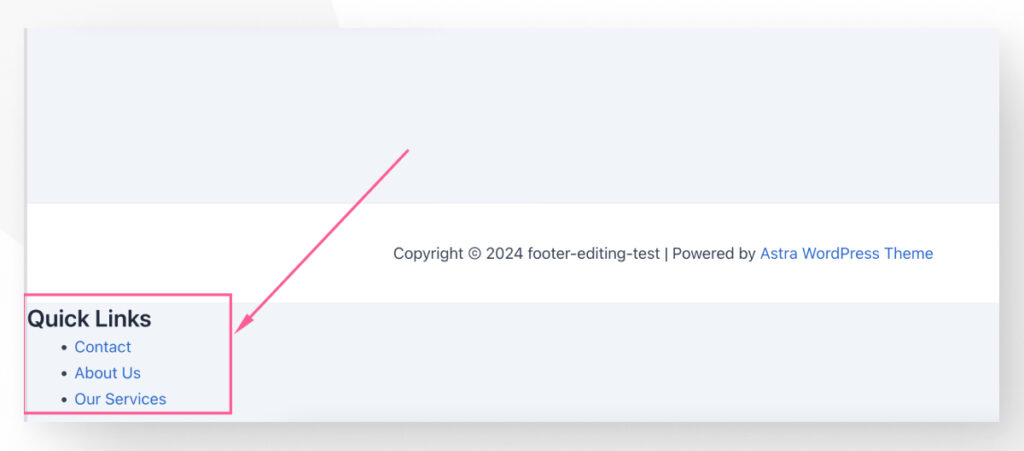
<div class="footer-section">
	<h3>Quick Links</h3>
	<ul>
		<li><a href="/contact-us">Contact</a></li>
		<li><a href="/about-us">About Us</a></li>
		<li><a href="/our-services">Our Services</a></li>
	</ul>
</div>
After adding the snippet, click on Save Changes.

Now, go to your live site to see the text you added at the bottom.
As you can see, this plugin adds the content regardless of whether your theme already has a default footer. As a result, you may need to edit your theme, too, if you want to use the Insert Headers and Footers plugin to create and edit all your footers.
Edit Your Footers in WordPress With These Methods
Learning to change the contents of your WordPress footer helps you make your website more informative and user-friendly, as it allows you to provide quick useful links and contact information for your visitors.
In this article, we explored 5 methods for changing and editing your footer’s contents, helping you take control more of your site and user experience. Hopefully, you can now edit your footer to display all the information your users need.
If you found this post useful, read our blog and resources for more insights and guides!
📬 Get WordPress updates to your inbox
Sign up for WC Blog updates and never miss a post!
Related Articles

How to Make a Subscriber Into an Admin on WordPress?

How to Grant Secure Access to a Not Live WordPress Site During Development

Do You Need a Web Developer to Build a WordPress Site?

How to Change the Bottom Padding Dimensions on WordPress Blocks