How to Find Your WordPress Installation Path?

Whether you’re a website owner or developer, it’s essential to understand the ins and outs of the core files that make up your installation. Learning how to find your WordPress installation path will help you better understand your website and be ready if you ever need to make quick changes.
Let’s explore two beginner-friendly methods to access your installation path, which contains all the files your WordPress site needs to function properly.
What Is Your WordPress Installation Path?
Your WordPress installation path is the root directory containing all your website’s core files. This root directory contains the PHP and JS files, subdirectories, themes, plugins and other files that make your site possible. The WordPress root is located in the server hosting your site, usually in a folder named / or root, public, root_html, public_html, or your website’s name.
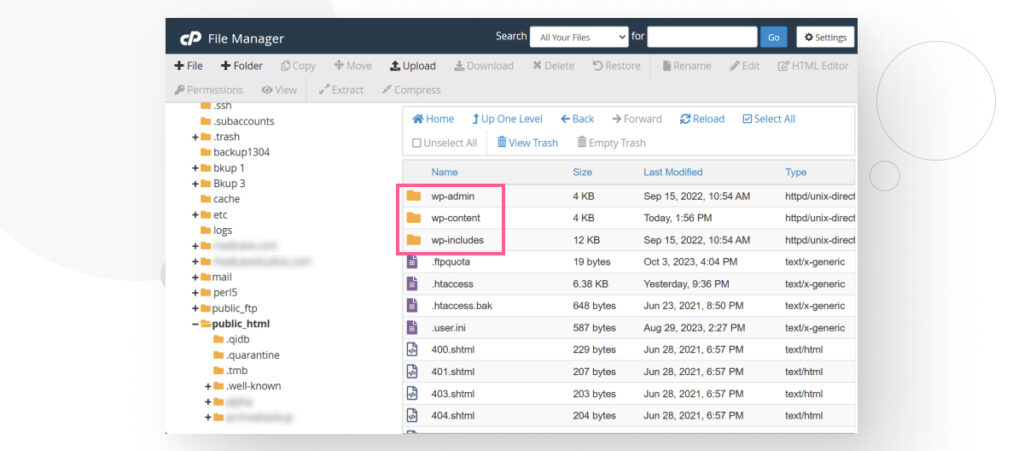
Specifically, the root directory contains three folders and several other files of various formats, mostly .php. The three folders are wp-admin, wp-content, and wp-includes.
- The wp-admin folder contains the data from your dashboard.
- The wp-content folder contains media uploads and plugin and theme files.
- The wp-includes folder contains all the WordPress functions necessary for your website to run (posting, widgets, and more).
The remaining files outside the subdirectories also contain essential data. wp-config.php, for example, includes functions for connecting to the database and global settings.
2 Beginner-Friendly Ways to Access Your WordPress Installation Path
Before moving forward, remember to always back up your WordPress site when making significant changes. If you plan to edit a single file, back up that file before editing.
Methods #1: Use Your Web Hosting Control Panel
Perhaps the easiest and most beginner-friendly way to access your WordPress installation directory is by using your web hosting control panel. The most popular control panel is cPanel, provided by your web host as part of your hosting plan.
Some web hosts have proprietary control panels, but most provide cPanel. To access your installation path, log in to your cPanel account and go to the File Manager from the control panel’s main dashboard.
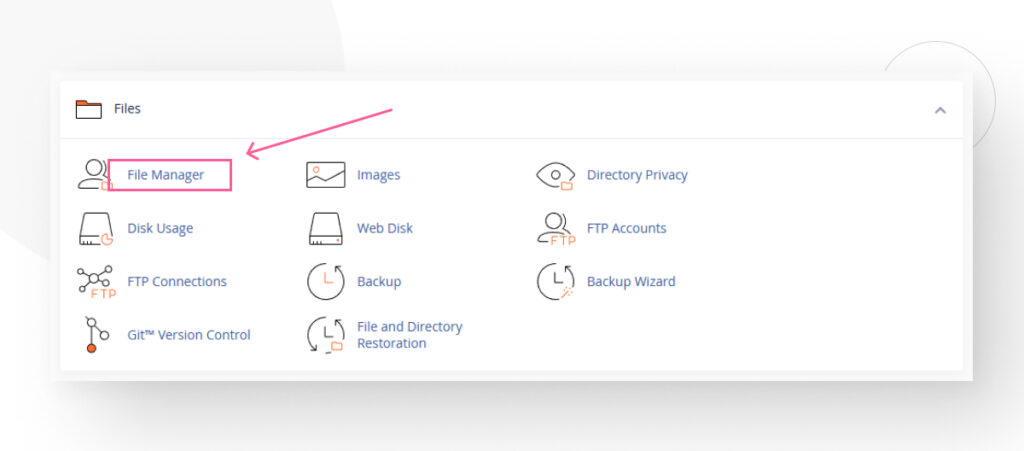
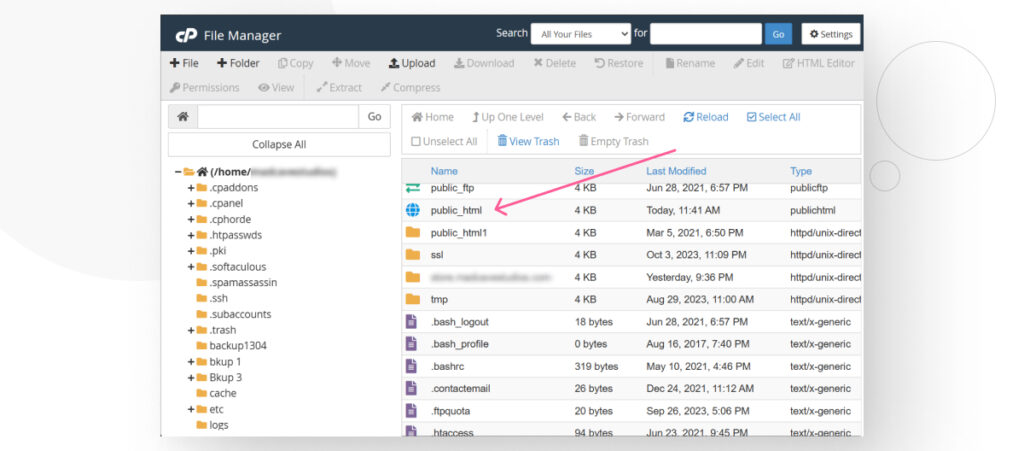
Then go to the directory that leads to your installation path. It’ll usually be public_html, but it may be different for you.
You should see the three main WordPress folders on the following screen: wp-admin, wp-content, and wp-includes.
Methods #2: Establish an FTP Connection
Another common method to access your installation path and edit files is establishing a File Transfer Protocol (FTP) connection to your server.
FTP allows you to transfer files and access remote locations across the internet. To do that, you’ll need an FTP client like FileZilla. It’s free to use and you can download it from the official website.
Assuming you use FileZilla, input your domain name and credentials to gain access to your website’s folders.
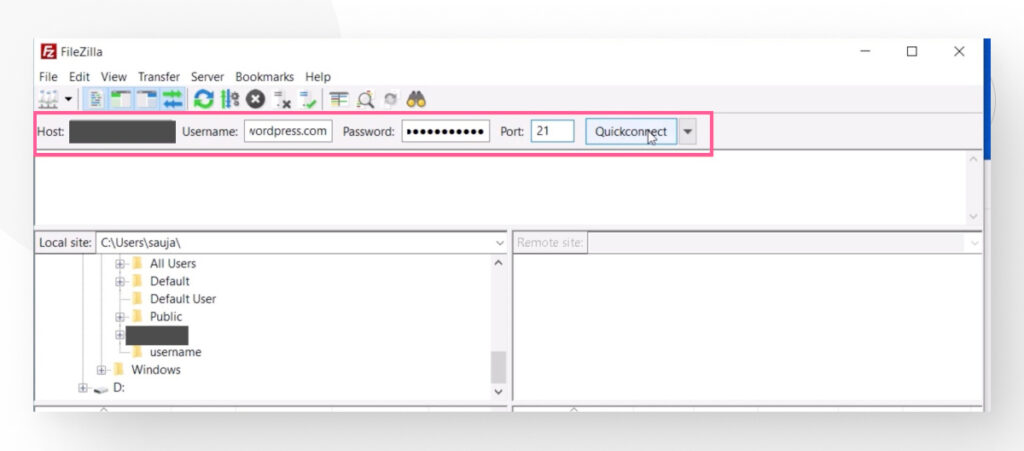
Your hosting provider’s user portal should have the credentials you need to connect to your site via FTP. If you don’t know where to find the credentials, contact your provider for help.
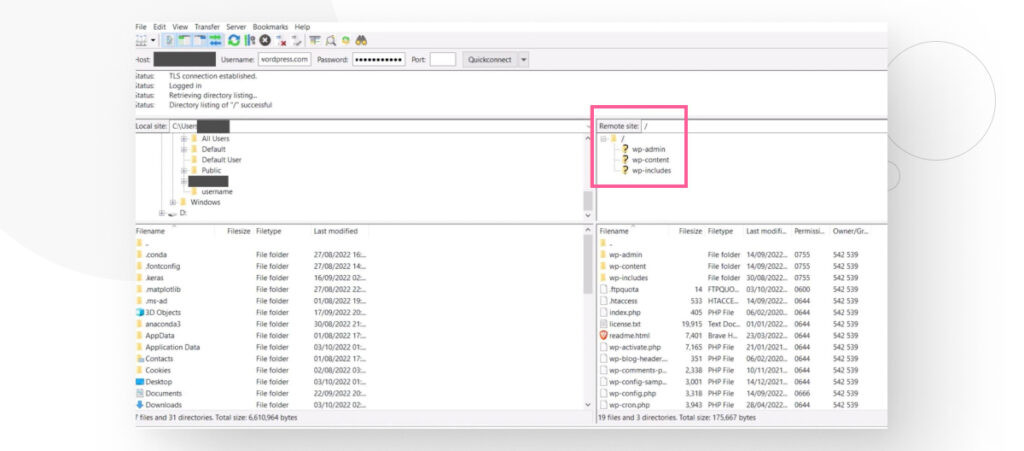
Once you gain access, you’ll likely land on the root directory, named / in this case. In the screenshot, you can also see the three main WordPress directories and core files.
What Is the Correct WordPress Path for WP Engine Websites and Other Hosting Providers That Don’t Have a File Manager or FTP?
It’s possible that your hosting provider does not offer a File Manager feature or a method of connecting via FTP.
Some providers, such as WP Engine, only allow you to connect to your WordPress path via SFTP (SSH File Transfer Protocol) since it provides more security.
As a result, you need to create an SFTP user from your user portal and use it to connect to your site. The process is a bit more involved, but the connection to your site will be very secure.
We’ll use WP Engine as an example in this post, but the steps are very similar to those of other hosting providers.
Step #1: Create an SFTP User
Go to WP Engine’s site and log in.
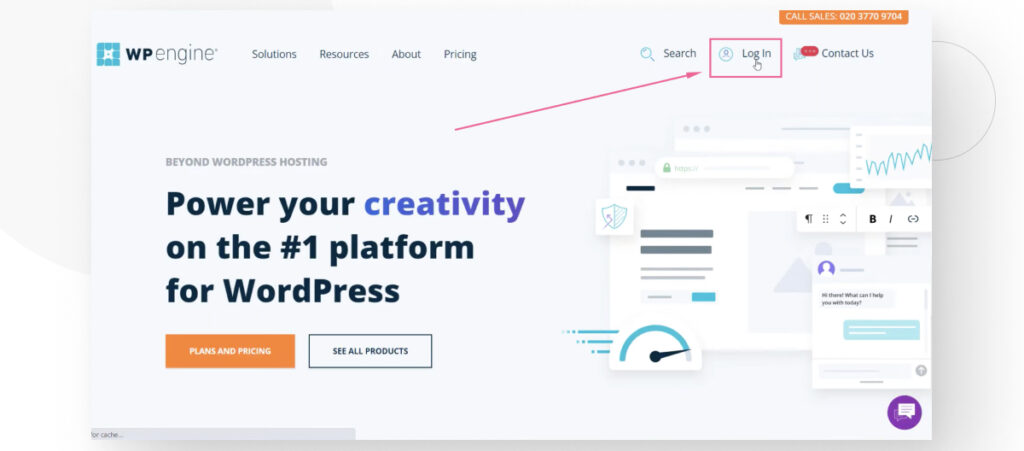
Once on the front page of the user portal, click on your username.
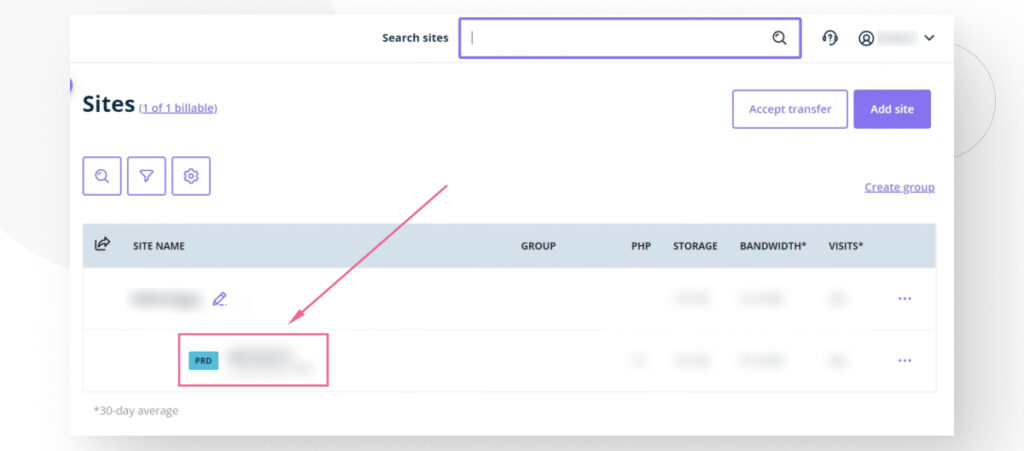
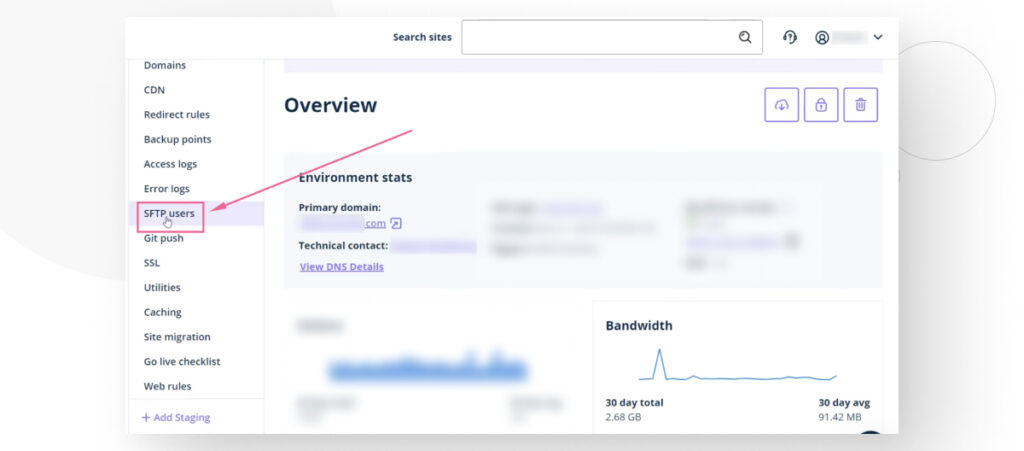
In the following screen, click on SFTP users on the left-hand sidebar.
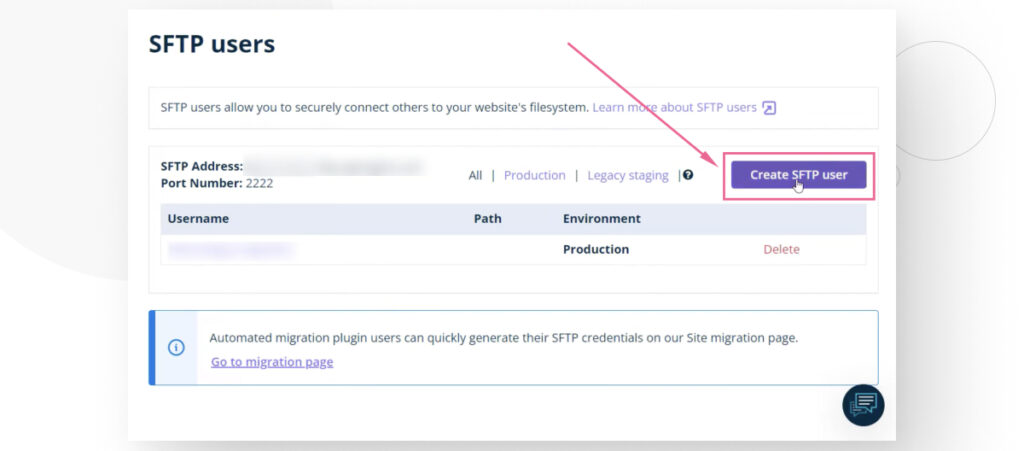
In the next screen, click on Create SFTP user.
Now, you can set a username and password for your SFTP user.
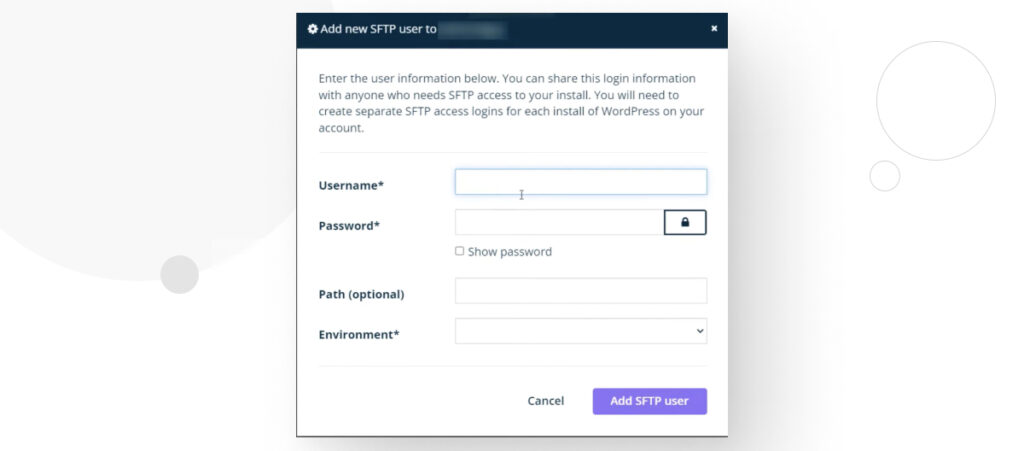
Optionally, you can fill the Path section with a specific subfolder of your site if you only want this SFTP user to access some locations but not all. However, in this case, you should leave it empty.
In the Environment section, choose Production.
Finally, click on Add SFTP user. Your user is now created, and you can use it to connect to your site.
Step #2: Connect to Your WordPress Site Via SFTP
You’ll need an FTP client to connect to your site via SFTP. If you don’t have it yet, you should download and install FileZilla, one of the most popular FTP clients. FileZilla SFTP capabilities, so it’s perfect for you.
You must provide a host, username, password, and port number to connect to your site.
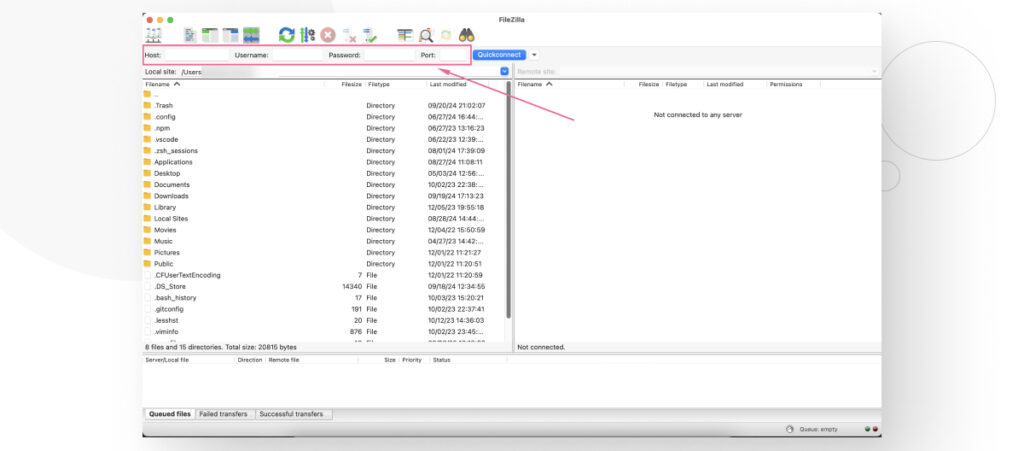
To do that, go to File > Site Manager at the top.
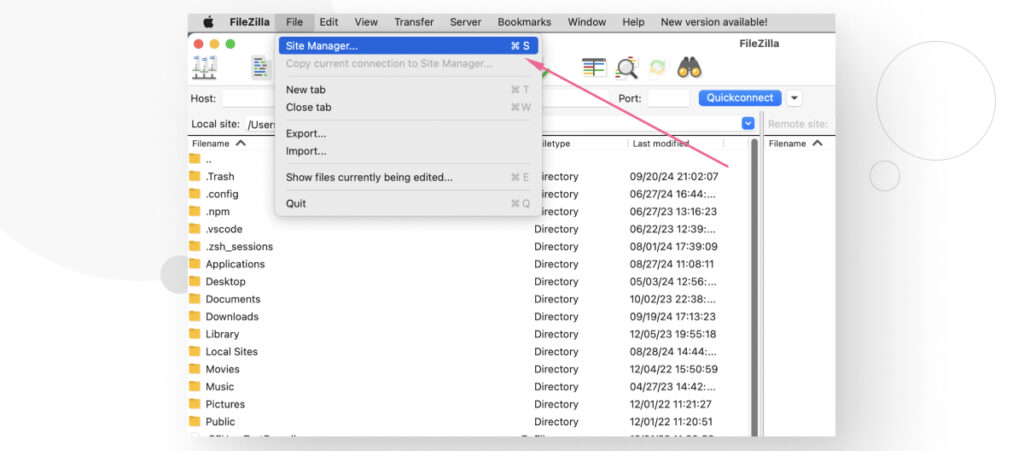
Now click on New Site and give your site a name.
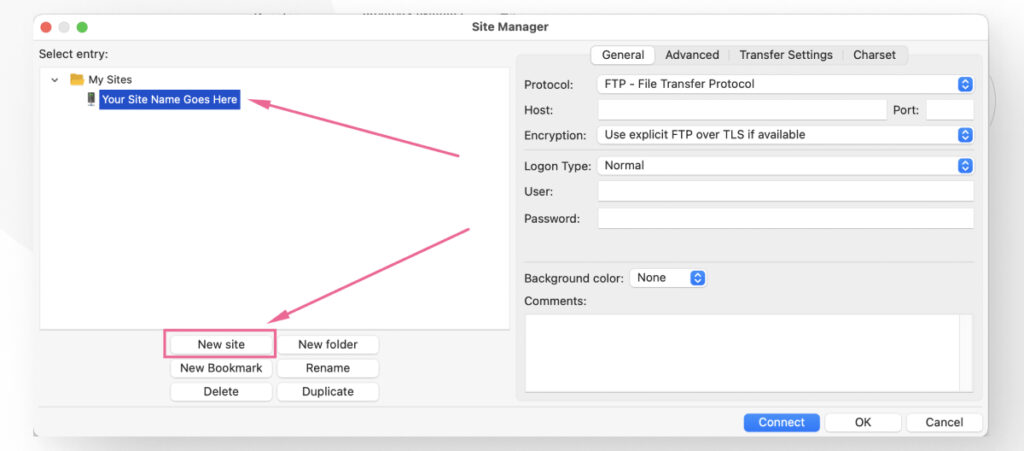
The next step is to ensure the Protocol dropdown menu is set to SFTP – SSH File Transfer Protocol.
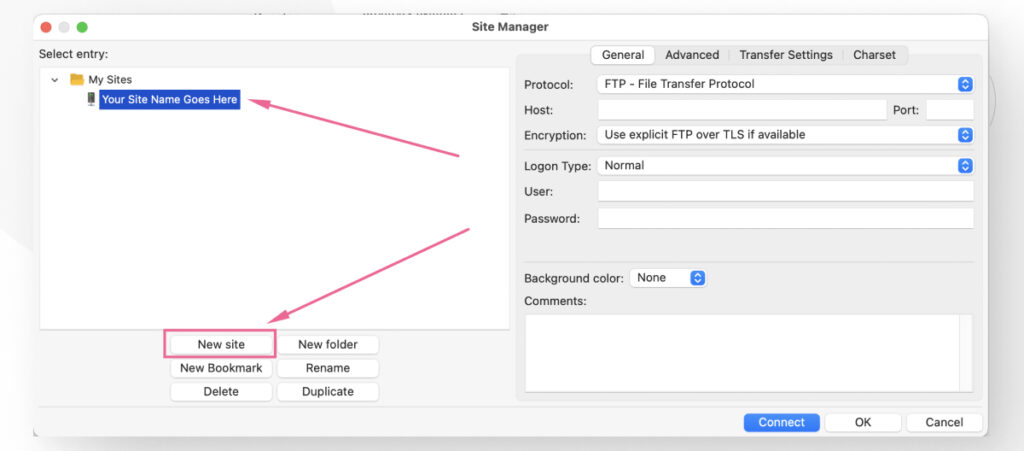
Now it’s time to add the information for the username you just created. Go back to SFTP Users in your WP Engine user portal to get it.
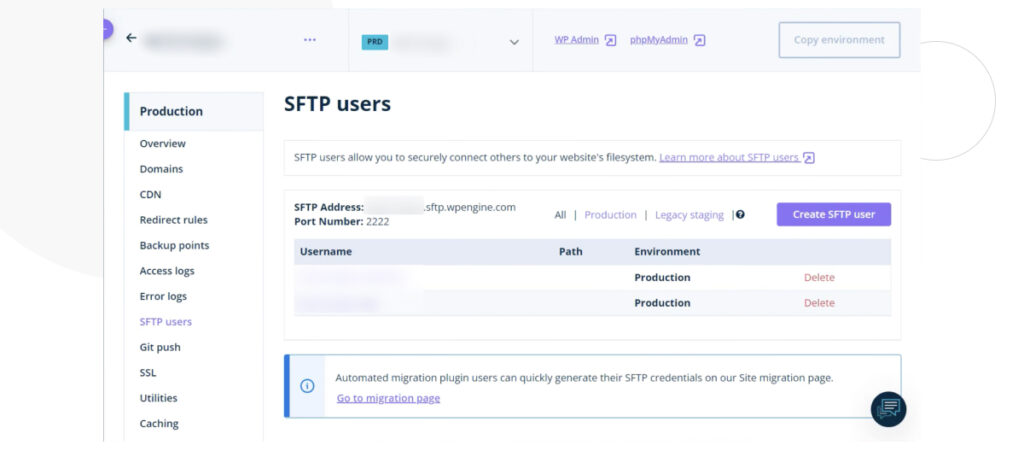
Here’s where to find the information you need to complete each field that FileZilla’s Site Manager requires.
- For the Host field in FileZilla, you’ll need to copy and paste the SFTP Address from your user portal.
- For the Port field in FileZilla, you’ll need to copy and paste the Port from your user portal.
- Then, type in your Username and Password.
Like this:
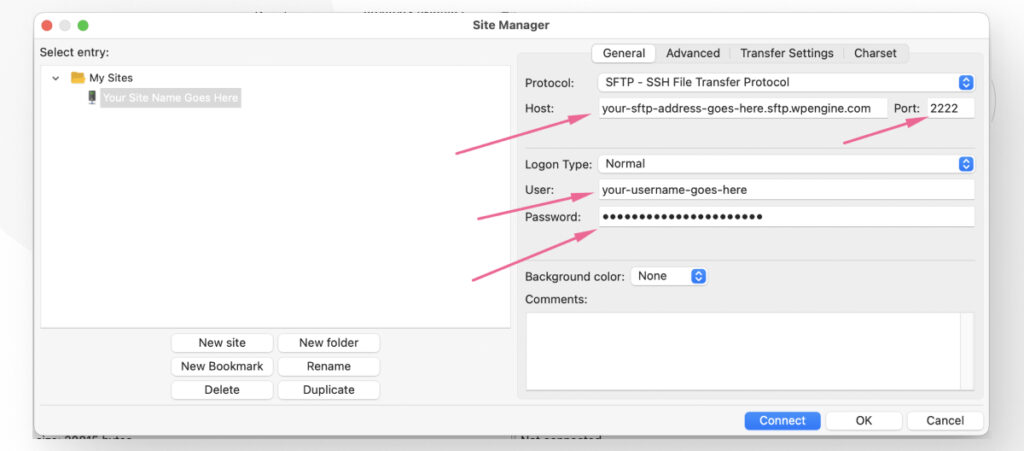
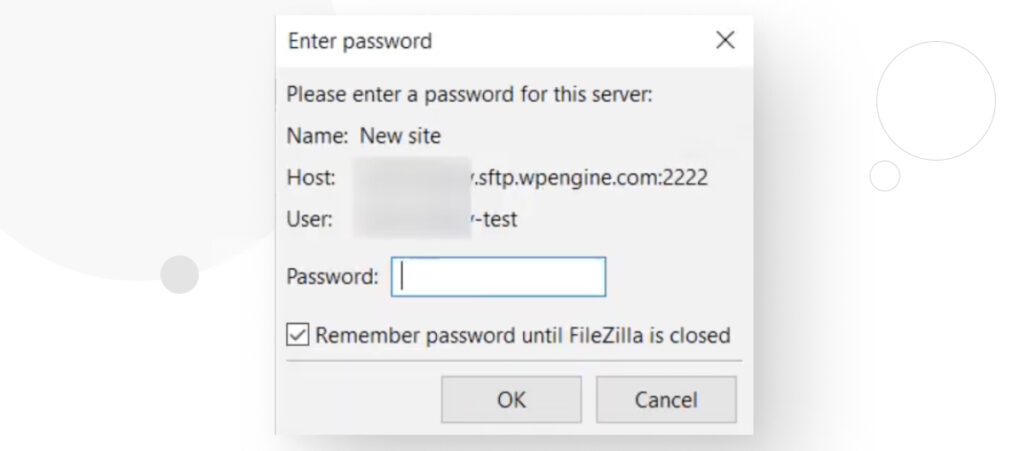
After filling in all the fields, click on Connect. You’ll be prompted to enter the Password again, so do it and click on OK.
After clicking OK, you should connect to your site and see your WordPress installation path on the right-hand panel.
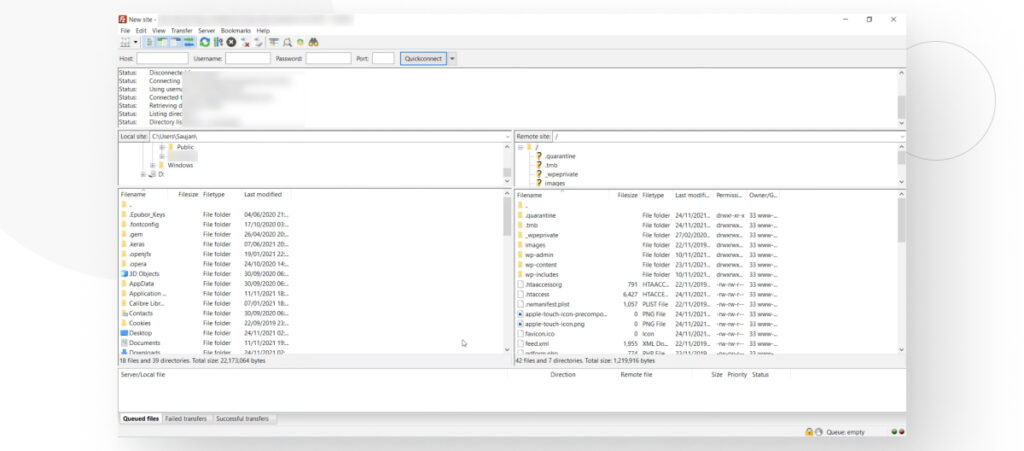
If it doesn’t connect, you most likely mistyped some of the Site Manager fields or forgot to set the Protocol dropdown menu to SFTP.
Why Should You Know How to Find the WordPress Installation Path?
While editing the WordPress core files is generally not recommended, some situations require quick and easy fixes that require adding code snippets to specific files.
For example, if you’re manually installing a new website in one of your main website’s subdirectories, at some point, you’ll need to associate a database with your new website, which means you’ll need to edit the wp-config.php file to add the database’s name, username, and password.
Establishing file permissions for different types of users is another situation where you may need to access and edit core files. But regardless of the circumstances, knowing how core files work and how to access them is empowering.
This knowledge will make you a more competent website owner who doesn’t rely on developers to make minor fixes. Additionally, navigating core files is a requirement to become a full-stack WordPress developer.
Hopefully, this guide helped you better understand WordPress’ core files and how to access them when you need to make changes.
Related Articles
How to... / 5 min read
How to... / 5 min read
How to Make a Subscriber Into an Admin on WordPress?
While it's not the most common situation, at some point, you may find yourself needing to make a Subscriber into an Admin on your WordPress site. Maybe you need to…
Read More
How to... / 3 min read
How to... / 3 min read
How to Grant Secure Access to a Not Live WordPress Site During Development
When developing a WordPress site, you often need to collaborate with multiple developers and grant access to the website owner so they can review the progress themselves. However, granting access…
Read More
Industry Insights / 11 min read
Industry Insights / 11 min read
Do You Need a Web Developer to Build a WordPress Site?
If you’re building a WordPress site or considering building one, you wonder whether you need a web developer to create it or you can do it yourself. The answer can…
Read More
How to... / 6 min read
How to... / 6 min read
How to Change the Bottom Padding Dimensions on WordPress Blocks
If you're learning to modify your WordPress site's layouts and design, you may be wondering how to change the bottom padding dimensions of some of its elements. If that's the…
Read More
How to... / 10 min read
How to... / 10 min read
How to Disable the “Similar Posts” Section in WordPress Blogs
If you’re diving deeper into customizing your site, you may be wondering how to disable the “Similar Posts” section that appears on the bottom, sidebar, or footer of your WordPress…
Read More