How to Fix the “Update Failed: -1” Error in WordPress
The WordPress “update failed: -1” error usually happens because you’re using an outdated version of the Starter Templates plugin, preventing you from updating any plugins. However, that’s not the only possible cause.
In this article, we’ll explain this error and how to fix it to restore your WordPress site to normal.
Key Takeaways
- The WordPress “update failed: -1” error prevents you from updating any plugins.
- It’s usually caused by an outdated Starter Templates plugin version.
- You can usually fix it by deactivating Starter Templates, updating Starter Templates (while keeping it deactivated), then updating all other plugins and reactivating Starter Templates.
What Is the “Update Failed: -1” Error in WordPress?
The WordPress “update failed: -1” error typically occurs when there is an issue with updating plugins.

While it is not as common as other errors, multiple WordPress.org forum threads have popped up over the years, with users asking for support with this problem.
The most common cause of this problem appears to be a compatibility issue caused by the Starter Templates plugin, so let’s tackle that particular problem first and then move on to other possible solutions.
Important: Back up your site before making any major configuration changes, such as the ones we’ll explore in this article.
6 Solutions for the “Update Failed: -1” Error in WordPress
Solution #1: Deactivate the Starter Templates Plugin and Try Again
As mentioned, some outdated versions of the Starter Templates plugin appear to be at the root of this issue. Specifically, version 3.1.26 from February 2023 caused problems for several users due to a nonce issue that wouldn’t allow plugins to update.
Even if you have a newer version of the plugin, this solution is worth trying, as it is one of the most common causes we’ve encountered.
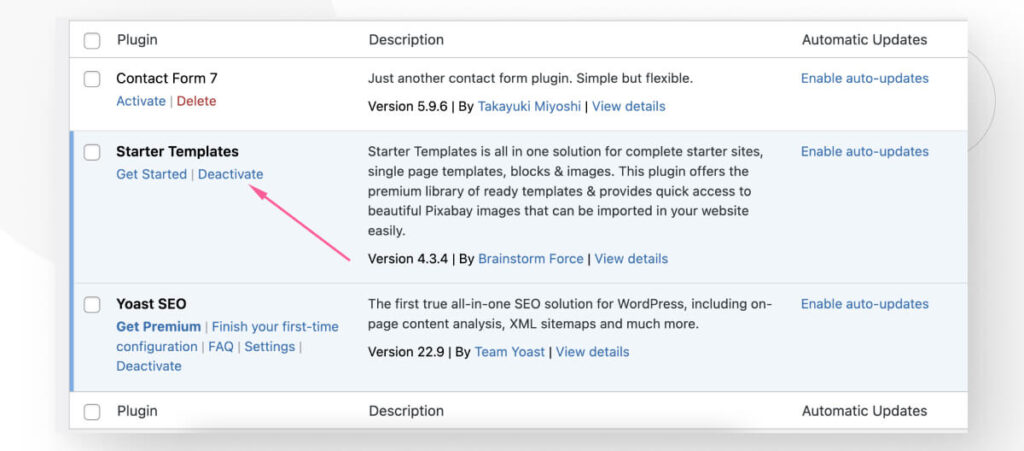
Go to Plugins > Installed Plugins and click Deactivate on Starter Templates.
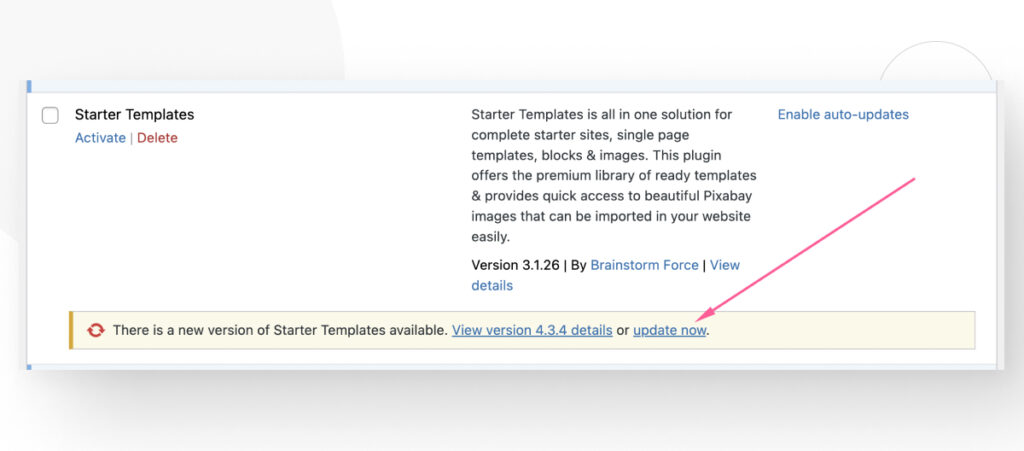
Once deactivated, update Starter Templates to the latest version.
With Starter Templates updated (but still deactivated), retry updating your plugins. Given that the Starter templates plugin is likely the culprit, you should be able to update your plugins normally now. Remember to reactivate Starter Templates after all updates are complete.
If deactivating and updating Starter Templates didn’t work, try some of the following solutions.
Method #2: Modify File Permissions
This is a less common cause, but if your site has multiple admins with backend access, one of the users may have modified the file permissions in such a way that WordPress can’t edit the necessary files.
This may happen because the folders containing the files WordPress needs to edit to perform the update are read-only, meaning no one can edit them but only view their contents.
To modify file permissions, you must access your site via FileZilla or cPanel.
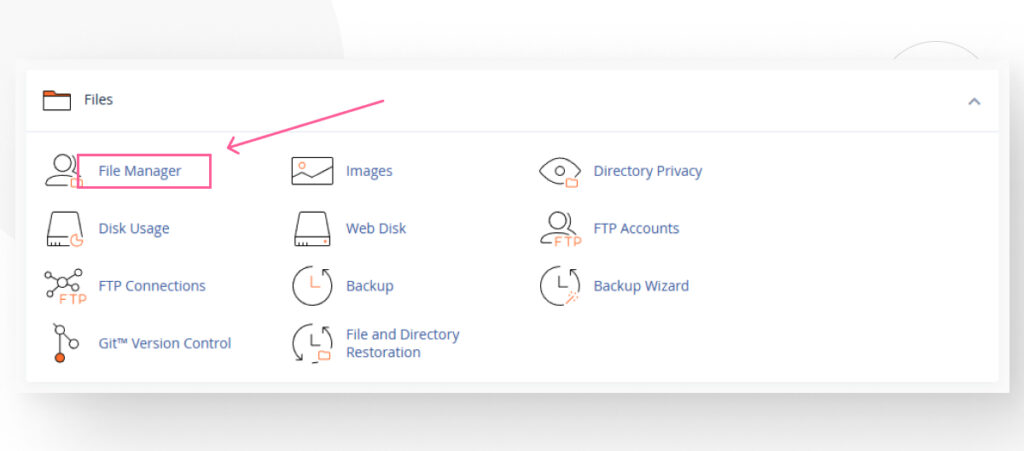
If you use cPanel, log in to your cPanel account, go to the Files section, and click File Manager from the main dashboard. If you’re using an FTP client, the steps are the same.
Navigate to the public_html folder.
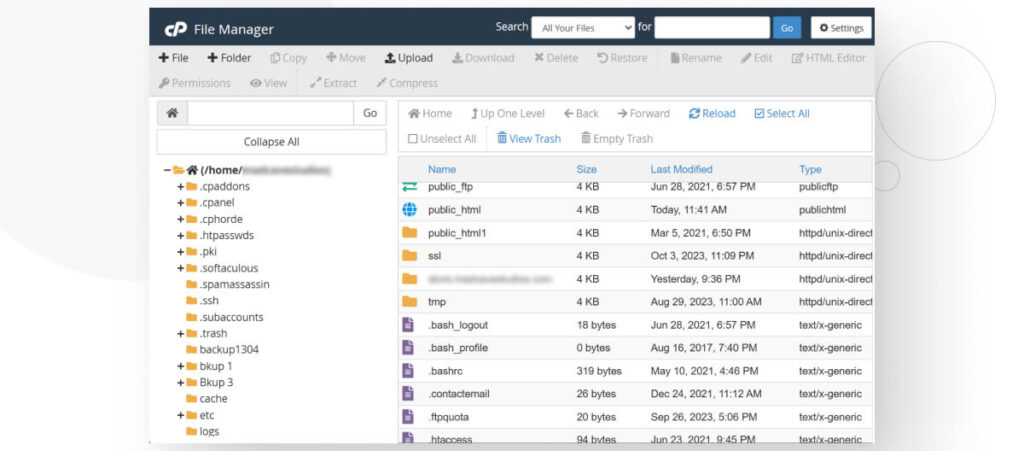
This is your core WordPress folder.

Right-click the wp-content folder (the folder containing all your plugins), and then select Change Permissions.
Change the folder’s permissions to look like this:
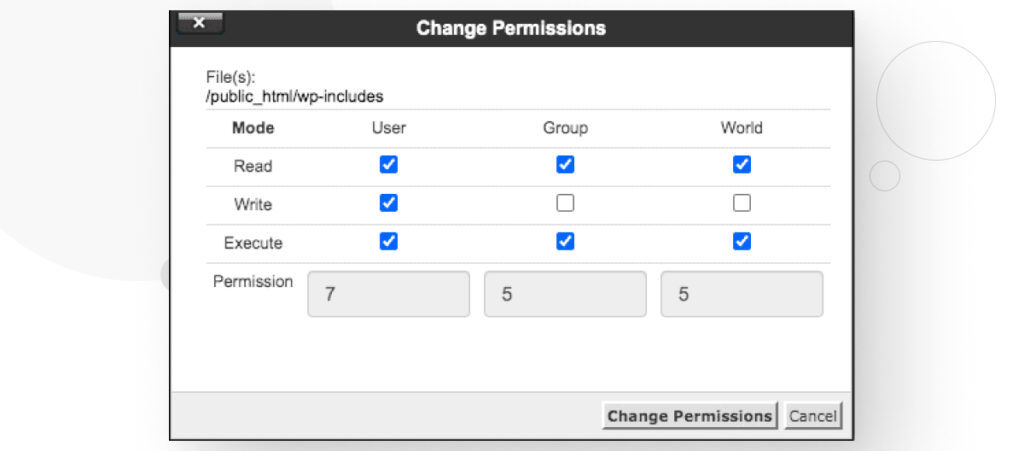
You can check specific boxes individually or type 755 below. Both work. Once you set permissions to 755, your user will be able to modify the files in the wp-content folder during the update process.
You don’t necessarily need to know what these numbers mean, but file permissions determine who can view, modify, and execute WordPress files. Additionally, these permissions apply to site admins, groups of users, and the rest of the world.
File permissions vary depending on the folder, with some folders having more or less restrictive permissions than others. To learn more about file permissions in WordPress, read WordPress’s official guide.
Solution #3: Increase the PHP Memory Limit
If your WordPress site reaches its PHP memory limit while updating a plugin, that may also cause the “update failed: -1” error. To fix this problem, you can try increasing the PHP memory limit.
A low PHP memory limit is a common problem in relatively cheap hosting providers, which often offer limited resources. To increase it, you’ll have to modify one line from the wp-config.php file.
To access it, use cPanel or FileZilla like in the previous method. Navigate to the public_html folder, then right-click wp-config.php, and select View/Edit.
Once inside the file, use CTRL + F or CMD + F to search for WP_MEMORY_LIMIT. If you find it, it’ll look like this:
define('WP_MEMORY_LIMIT', '64M');Simply change 64M to 128M or 256M to increase your PHP memory limit. 128M should be enough for most sites, and 256M should be enough for sites that run resource-intensive plugins.
If you can’t find the line, you’ll simply have to copy and paste it. You must insert it above the line that says /* That's all, stop editing! Happy publishing. */, which is near the end of the file. It should look like this:
define('WP_MEMORY_LIMIT', '256M');
/* That's all, stop editing! Happy publishing. */
Solution #4: Use the Debug Log
The WordPress debug log is a tool for identifying and resolving issues within a WordPress site. It records errors, warnings, and notices generated by the WordPress core, themes, and plugins.
This log helps developers and site admins pinpoint the causes of problems by providing detailed information about what went wrong and where in the code the issue occurred.
The debug log is stored in a file named debug.log within the WordPress core’s wp-content directory. The path to the debug.log file is public_html > wp-content > debug.log.
To activate the debug log, go to the wp-config.php file in your root directory (public_html). Use an FTP client like FileZilla or a hosting control panel like cPanel to access it.
Paste the following code into the wp-config.php file:
define( 'WP_DEBUG', true );
define( 'WP_DEBUG_LOG', true );
These two lines enable WordPress debugging mode and log all debugging information to the debug.log file.
To access the debug file, go to the wp-content folder in public_html. Inside, you should be able to see the debug.log file.
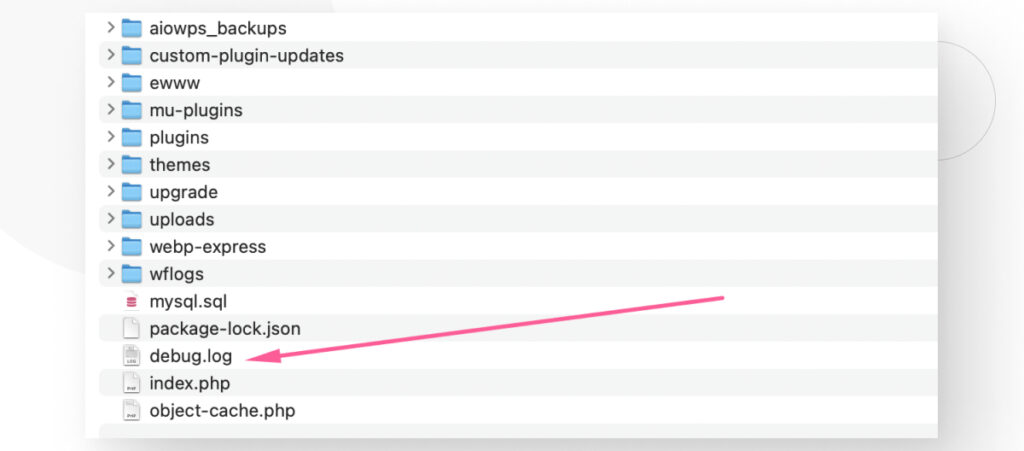
The file contains all the debugging information your site generates.
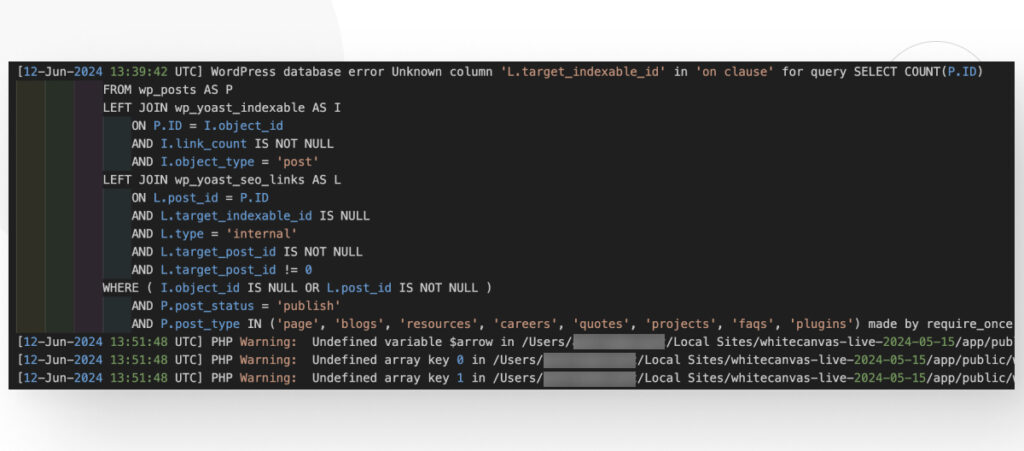
Use the debug information to pinpoint the problem and fix it or ask your hosting provider about it.
Solution #5: Update Your Plugin Manually
Updating plugins manually via FTP clients is not the most recommended method, and you should only use it when absolutely necessary. Additionally, this will not fix the “update failed: -1” error, but it may allow you to update a critical plugin in the meantime.
But if you want to give it a try, you’ll need:
- An FTP client like FileZilla.
- A file archiver like 7-Zip or WinRAR to unpack the plugin’s files.
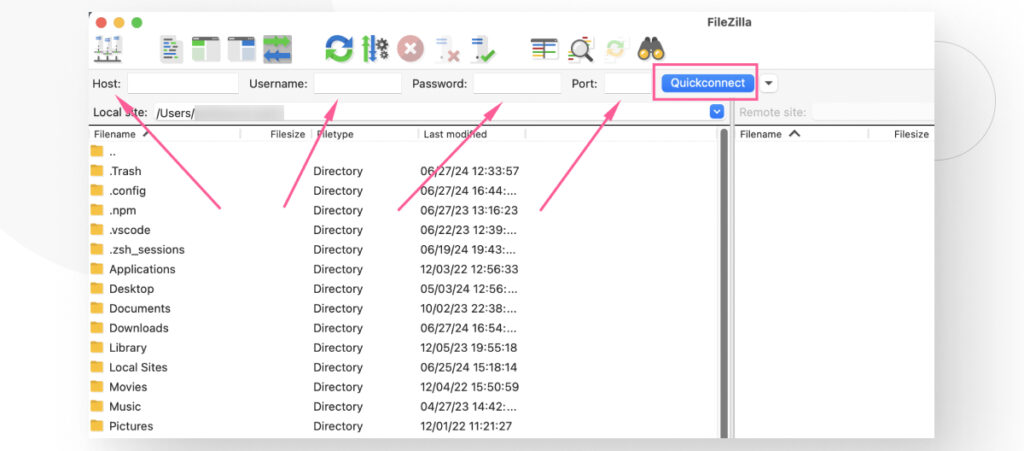
- Your FTP information. Your hosting provider should have this information. Contact them or browse your hosting account’s settings to get them. The information you’re looking for is the host, username, password, and port.
Once you’ve installed FileZilla (or whichever FTP client you prefer), enter your credentials.
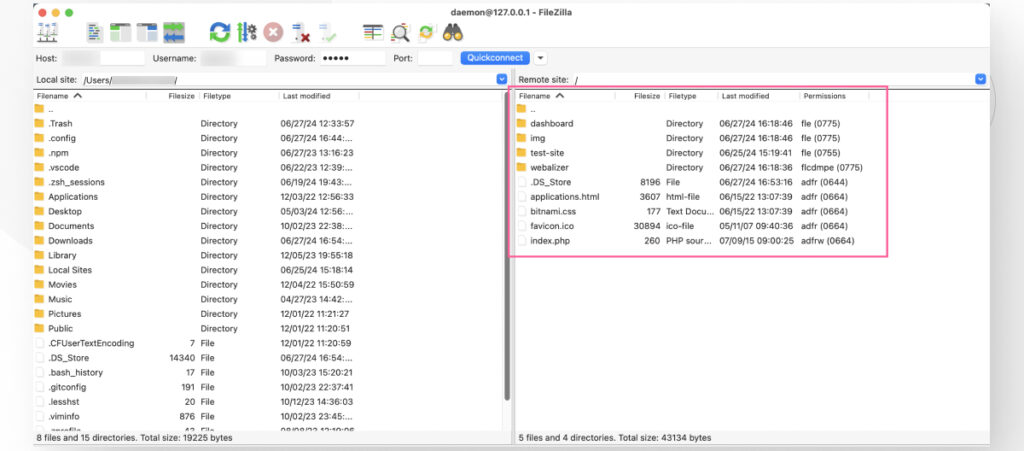
When you connect, you should see your server’s remote directory on the right side.
Navigate to your WordPress site’s wp-content folder and enter the plugins subfolder.

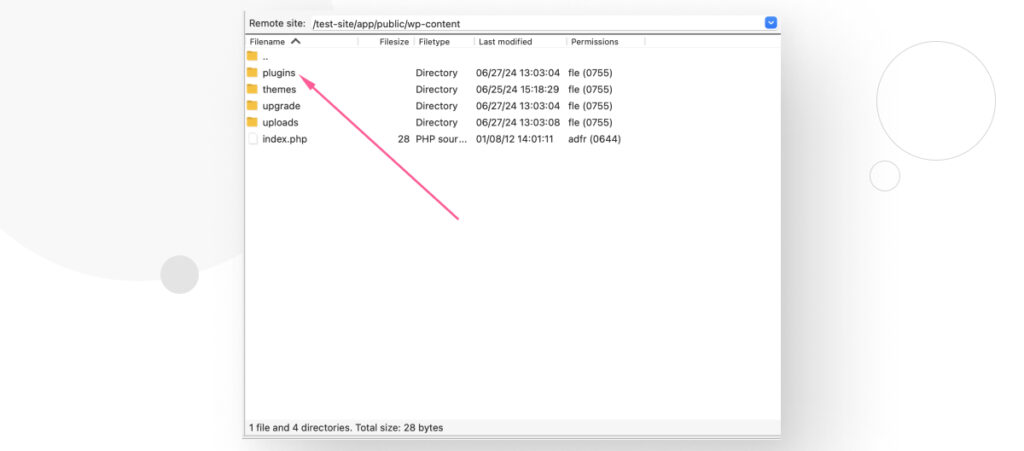
Now, enter the folder of the plugin you’re trying to update manually.
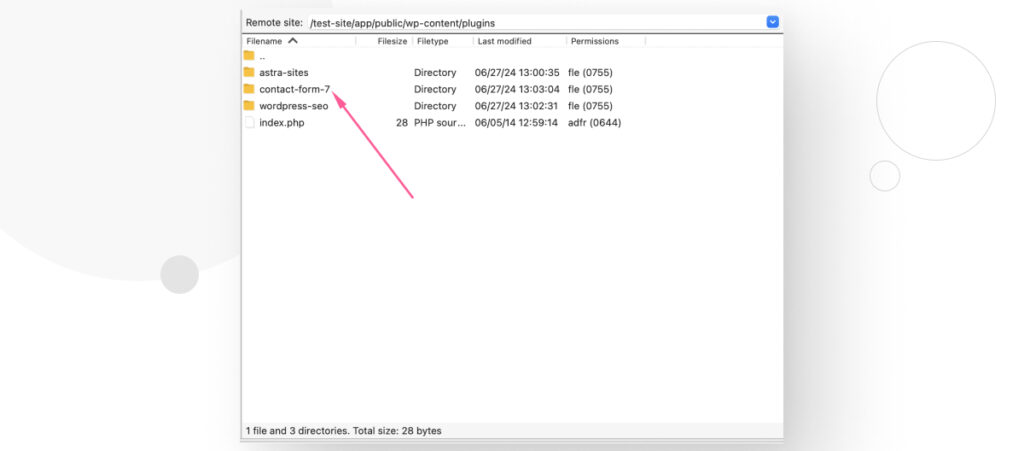
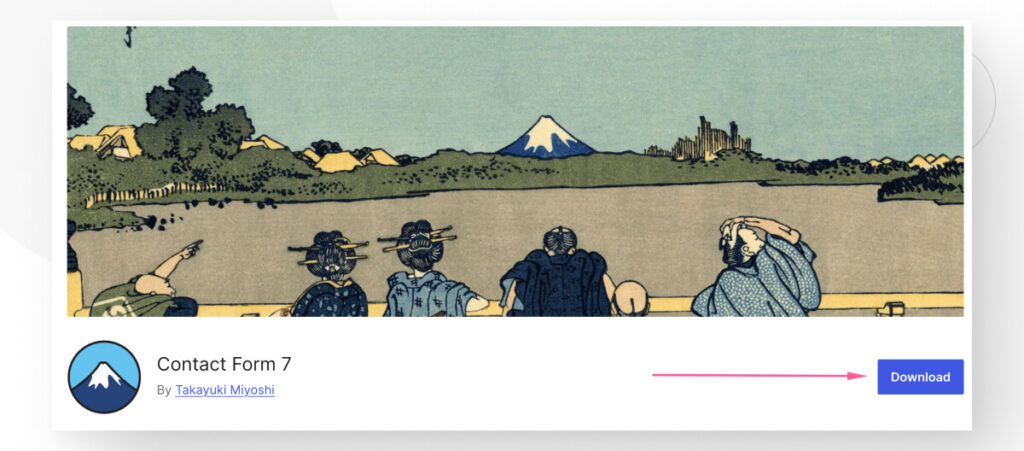
Now that you’re inside the plugin’s folder, you need to download the most updated version of your plugin directly to your local machine (not to WordPress). If the plugin you’re updating is in WordPress.org’s plugin directory, you can download it with a single click on the plugin’s page.
It will land on your local Downloads folder as a compressed archive, so use 7-Zip or WinRAR to unpack it. Once unpacked, it’s time to move the local files to the plugin folder on your web server.
You have 2 options. The first is to rename the current plugin directory on your web server and keep the old version’s files until you confirm that the newest version works. For example, you could rename contact-form-7 to old_version_contact-form-7. After renaming the older version, drag and drop the newer version onto the remote web server.
The second is to simply drag and drop the files from your local machine into the remote web server and overwrite the existing version.
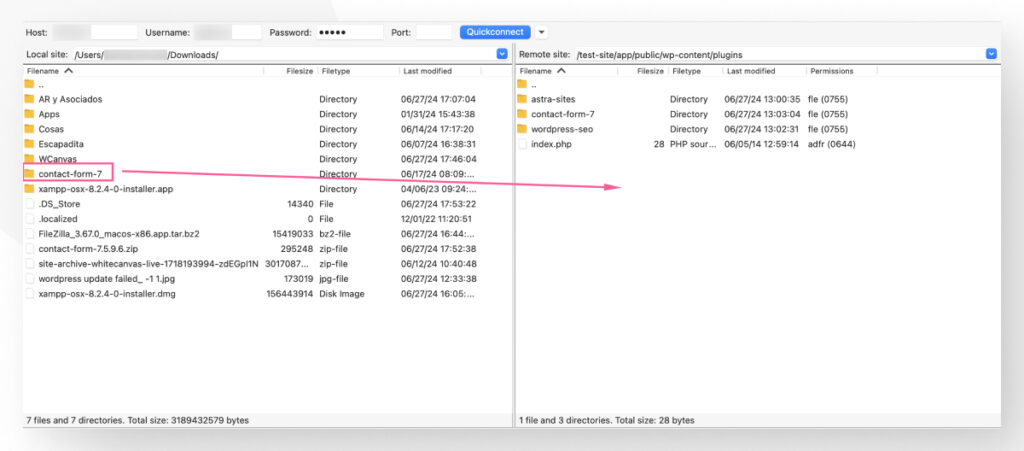
After dropping the folder into the web server, your plugin should be updated.
The best part is that because you didn’t edit WordPress’s database, you will retain all settings for the plugin you’re updating.
Solution #6: Contact Your Hosting Provider
If you’ve tried the above solutions and still face the “failed update: -1” error, it may be time to contact your hosting provider. This is especially true if you don’t have the technical skills to troubleshoot the issue on your own. Your provider may know what the problem is and take the appropriate steps to solve it.
For example, your provider’s tech support team may increase the PHP memory limit, spot incompatible plugins, or discover another problem you don’t know about.
In addition to providing help for site owners who may not have the technical expertise to solve the problem, contacting your provider may be the only way to solve the problem in some cases.
That’s because some providers, especially if you have a shared hosting plan, do not allow clients to make the some changes that would potentially solve the issue. You must contact tech support, and they’ll do it.
Fix the “Update Failed: -1” Error in WordPress
The “update failed: -1” error is usually caused by an outdated Starter Templates plugin version. By deactivating the plugin and updating it, then updating all other plugins while keeping Starter Templates deactivated, you’re likely to overcome this problem.
However, we also included other possible solutions in case the Starter Templates method doesn’t work (or if you don’t have Starter Templates installed at all). Hopefully, one of them will help you get your site up and running again.
If you found this post useful, read our blog and resources for more insights and guides!
📬 Get WordPress updates to your inbox
Sign up for WC Blog updates and never miss a post!
Related Articles
How to Make a Subscriber Into an Admin on WordPress?

How to Grant Secure Access to a Not Live WordPress Site During Development

Do You Need a Web Developer to Build a WordPress Site?

How to Change the Bottom Padding Dimensions on WordPress Blocks