- Blogs
- WordPress 101
- How to Link to a Specific Section of a Page in WordPress
WordPress 101 / 7 min read
How to Link to a Specific Section of a Page in WordPress

Have you ever wondered how to link to a specific section of a page in WordPress? It can be a very effective way to lead your users to a part of your page without having them scroll all the way there.
To do that, you need anchor links, a fundamental HTML concept WordPress makes very easy to implement with the Gutenberg editor. More specifically, some refer to anchor links that lead to different sections of the same page as “jump links.”
This article will show you how to add jump links to your posts, making them easier to navigate.
As an initial demonstration, here’s a table of contents with jump links to each section of this article. Click on any of them, and you’ll automatically scroll down to that section.
- Key takeaways
- Anchor Links in HTML and WordPress
- How to Link to a Specific Section of a WordPress Page Using Anchor Links
- Benefits of Jump Links in WordPress
- Jump Links Are Very Useful and Easy to Implement
Key takeaways
- An anchor link is an HTML element that creates a link toward an external website, a different page of the same website, or a specific section of the page.
- Anchor links that lead to a different section on the same page are sometimes called “in-page links” or “jump links.”
- Using the Gutenberg editor or HTML code, you can easily add jump links in WordPress.
- Most Gutenberg blocks allow you to quickly add a jump link with the Advanced tag, but some custom blocks lack anchor support, forcing you to use HTML.
Anchor Links in HTML and WordPress
An anchor link is an HTML element that creates a link toward an external website, a different page of the same website, or a specific section of the page. This last use case is the one we’ll discuss in this article.
You can use anchor links to create a hyperlink that lets you jump to a specific section of the same page. Some use the term “in-page link” or “jump link” to refer to these anchor links. In WordPress, jump links can be very useful for creating tables of content that link to each heading and subheading, helping users navigate your content more easily.
For example, if you click here, you’ll be directed to this section’s heading. We did this with an anchor link (jump link), and you can use them to link to any type of content (paragraphs, images, videos, etc.), not just headings.
The rest of this article will explain how you can do it in your own posts and pages.
How to Link to a Specific Section of a WordPress Page Using Anchor Links
WordPress has 2 main methods for jump links: the Gutenberg editor and good old-fashioned HTML.
In most cases, the editor will be more than enough because most Gutenberg blocks allow you to add an anchor. The only case where you may need to use HTML is when the block you’re trying to link to doesn’t support anchor links, which will likely only happen with blocks created by plugins or other custom blocks.
Here’s a step-by-step guide for both methods.
Method #1: Add Jump Links with the Gutenberg Editor
This is the easiest and fastest to add jump links in WordPress since the Gutenberg editor skips the HTML code.
Add the Anchor
First, you need to go to the editor. Head to the page or post you want to edit, then place the pointer on the heading you want to link to. On the right-hand sidebar, you should see an Advanced tab (you may need to scroll down to see it). Click on the arrow to the right to expand the dropdown menu.
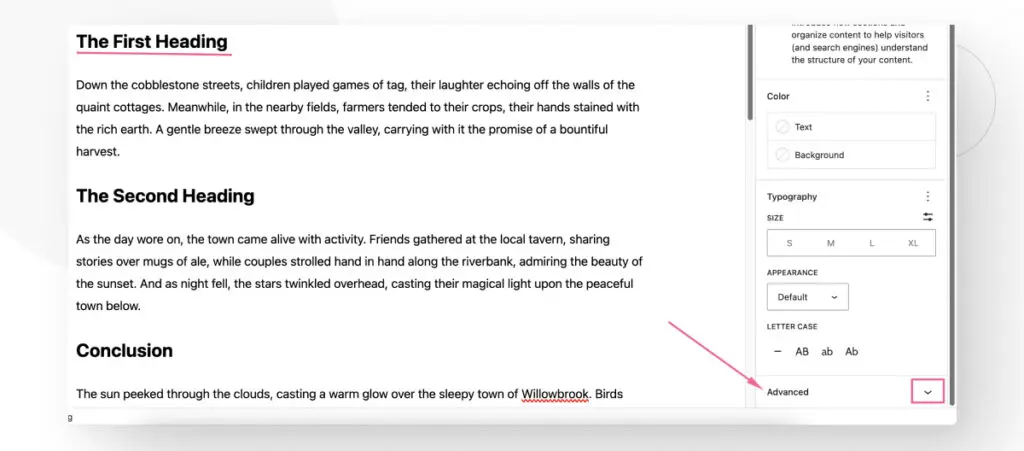
You will see several text boxes. The one we care about right now is HTML Anchor.
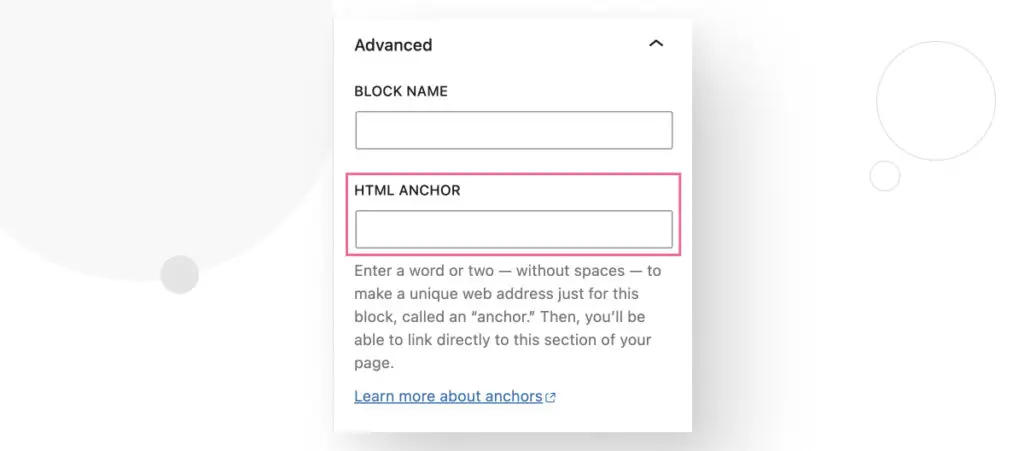
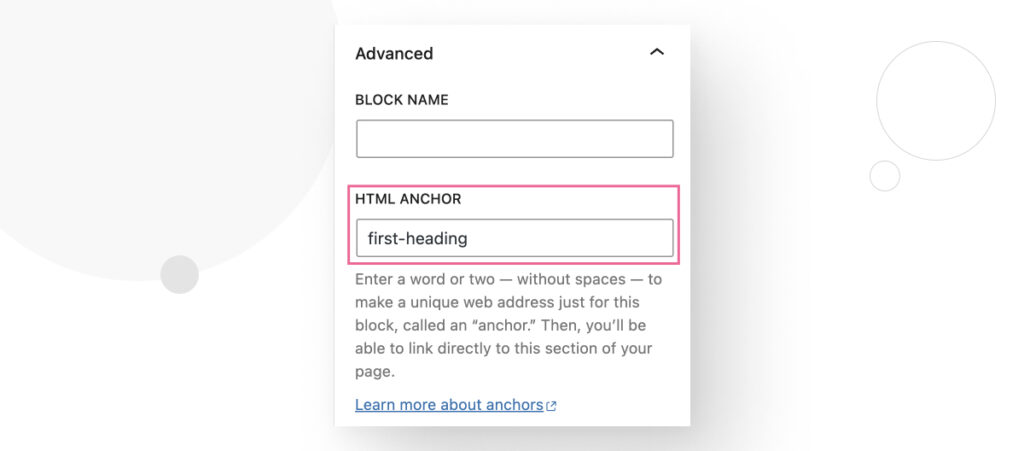
Add a name for the anchor. It should have no spaces and be unique to this particular page or post. You can use dashes to separate words.
Give it a meaningful name that is relevant to the section’s content. In this case, we’ll name it first-heading.
Link to the Anchor
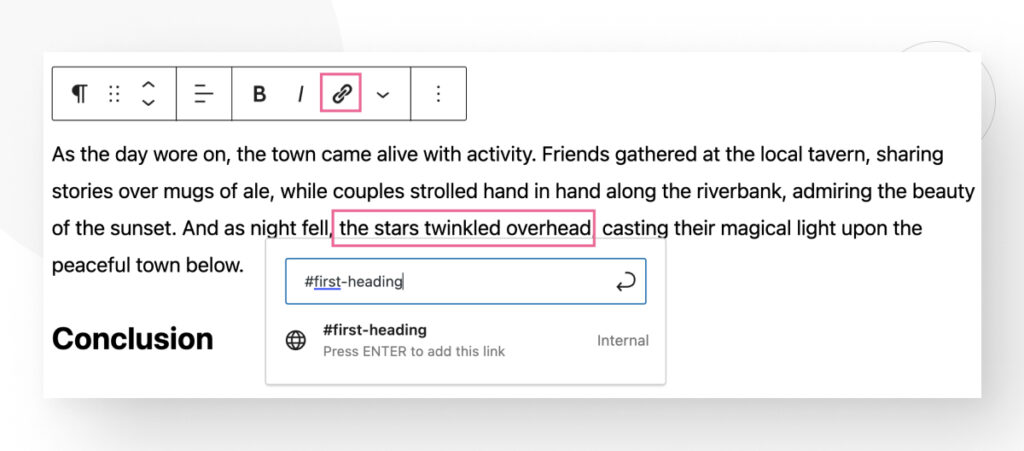
Now, all you have to do is create a link that points to the anchor you just made. Simply highlight the text that will contain the link and click on the Link icon to bring up the link menu. You can also press CTRL + K or CMD + K.
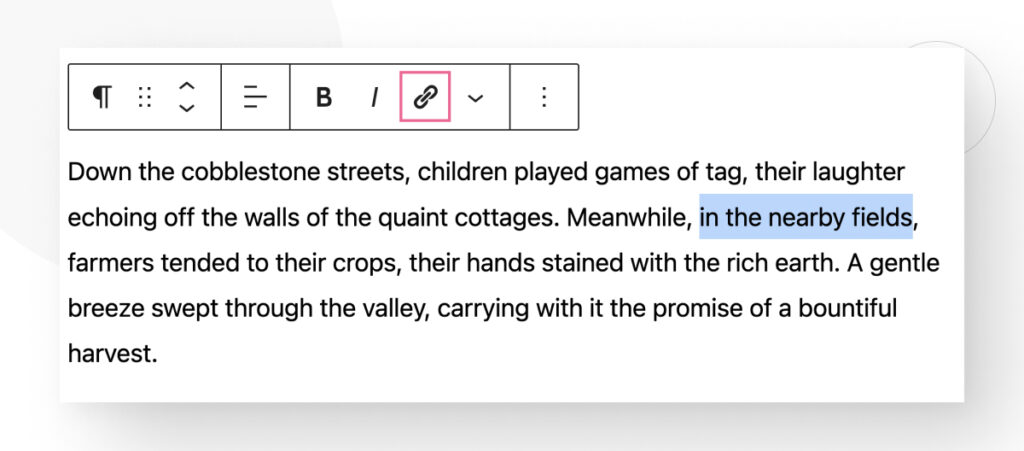
To create the link to the anchor, all you have to do is add the anchor’s name preceded by a numeral sign (#). In our case, it would be #first-heading. Press Enter to confirm.
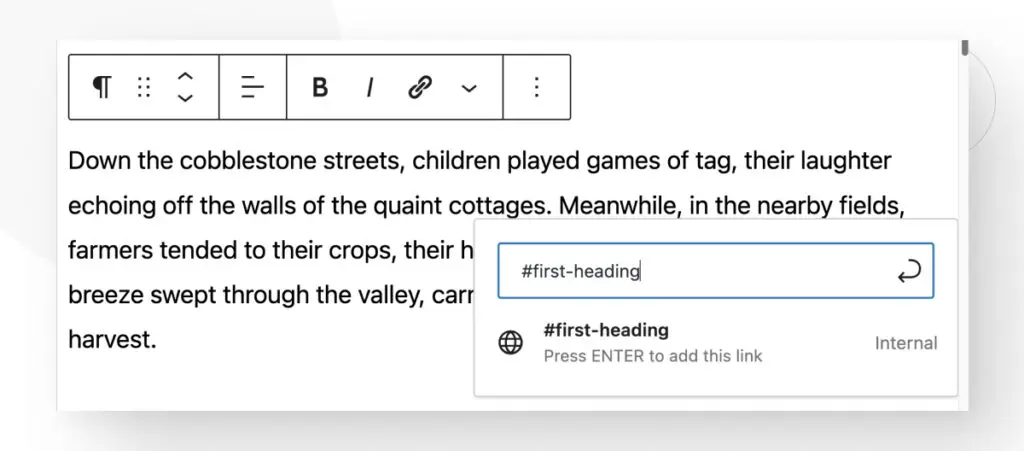
And that’s it! Now, you can go to the post or page’s preview and click on the resulting hyperlink. Instead of directing you to a different page, it’ll scroll to the specified section.
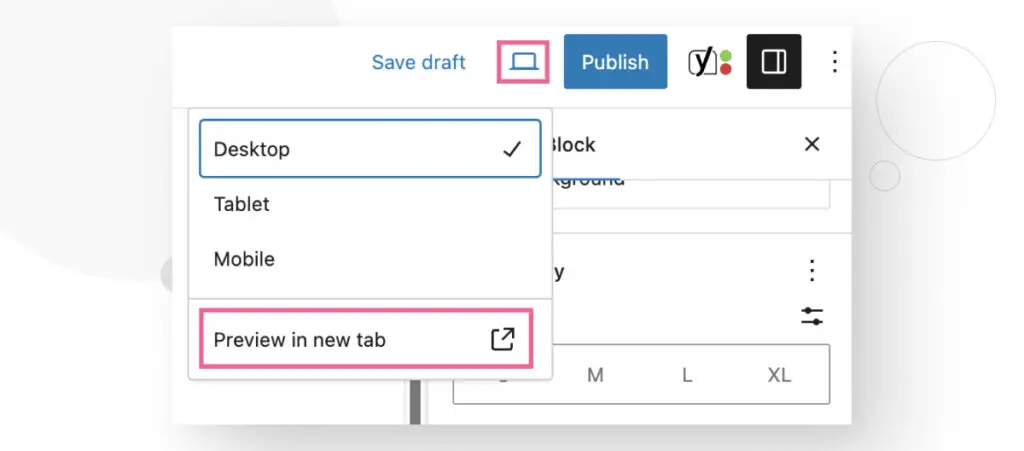
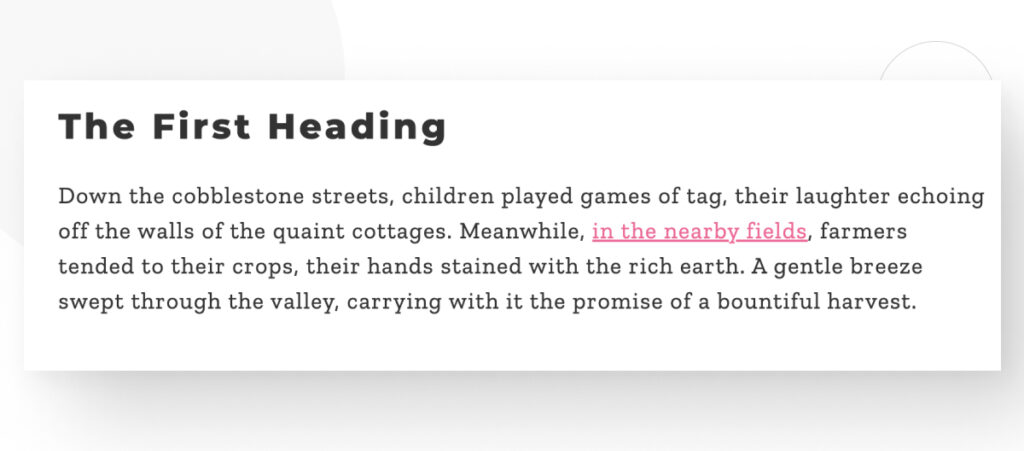
Method #2: Add Jump Links with HTML
The other, slightly more complicated way of adding anchors is using HTML code. This is likely only necessary if you encounter a block that doesn’t support anchors, like custom blocks or blocks added with plugins.
But even if you’ve never used HTML, adding anchors is pretty simple and only requires basic computer skills.
Add the Anchor with HTML
Click on the section you want to add the anchor to. On the toolbar, click on the 3 vertical dots to the right. This will expand a menu where you can select Edit as HTML.
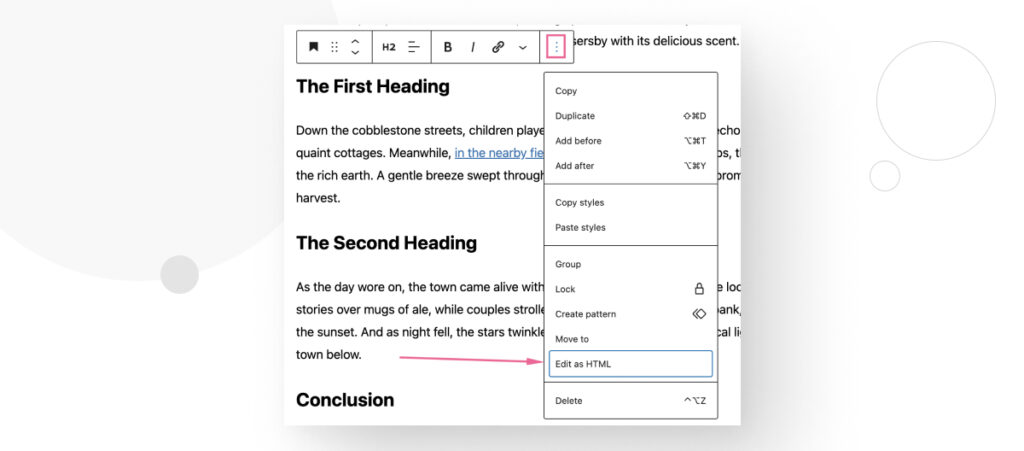
Your heading will turn into a small HTML block. It will look something like this:
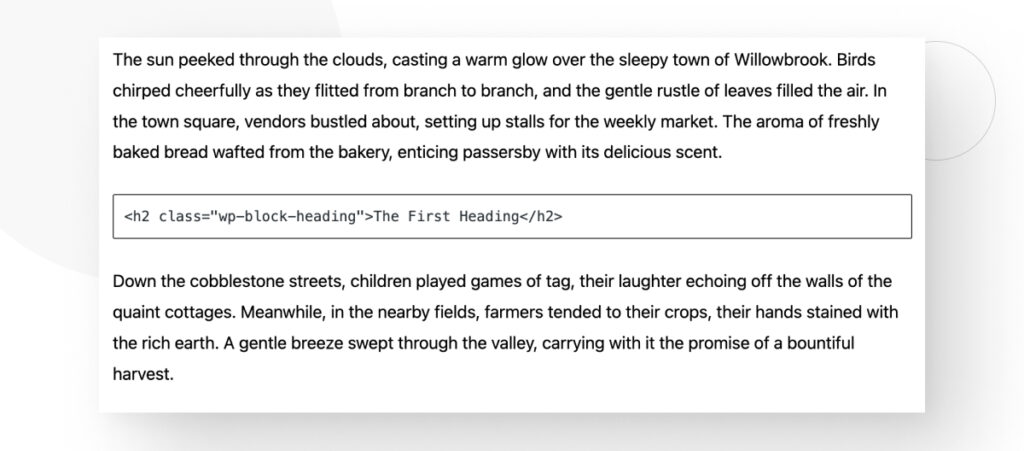
<h2 class="wp-block-heading">The First Heading</h2>To add the anchor, insert the id HTML attribute within the heading tag. It’s important that the anchor name is inside quotation marks (“”) and the id attribute is inside the tag wrappers (<>).
Otherwise, you follow the same naming rules as before: keep the anchor name unique and relevant to the content and use dashes to separate words.
An anchor with the name first-heading would look like the following code. Notice how we added a new id attribute following the rules above:
<h2 class="wp-block-heading" id="first-heading">The First Heading</h2>Link to the Anchor
After you’ve added the anchor using HTML, the process is the same. Simply link to the newly-created id attribute in the same way we did before.
Benefits of Jump Links in WordPress
Using anchor links to create jump links in WordPress has several benefits:
- Improved user experience. Anchor links allow users to navigate directly to specific sections of a page. This can be very useful for long content pages because it helps visitors quickly find the information they are interested in without scrolling through the entire page.
- Better content organization. You can use jump links to create a table of contents at the beginning of a page, making it easier for readers to understand the structure of your content and navigate to the sections that interest them the most.
- Better SEO. Jump links can improve SEO by providing direct links to different sections of your content, which makes it easier for search engines to understand the structure of your page.
- Potentially lower bounce rate. By making navigation easier, jump links potentially reduce the bounce rate, as users are more likely to stay on a page when they can easily find what they’re looking for.
Jump Links Are Very Useful and Easy to Implement
Anchor links are an essential part of HTML, helping you direct your users to external sites, a different page on your own site, or a specific section of the same page (jump links).
Adding jump links is very easy, whether you use Gutenberg or HTML, making your site easier for users to navigate and for search engines to crawl.
Hopefully, you know more about anchor and jump links now, and you can apply them on your own posts and pages.
If you found this post useful, read our blog for more WordPress insights and guides!
Related Articles

How to... / 5 min read
How to... / 5 min read
How to Make a Subscriber Into an Admin on WordPress?
While it's not the most common situation, at some point, you may find yourself needing to make a Subscriber into an Admin on your WordPress site. Maybe you need to…
Read More
How to... / 3 min read
How to... / 3 min read
How to Grant Secure Access to a Not Live WordPress Site During Development
When developing a WordPress site, you often need to collaborate with multiple developers and grant access to the website owner so they can review the progress themselves. However, granting access…
Read More
Industry Insights / 11 min read
Industry Insights / 11 min read
Do You Need a Web Developer to Build a WordPress Site?
If you’re building a WordPress site or considering building one, you wonder whether you need a web developer to create it or you can do it yourself. The answer can…
Read More
How to... / 6 min read
How to... / 6 min read
How to Change the Bottom Padding Dimensions on WordPress Blocks
If you're learning to modify your WordPress site's layouts and design, you may be wondering how to change the bottom padding dimensions of some of its elements. If that's the…
Read More
How to... / 10 min read
How to... / 10 min read
How to Disable the “Similar Posts” Section in WordPress Blogs
If you’re diving deeper into customizing your site, you may be wondering how to disable the “Similar Posts” section that appears on the bottom, sidebar, or footer of your WordPress…
Read More