If you’re diving deep into WordPress web design, you’ll eventually need to learn how to change the width of a blog on your WordPress site.
It can improve readability or make your blog posts more consistent with other content types you’ve already modified, like your pages or custom posts.
In this article, we’ll explore 3 beginner-friendly methods to change the width of your blog posts on WordPress.
Key Takeaways
- You can modify the width of your WordPress posts with the Customize feature on classic themes.
- However, block themes don’t have the Customize feature, so you have to modify the Single Posts template or manually edit the theme.json file.
Why Change the Width of a WordPress Blog Post?
The main reason to learn how to change the width of a WordPress blog post is to meet your design expectations. If you’re creating a custom theme or modifying an existing one, you may want to customize the width to meet a web design plan.
Additionally, you change the width of WordPress blog posts to:
- Improve readability. Generally, lines should have 50 to 75 characters.
- Improve responsiveness for various types of devices.
- Maintain consistency with other types of content like pages or custom post types.
2 Methods to Change the Width of a WordPress Blog Post
There are multiple ways of changing the width of blog posts, and the method depends on the nature of your theme. Most WordPress themes can be roughly divided into block themes and classic themes.
Block themes use Gutenberg blocks for all parts of the site, including navigation menus, header, content, and site footer. You edit block themes from the Site Editor feature.
Classic themes don’t support the Site Editor and are built with fixed HTML, PHP templates, and stylesheets. There are many ways to edit classic themes, one of the most popular ones being the Theme Customizer feature.
Let’s explore how to change your blog posts’ width in classic and block themes.
2 Methods to Change the Width of a WordPress Blog Post
There are multiple ways of changing the width of blog posts, and the method depends on the nature of your theme. Most WordPress themes can be roughly divided into block themes and classic themes.
Block themes use Gutenberg blocks for all parts of the site, including navigation menus, header, content, and site footer. You edit block themes from the Site Editor feature.
Classic themes are the themes that don’t support the Site Editor and are built with fixed HTML, PHP templates, and stylesheets. There are many ways to edit classic themes, with one of the most popular ones being the Theme Customizer feature.
Let’s explore how to change the width of your blog posts in both classic and block themes.
Method 1: Use Your Theme’s “Customize” Feature (Classic Themes)
Let’s start with classic themes. If you don’t know whether your current theme is a classic or block theme, the easiest way to tell is to navigate to your admin dashboard and look for the Theme > Customize feature.
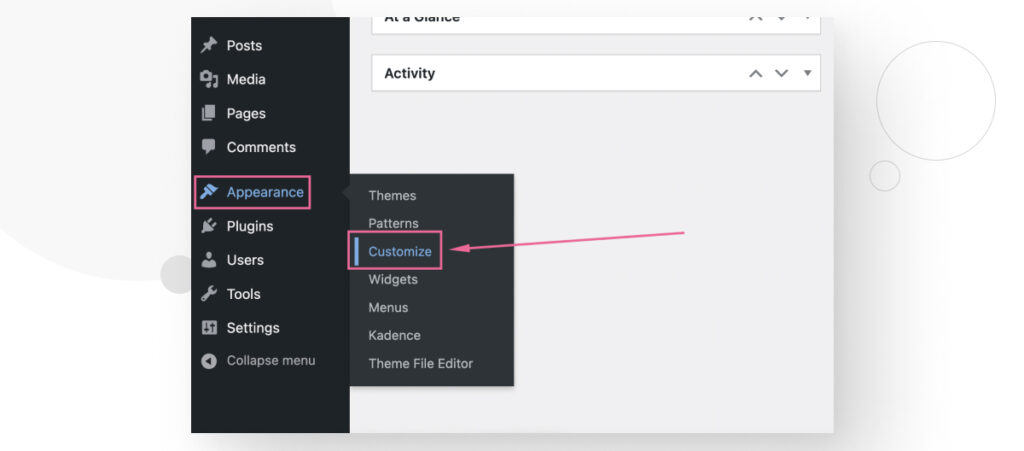
Block themes don’t have the Customize feature, so if your theme has it, it’s a classic theme.
While you can manage the width of your blog layout from the Customize feature, it’s also important to know that themes have different configurations, so the setting to change width may not be as customizable or evident in some themes.
Here are some examples of how to change the width of your blog content using the Customize feature. Explore your theme’s Customize settings and use whichever method matches your theme.
Select a Preexisting Width From the Customize Feature
Some themes provide multiple preexisting blog layouts that modify the width and other settings.
For example, if you’re using the Kadence theme, navigate to Theme > Customize, then go to Post/Pages Layout > Single Post Layout. “Single posts” are the templates that WordPress uses to build the layouts and styles of your blog posts.
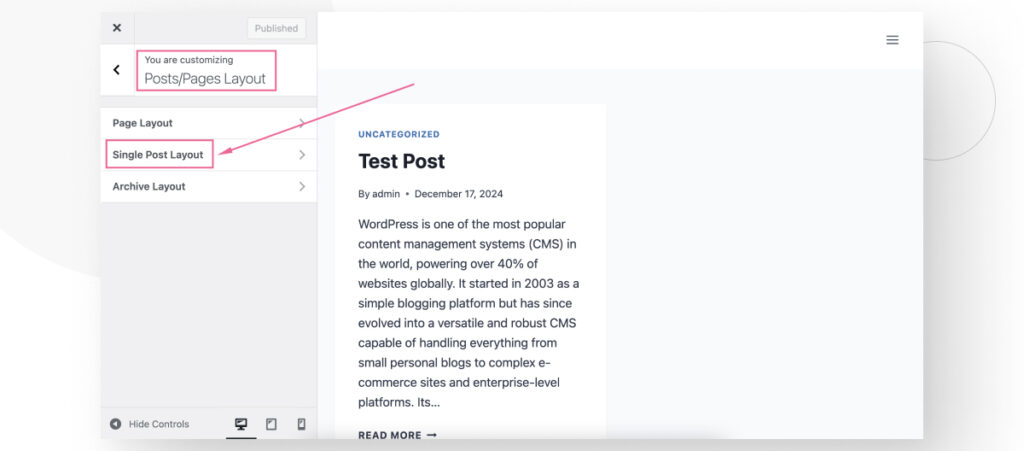
Scroll down until you find the Default Post Layout section.
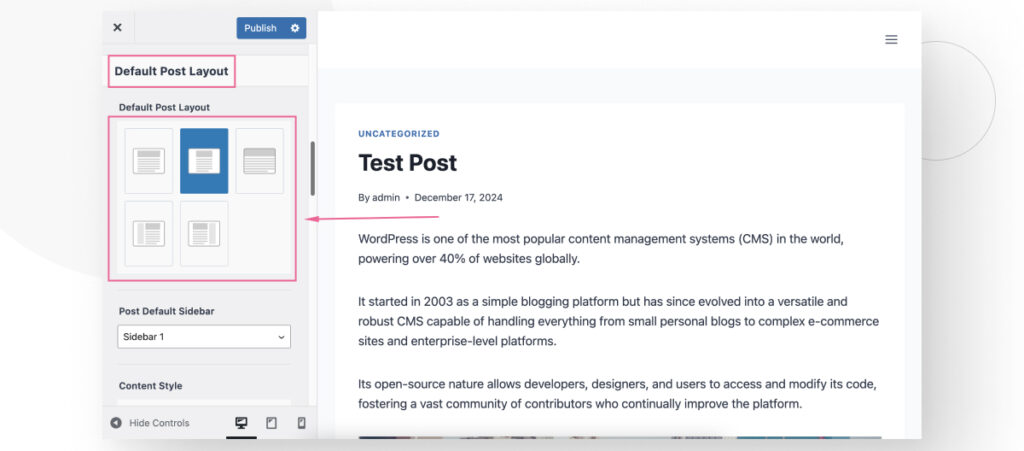
In Kadence, the default layout is Narrow, but there’s also a Fullwidth layout that increases the blog’s width.
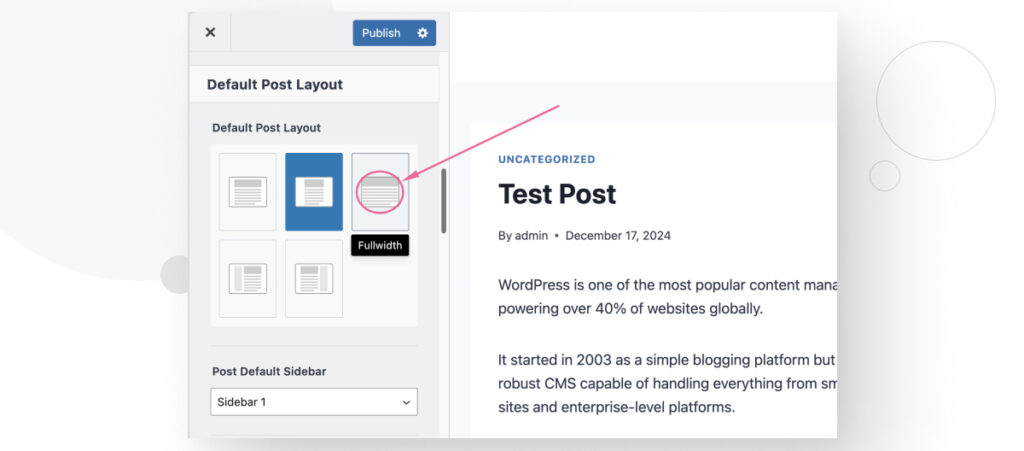
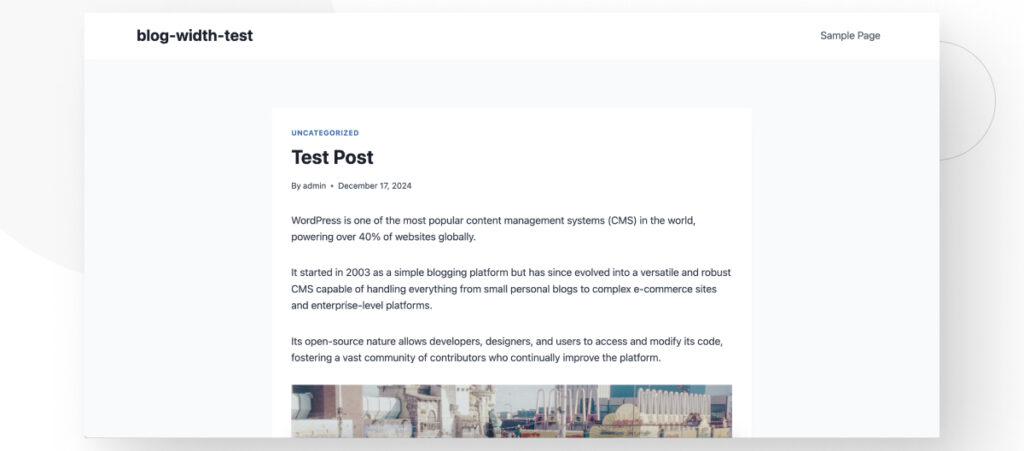
After applying the Fullwidth layout and clicking Publish at the top to save changes, your posts will go from looking like this:
To looking like this:
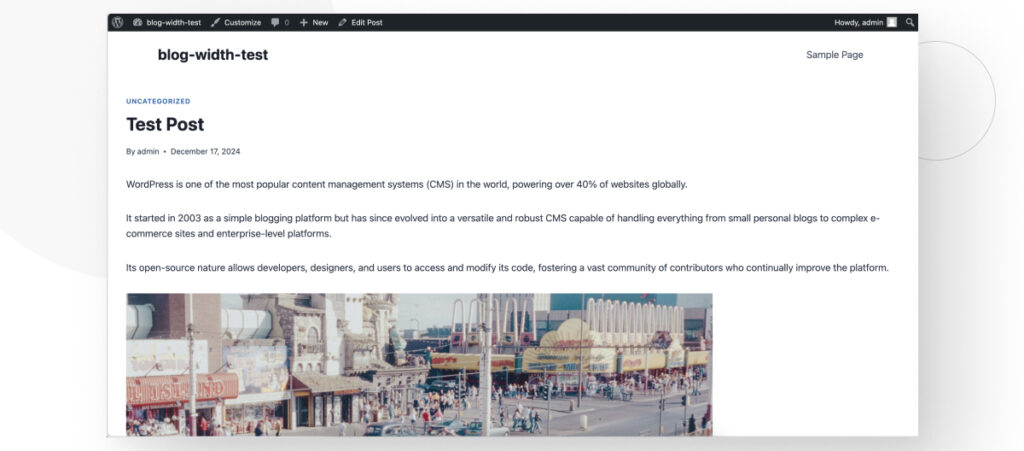
As you can see, there was a significant increase in the width of your blogs. You can also use other layouts to decrease the width if you prefer.
If your theme doesn’t have the same sections as Kadence, explore its settings until you find configurations related to single post layouts, as they control your blog posts.
However, keep in mind that some themes are more customizable than others, so yours may or may not have the settings you need to choose from preexisting layouts and widths.
Use Custom CSS
If your classic doesn’t have readily available blog layouts for you to choose from, you can always count on custom CSS to help, as it works on every theme.
To apply custom CSS, go to Appearance > Customize > Additional CSS. Remember that the Customize menu is only available for classic themes. It won’t appear on block themes like the default WordPress themes.
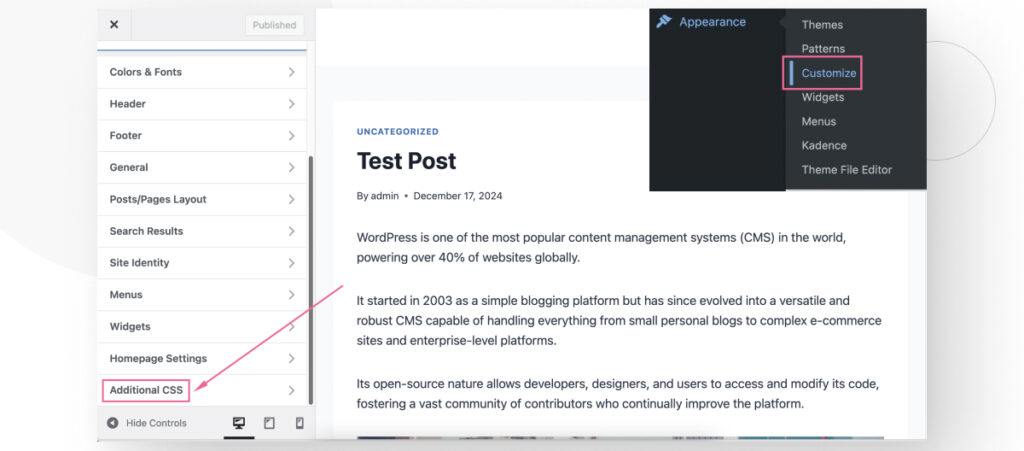
From here, you can add custom CSS. The key is knowing what to target for the CSS to apply to the elements you want (in this case, your blog posts’ content).
You could use the following CSS code and customize it as you see fit:
.blog .hentry, .archive:not(.post-type-archive) .hentry, .search .hentry, .single-post .hentry, .single-post .comments-area, .single-post .post-navigation {
  max-width: 500px;
  width: auto;
}
Scroll down to the textbox, paste it, and click Publish to save the changes.
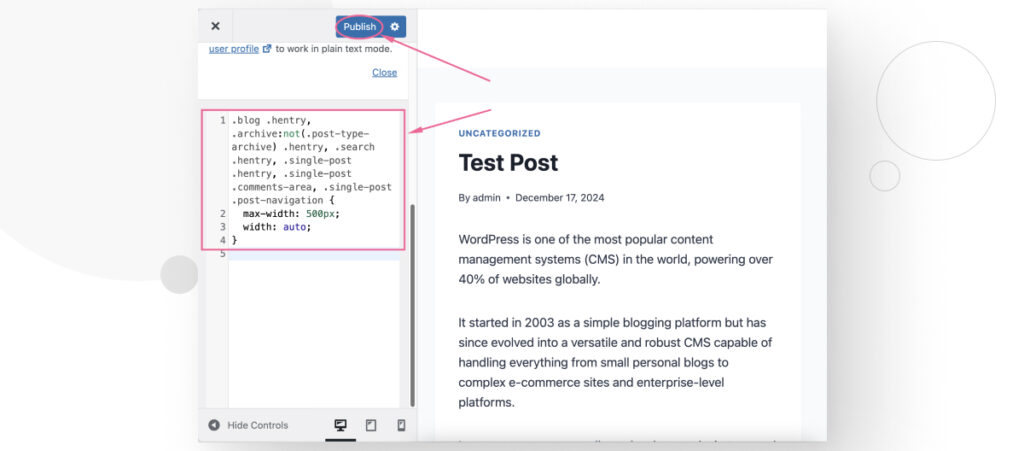
With this piece of CSS code, we reduced the width of a blog post to 500 pixels, so it looks pretty narrow.
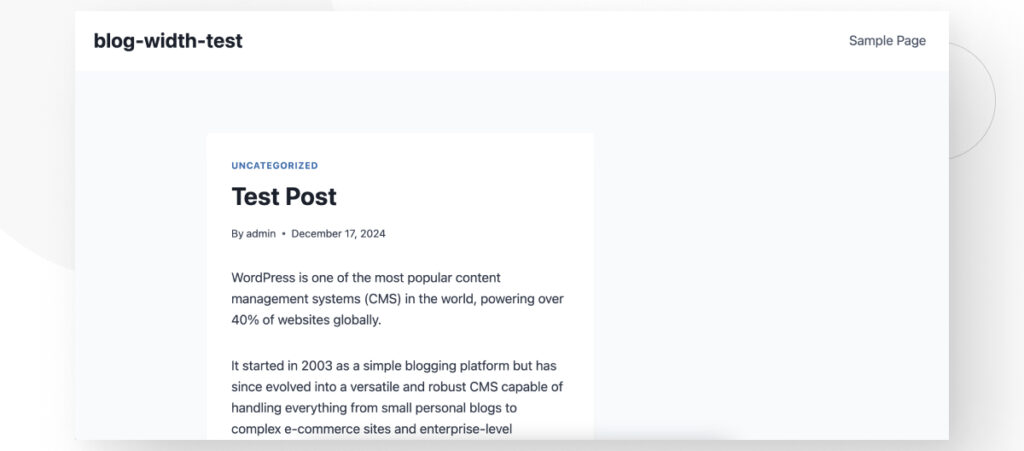
We don’t necessarily recommend using this specific width, it’s just an example.
Method 2: Modify Templates With the Site Editor (Block Themes)
If you’re using a block theme like the Twenty Twenty line of default themes, the Customize feature will not be available in the Appearance menu.
That’s because block themes work with Gutenberg blocks rather than fixed PHP, HTML, and CSS code.
However, that doesn’t mean the process is complicated. In fact, it’s a pretty straightforward series of steps.
Start by going to any blog post on your site. Go to Posts > All Posts and click Edit on any post. On the right-hand sidebar, you should see the Template field. Click on Single Posts and then click on Edit Template.
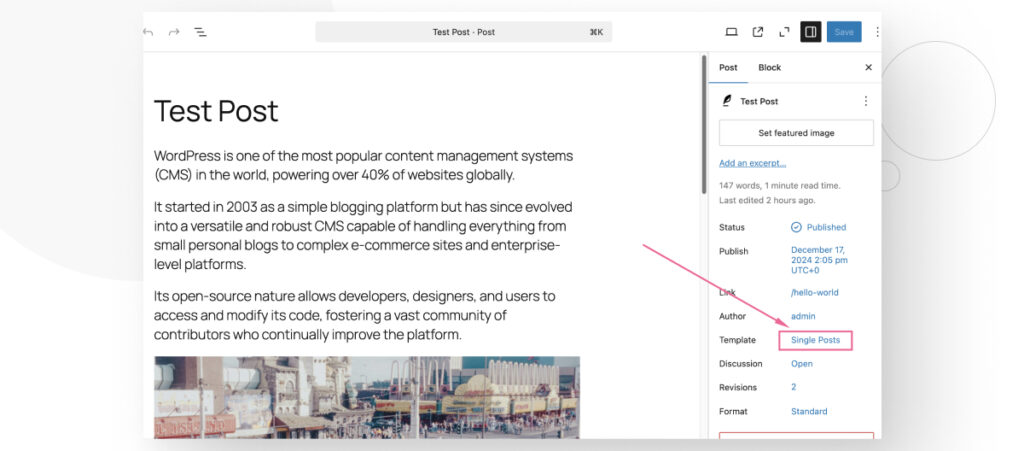
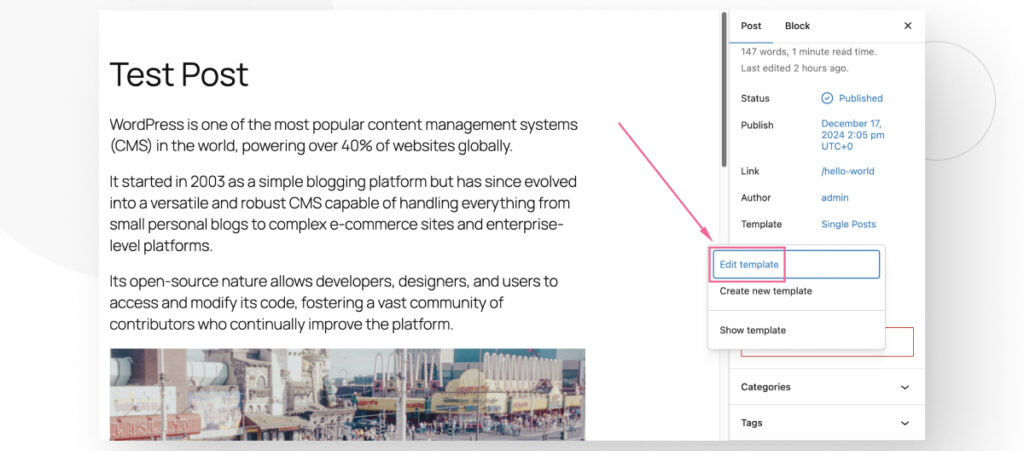
Remember that “single post” is the template WordPress uses to build the layout for blog posts.
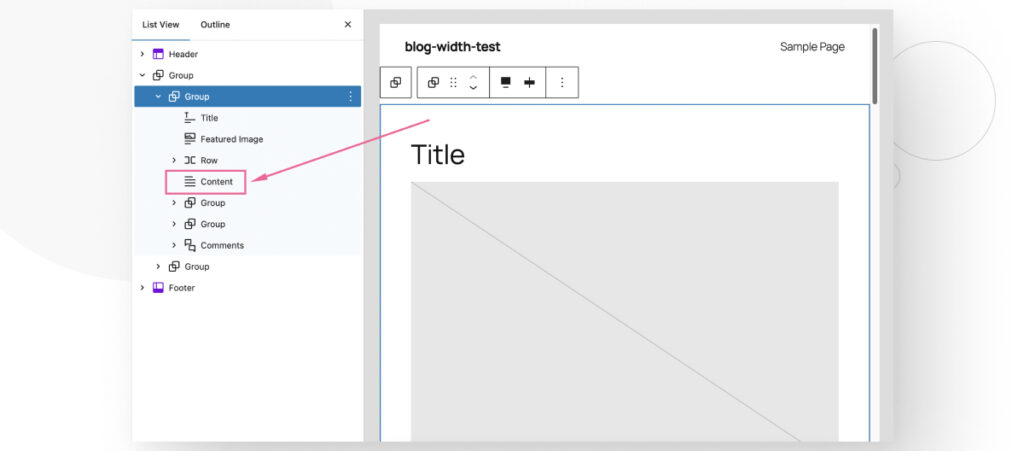
Click on the Document Overview button at the top and then click on the Group section.
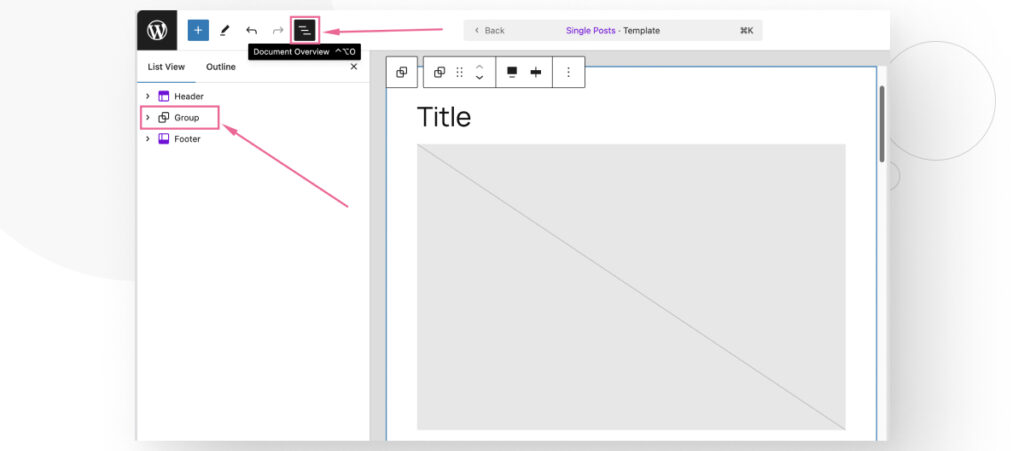
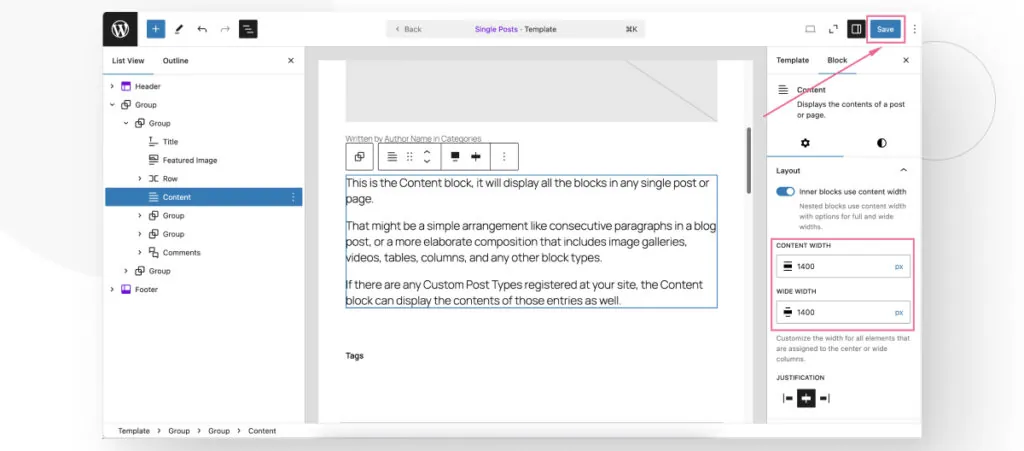
Group contains various blocks that make up the template for blog posts. You may not know what every block does yet, but the Content block is the one that controls the width of your blog’s text. Click on it.
On the right-hand sidebar, you should see the Content Width and Wide Width settings. Modify them both to meet your needs. In our case, we used 1400px. If you prefer, you can also use other units other than pixels by clicking on the px button. Save your changes.
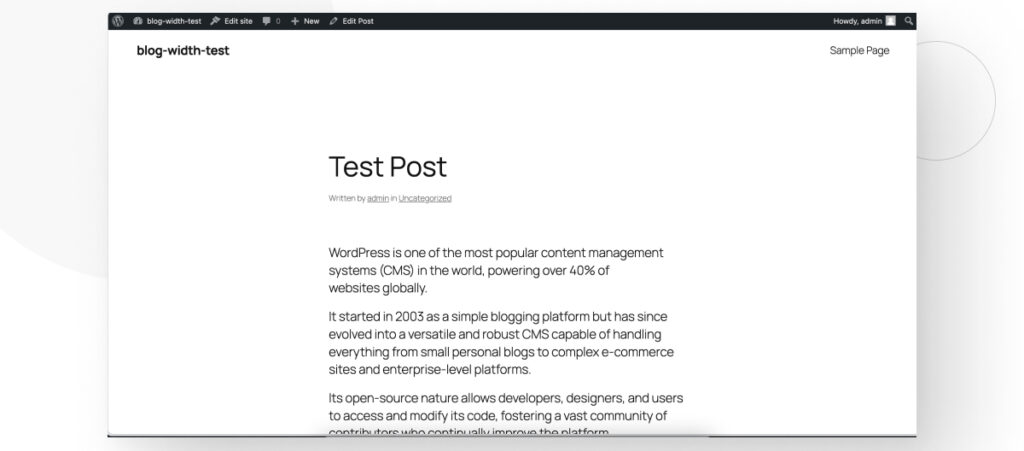
Using the Twenty Twenty-Five theme, our blogs went from looking like this with the default width:
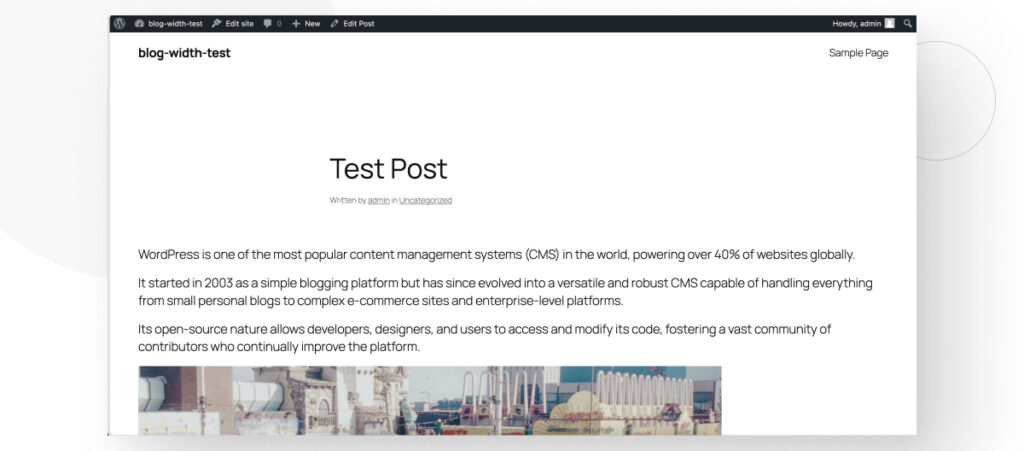
To looking like this with a width of 1400px:
You can go back to the Single Posts template to continue modifying the width of other elements, like images, the title, etc., until they are the right width for your design needs.
Method 3: Use the theme.json File (Block Themes)
Another way to modify blog width in block themes is using the theme.json file inside your theme’s folder.
To access your WordPress files, you could use a hosting control panel like cPanel, an FTP client like FileZilla, or a local WordPress installation. Regardless of your method, you’ll have to navigate to wp-content > themes > your-current-theme > theme.json.
Open it with your FTP client, file manager, or a code editor like VS Code. Once you open it, you’ll see a long file with many sections.
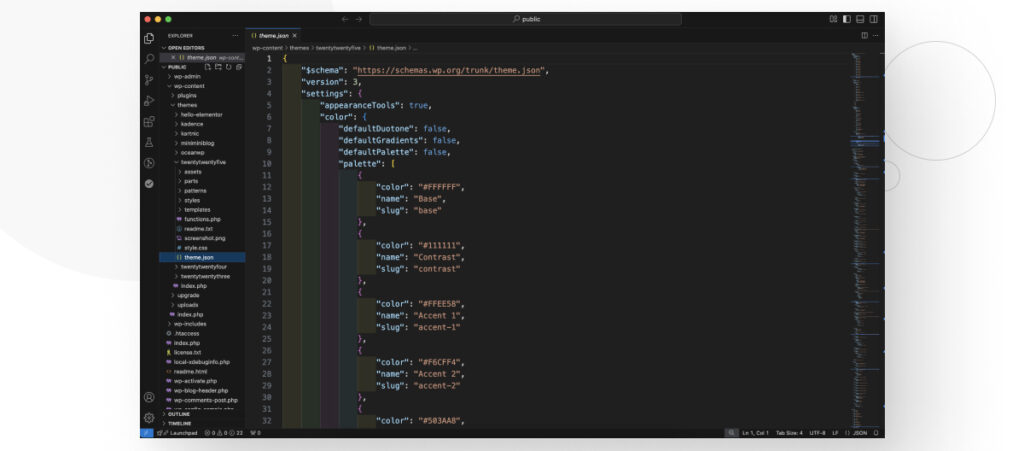
Use CMD + F or CTRL + F to open up the search bar and search for layout. You’ll find a short section that looks like this:
"layout": {
    "contentSize": "645px",
    "wideSize": "1340px"
}
contentSize corresponds to the width of the text on your blog posts, and wideSize corresponds to the width of the entire content, including the header, footer, etc.
Modify contentSize if you want to modify only the width of the container that includes your blog’s text and other content elements like images.
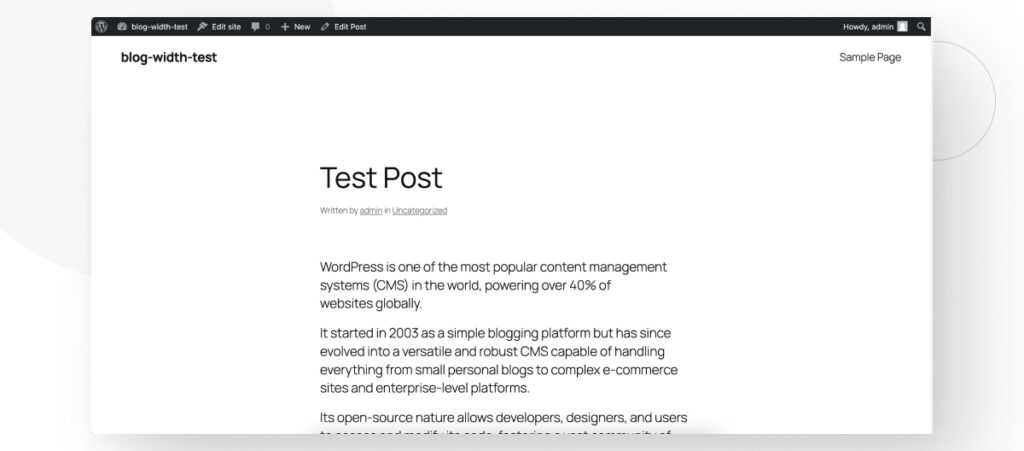
For example, in Twenty Twenty-Five, the default contentSize is "contentSize": "645px". Increasing it to "contentSize": "900px" makes the blog’s content wider. By default, it looks like this:
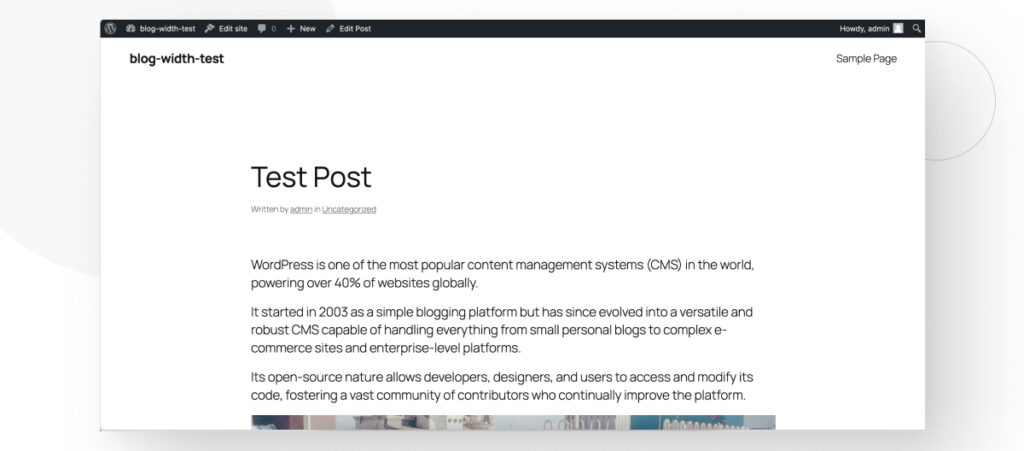
After changing the width to "contentSize": "900px" in theme.json and saving the changes, it looks like this:
Experiment with various widths until you find the perfect one for your blog.
Change the Width of Your WordPress Blog to Fit Your Design Needs
WordPress allows you to modify the width of your blog post’s content in various ways, from using the Appearance > Customize button to modifying templates with the Site Editor and manually editing the theme.json file.
Using the method that best suits your theme and needs will help you gain greater control over your site’s layouts.
If you found this post useful, read our blog and developer resources for more insights and guides!
Related Articles

How to... / 5 min read
How to... / 5 min read
How to Make a Subscriber Into an Admin on WordPress?
While it's not the most common situation, at some point, you may find yourself needing to make a Subscriber into an Admin on your WordPress site. Maybe you need to…
Read More
How to... / 3 min read
How to... / 3 min read
How to Grant Secure Access to a Not Live WordPress Site During Development
When developing a WordPress site, you often need to collaborate with multiple developers and grant access to the website owner so they can review the progress themselves. However, granting access…
Read More
Industry Insights / 11 min read
Industry Insights / 11 min read
Do You Need a Web Developer to Build a WordPress Site?
If you’re building a WordPress site or considering building one, you wonder whether you need a web developer to create it or you can do it yourself. The answer can…
Read More
How to... / 6 min read
How to... / 6 min read
How to Change the Bottom Padding Dimensions on WordPress Blocks
If you're learning to modify your WordPress site's layouts and design, you may be wondering how to change the bottom padding dimensions of some of its elements. If that's the…
Read More
How to... / 10 min read
How to... / 10 min read
How to Disable the “Similar Posts” Section in WordPress Blogs
If you’re diving deeper into customizing your site, you may be wondering how to disable the “Similar Posts” section that appears on the bottom, sidebar, or footer of your WordPress…
Read More
