
Headless WordPress and Next.js: benefits and setup
The world’s most popular content management system, WordPress, has evolved past its reputation as a blogging-only platform. It’s become a mature CMS that took its first steps into headless territory in the past years.
But headless CMSs need a frontend framework to create engaging user interfaces, so which one should WordPress developers choose for their websites? In this article, we’ll explore why Next.js is an excellent choice, why developers should consider using it for their projects, and how to set it up.
Let’s get started.
What is headless WordPress?
Headless WordPress refers to using WordPress with a headless architecture instead of a traditional monolithic one. In a traditional setup, the backend and frontend of a website are combined into a single software. The backend manages the site’s content, including databases and servers, while the frontend is what users see and interact with.
With a headless architecture, the backend and frontend are separated. WordPress acts as the backend, while a different platform displays user-friendly interfaces and content on the frontend. Popular frontend technologies like React, Angular, and Gatsby are commonly used for headless WordPress implementations.
Under this model, WordPress is a content hub and exposes an application programming interface (API) that allows any frontend technology to access and display the content.
Headless WordPress is a relatively new concept but is gaining attention due to its potential advantages over a monolithic model. It provides developers with flexibility in choosing their frontend technologies and offers scalability in managing multiple channels from a single backend.
What is Next.js?
Next.js is a React-based, open-source frontend framework. Developers use Next.js to build modern, server-rendered React applications through various powerful features that simplify development and help create high-performing web apps.
Next.js differs from the client-side rendering React implements by default, instead providing server-side rendering (SSR) and static site generation (SSG). SSR allows developers to render React components on the server and send the generated HTML to the client. SSG generates static HTML files at build time, generally served to clients through a content delivery network (CDN).
SSR and SSG are faster than client-side rendering because they avoid initializing React code on the client’s machine, which can slow down websites if many components are loading on-screen. They also provide much better SEO tools for developers.
In addition to server rendering and its many benefits, Next.js has multiple features that make it an excellent choice for frontend developers, including:
- Hot Code Reloading (HCR). Pages reload automatically when saving changes.
- Automatic Routing. URLs are mapped to files in the pages folder without additional configuration.
- Single file components. The integrated styled-jsx library allows easy styling scoped to components.
- Compatibility. Next.js is compatible with the rest of the JavaScript, Node.js, and React ecosystems.
- Automatic code splitting. Pages are broken into separate resources, loading only the necessary JavaScript per page.
- Prefetching. The Link component supports prefetching page resources in the background.
- Dynamic components. Developers can dynamically import JavaScript modules and React components.
- Static exports. Export a fully static site using the next export command.
- TypeScript support. Next.js is written in TypeScript and has excellent TypeScript support.
Why use Next.js as the frontend framework for headless WordPress?
The headless model offers the possibility of creating flexible, scalable, and high-performing WordPress sites with the potential for seamless multi-channel delivery. Many frontend solutions fit with WordPress as a headless CMS, but our developers choose Next.js because it offers some of the best SEO features from any frameworks available.
Server rendering, the ability to append meta tags to HTML’s <head> section, and native tracking for essential SEO stats are some of the main SEO benefits of Next.js. However, SEO is not the only reason to choose Next.js (but it’s still a major one). Other reasons why we choose Next.js for headless development include the following:
- Next.js simplifies development by providing ready-to-use tools and features that facilitate building and maintaining complex frontend apps without worrying too much about the WordPress backend.
- Next.js is a flexible framework that integrates seamlessly with WordPress installations.
- Next.js has a large community that ensures it remains updated and maintained. You can rely on Next.js for long-term support and stability.
- Next.js is free and open-source, making it extremely cost-effective.
- When properly optimized, Next.js-powered sites are high-performing and provide an excellent user experience.
In short, Next.js is an excellent choice for building headless WordPress websites because it simplifies development, integrates seamlessly with headless WordPress, has strong community support, it enables easy content management, improves SEO, enhances user experience, and is cost-effective. Next.js empowers developers to create dynamic, scalable, and fast web applications. And that’s why we use Next.js for our headless WordPress projects.
How to set up a basic blog for headless WordPress using Next.js and GraphQL
Now that we know what Next.js is and how it benefits your headless WordPress project, let’s explore how to set up a basic blog for a headless WordPress installation with Next.js and GraphQL. For this guide, you’ll need the following:
- A deployed WordPress installation. It can be a live WordPress site or a Local installation.
- Node.js 16.8 or later.
- The WPGraphQL plugin.
- The Next WordPress Starter GitHub repository. This project takes care of connecting to WordPress, connecting to the WordPress GraphQL API, querying the data, creating the landing page for the blog, and the dynamic template for each individual blog post. It’s an excellent starting point if you’re new to Next.js with headless WordPress.
Step 1: Install WordPress
Naturally, you’ll need a WordPress installation to act as the content hub that your Next.js-powered frontend will display. You’ll need a live, deployed WordPress instance that you can access on the internet.
Step 2: Install and activate WPGraphQL
Go to Plugins > Add New and search for the WPGraphQL plugin. Install and activate it.
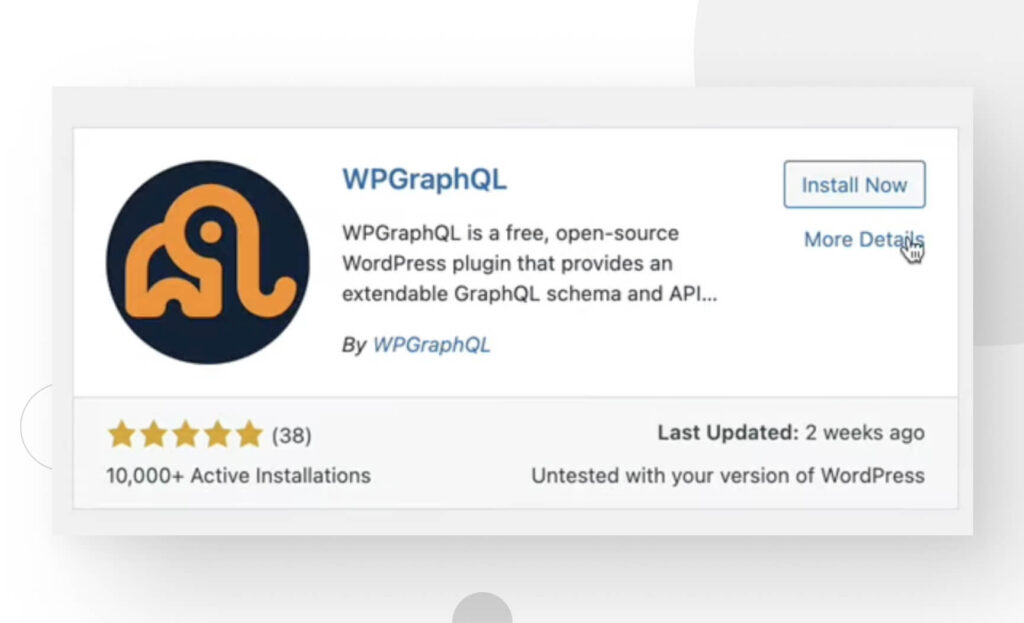
GraphQL is an open-source query language created by Meta in 2012, mainly used to create versatile and efficient APIs, emerging as an alternative to the REST API architecture, like the one WordPress uses by default. The WPGraphQL plugin extends WordPress’ functionality by exposing its data and features through a GraphQL endpoint.
Once active, you’ll see a GraphQL button on your admin dashboard’s sidebar. Hover your pointer over it and click on GraphiQL IDE. This will take you to the GraphQL playground, where you can write queries to your database. In the playground, you can experiment with queries by writing them on the left-side pane. For example, the following schema queries all the titles for every post on your site:
query postsQuery{

  posts{

    edges{

      node{

        title

        }

      }

  }

}
Execute the query by hitting the “Play” button at the top, and you’ll get a response like the following on the right pane:
{

  "data": {

    "posts": {

      "edges": [

      {

        "node": {

          "title": "Post Title 1"

        }

      },

      {

        "node": {

          "title": "Post Title 2"

        }

      },

      {

        "node": {

          "title": "Post Title 3"

        }

      }

    ]

  }

}
The exact content of the response depends on the current posts on your WordPress, but getting a successful response means WPGraphQL is working, and you can connect your headless WordPress backend with any modern frontend framework.
Step 3: Clone the starter repository
Clone the Next WordPress Starter repository from the console using this command:
git clone https://github.com/colbyfayock/next-wordpress-starterTo clone it from Github Desktop, go to Add… > Clone Repository.

Then paste the repository’s URL in the URL section.

Now open the folder on Visual Studio Code or your preferred code editor. The project contains a fairly standard Next.js setup.
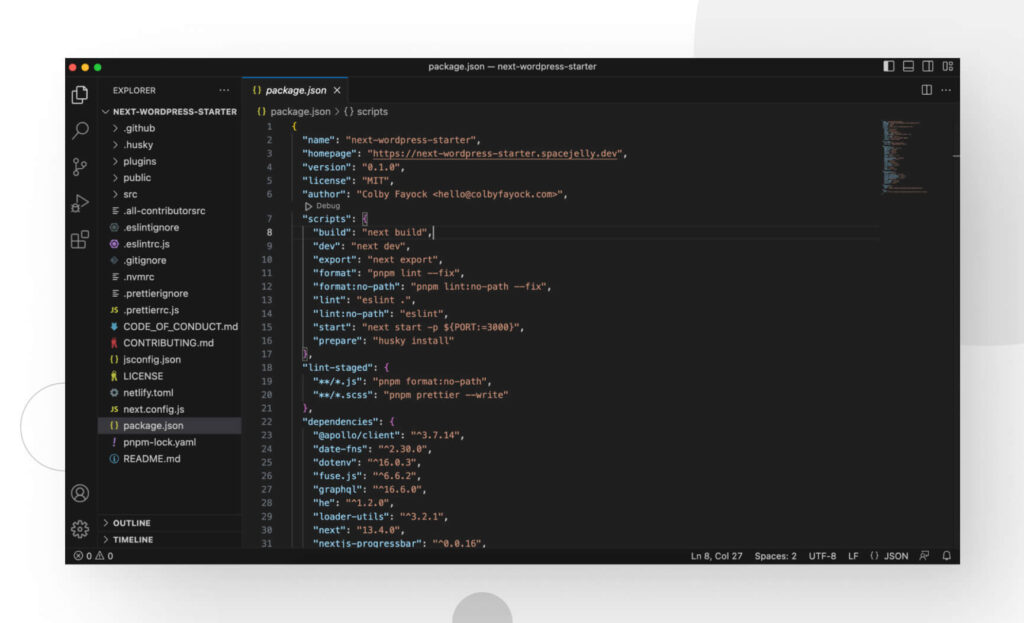
If you explore the package.json file, you’ll notice the following function for Apollo support, a popular GraphQL client:
"@apollo/client": "^3.7.14"This project uses the Apollo GraphQL client to send GraphQL queries to your WordPress backend. However, you’ll have to add an environment variable before you can start sending queries and successfully connect your WordPress site with this Next.js project.
Step 4: Add the environment variable
Add the .env.local file to your project’s root directory. .env.local is the file where you can add environment variables while testing in Next.js.

Add the following code to the new .env.local file:
WORDPRESS_GRAPHQL_ENDPOINT=http://wordpressite.com/graphqlThis is the single GraphQL endpoint your Next.js site will consume to display content on the frontend. Substitute “wordpressite.com” with your WordPress site’s domain name.
If you are using a Local installation, use your site’s local address:
WORDPRESS_GRAPHQL_ENDPOINT=http://wordpressite.local/graphqlStep 5: Install dependencies and run your site
Now all that’s left is installing dependencies, and you’ll finally be able to start managing your site. To install dependencies, run the following command on the console:
npm installOnce all dependencies are installed, type the following command to run the application in development mode:
npm run devTo view your Next.js frontend site in action, paste “http://localhost:3000” on your browser, and you should be able to experience your site! From this point on, any change you make on the WordPress backend will reflect on the Next.js frontend.
However, remember that you need to run “npm run dev” again whenever you want to see the changes, as you need to wait for the local server to go through another build process.
Now start editing and managing your site!
Next.js helps you develop fast and flexible headless WordPress sites
WordPress has transformed from a blogging platform to a powerful CMS that can now power headless architectures. Among the various frontend frameworks available, Next.js stands out as an excellent choice for developers.
Next.js empowers developers to create dynamic, scalable, fast web applications with headless WordPress. By leveraging its features, developers harness its benefits to streamline development processes, improve SEO, and provide exceptional user experiences. Its versatility is a precious tool for building headless WordPress projects.
Hopefully, you found this guide helpful and can now start managing your headless WordPress installation using Next.js as the frontend framework. Good luck!
For more guides and WordPress insights, visit our blog!
📬 Get WordPress updates to your inbox
Sign up for WC Blog updates and never miss a post!
Related Articles

How to Make a Subscriber Into an Admin on WordPress?

How to Grant Secure Access to a Not Live WordPress Site During Development

Do You Need a Web Developer to Build a WordPress Site?

How to Change the Bottom Padding Dimensions on WordPress Blocks