
3 Ways to Allow Users to Change Text Size in WordPress

WordPress is very flexible, but it does not come with a default feature to allow users to change the text size.
Even if your site has a text size that accommodates most people, some people will always prefer larger or smaller sizes. Additionally, some people have limited sight and require the option to increase font sizes without necessarily making the entire site’s interface larger.
In this article, we’ll explore 3 no-code methods to allow users to change the text size while using your WordPress site.
Key Takeaways
- Allowing users to change the text size is important for accessibility and readability.
- You can add features to change text size with various plugins.
- Some plugins involve adding a widget, which limits the themes that can use it. However, other plugins work regardless of the theme you’re using.
Why Allow Users to Change the Size of Text in WordPress
The main reasons for providing a feature for changing text size are accessibility and readability.
People have different preferences for text size, so giving them alternatives is good. Additionally, some people have limited sight and need larger font sizes to read your content more comfortably.
Adding a feature to allow users to change the font size makes your site more accessible and accommodates different preferences and capabilities.
3 Ways to Allow Users to Change Text Size in WordPress
Method 1: Use the Zeno Font Resizer Plugin
The first option is using the Zeno Font Resizer plugin. However, keep in mind that this plugin only works on themes that support widgets. This means it will not work if you’re using a default WordPress theme like the Twenty Twenty line.
Also, keep in mind that not every non-default theme supports widgets, so you should ensure your theme supports widgets first by exploring the Appearance menu in your WordPress admin.
If you can’t see a Widgets option in the menu, your theme doesn’t support widgets.
That said, let’s explore how to use this plugin.
Step 1: Install the Plugin
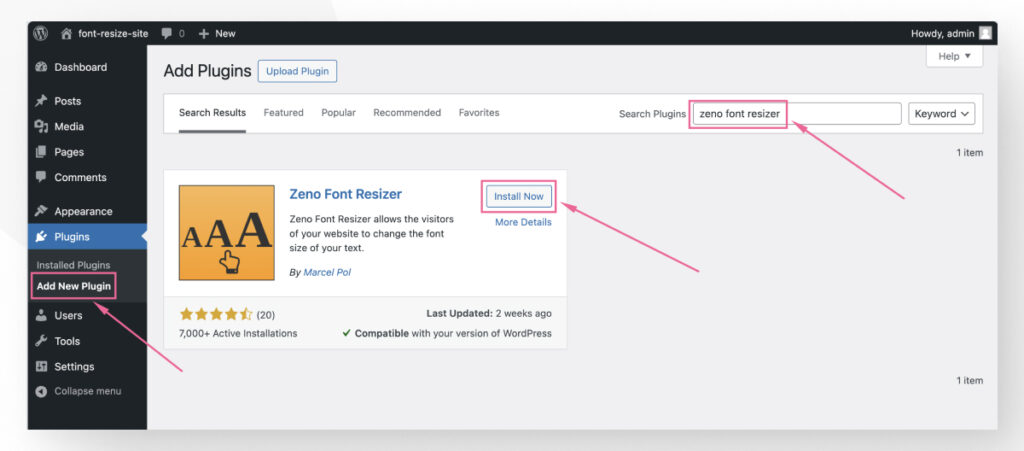
Go to Plugins > Add New Plugin. In the search bar, type “Zeno Font Resizer” and click on Install Now. Once it’s installed, click on Activate.
Step 2: Configure the Plugin
As mentioned, this plugin adds a new widget to your WordPress theme. To configure it, go to Settings > Zeno Font Resizer. You will see various configurations to play around with.
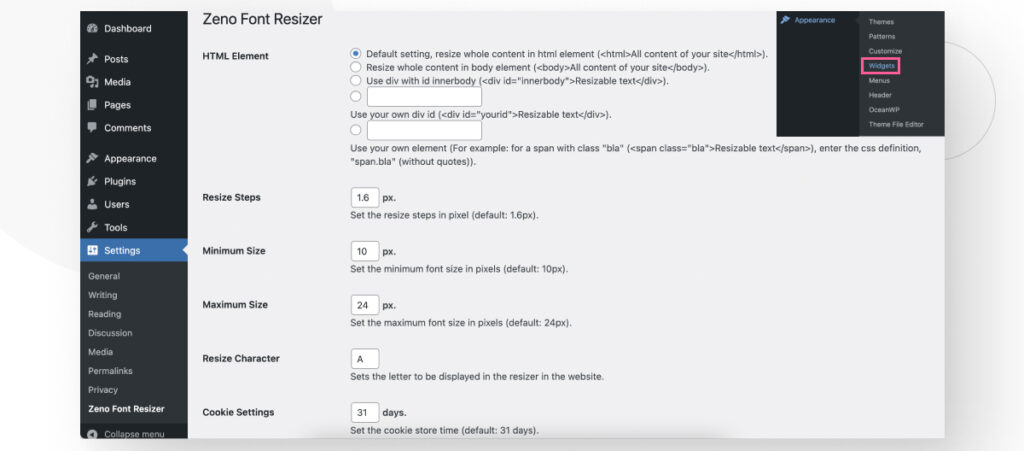
So, how do you configure it? You could leave it as-is, and it should work by allowing users to change the size of your entire site’s fonts.
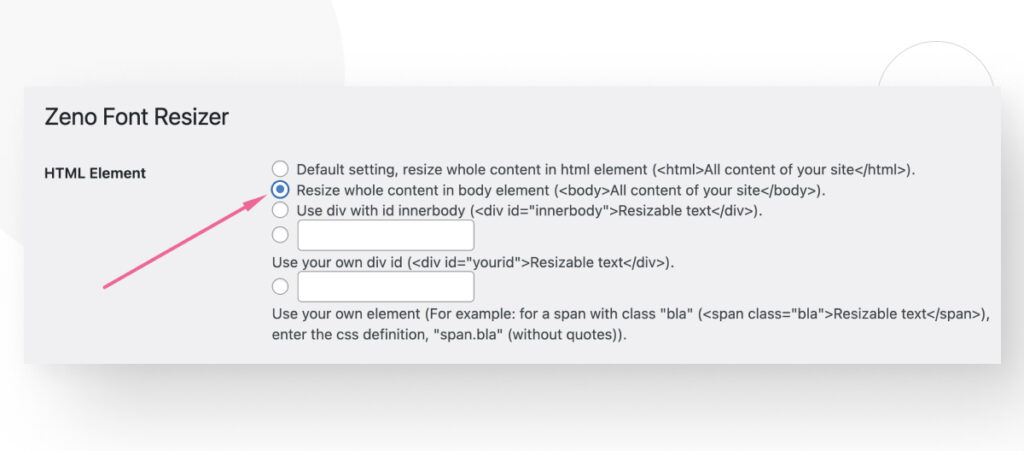
However, if you’re only interested in changing the size of the main content of your post and pages, you should select the following option in the HTML Element section: Resize whole content in body element (<body>All content of your site</body>).
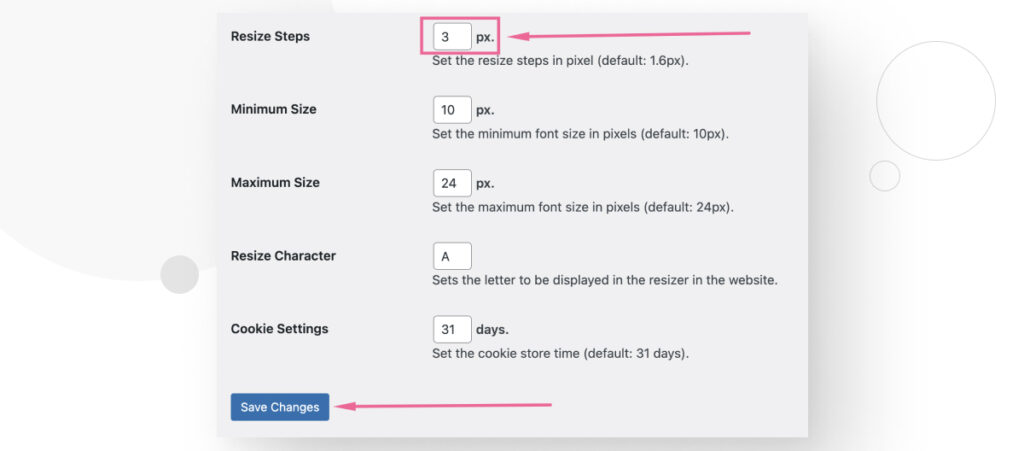
Additionally, we recommend that you change the Resize Steps box from 1.6px to 3px. 3px provides a more significant observable difference when the user increases or decreases the font size.
You can change the rest of the options as you see fit or according to your users’ needs.
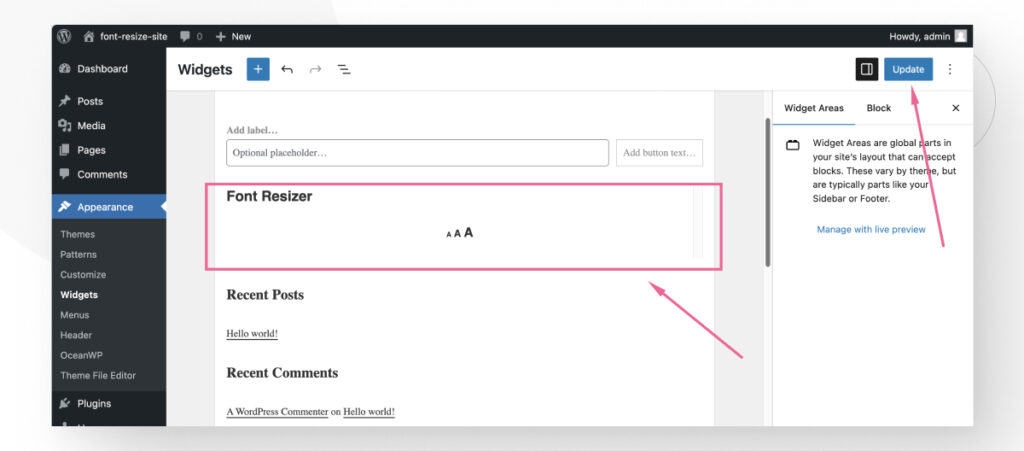
Step 3: Set the Font Resizer Widget in Your Site
This plugin adds a widget for your site, so you need to place this widget in a specific spot for your users to access.
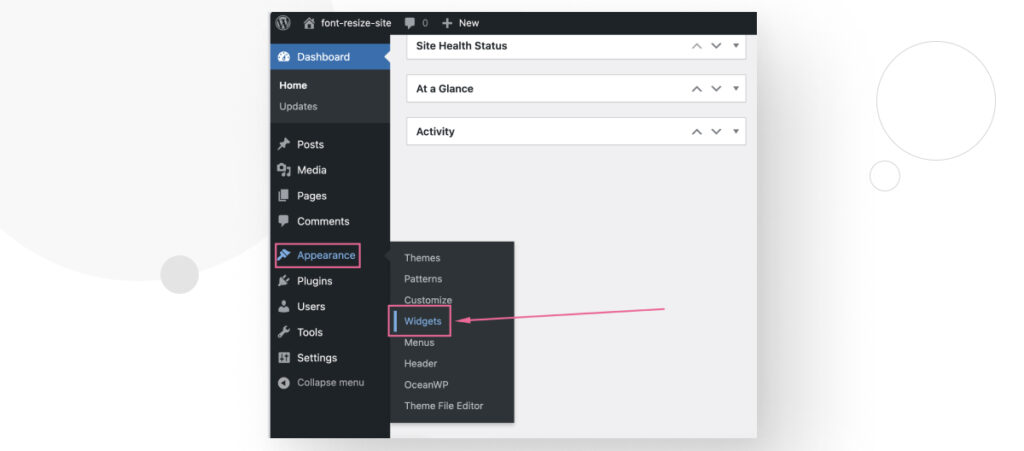
First, go to Appearance > Widgets. Remember that not every theme supports widgets, so your theme may not have this option.
You will see the various sections where you can place your widgets (header, footer, sidebar, etc.).
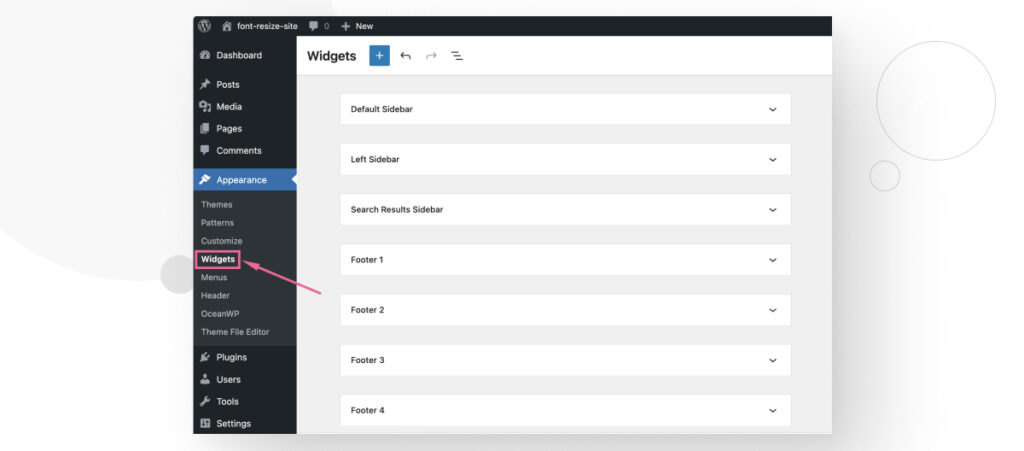
In this example, we will place it in the Default Sidebar, which is on the right side of the site’s interface. You can place it wherever you want, but be mindful of how easy it will be to find for your users.
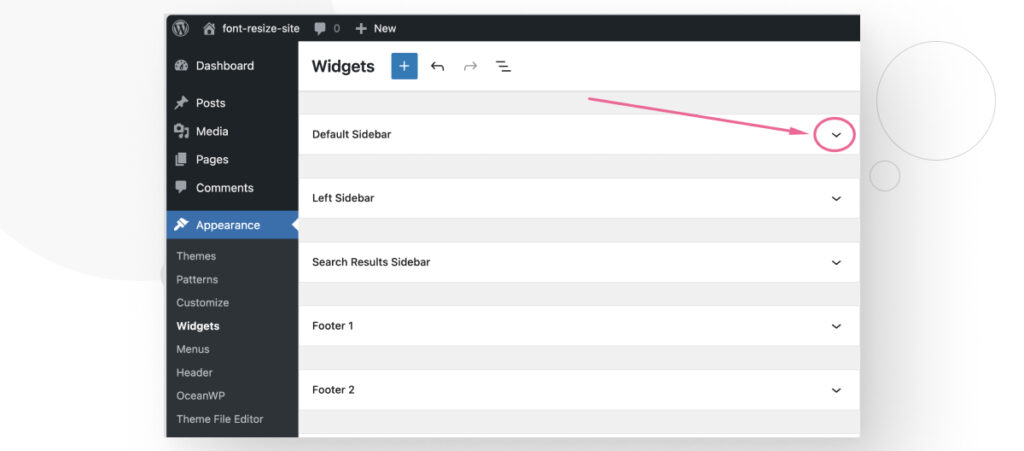
Click on your selected section to expand it.
Hover your mouse above or below an existing block to make the Add block button appear. Click it.
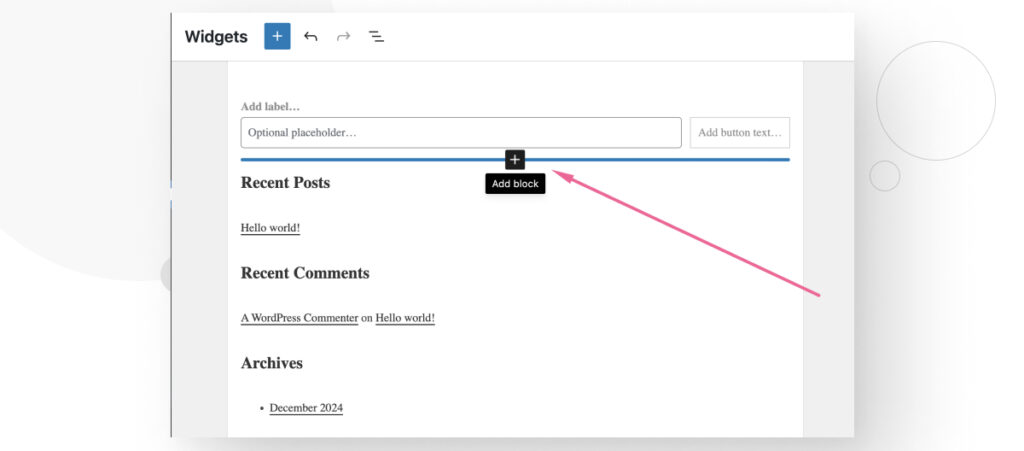
Now, search for the “Zeno Font Resizer” block. Click on it.

Your font resizer widget is now set. Click Update in the right-hand corner to save your changes.
Step 4: Test the Font Resizer Feature
Finally, go to any part of your site that features the section where you added the widget.
In our case, let’s go to a blog post and check if the sidebar contains the Font Resizer widget.
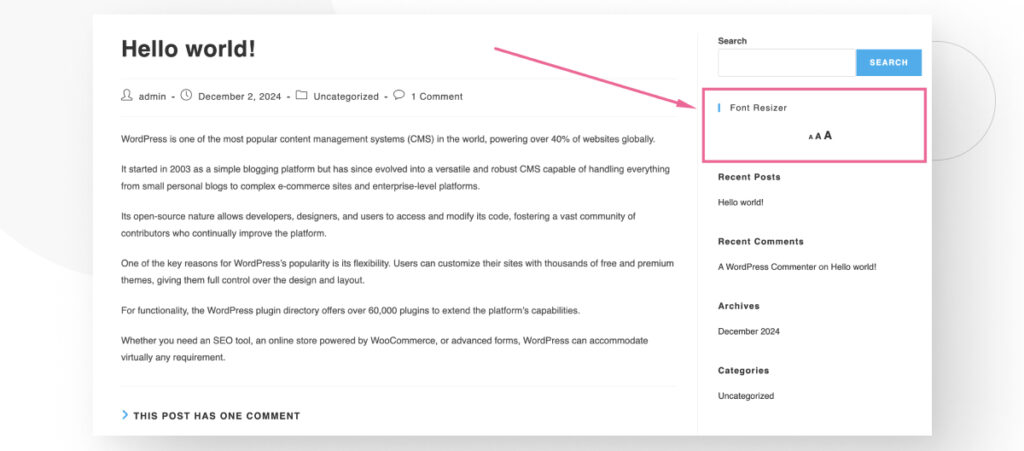
There it is.
The small “A” decreases the size of the text, the middle “A” brings it back to the default size, and the big “A” increases its size.
Remember that the size of the increase or decrease is determined by the Resize Steps option in the plugin’s configuration (Settings > Zeno Font Resizer).
Finally, also remember that even if your theme has widget support, it may not have the specific sections shown in our example (we used the OceanWP theme in our example).
For example, if your theme doesn’t have a sidebar, you’ll need to create one before placing a widget in it. Or you can place the widget in other sections of your site.
Method 2: Use the Accessibility Widget Plugin
An alternative to the previous method is using the Accessibility Widget plugin. It’s similar to the previous one we used, but may be a bit more user-friendly since it gives you more options from the Widgets instead of from its own dedicated page on the admin dashboard.
Like the previous plugin, it does not work on default WordPress themes or themes that don’t support widgets, so keep that in mind.
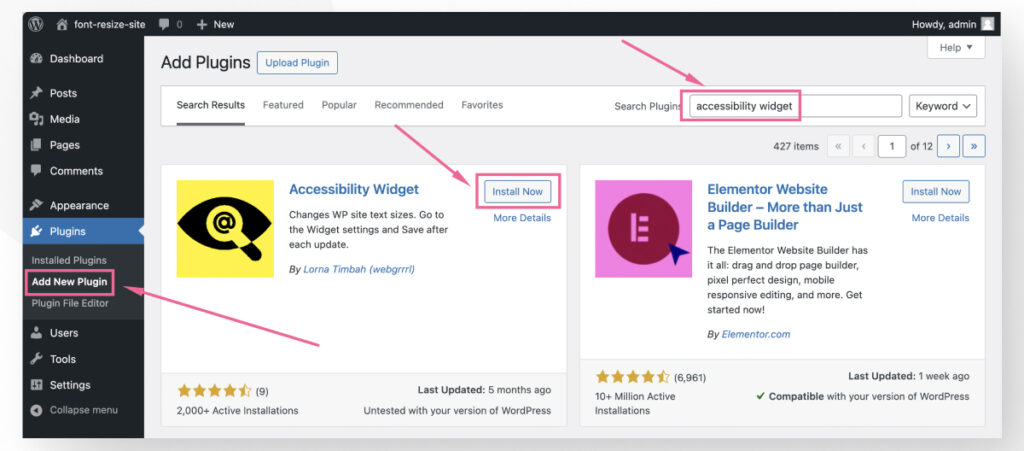
Step 1: Install the Plugin
Go to Plugins > Add New Plugin. Input “Accessibility Widget” in the search bar and click on Install Now. Once it’s installed, click on Activate.
Step 2: Set the Widget in Your Site
As mentioned, this plugin adds a new widget to your site, so you need to place it in a specific spot for your users to access.
First, go to Appearance > Widgets. Remember that not every theme supports widgets, so your theme may not have this option.
You will see the various sections where you can place your widgets (header, footer, sidebar, etc.).
You will see the various sections where you can place your widgets (header, footer, sidebar, etc.).
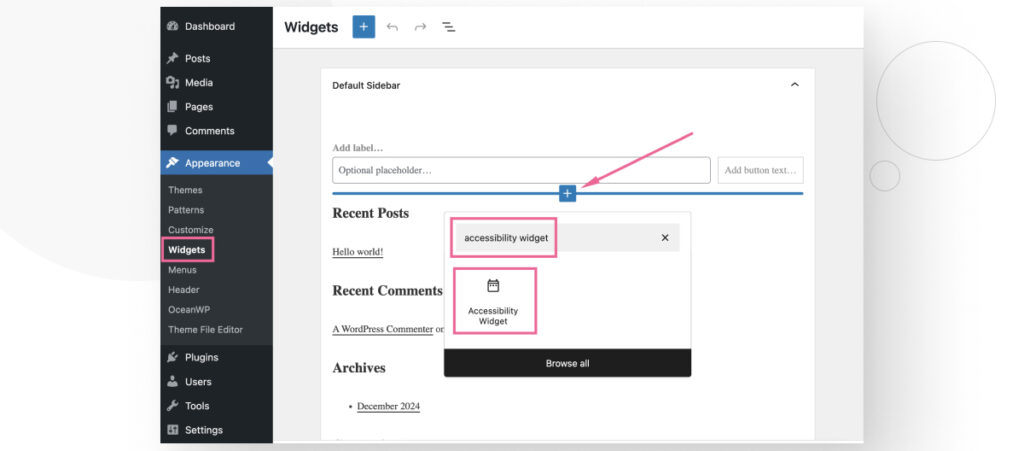
For this example, let’s place it on the Default Sidebar. If your theme doesn’t have a sidebar, you’ll have to create one or place this widget in another section of your site.
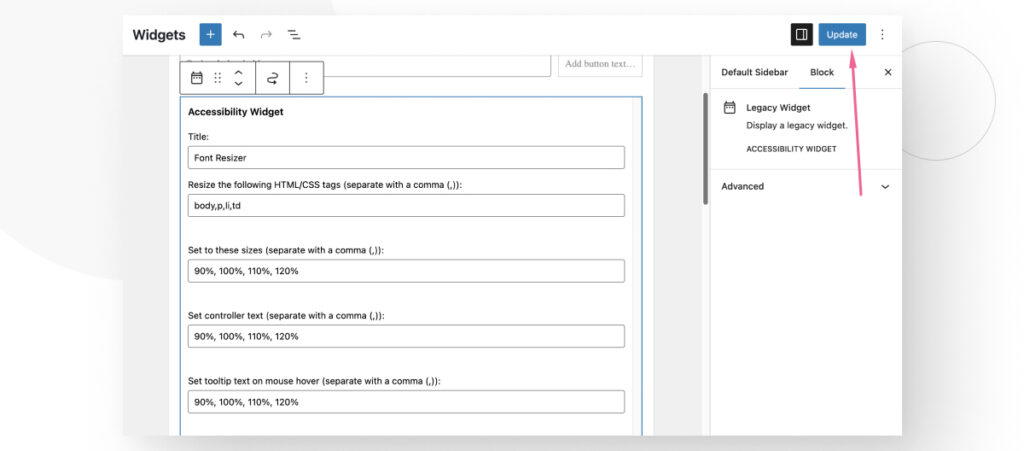
To add the widget, click on the Add block button. Search for the “Accessibility Widget” block and click on it. You will see various configuration options.
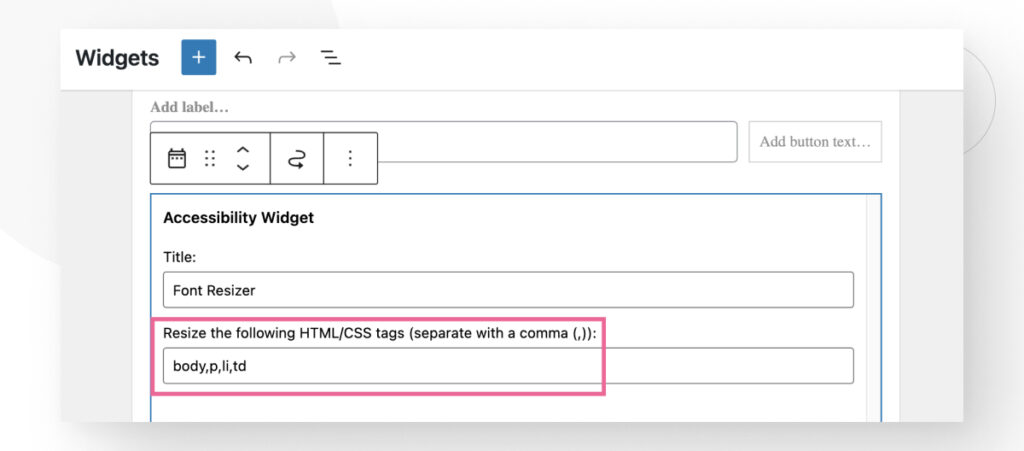
First, give the block a name like “Font Resizer.”
Additionally, you may want to select the specific HTML or CSS tags that will be affected by this plugin in the Resize the following HTML/CSS tags option.
The tags enabled by default are body, paragraph, list items, and table cells. You can test the plugin with these default options and modify based on your needs.
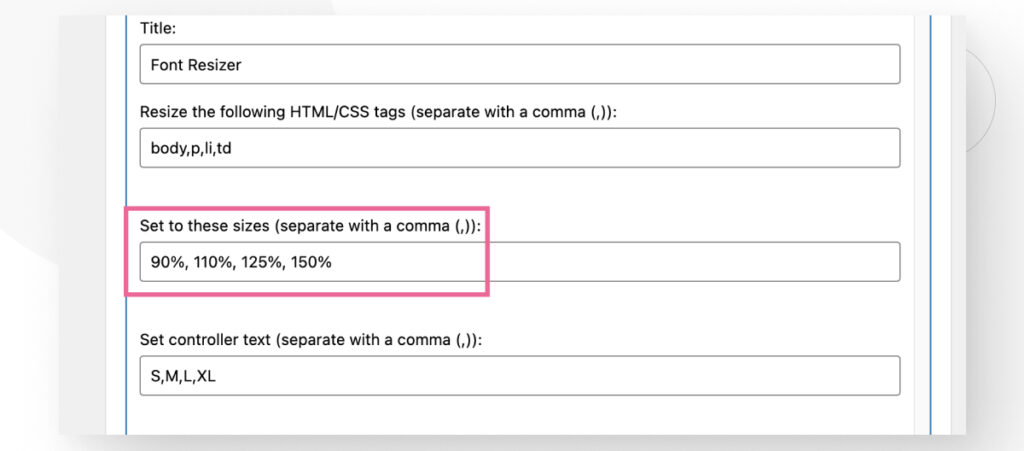
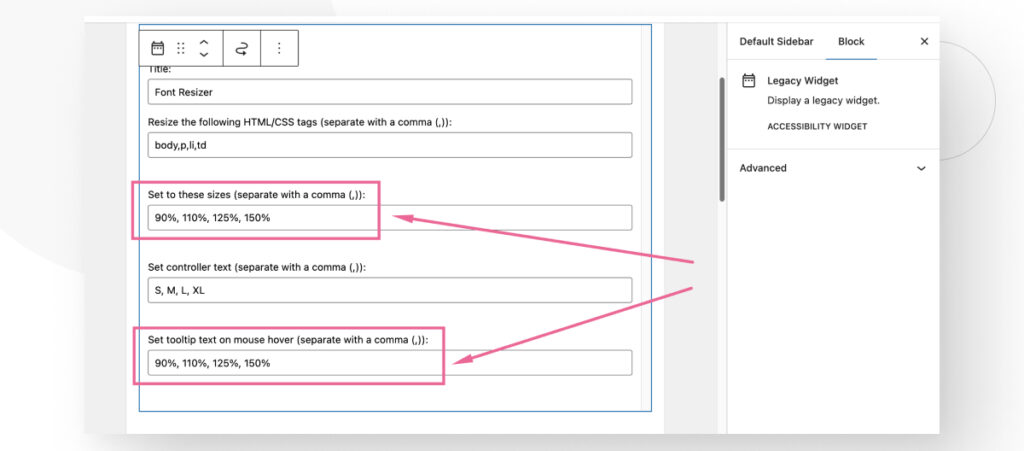
Additionally, you can edit the specific size increases or decreases. The default options are 90%, 100%, 125%, and 150%, but you can edit all of them as needed.
You can also change the controller text, which is the text users will see on the widget. It can be independent from the actual percentages and you can use it to display letters instead of percentage points.
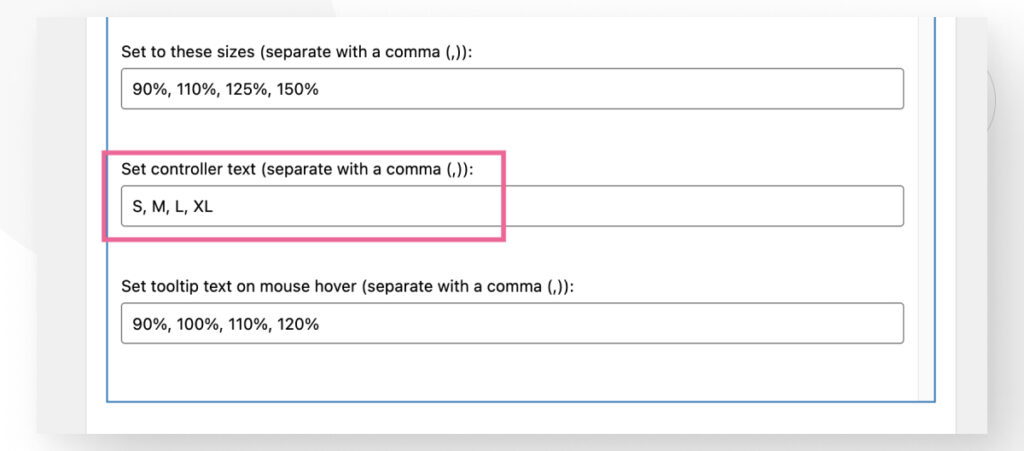
Finally, you can set the tooltip text that appears when users hover their mouse over each resize option. This text should correspond to the actual percentage increases for each step.
When you’re done configuring the widget, click on Update.
Step 3: Test the Font Resizer Feature
Finally, go to any part of your site that features the section where you added the widget.
In our case, let’s go to a blog post and check if the sidebar contains the Font Resizer widget.

Method 3: Use the WP Accessibility Plugin
This final method uses the WP Accessibility plugin.
It is perhaps even easier to set up than the previous ones and works on every theme, not just themes with widget support. Let’s get into it.
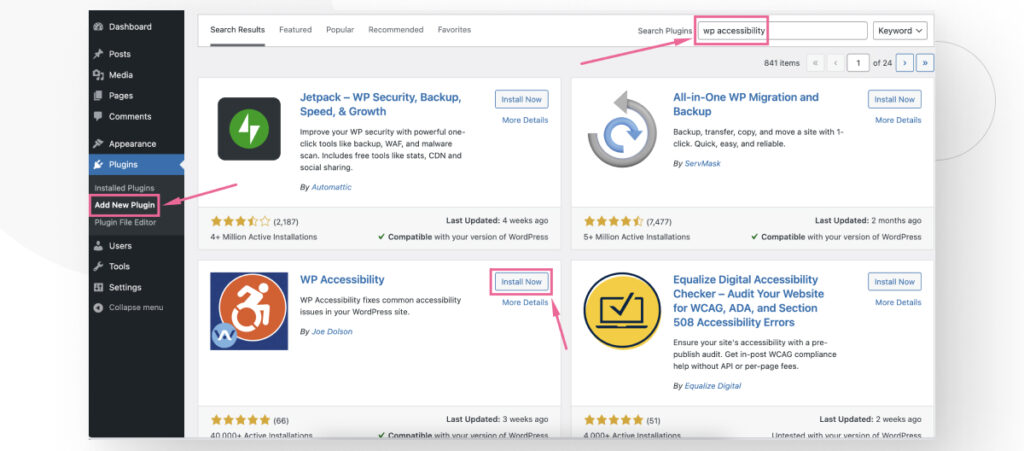
Step 1: Install the Plugin
Go to Plugins > Add New Plugin. Input “WP Accessibility” in the search bar and click on Install Now. Once it’s installed, click on Activate.
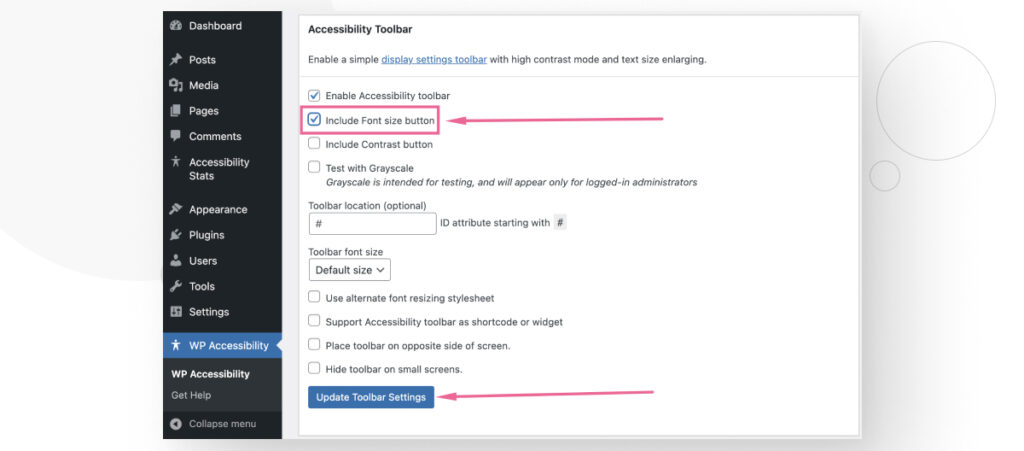
Step 2: Configure WP Accessibility
Go to WP Accessibility from your WordPress admin dashboard.
Check the Enable Accessibility toolbar box. Various options will appear below. If you’re only interested in the font resizer, check the Include font size button box. When you’re done editing the settings, click on Update Toolbar Settings.
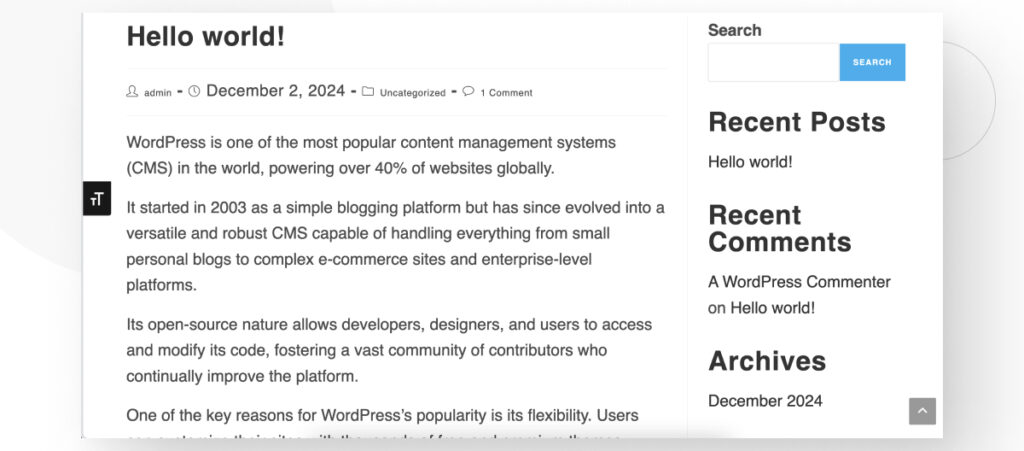
Step 3: Test the Font Resizer Feature
Visit your live site, and you should see a new button to the left of your content.

Clicking it increases the font size of most text elements on your site.
Make Your WordPress Site More Readable and Accessible
Adding a feature to allow users to change the font size of your WordPress site doesn’t require any coding knowledge. You can provide this important accessibility by using existing WordPress plugins.
We explored 3 plugins you can use to include this feature. Hopefully, this variety gives you enough options to select the solution that best suits your needs and WordPress theme.
If you found this post useful, read our blog and developer resources for more insights and guides!
📬 Get WordPress updates to your inbox
Sign up for WC Blog updates and never miss a post!
Related Articles
How to Display a Random Image on WordPress
Can You Embed Systeme.io Forms in WordPress?
My Experience Improving Navbar Accessibility in a WordPress Project

Best Practices for Fetching Data in Next.js