Can you create a WordPress website without a domain?

Purchasing a domain name and a web hosting plan are the only two must-have requirements for making your WordPress website available worldwide. Because of this, you may think you can’t create a WordPress website without a domain name since you wouldn’t be able to host it.
There are ways to create a WordPress website without hosting or a domain name. These methods allow you to experiment with WordPress features without the long-term monetary commitment of maintaining a site.
This article explores two of the most popular methods to create a WordPress website without a domain name.
What are domain names, and why do you need one?
As mentioned above, a domain name and a hosting provider are the two fundamental requirements for setting up WordPress.org websites.
- The domain name is equivalent to your physical address. It’s a unique identifier that helps others locate and access your site through a human-readable name rather than an IP address like 18.5.24.67.
- The hosting provider is a private company that rents its servers to website owners, so they can make their websites accessible through the Internet.
Since your domain name acts as your unique internet address, you need one for your website (WordPress or otherwise) to be accessible worldwide. The primary method for acquiring a domain name is purchasing one from domain name registrars like Bluehost, GoDaddy, or HostGator. These companies lease available domain names for one or more years, and you must periodically renovate your registration when it expires.
Another common approach is purchasing a domain from your hosting provider since some offer domain name services. This method can handle the two essential WordPress requirements from a single account.
Beyond domain name and hosting services, you need nothing else to run a WordPress website, making the software as cheap as under $75 per year if you only use free themes and plugins.
Why create a WordPress website without a domain?
Now that we know why you need domain names, it’s important to ask why you’d want to avoid getting a domain name for your website. The following are the primary reasons:
- You can build a WordPress website completely free if you use local environments, one of the methods we’ll discuss below. That saves you the upfront costs for hosting and domain name.
- Alternatively, you can get a full refund when using certain hosting providers if you use the platform for less than a specified period (30 to 90 days). You still have to cover the costs but can get it back if you follow the refund terms.
- It gives you a sandbox to experiment with WordPress features when taking your first steps into web development.
- You can build, manage, test, and update your site without an internet connection (if using local environments).
2 methods to create a WordPress site without a domain
Let’s explore the two main methods to build a WordPress without a domain name.
Method 1: Set up a local installation on your computer.
Setting up a local installation or environment means using your local computer as a hosting server. You can run and develop WordPress websites without using external live servers, DEV/STG hosting environments, or paying a domain name registrar.
Local environments are effectively sandboxes to create and customize your website and test your WordPress skills without being exposed to security breaches or paying anything.
Once your local environment is set up, you can install WordPress and create websites just as you would on a live server. This includes installing plugins and themes, testing various configurations, tweaking functionalities, and adding features. All from your computer.
Managing local sites is also an important skill, as many WordPress agencies develop, update, and test sites locally before pushing them live when they’re ready. Personal experience with local environments could help you land your first developer position.
How to set up a WordPress local environment?
There are multiple ways to set up local WordPress environments. Three of the most common software solutions are XAMPP, WampServer, and Local, which provide a bundled setup with all the necessary components to run your installation locally.
For this example, we’ll use the aptly-named Local since it’s specifically designed for WordPress local installations and it’s the one we use for our projects. Follow these steps to set up a local WordPress environment using Local.
Step 1: Download Local.
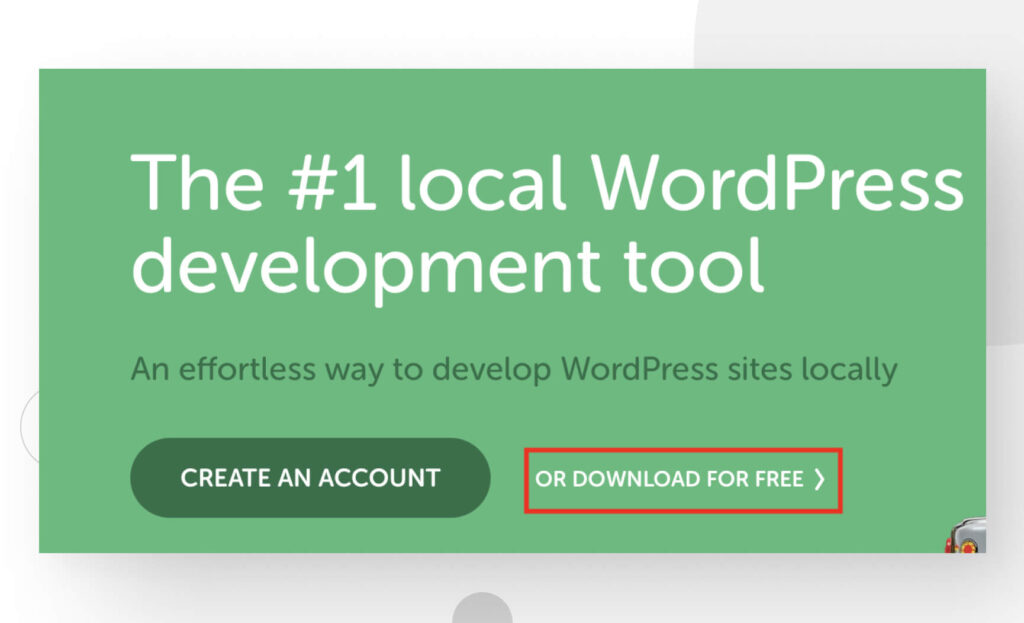
To download Local, go to the webpage and click Download for free. After inputting some user information, you can download Local on your computer.
Step 2: Install it and start setting it up
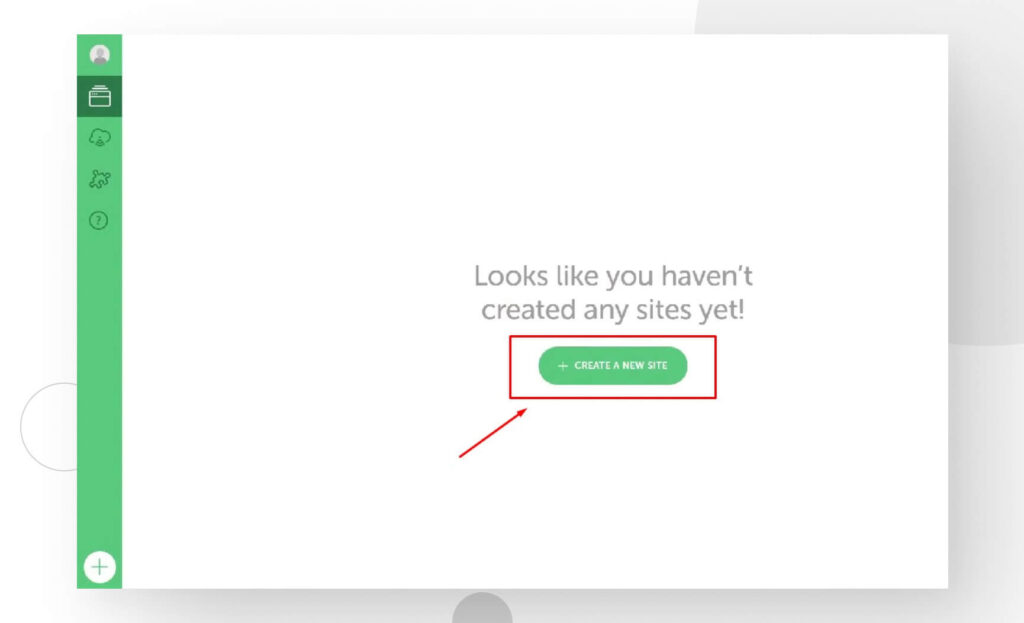
Once downloaded, follow the installation prompts to install it on your computer. When installed, open Local and click on Create a new site.
Step 3: Name your site
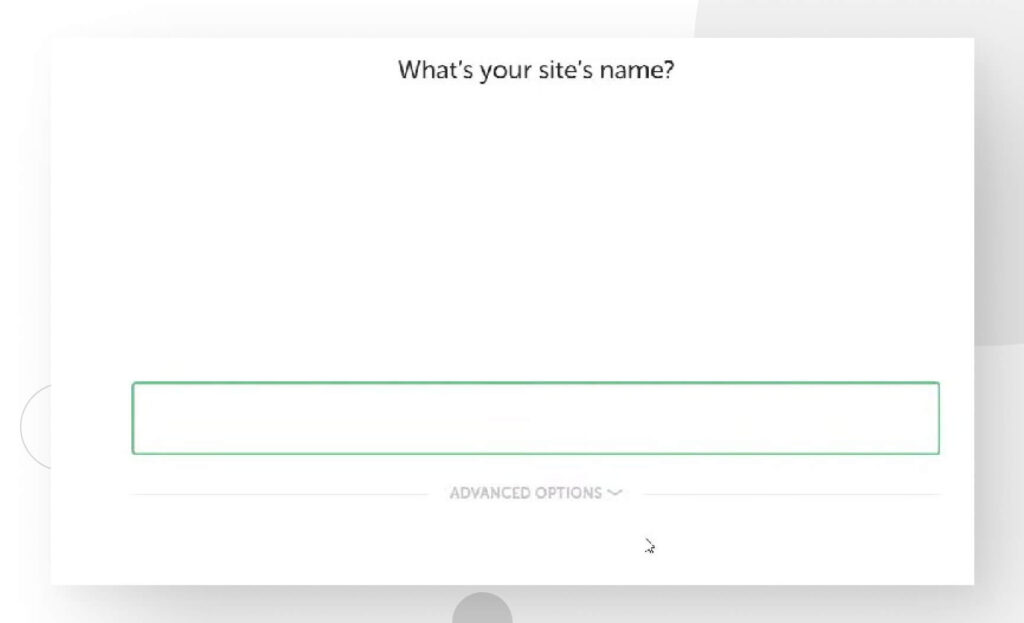
On this screen, you’ll be prompted to name your site. Keep in mind that this name is only for reference within Local. If you ever push this local environment to a server, it won’t affect your live site.
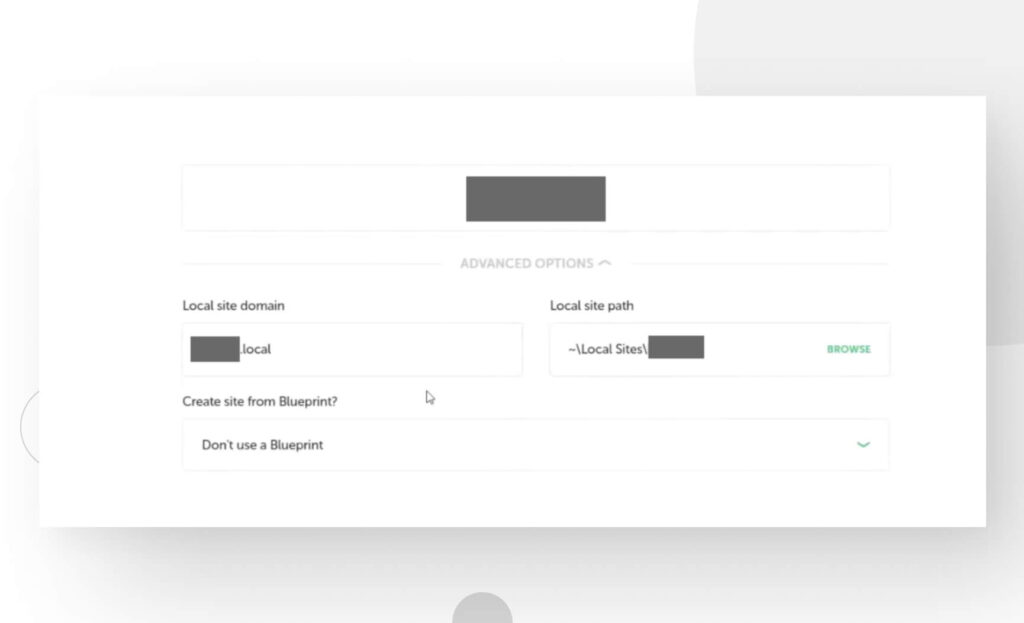
You can click on Advanced Options to play around with other settings. Click Continue when you’re done.
Step 4: Choose an environment
Now you’re in the Choose your environment section, where you can choose the PHP version, web server type, and database your site will use. You can choose Preferred for the recommended settings or Custom if you want a specific combination of settings.
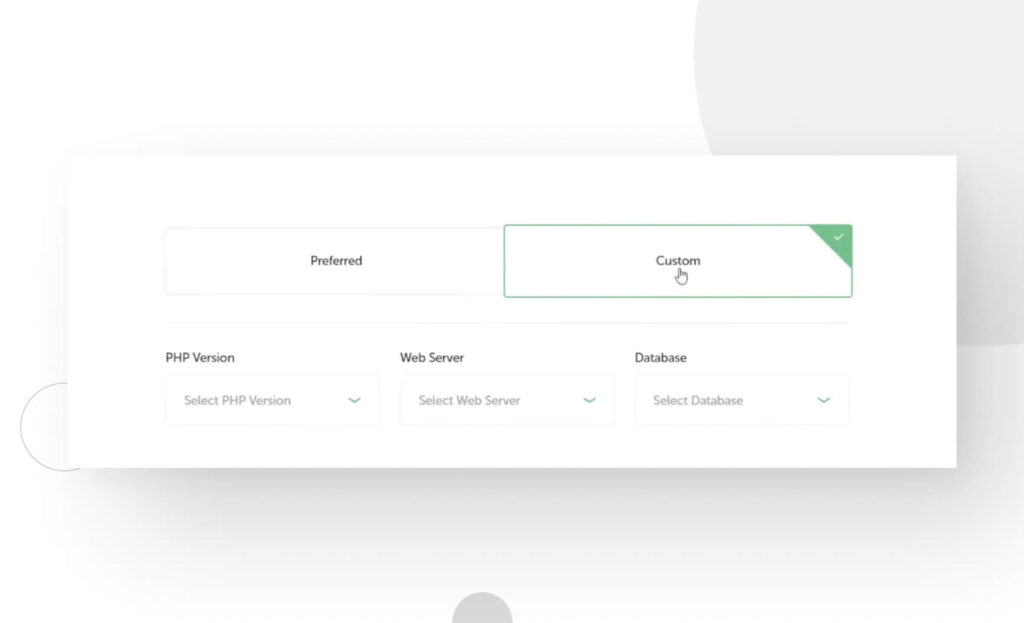
Click Continue.
Step 5: Create your username and password
Now it’s time to create your admin password and username, which you’ll use to log in locally, just as you would on a live server.
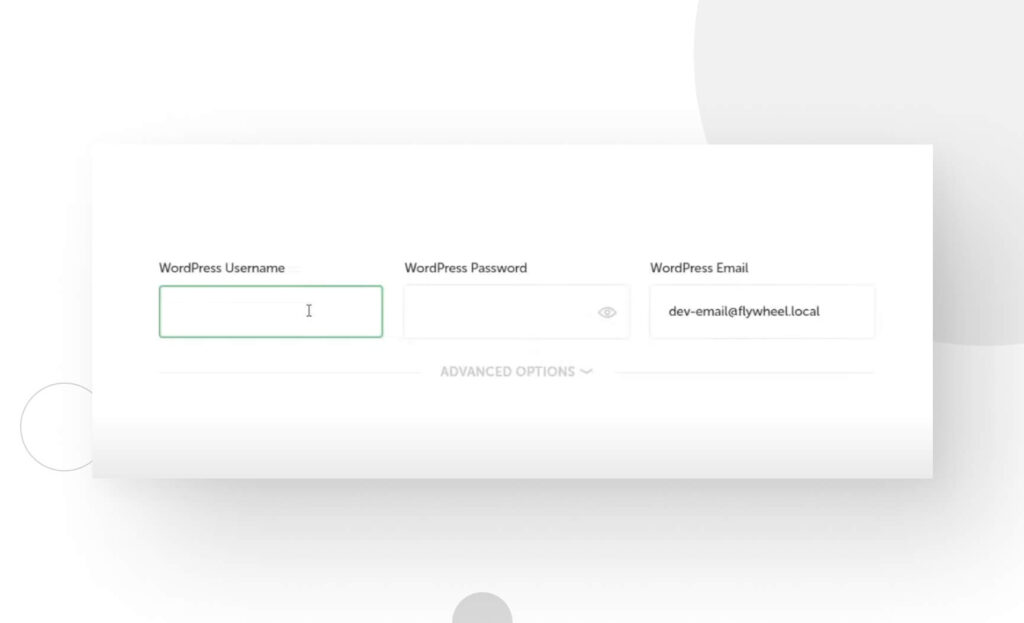
Click Continue when you’re done. You’ll have to wait for Local to generate your site.
Step 6: Start building your WordPress site
Finally, your WordPress site is all set up.
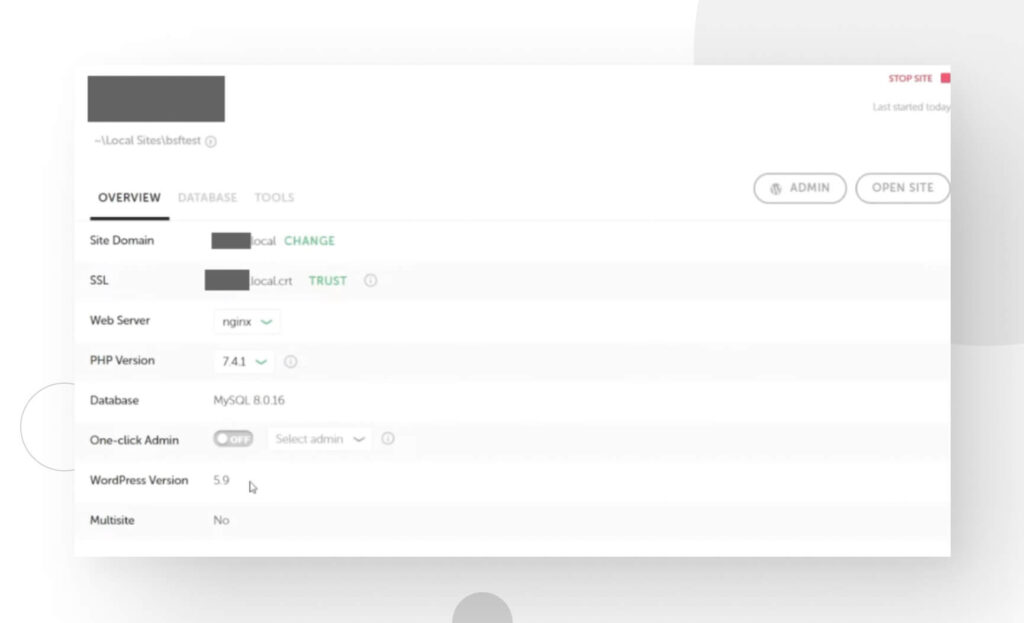
Click on Admin, and you’ll be prompted with the WordPress login page.
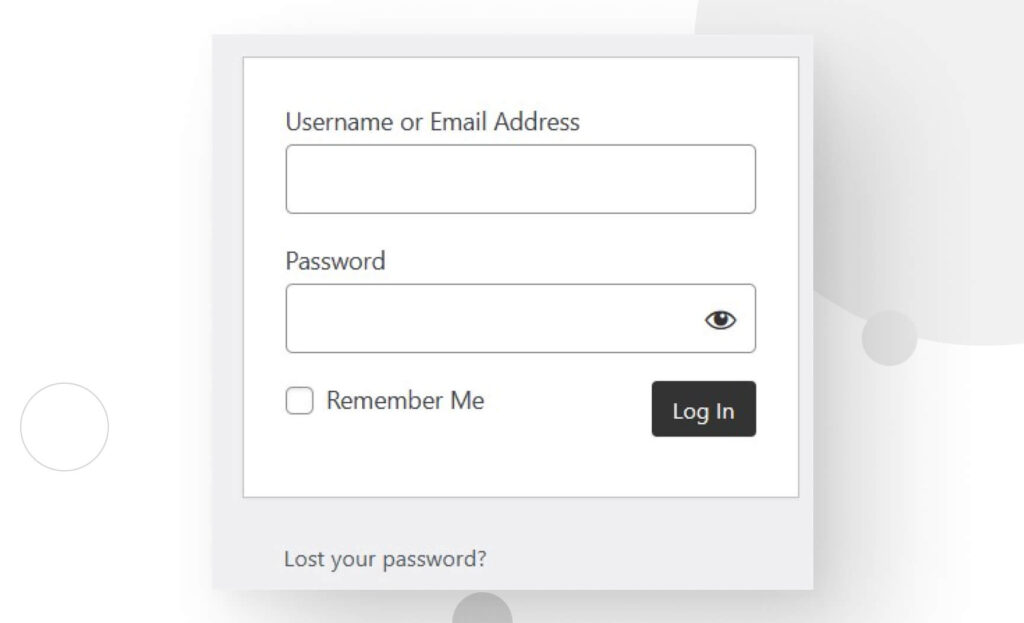
After logging in, you’ll be at the WordPress dashboard, where you can start building and testing your site, installing plugins and themes, and tweaking settings to your heart’s content.
Method 2: Use a WordPress hosting provider and get a refund
This method feels a bit like cheating because you do have to pay for your domain name and hosting services. Still, you can get a refund if you use a hosting provider that supports refunds and don’t use the platform for more than the stipulated time.
The following are some of the most popular providers that have refund policies for WordPress hosting:
- Hostinger provides refunds for up to 30 days on all their web hosting plans.
- SiteGround offers cloud WordPress hosting with a 30-day refund policy.
- WPEngine has a 60-day money-back guarantee policy.
- Immotion Hosting’s WordPress hosting plans have an “industry-leading” 90-day full money-back guarantee.
One of the main benefits of this method is that your hosting provider may have some benefits you’d like to take advantage of, such as DEV/STG environments, dedicated customer support, and managed hosting.
Wrapping up
Domain names and web hosting are the two main requirements for making your WordPress website accessible worldwide. However, there are two ways you can develop a WordPress site without purchasing a domain name long-term: using a local installation and getting a refund from your hosting provider after trying out WordPress for up to 90 days, depending on the provider.
Local installations are the only option that is truly 100% free and, therefore, the most recommended since the alternative requires paying for the domain and hosting (knowing you can get a refund later). The main advantage of paying for your site is using the benefits of your web host, like customer support and managed hosting.
Hopefully, this article was helpful, and you can now develop your WordPress site without making a long-term monetary investment, not even a modest one. If you found it useful, explore our blog for more guides, tips, tricks, and valuable WordPress information.
Related Articles
How to... / 5 min read
How to... / 5 min read
How to Make a Subscriber Into an Admin on WordPress?
While it's not the most common situation, at some point, you may find yourself needing to make a Subscriber into an Admin on your WordPress site. Maybe you need to…
Read More
How to... / 3 min read
How to... / 3 min read
How to Grant Secure Access to a Not Live WordPress Site During Development
When developing a WordPress site, you often need to collaborate with multiple developers and grant access to the website owner so they can review the progress themselves. However, granting access…
Read More
Industry Insights / 11 min read
Industry Insights / 11 min read
Do You Need a Web Developer to Build a WordPress Site?
If you’re building a WordPress site or considering building one, you wonder whether you need a web developer to create it or you can do it yourself. The answer can…
Read More
How to... / 6 min read
How to... / 6 min read
How to Change the Bottom Padding Dimensions on WordPress Blocks
If you're learning to modify your WordPress site's layouts and design, you may be wondering how to change the bottom padding dimensions of some of its elements. If that's the…
Read More
How to... / 10 min read
How to... / 10 min read
How to Disable the “Similar Posts” Section in WordPress Blogs
If you’re diving deeper into customizing your site, you may be wondering how to disable the “Similar Posts” section that appears on the bottom, sidebar, or footer of your WordPress…
Read More