Yes, it’s possible to embed Systeme.io forms into WordPress.
Systeme.io has built-in features that allow you to export your sales funnel forms to any website, including WordPress sites. However, there are some format issues with how the forms are displayed on WordPress.
Keep reading to learn how to integrate your Systeme.io forms into WordPress and modify them to improve their display.
Key Takeaways
- You can integrate your Systeme.io forms as a script or as HTML code.
- Forms loaded via scripts do not seem to fit WordPress’s default page width in some themes, so you will likely need to edit them in Systeme.io.
- The HTML code provided by Systeme.io is pretty basic, and you may want to modify it to improve the user experience.
How to Embed Systeme.io Forms in WordPress
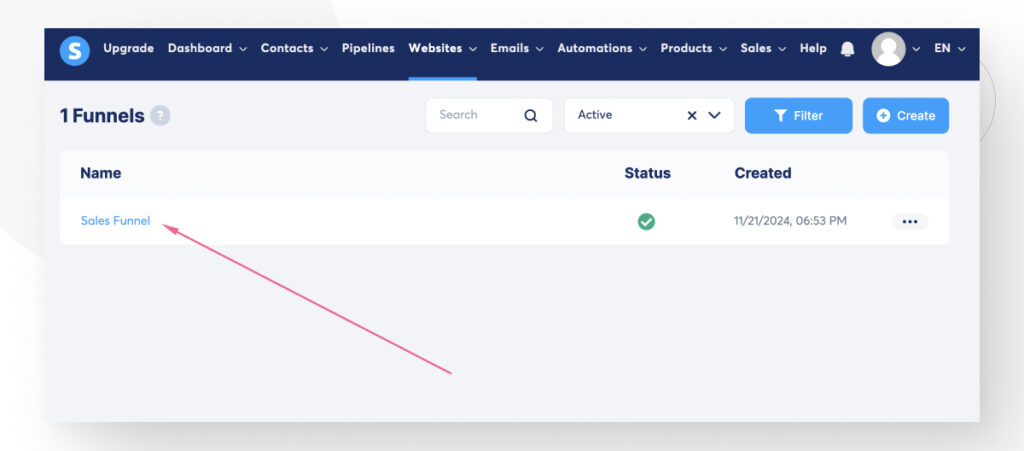
Let’s start by creating an Inline Form in your Systeme.io sales funnel. Go to Website > Sales Funnel and select one of your funnels.
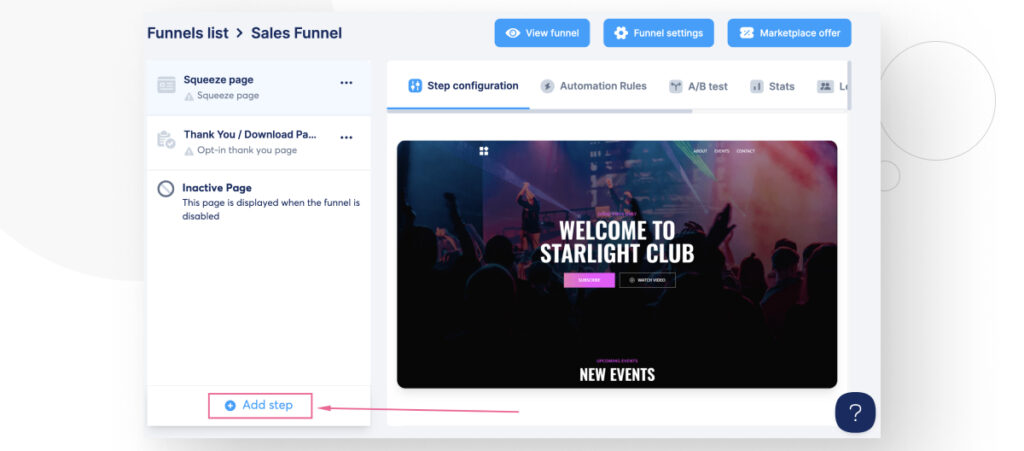
Click on Add Step.
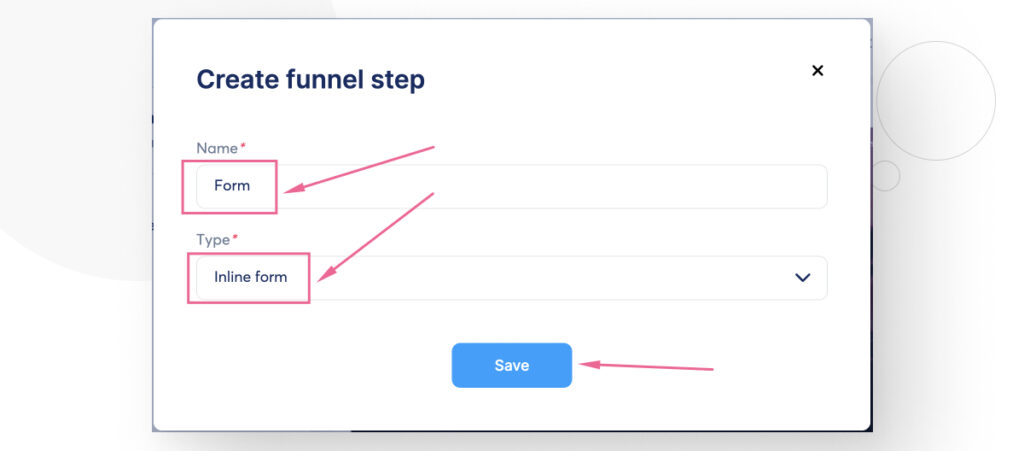
Give your step a name and select Inline Form in the Type field.
Now choose a template for your form. You can edit the template once you choose it.
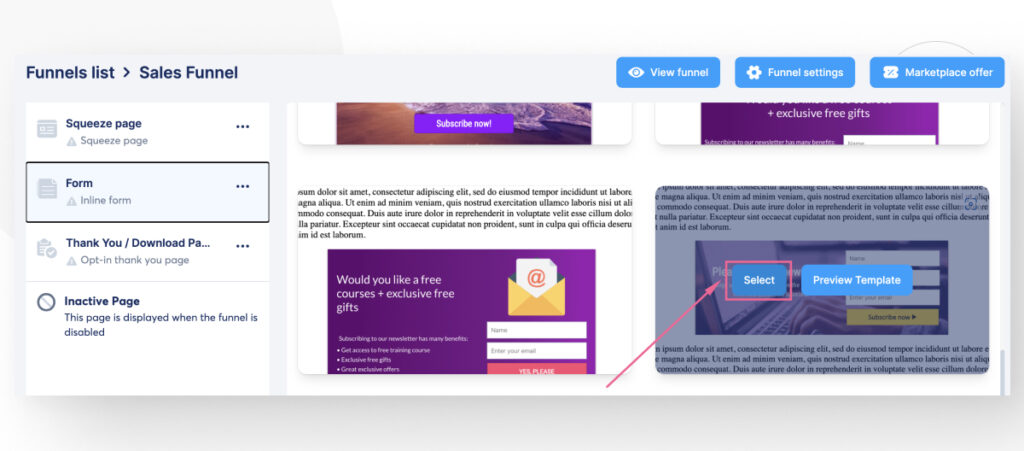
After selecting your form, you have two options to integrate it into your WordPress site:
- Copy your form as a script that will load the form into your site.
- Copy your form as HTML code.
The script will retain the styling for your form, but the distribution of the elements (name, surname, email. etc.) may look out of place compared to the original form.
On the other hand, if you use the HTML code instead, the form will lose all the styling and will simply be a series of input fields for users to fill in.
Here’s the step-by-step for each so you can decide which one you prefer.
How Embed Embed Systeme.io Forms in WordPress as a Script
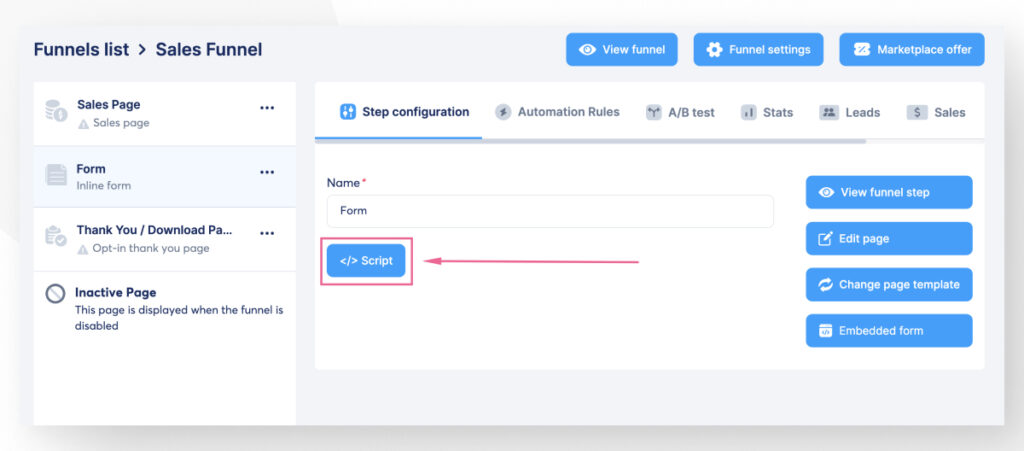
If you want to integrate the form as a script, go to your Systeme.io account. Navigate to your funnel and select the step that contains your inline form.
Click on the </> Script button.
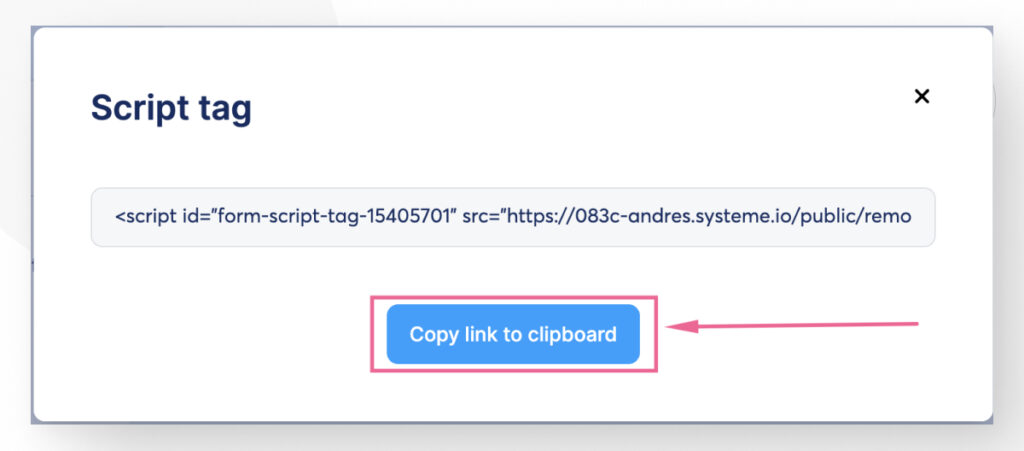
A modal will pop up. Click on Copy link to clipboard.
With the script’s code in your clipboard, go to your WordPress site.
If you want to embed this script into your blog posts or any of your pages, go to Posts > All Posts or Pages > All Pages and edit the post or page where you want to integrate your form.
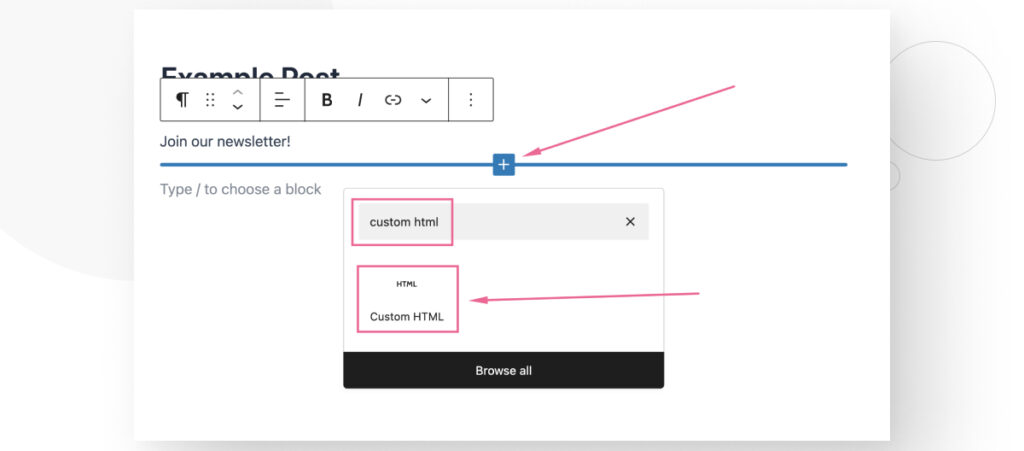
Once in the editor, click the Add block button and search for the Custom HTML block.
Paste the script’s code into the Custom HTML block.
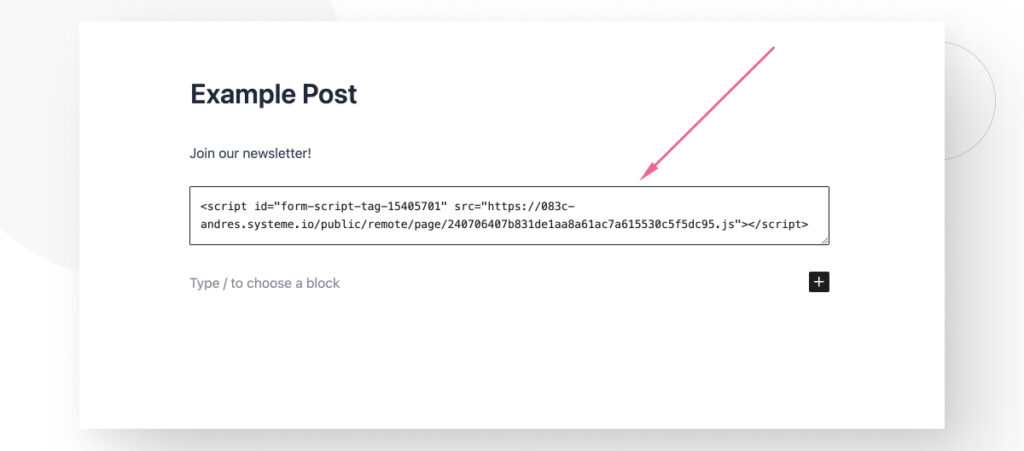
Finally, save the changes to your post and go to your site to check how the form looks. Here’s how it looks for us:
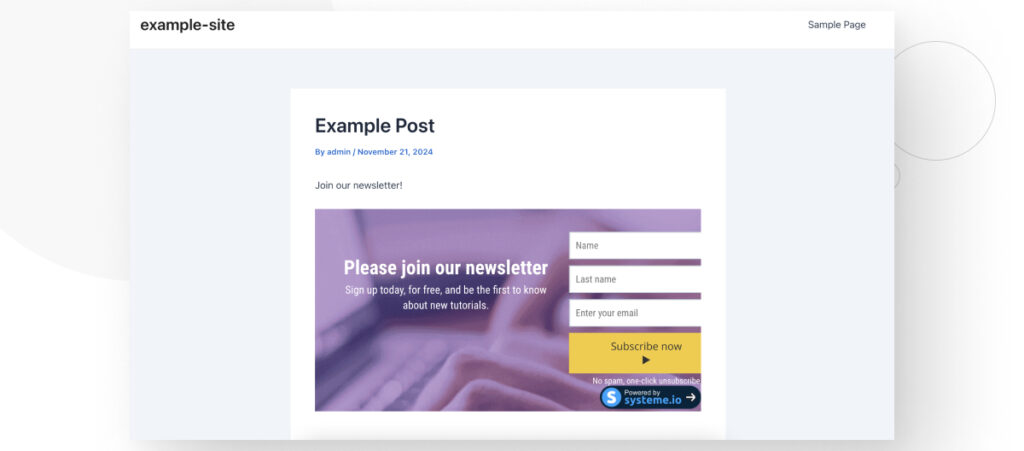
While it works, you’ll notice that the input fields are pushed excessively to the right. If this happens to you, your only option is to modify the form to fit the width of your posts or pages.
How Embed Embed Systeme.io Forms in WordPress as HTML
The process for embedding a Systeme.io form as HTML is similar to the previous method.
On your Systeme.io account, navigate to your funnel and the step that contains your inline form.
Click on the Embedded Form button.
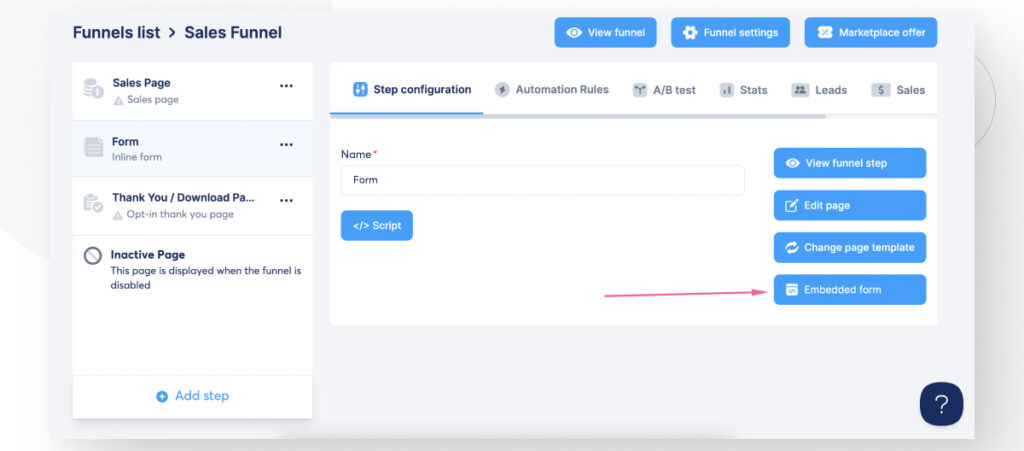
A modal will pop up. Click on the Copy link to clipboard button.
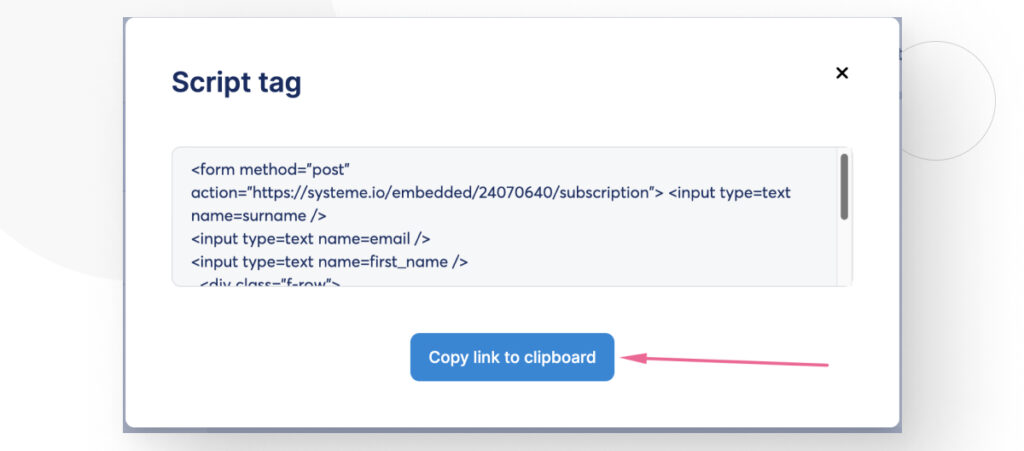
With the copied text on your clipboard, go to the page or post where you want to integrate your form.
Once in the editor, click the Add block button and search for the Custom HTML block.

Paste the HTML code into the Custom HTML block.
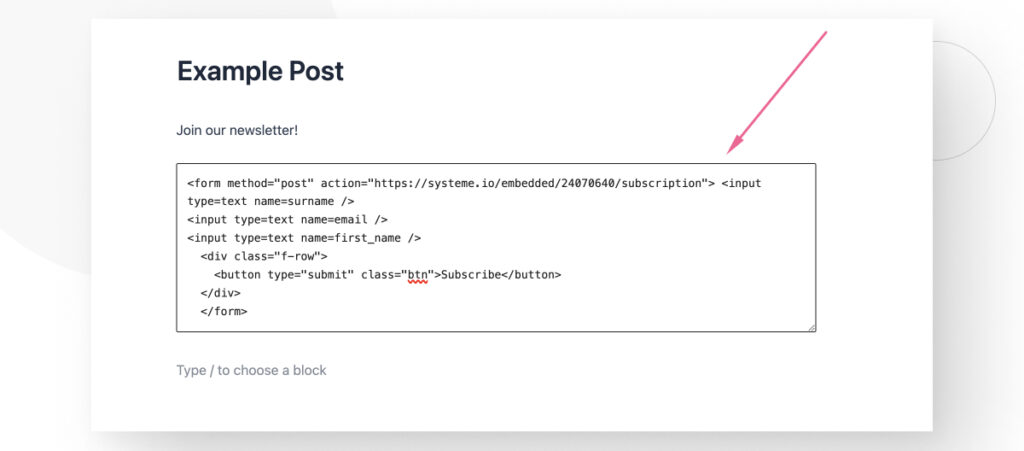
Save the changes to your post and go to your site to check how the form looks. Here’s how it looks for us:
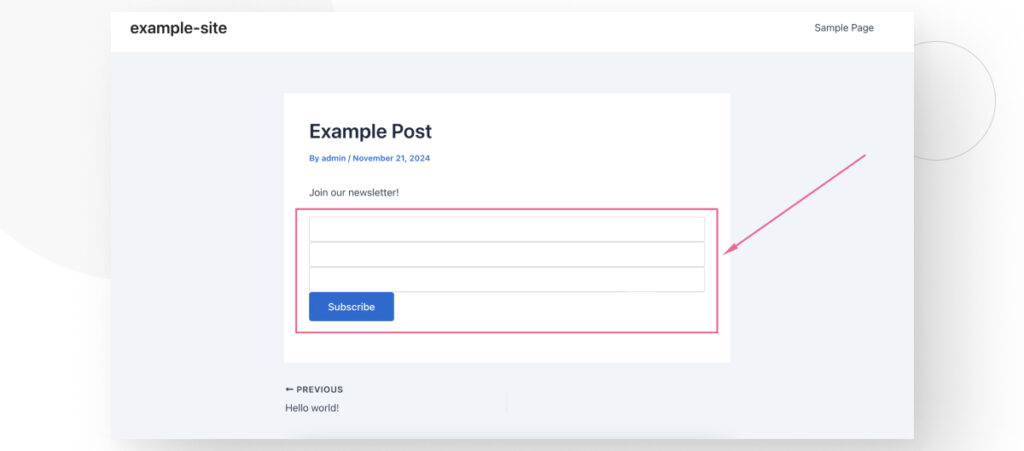
This form achieves its goal and sends any information your users share with you into your Systeme.io sales funnels.
However, it doesn’t look very clear because none of the input boxes are labeled, so users won’t know what to write in each field.
We recommend that you use the HTML code we’ll provide below instead. However, you’ll need to modify the text inside the action field with the URL provided by Systeme.io.
All you need to do is go back to your Systeme.io account, click on Embedded form and copy the URL inside the double quotes in the action field.
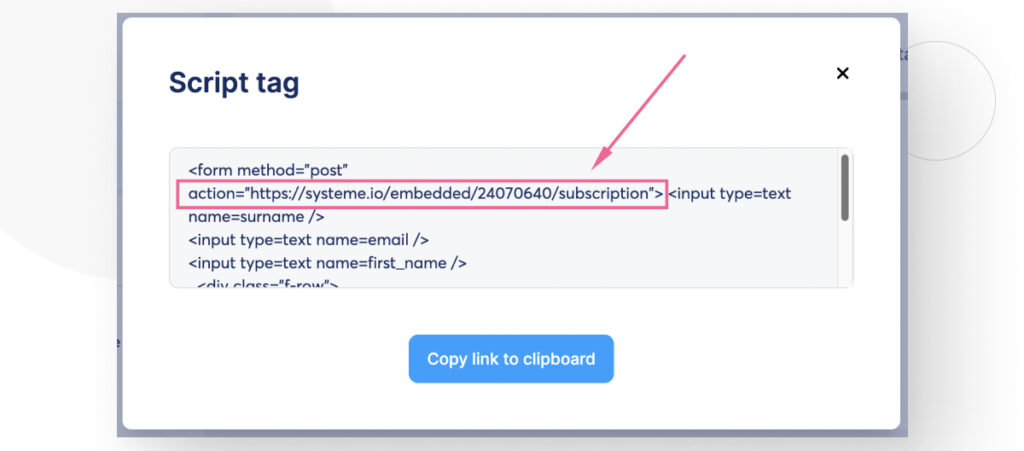
Paste the URL where it says YOUR-URL-GOES-HERE. Finally, copy and paste the entire HTML snippet into your post’s Custom HTML field.
<form method="post" action="YOUR-URL-GOES-HERE">
  <!-- Label and input for First Name -->
  <div class="form-group">
    <label for="first_name">First Name</label>
    <input type="text" id="first_name" name="first_name" placeholder="Enter your first name" required />
  </div>

  <!-- Label and input for Surname -->
  <div class="form-group">
    <label for="surname">Last Name</label>
    <input type="text" id="surname" name="surname" placeholder="Enter your last name" required />
  </div>

  <!-- Label and input for Email -->
  <div class="form-group">
    <label for="email">Email Address</label>
    <input type="email" id="email" name="email" placeholder="Enter your email address" required />
  </div>

  <!-- Submit button -->
  <div class="f-row">
    <button type="submit" class="btn">Subscribe</button>
  </div>
</form>
If you don’t substitute the URL, your user’s data will not reach your Systeme.io sales funnel.
Here’s how the form looks with the provided HTML:
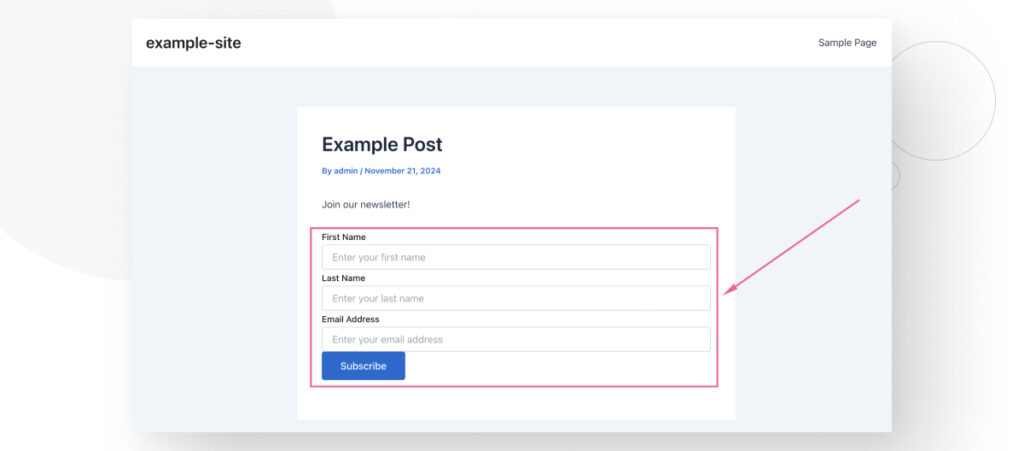
It looks much better and clearer for your users.
Integrating Systeme.io Forms Into WordPress Is Easy
As you can see, the steps to integrating your Systeme.io forms into WordPress are very straightforward, and you can complete the process in a few minutes.
Hopefully, this guide helped you integrate forms into your WordPress site, and you can use them to grow your audience, increase sales, get more traffic, and more.
If you found this post useful, read our blog and developer resources for more insights and guides!
Related Articles

How to... / 8 min read
How to... / 8 min read
How to Display a Random Image on WordPress
Needing to learn how to display a random image on WordPress is not very common, but there are all sorts of websites out there. Maybe you run a school’s website…
Read More
How to... / 8 min read
How to... / 8 min read
3 Ways to Allow Users to Change Text Size in WordPress
WordPress is very flexible, but it does not come with a default feature to allow users to change the text size. Even if your site has a text size that…
Read More
Behind the Canvas / 3 min read
Behind the Canvas / 3 min read
My Experience Improving Navbar Accessibility in a WordPress Project
Web accessibility is key in any WordPress development project. Navbar accessibility, in particular, can be a defining factor in helping people of different capabilities navigate sites effectively with only their…
Read More
Behind the Canvas / 4 min read
Behind the Canvas / 4 min read
Best Practices for Fetching Data in Next.js
Efficient data fetching is key to creating a smooth and fast user experience in Next.js apps. In this article, we’ll explore how our development team learned to optimize Next.js data…
Read More
Behind the Canvas / 5 min read
Behind the Canvas / 5 min read
How Interactive Animations Improve the User Experience in a WordPress Site Using Framer Motion and React
Interactive animations have become more prominent in website development in the past years, including WordPress environments. Tools like GSAP, React Spring, and Framer Motion help developers create more interactive and…
Read More
