If you’re starting to explore WordPress’s many styling options, you may be wondering how to add text borders to your WordPress site.
Depending on what you’re trying to do, adding borders can improve your content’s presentation and make some important elements stand out, so it makes sense that you’d like to use them.
Luckily, adding text borders in WordPress is very easy. If you want your text to have borders like the ones in this paragraph, keep reading to learn how to add them.
Key Takeaways
- You can add borders to your WordPress site by using the Gutenberg editor’s built-in border settings.
- Alternatively, you can use custom CSS to add borders to your text. You can do it via your theme’s stylesheet (block themes) or the Theme Customizer feature (classic themes).
2 Methods to Add Text Borders in WordPress
There are many methods to add text borders in WordPress. The most straightforward is using Gutenberg’s built-in block styling options, but you can also use CSS if you prefer.
Let’s explore both options.
Method 1: Add Text Borders With the Paragraph Block’s Settings
The easiest way to add borders to your WordPress text is by using WordPress’s built-in styling settings.
Click on any paragraph or heading to which you want to add a border. Scroll down the block settings sidebar until you see the Border section. Click on the + (Border Options) button and click Border on the small menu that appears right after.
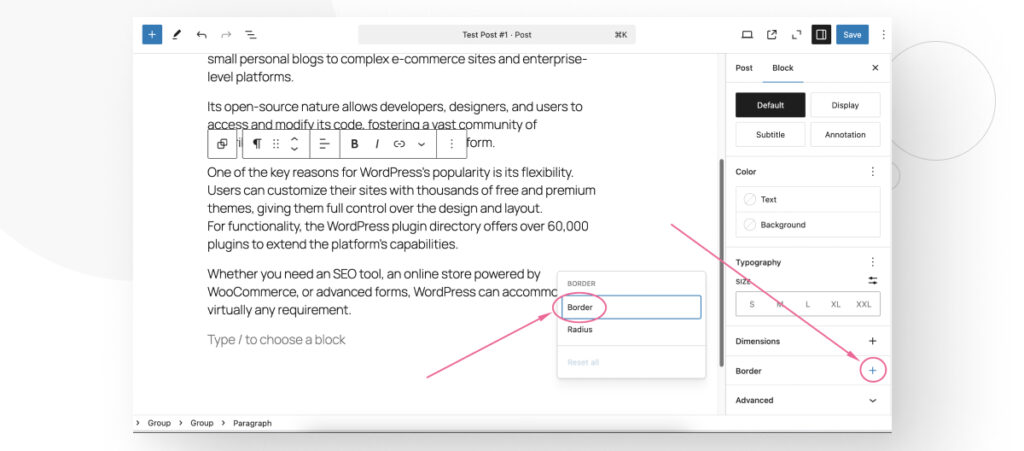
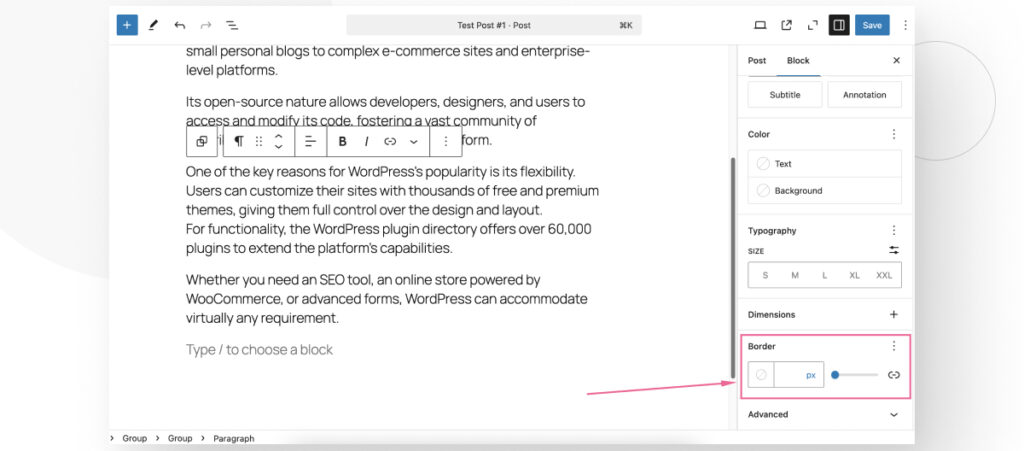
Now you can use a slider to determine the size of the border or directly input the number of pixels you want the border to have. Click Save at the top to save your changes.
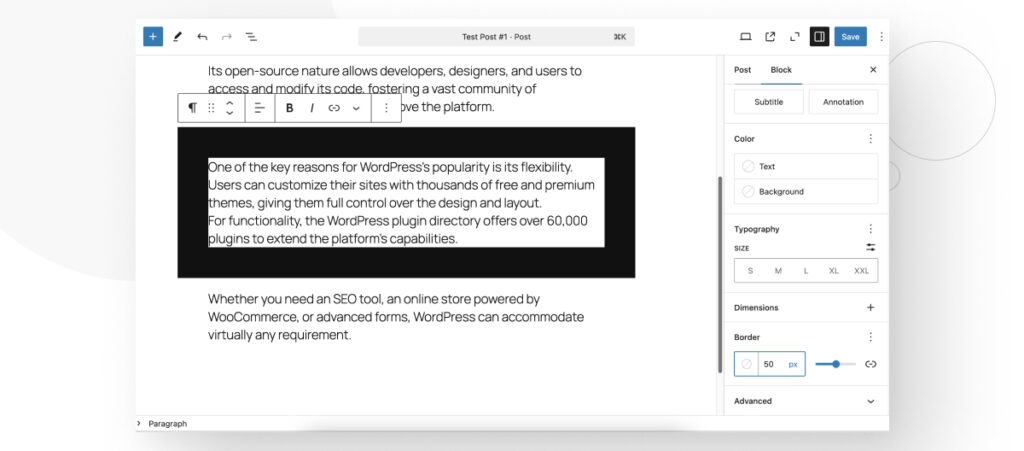
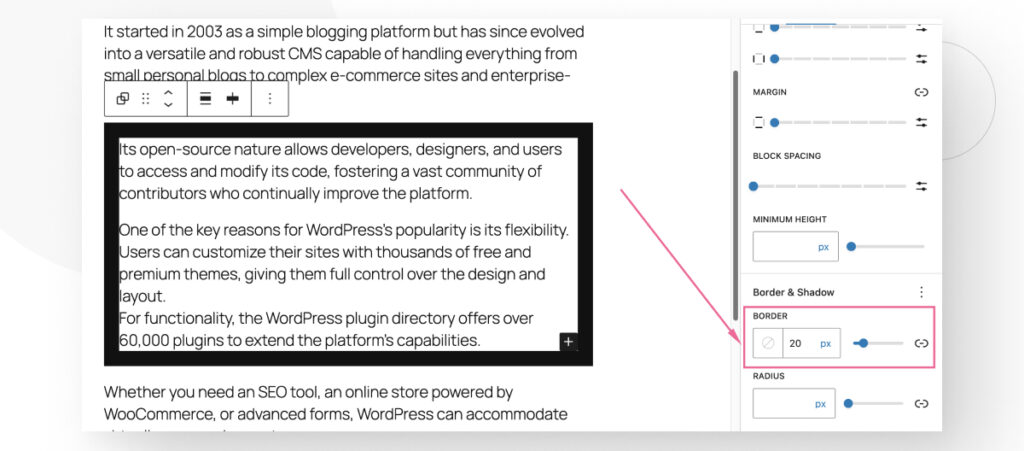
For example, this is how your paragraph block will look with a 50px border.
Give Each Side Its Own Independent Border (Optional)
You can also make each of your block’s borders independent of one another by clicking the Unlink sides button, represented with a hyperlink icon.
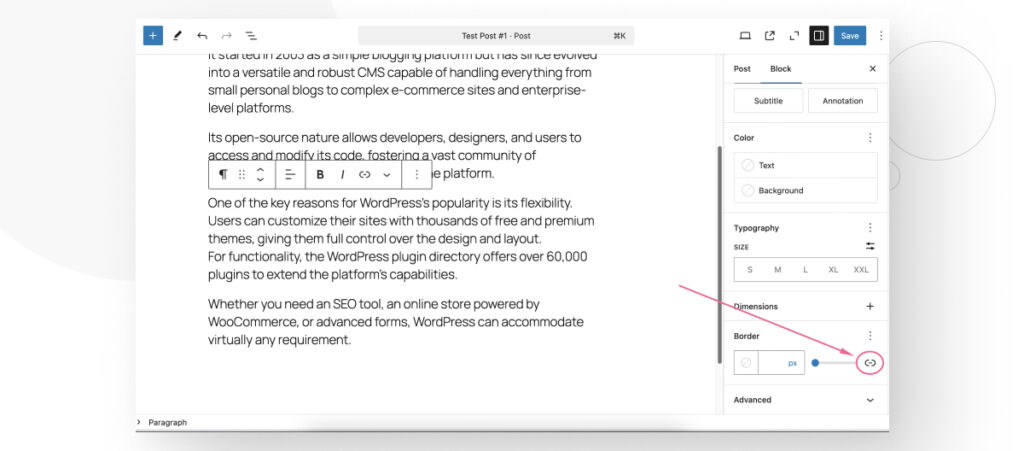
After unlinking the sides, you can give each side its own independent border.
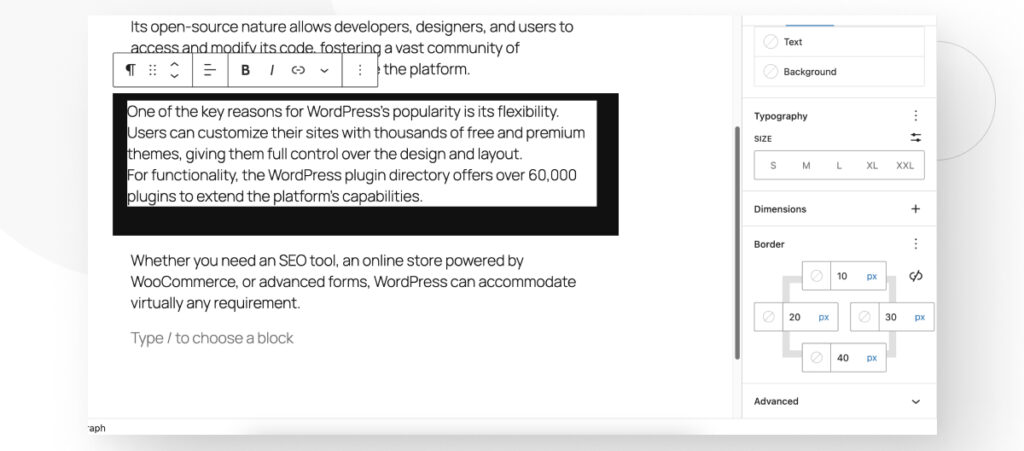
Use the Same Border for Multiple Text Blocks (Optional)
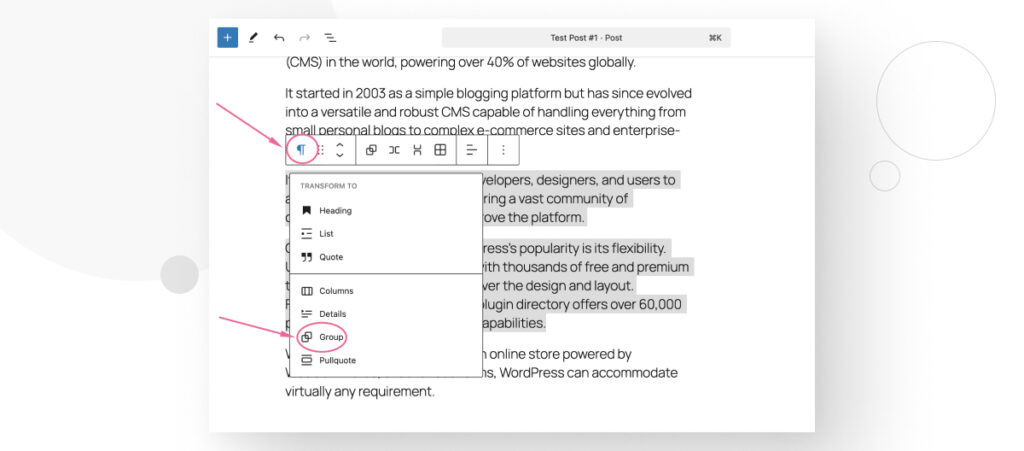
Finally, you can also group together multiple paragraphs and use the same border for all of them.
To do that, highlight all the paragraphs you want to group together (they have to be contiguous to one another), click on the Paragraph icon, and then click on Group.
After grouping together 2 or more paragraphs, click on Styles in the right-hand block settings sidebar.
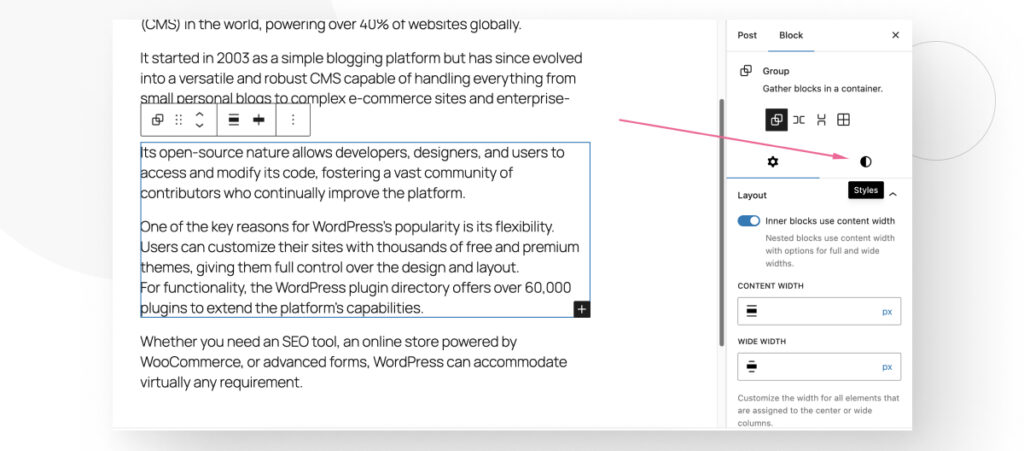
Scroll down until you see the Border & Radius section. Use the slider to determine the size of the border or enter a specific number of pixels.
Method 2: Add Text Borders With Custom CSS
While the first method should be more than enough, and there should be no reason to need another one, you can always count on CSS to help you with any website styling needs.
As a result, we’re adding it for the sake of completeness and because it may help you learn more about controlling your site’s styles.
Step 1: Assign a Unique HTML Class to Your Text
Classes are HTML attributes used by CSS and JavaScript to access and modify HTML elements of that class.
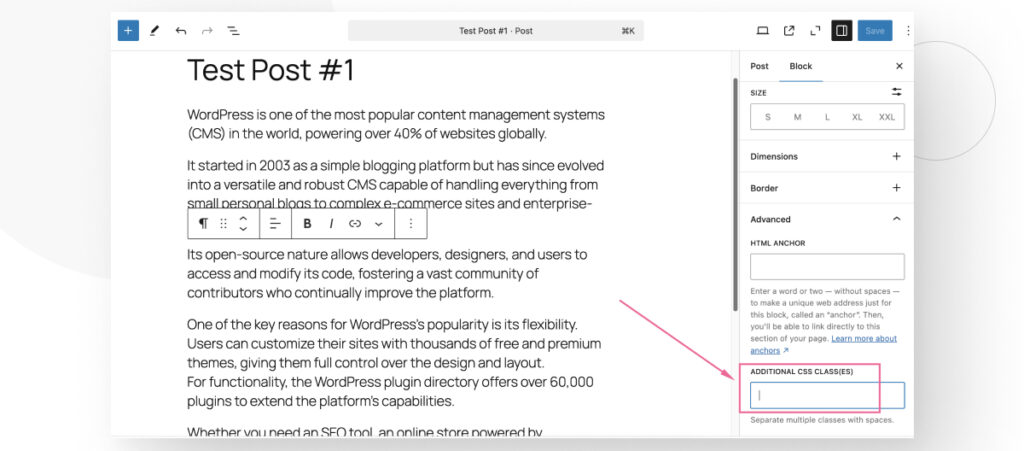
To assign a WordPress block a unique HTML class, go to the page or post on your site where you want to add a border to your text. Click on the block you want to style and look for the Advanced section on the block settings sidebar.
Use Additional CSS Class(es) to add a class that is unique to your entire site, like special-paragraph. Preferably, use dashes to separate words. Click Save at the top to save changes.
With the class in place, the process to apply custom CSS to it depends on your theme. More specifically, it depends on whether you can access the Appearance > Customize feature on your WordPress admin.
Classic themes allow you to use this feature (the Theme Customizer), while block themes do not.
Let’s explore how to use this feature to add custom CSS on classic themes and the alternatives if you have a block theme.
Step 2 (Classic Themes): Add Custom CSS With the Theme Customizer
Go to Appearance > Customize > Additional CSS.
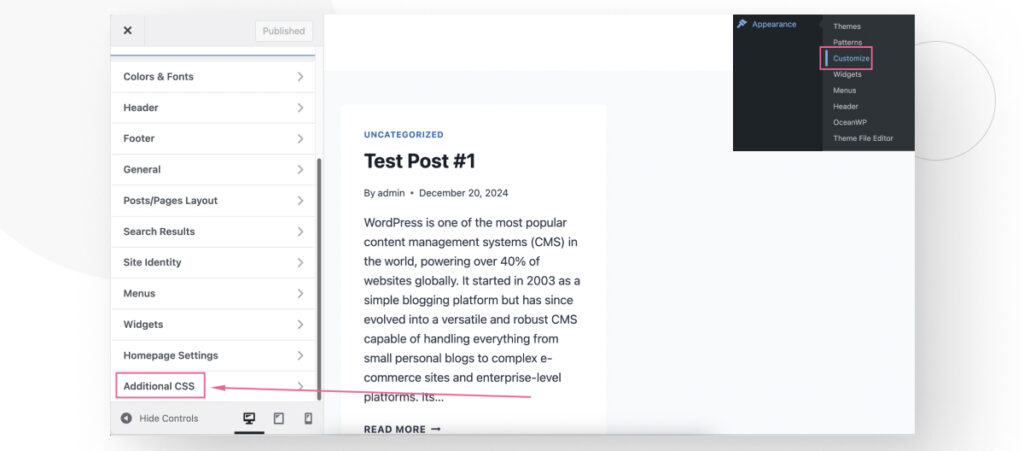
In the Additional CSS screen, add the following CSS snippet. Remember to insert the class you assigned to your block and modify the specific style to whatever you need:
.special-paragraph {
  border: 5px solid #000;
}
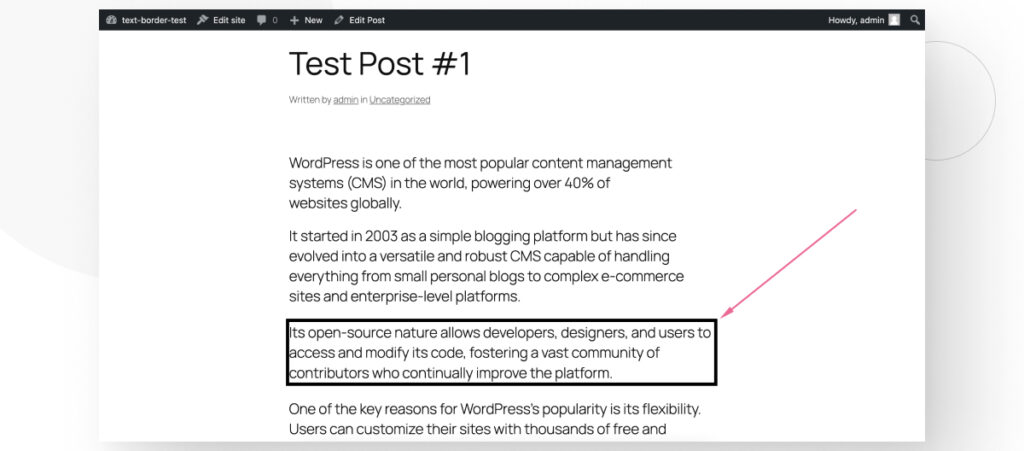
This CSS style will add a 5-pixel wide, solid, black border to the paragraph you assigned the special-paragraph class to.
When you add styles via the Theme Customizer, you can’t preview them in the Gutenberg editor, so go to your post and check the results.
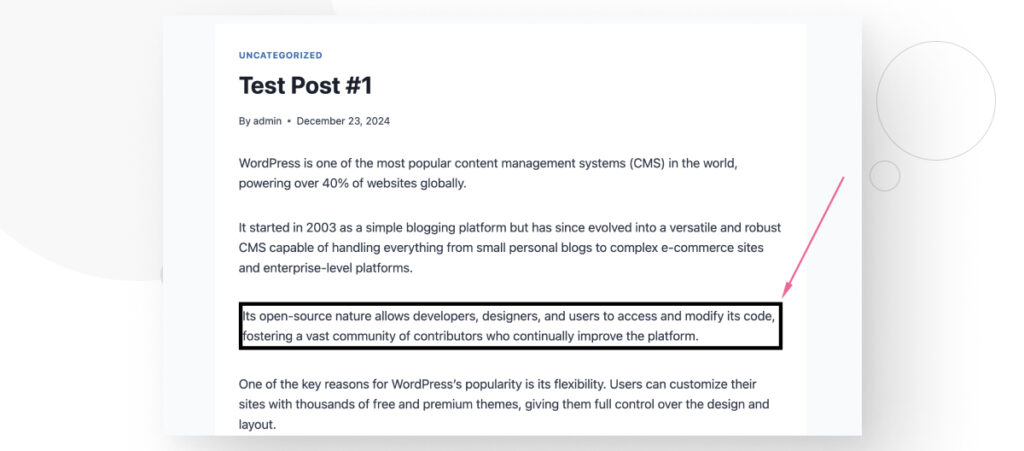
As you can see, the border style was applied correctly!
Step 2 (Block Themes): Add Custom CSS by Editing Stylesheets
With the class name in place, you have 3 options to add custom CSS:
- Navigate through your WordPress files using a hosting control panel like cPanel, an FTP client like FileZilla, or a local environment. The location of the file you have to edit is wp-content/themes/your-active-theme/style.css. It could also be styles.css.
- Use a code snippets plugin like WPCode and Code Snippets to add custom CSS without navigating core files. This method has the benefit of retaining custom styles if you ever update your theme.
- Create a child theme and add custom CSS to it. This method also retains custom CSS after updating your theme.
Regardless of the method, you need to add the following custom CSS snippet. Replace the class with the one you assigned to your block and modify the border’s thickness and other parameters to whatever you need:
.special-paragraph {
  border: 5px solid #000;
}
Save the style.css or styles.css file, and the changes should be reflected on your site immediately. Check back in the post where you added the custom HTML class to see the results.
Add Text Borders to Control Your WordPress Site’s Styling
Adding text borders to your site is not hard at all. WordPress’s Gutenberg editor has built-in styling options that allow you to add borders in less than a minute. However, you can also use CSS if you prefer.
In this article, we provided the steps to perform both, so hopefully you found it useful and can take control of your site’s styling with this knowledge.
If you found this post useful, read our blog and developer resources for more insights and guides!
Related Articles

Web Design / 6 min read
Web Design / 6 min read
How to convert Sketch to WordPress?
Sketch is a vector graphics editing tool used for prototyping web and desktop apps. Let’s explore 5 ways to convert your Sketch designs into WordPress websites.
Read More
Web Design / 5 min read
Web Design / 5 min read
Website Color Theory: How to Choose Website Colors Correctly
Did you know colors have a huge impact on your website’s success? Find out how to choose the best color palettes for your website.
Read More
Web Design / 5 min read
Web Design / 5 min read
UX/UI Design — What’s the Difference between UX and UI?
What is UI? What is UX? Similar but not the same. Learn the difference between the UX and UI and how they work together in building your website or app.
Read More