How to Change the Size of Your Featured Image in WordPress

The size of the featured image in WordPress is an important factor in the look and feel of your posts, pages, and custom post types. As a result, you may be wondering how to edit the size of your featured images to better match your vision for your site.
Let’s explore everything you need to know about the size of your featured images and 3 methods you can use to change it.
Key Takeaways
- In WordPress, the featured image represents the content of your posts and pages.
- The size of the featured image is determined depending on your theme’s settings.
- You can change the size of the featured image in WordPress by using the Site Editor or the Theme Customizer or cropping the image manually in the Media Library.
What Is the Featured Image Size in WordPress?
The featured image in WordPress is the image that appears at the top of a post, page, or custom post type across your website. Here’s an example of a featured image from our blog.
In addition to appearing at the top of your posts, pages, and custom post types, featured images may also be used as thumbnails on the homepage, blog archives, or social media shares of your content.
In fact, when you upload a featured image to WordPress, your site will automatically generate multiple sizes of that image while also retaining the original size. These new sizes include:
- Thumbnail: Usually 150×150 pixels, used for small previews.
- Medium: Often set around 300×300 pixels, used for smaller displays within the content.
- Large: Typically 1024×1024 pixels, used for bigger image displays.
However, the actual size that gets displayed depends on your theme’s settings. Themes can define specific dimensions for featured images to ensure they look consistent across your site.
For example, if your theme specifies that featured images should be 1200×600 pixels, WordPress will try to crop or resize your image to fit those dimensions.
To actually know the size of your current featured image, you can use your browser’s Inspect feature to explore the image’s HTML, which will contain the dimensions. Simply right-click on your featured image and select Inspect.
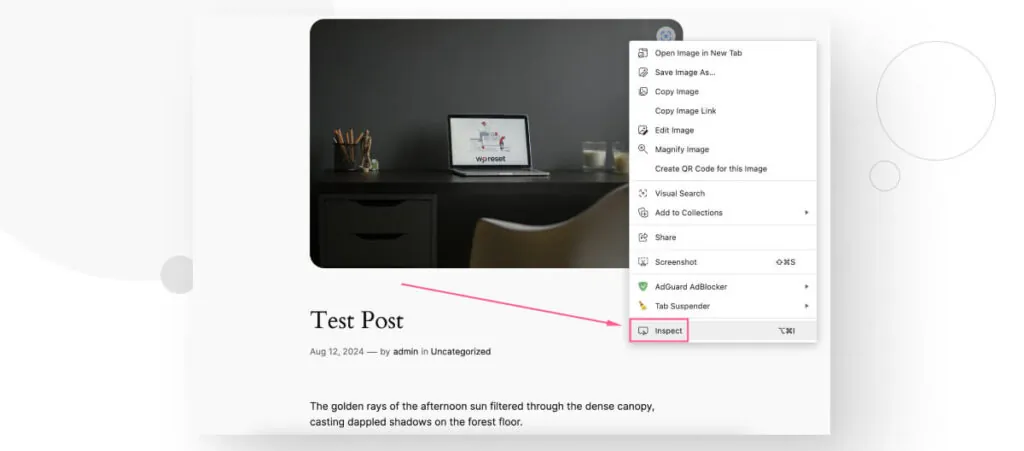
A panel with all the HTML that makes up the page will appear, highlighting the element you’re inspecting, which in this case is the featured image.
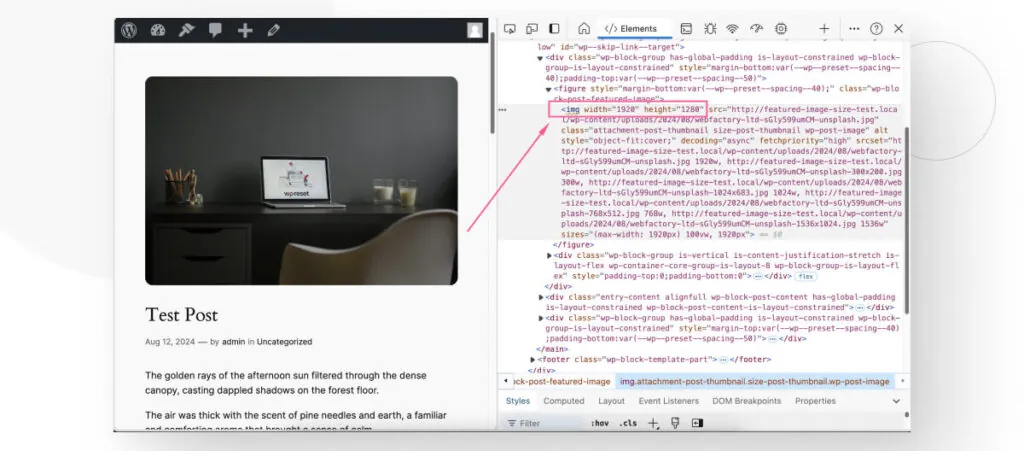
As you can see, our site displays featured images with a width of 1920 pixels and a height of 1280 pixels.
With this in mind, let’s explore how to edit the size of your featured images.
How to Change the Size of the Thumbnail, Medium, and Large Versions of Your Featured Image?
As mentioned, once you upload your featured image (or any image), WordPress creates multiple copies of different sizes, which it uses in blog archives and other places throughout your site.
Before getting into the various methods for editing your featured image display size, let’s quickly explore how to change these additional sizes that WordPress creates. All you have to do is go to Media > Settings.
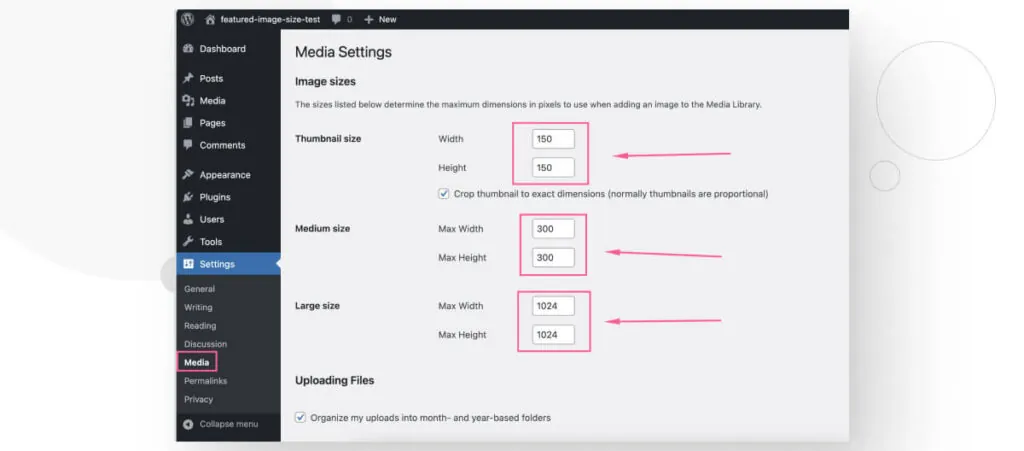
Editing these text boxes will allow you to customize the sizes of the various copies WordPress creates when you upload any image, including your featured image. After making changes, scroll down and click on Save Changes.
How to Change the Size of the Featured Image WordPress?
Now that we know the featured image size and how your theme can modify it, let’s explore a few methods for modifying it in WordPress.
Note: Make a backup before moving forward. You should make a backup every time you plan to make changes affecting your entire site. With a backup, you’ll have a checkpoint you can return to if something doesn’t work out as expected.
Method #1: Use the Site Editor (Only for Block Themes)
This method will work for you if you’re using a default WordPress block theme like Twenty Twenty-Four or Twenty Twenty-Three or you’re using one of the many third-party block themes in the WordPress theme directory.
Once you’ve set a featured image for your post, you’ll have to edit the template you’re currently using so that every piece of content of this type has a new featured image size.
For example, if you want to edit the size of featured images in blog posts, you’d have to edit the Single Posts template, and if you want to edit the size of featured images in pages, you’d have to edit the Pages template.
Let’s walk you through the steps:
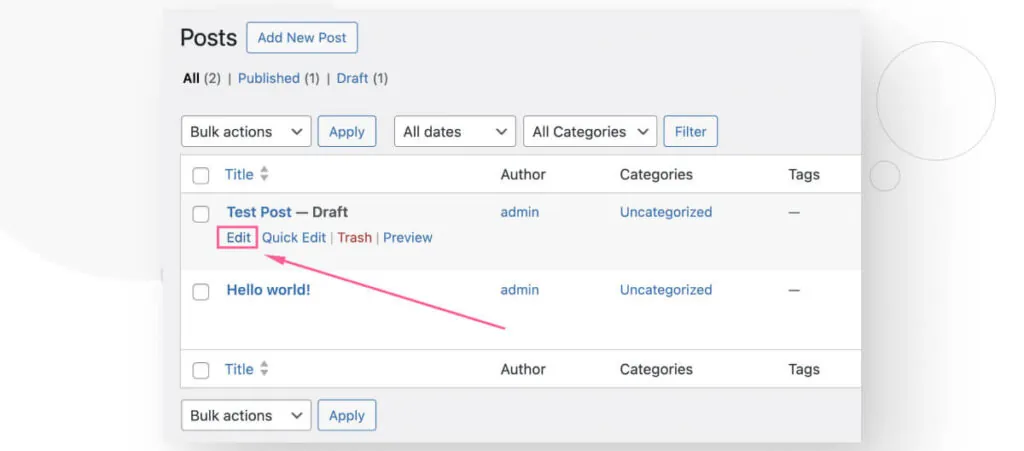
Step #1: Go to the Page or Post
Go to the type of content (page or post) for which you want to edit featured images. Simply go to Posts > All Posts or Pages > All Pages and click on Edit on any page or post.
Step #2: Identify the Template
Every post and page on your site uses a template. A template is a predefined layout or design that controls the appearance and organization of content on your website’s pages, posts, or other elements.
You can quickly determine your post or page’s template from the Gutenberg editor. Once you’re editing your page or post, ensure the right-hand sidebar is on the Post or Page tab and seek the Template element on the list.
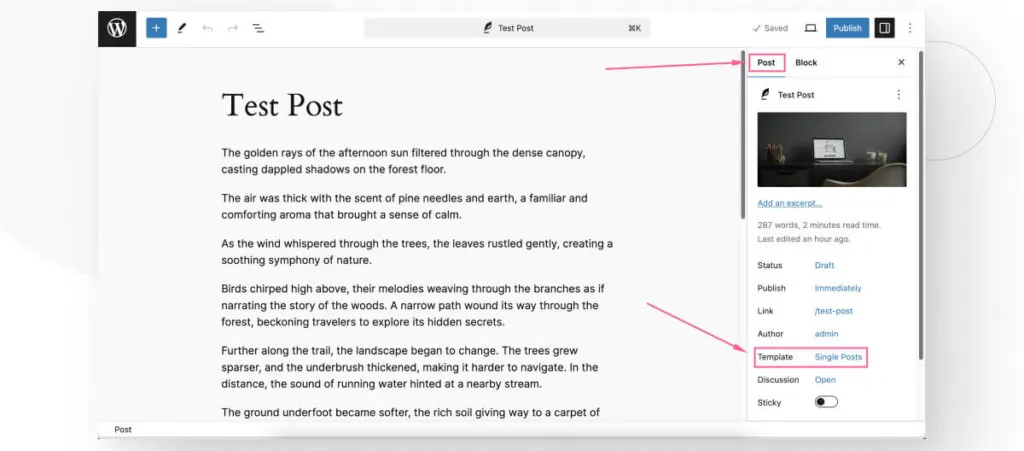
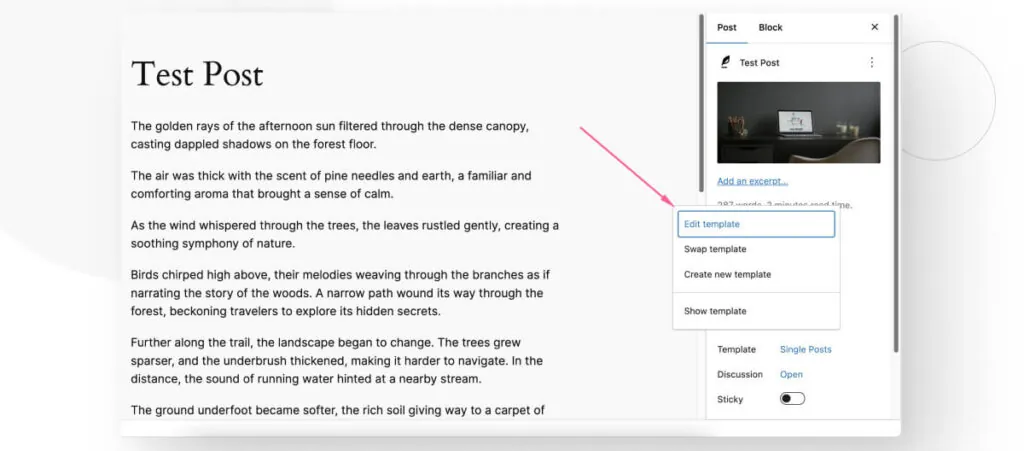
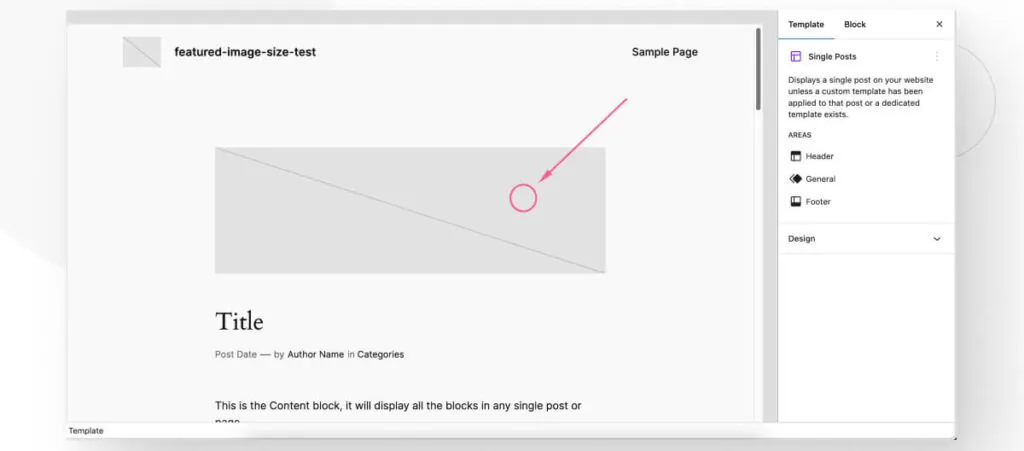
Since we’re working on a post, you’ll see the Single Posts template. Click on it and then click on Edit Template.
Step #3: Edit the Size of the Featured Image
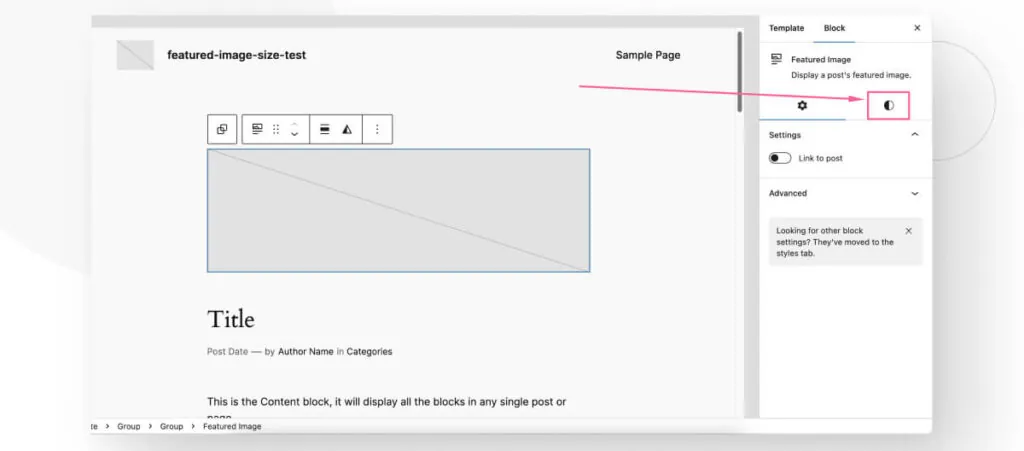
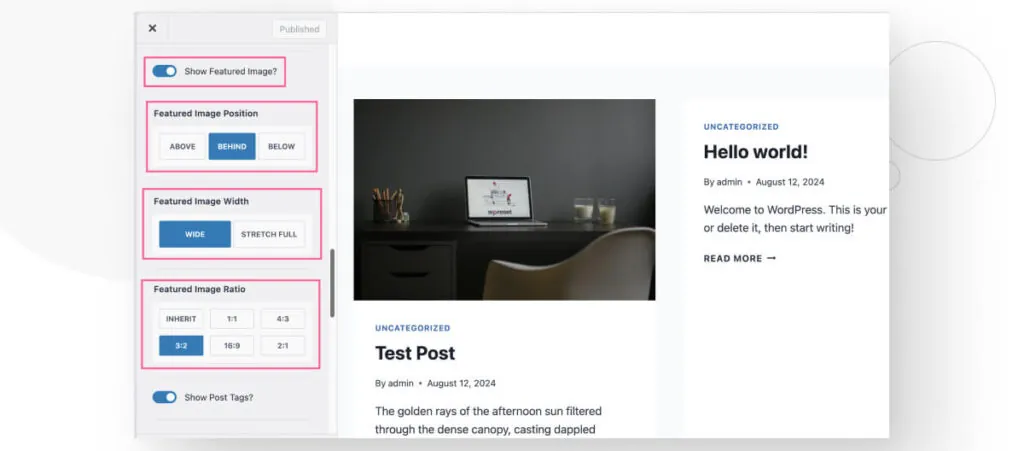
Now, you’re editing the template that controls the layout of your post or page. First, click on the Featured Image block.
Now, click on the Styles tab, which is the black-and-white circle on the right-hand sidebar.
Scroll down until you see the Aspect Ratio, Height, and Width settings.
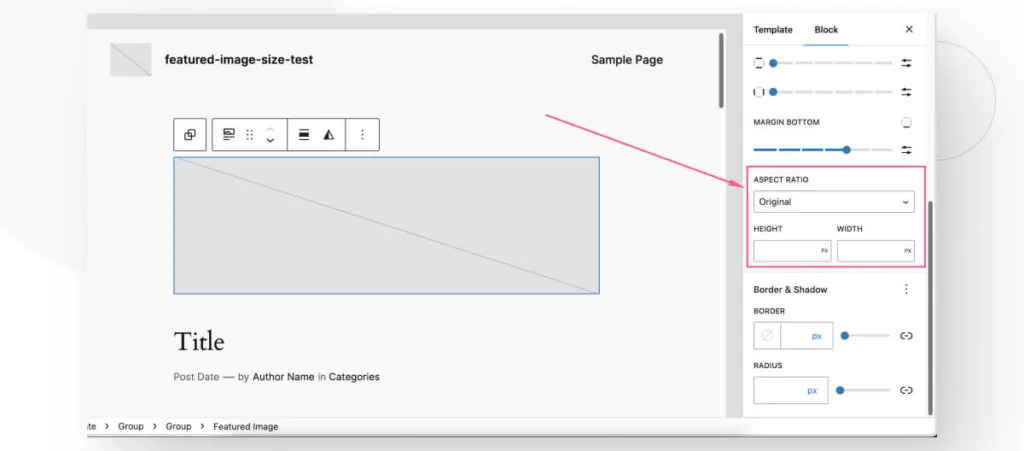
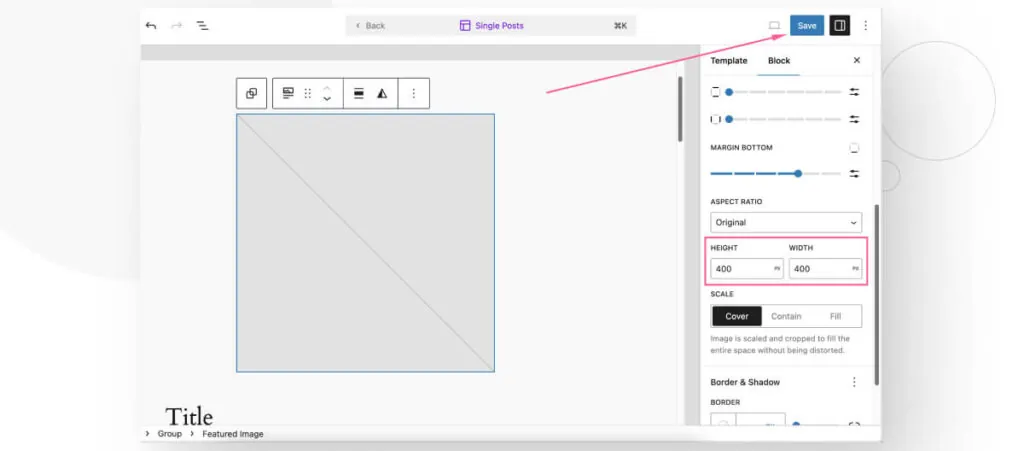
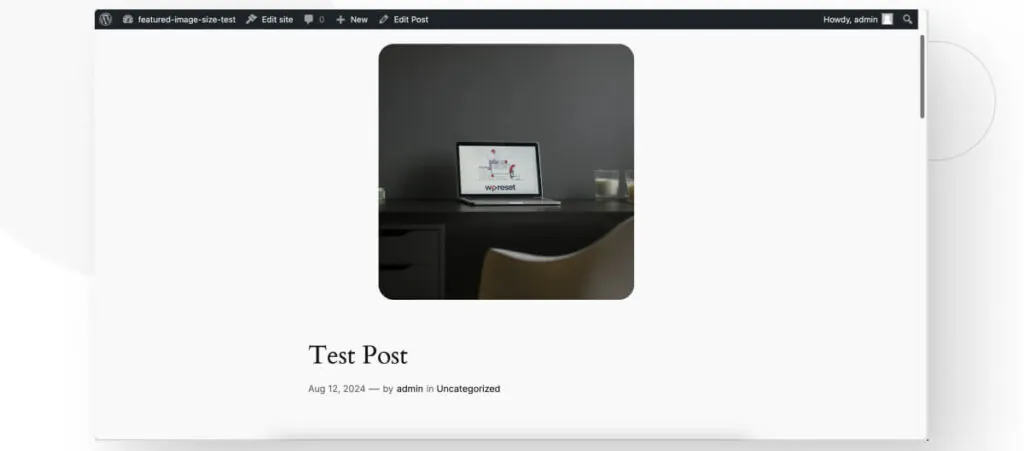
You can change any of these settings to modify the HTML container that will display your featured image on your live site. For example, let’s edit the Height and Width to make every featured image using this template become a 400 x 400 image. Remember to click on Save when editing templates.
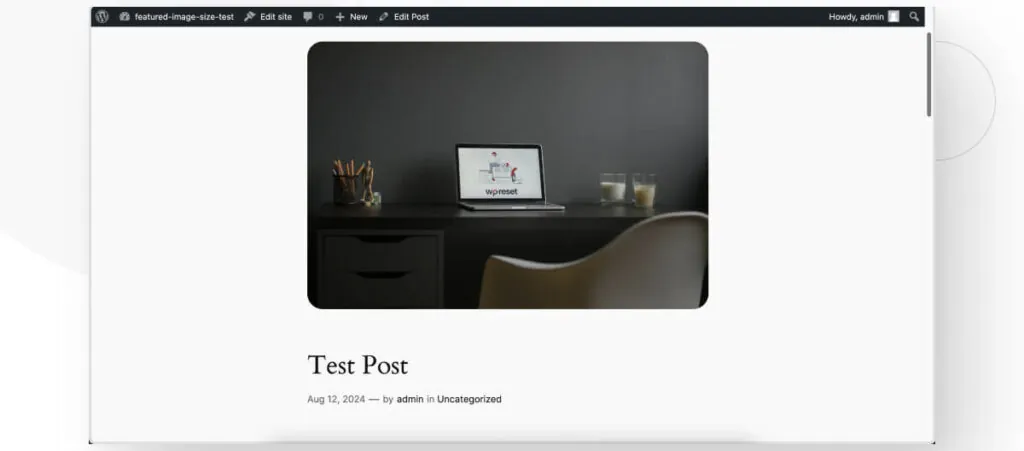
Here’s how the featured image looks before the change.
And here’s how it looks after changing the size to 400 x 400.
You can repeat this process for every template you’re interested in changing.
Method #2: Use the Theme Customizer
This method works for classic themes like Astra, Hello, and Kadence. However, keep in mind that not every theme allows you to change featured image sizes from the Customizer. So, you’ll have to check for yourself whether your theme allows you to edit featured image sizes.
In this case, we’re using the free Kadence theme.
Go to Appearance > Customize from the admin dashboard. You’ll be in Theme Customizer, a feature that allows you to preview and change your site’s theme settings in real time.
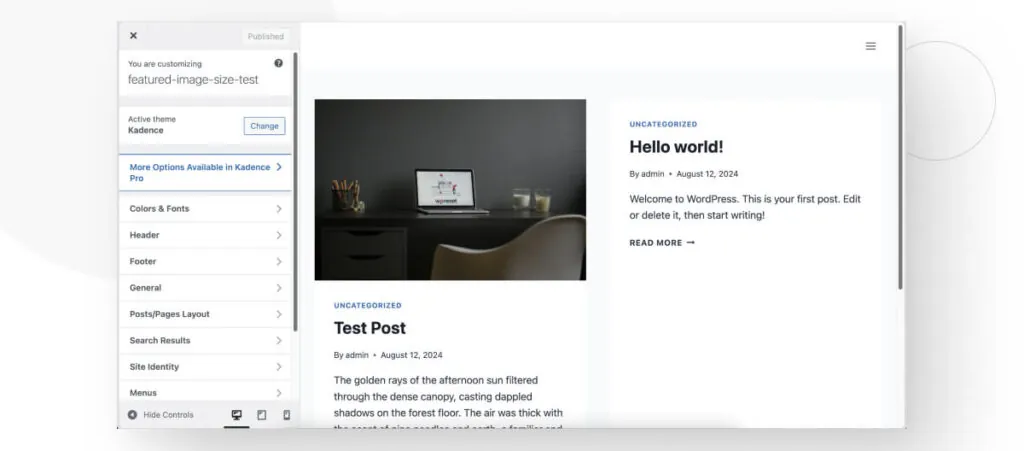
Every theme distributes its settings in unique ways, so you’ll have to go through various screens until you find the featured image settings. In the Kadence theme, you have to go to Posts/Pages Layout.
You’ll be met with various layouts to edit, including Pages, Posts, and Archive Pages. In this case, we’ll edit the Single Post Layout, which controls the layout for blog posts.
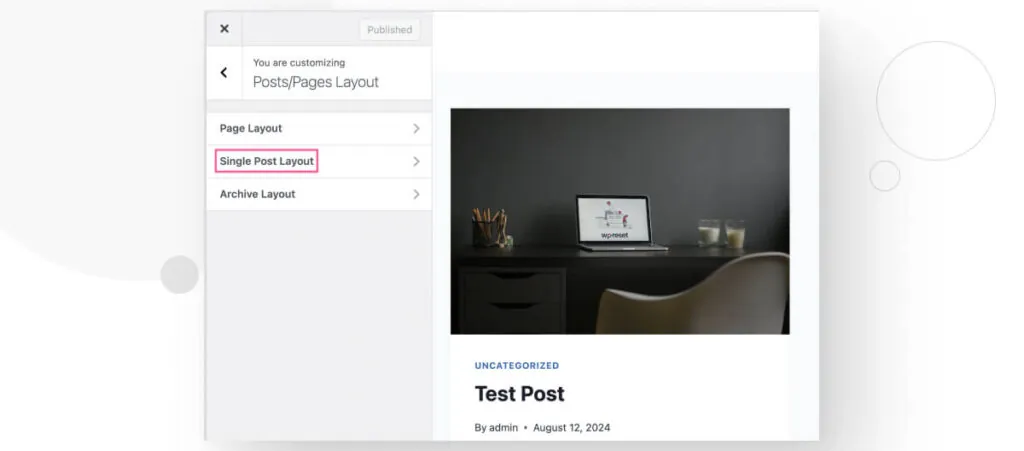
On the following screen, stay on the General tab and scroll down until you find settings related to featured images. In the case of the Kadence theme, you have the option to show or hide the featured image, change its width, and change its size ratio.
Unfortunately, Kadence doesn’t have an option to edit width and height to a specific amount of pixels. This is a limitation that you’ll also find in other themes, so this method relies on the amount of options the theme developer allows you to tinker with.
Some themes provide more options than others, and some themes (like Astra) only allow you to customize the featured image’s size in the theme’s premium version.
Method #3: Crop it Manually on the Gutenberg Editor
This method is not very recommended, but it is still available. The Media Library contains a feature to edit uploaded images, allowing you to crop featured images to fit specific dimensions.
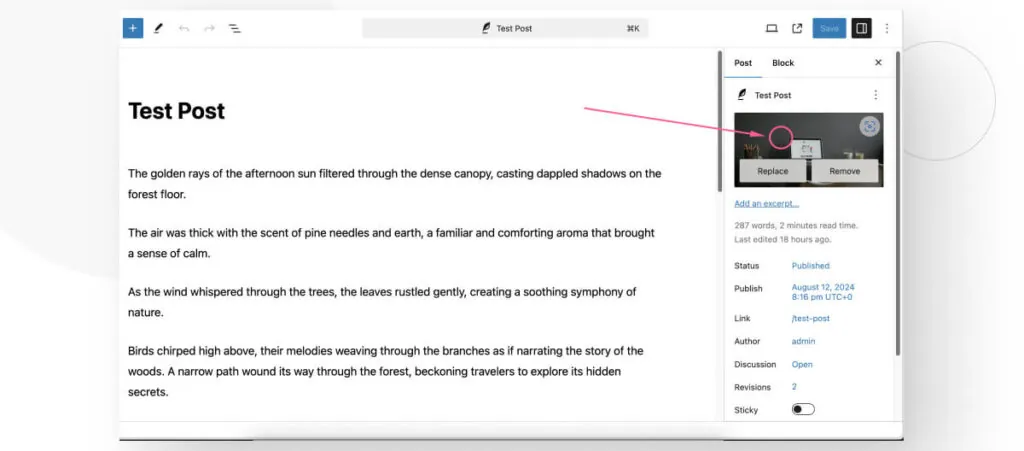
First, go to the post or page whose featured image you want to edit and click on it. Don’t click on Replace or Remove.
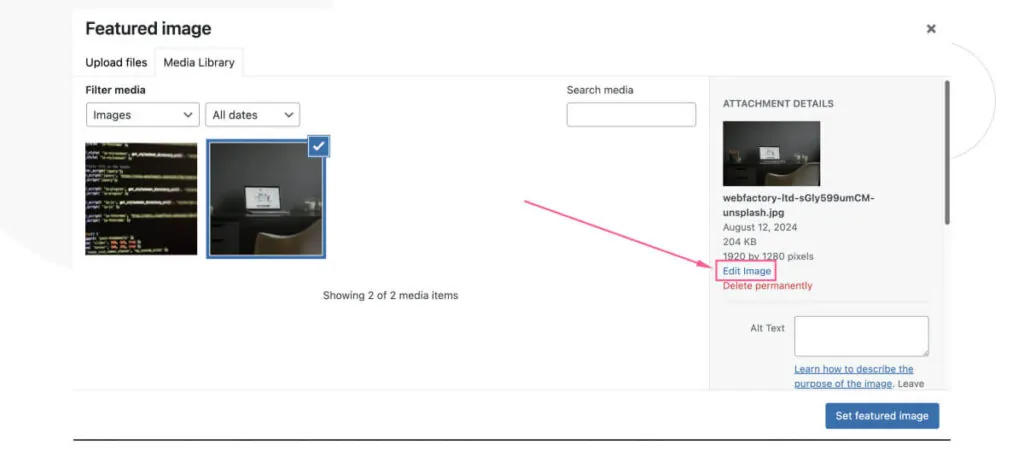
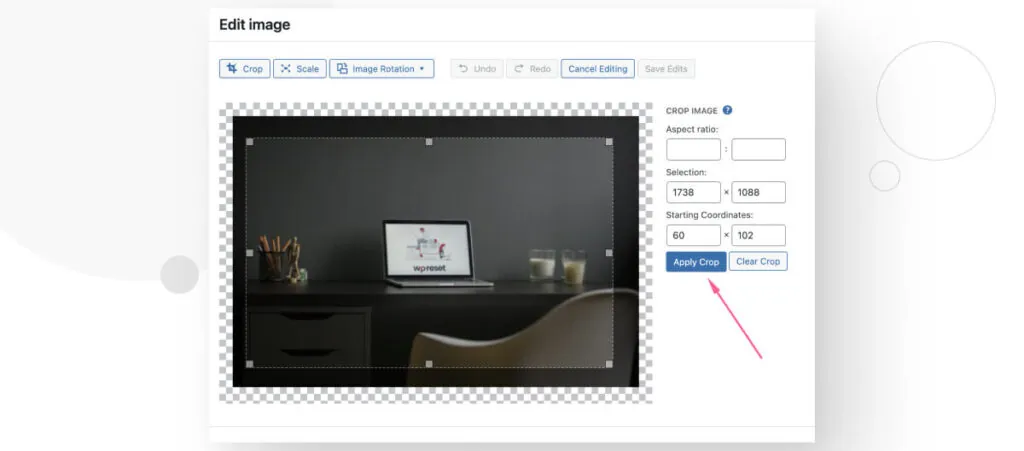
On the following screen, click on Edit Image.
Click on Crop.
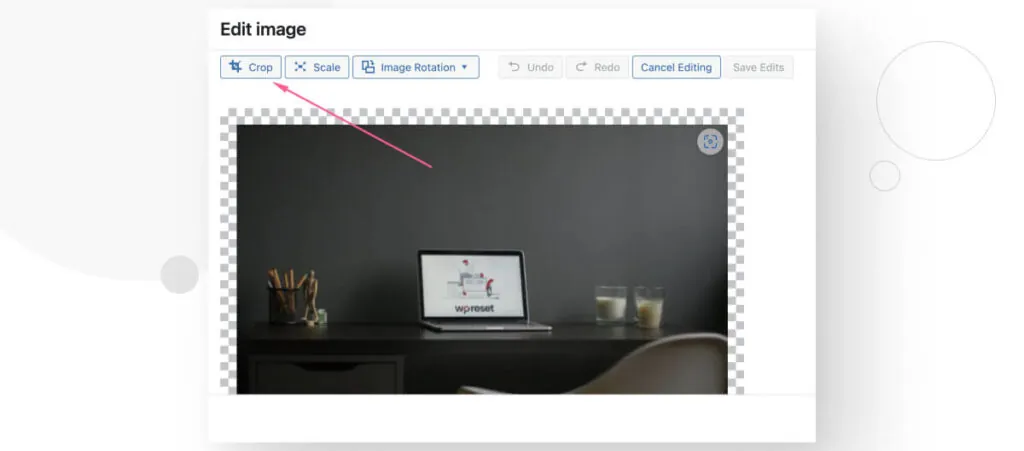
Finally, crop the image to fit the dimensions you need and click on Apply Crop. You can also input the desired dimensions directly.
Again, this method is not as recommended as others because it doesn’t apply to all other featured images, just this one. Additionally, if you crop it too small, it can result in low-quality featured images.
Change Your Featured Image Size in WordPress
Your WordPress featured image gives your users an idea of what a page or post is about, and maintaining a consistent featured image size across your site is important for branding and user experience.
In this article, we’ve explored 3 methods for changing the size of your featured image in WordPress. Hopefully, one of them will be helpful to you, and you will be able to take more control over your site’s layout.
If you found this post useful, read our blog and resources for more insights and guides!
📬 Get WordPress updates to your inbox
Sign up for WC Blog updates and never miss a post!
Related Articles

How to Make a Subscriber Into an Admin on WordPress?

How to Grant Secure Access to a Not Live WordPress Site During Development

Do You Need a Web Developer to Build a WordPress Site?

How to Change the Bottom Padding Dimensions on WordPress Blocks