The WordPress Uploads folder is located on wp-content and contains all media files, such as images, videos, and documents, that you upload through the WordPress Media Library. Over time, it can become clogged with unnecessary data, duplicates, and multiple sizes for each item, so you may be wondering how to clean your WordPress Uploads folder, right?
In this article, we’ll explore the methods for cleaning up the Uploads folder so that you leave only the media you are actually using and discard everything else.
Key Takeaways
- The Uploads folder holds all media files uploaded to your site via the Media Library.
- You can use the Media Cleanup plugin to find and delete unused files.
- You also use the Media Deduper plugin to find and delete duplicate media files, further cleaning up your Uploads folder.
What is the WordPress Uploads Folder, and Where Is It Located?
The WordPress Uploads folder is where all the media files you add to your site via the Media Library are stored. This includes images, videos, documents, and any other file you upload through the WordPress Media Library.
Whenever you add a new image to a blog post or upload a PDF for your visitors to download, WordPress saves these files in the Uploads folder. This makes it easy to manage and organize your media files.
You can see the contents of your Uploads folder by accessing the Media Library. To do so, go to Media > Library from the WordPress dashboard.
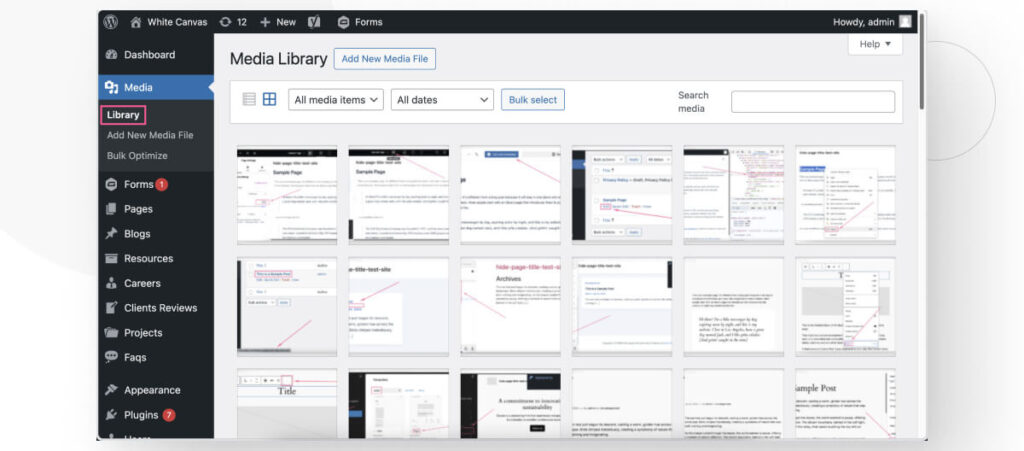
Where Is the Uploads Folder Located?
The Uploads folder is located inside the wp-content folder, one of the 3 main WordPress folders, along with wp-includes and wp-admin.
If you want to access the Uploads folder manually, you’d have to use a hosting control panel like cPanel or an FTP client like FileZilla. You’d have to navigate to public_html > wp-content > uploads.
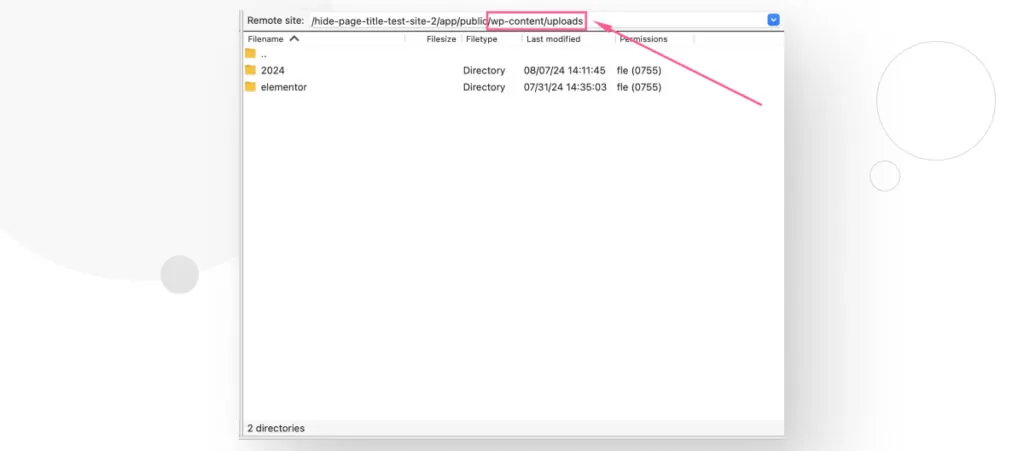
The Uploads folder separates media files by upload year, and every year’s folder further separates media uploads into months.
Why Clean Up The WordPress Uploads Folder?
Cleaning up the WordPress Uploads folder is crucial for several reasons. Over time, your Uploads folder can become bloated with unnecessary files, leading to various issues for your website.
Here’s why you should make it a habit to tidy up this folder regularly.
Improved Website Performance
A cluttered Uploads folder can slow down your website. When your server has to sift through hundreds or thousands of unnecessary files, it takes longer to load your site. By removing unused media, you speed up the server, leading to faster loading times and a better user experience.
More Storage Space
Web hosting plans often come with limited storage. As your Uploads folder grows, it can consume a significant portion of your allotted space. Cleaning up old, unused files can free up valuable storage, potentially saving you from having to upgrade to a more expensive hosting plan.
Enhance SEO
Website speed is a critical factor in search engine optimization (SEO). Faster websites tend to rank higher on search engine results pages. By keeping your Uploads folder clean and ensuring your site runs efficiently, you can improve your SEO and attract more visitors.
Reduce Backup Size and Time
Regular backups are essential for website security. However, the more files you have, the larger and more time-consuming your backups will become. Cleaning up your Uploads folder reduces the size of your backups, making them quicker and easier to manage.
2 Methods to Clean Up the WordPress Uploads Folder
There are multiple ways to clean your Uploads folder. For example, you could clean it up manually by going to wp-content > uploads and going through every year and month, deleting every file you’re not using. The problem with this method is that it’s error-prone and slow, and you can’t tell whether or not any particular media file is being used somewhere on your site.
To solve these problems, we have various plugins that perform cleanup operations. Many plugins clean up your Uploads folder, so we’ll limit ourselves to a couple of options.
Note: Make a backup of your site before using plugins that permanently delete data. It’ll allow you to go back to a previous checkpoint if you don’t like the results.
Method #1: Clean Up Your WordPress Uploads Folder With Media Cleaner
Media Cleaner is an easy-to-use app that finds and deletes unused files in your Media Library. Let’s go on a step-by-step-guide on how to use it.
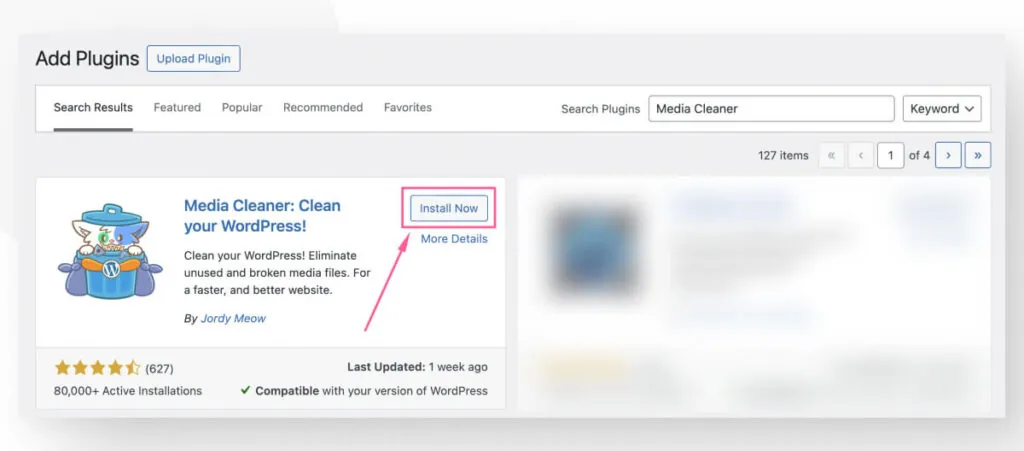
Go to Plugins > Add New Plugin and search for “Media Cleaner” in the search bar. Click Install Now and Activate.
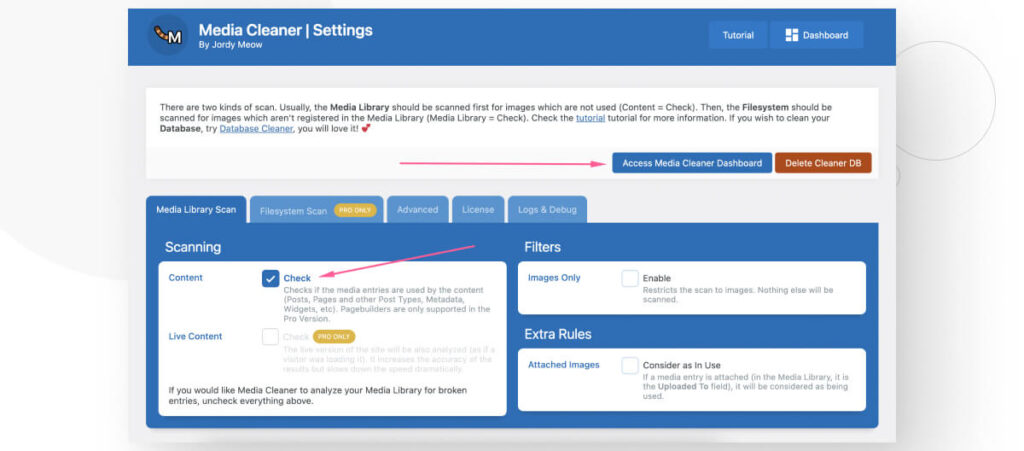
Once it’s active, go to Meow Apps > Media Cleaner from the admin dashboard.
Media Cleaner has multiple features. The feature we care about is scanning your site to find unused media files. To use it, first ensure that the Content checkbox is checked on the main dashboard, then click on the Access Media Cleaner Dashboard button.
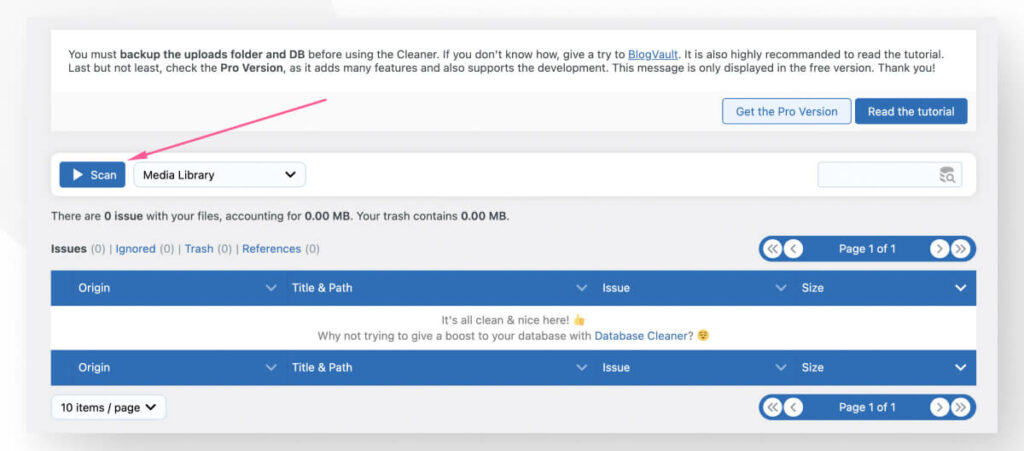
On the following screen, scroll down to see the results of the scan. At first, it will be empty because we haven’t run a scan yet, so press the Scan button and wait for Media Cleaner to run the scan. Depending on how many files your site has, it may take a couple of seconds or a couple of minutes.
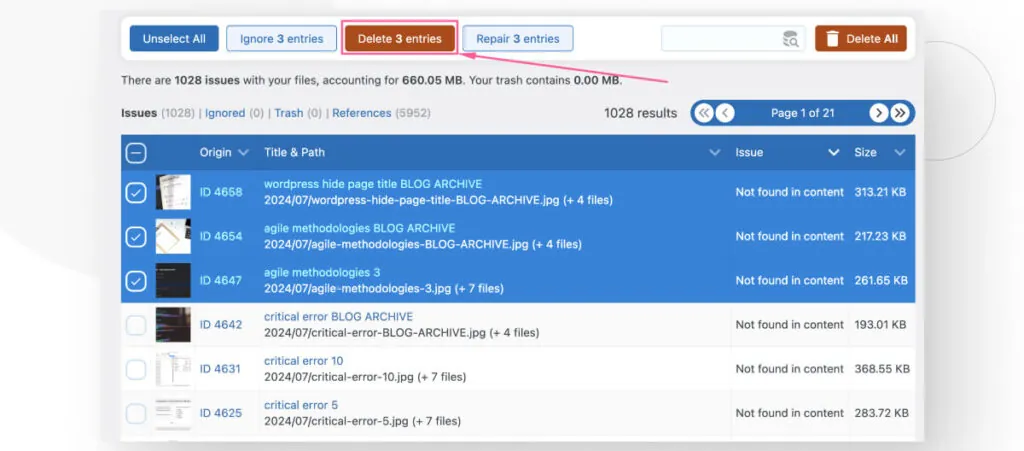
After our scan, we found 1028 media files that don’t appear in our content, which we can delete in bulk or selectively.
Use the checkbox to the left of each item to select the media files you want to delete and press the Delete … entries button to delete them permanently.
Method #2: Remove Duplicates From Your WordPress Uploads Folder With Media Deduper
Media Deduper is a plugin that finds and eliminates duplicate images and attachments from your WordPress site. To do this, Media Deduper builds an index of every media file on your site and determines which are duplicates, much like how Media Cleaner determines which images don’t appear in your content.
Once the index is done, you will be able to delete duplicates manually or use a “Smart Delete” function to delete images while preventing featured images that are also duplicates from being deleted.
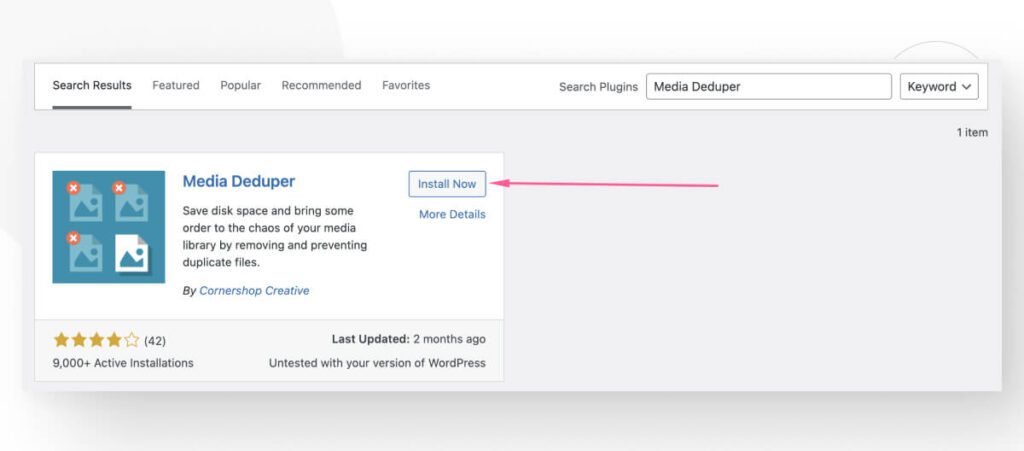
Let’s go through the step-by-step process of setting up and using Media Deduper. First, go to Plugins > Add New Plugin and search for “Media Deduper” in the search bar. Click Install Now and Activate.
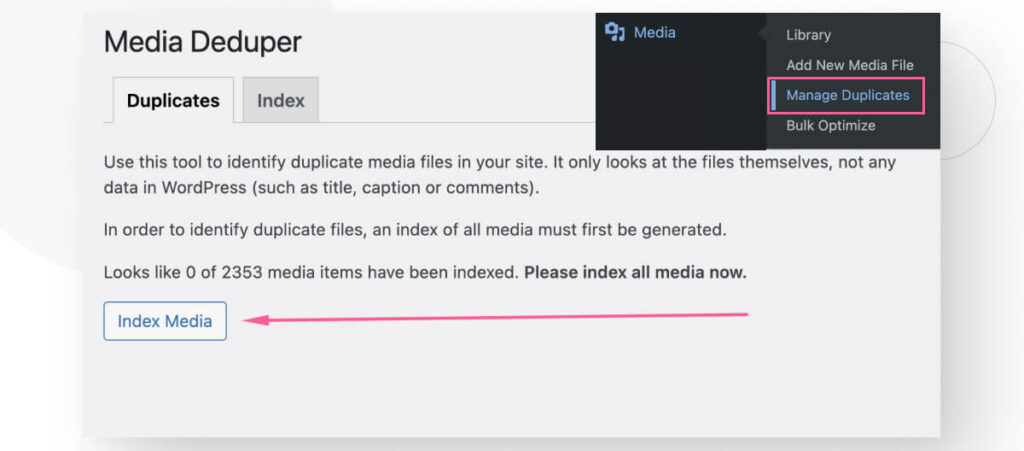
Once the plugin is active, go to Media > Manage Duplicates and click the Index Media button to build an index with all your site’s media files.
After the index is complete, click on the Manage Duplicates Now button under the percentage bar.
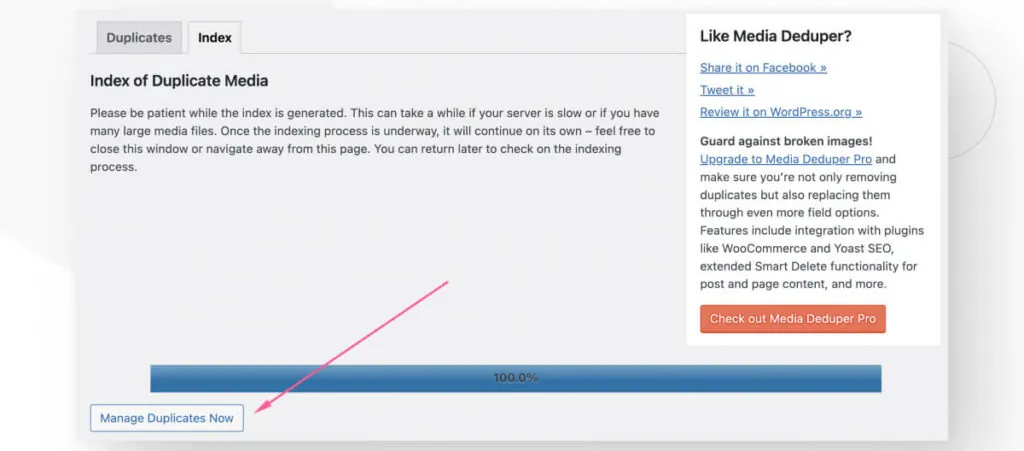
In the following screen, scroll down, and you will see the list of duplicate files on your site.
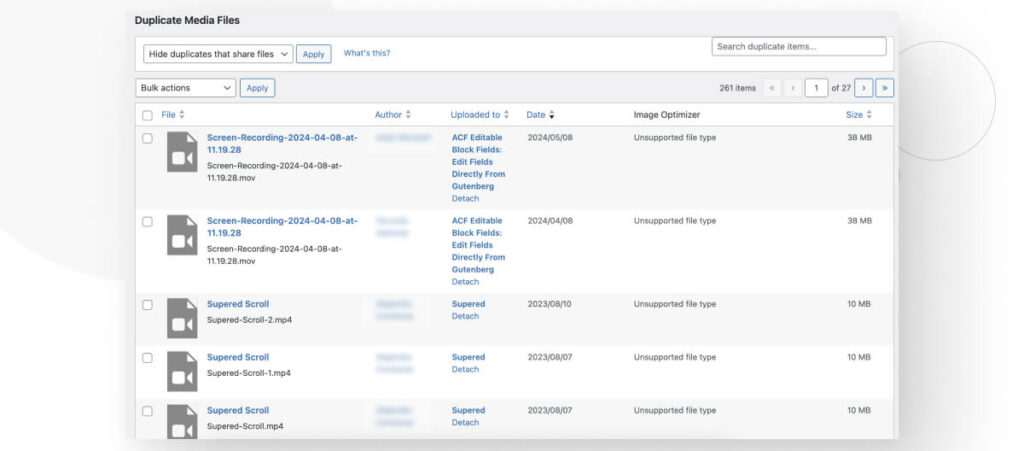
From now on, you can manually check every file you want to delete, select Delete Permanently, and then Apply. Alternatively, you could check all files and select Smart Delete.
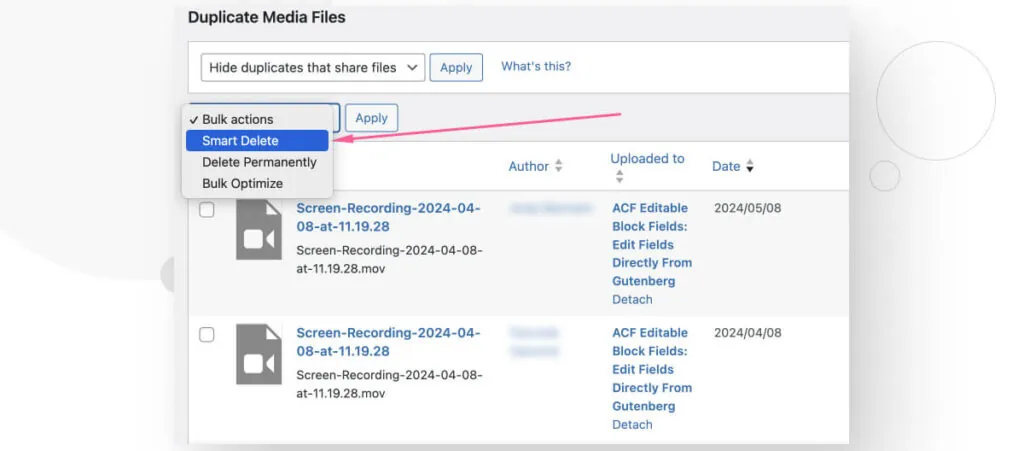
The Smart Delete function will delete all duplicate files but will also avoid deleting a post’s featured image if it is duplicate. It will first replace the image with another copy and then delete all duplicates.
This option prevents you from accidentally leaving one or more posts without a featured image.
Start Your WordPress Uploads Folder Clean Up
The WordPress Uploads folder contains all the media files you add to your site via the Media Library. Over time, it can become filled with unused files, so it’s important to clean it regularly to keep your site light and high-performing.
In this article, we explored 2 plugins that allow you to clean up your Uploads folder from unused and duplicate files, making it easy and quick to clean it up.
If you found this post useful, read our blog and resources for more insights and guides!
Related Articles

How to... / 10 min read
How to... / 10 min read
What to Do if Updating to PHP 8.1 Crashes Your WordPress Site?
PHP is the programming language in which WordPress is primarily written. It runs on the web server that hosts your site, and regularly updating it improves your site’s performance and…
Read More
How to... / 9 min read
How to... / 9 min read
How to Fix the WordPress “Cookie Check Failed” Error
The “cookie check failed” error is a message that appears on some WordPress sites, preventing users from accessing some or all content and admins from managing the website. Let’s explore…
Read More
How to... / 4 min read
How to... / 4 min read
How to Get Rid of Placeholder Posts in WordPress
If you just started a new WordPress site, there's a good chance you've encountered placeholder posts and pages like "Hello, World!" and "Sample Page." When customizing your site and making…
Read More
Troubleshooting / 11 min read
Troubleshooting / 11 min read
WordPress Doesn’t Display Correctly on Mobile: 5 Solutions
Sometimes, your WordPress site doesn't display correctly on mobile devices despite working just fine on desktop. This can be frustrating and hard to troubleshoot because there are so many reasons…
Read More
How to... / 8 min read
How to... / 8 min read
Why Is WordPress Missing the Color and Underline Font Options?
WordPress is the most popular CMS in the world, and many use it because its editor is intuitive and easy to learn. But sometimes, site owners or developers find the…
Read More
