Needing to learn how to display a random image on WordPress is not very common, but there are all sorts of websites out there.
Maybe you run a school’s website and want to show various images from events. Maybe you’re a photographer and want to display a random photo. There are many reasons to display a random image.
In this article, we’ll explore 2 WordPress plugins that will allow you to display random images in your posts and pages.
Key Takeaways
- The Hot Random Image and Image Refresh plugins allow you to display random images on your WordPress site.
- You can insert random images using shortcodes, custom blocks, or widgets.
- These plugins allow you to select from a pool of images, letting you be more selective about which set of images to randomize.
2 Plugins to Display a Random Image on WordPress
If you search the WordPress plugin directory, you will find a few plugins tagged as “random image.”
Most are outdated, but we found a couple that are up to date. In particular, we found that Hot Random Image and Image Refresh were very useful.
Let’s explore how each works.
Plugin 1: Display a Random Image on WordPress Using Hot Random Image
First, go to Plugins > Add New Plugin and search for “Hot Random Image.” Install and activate it.
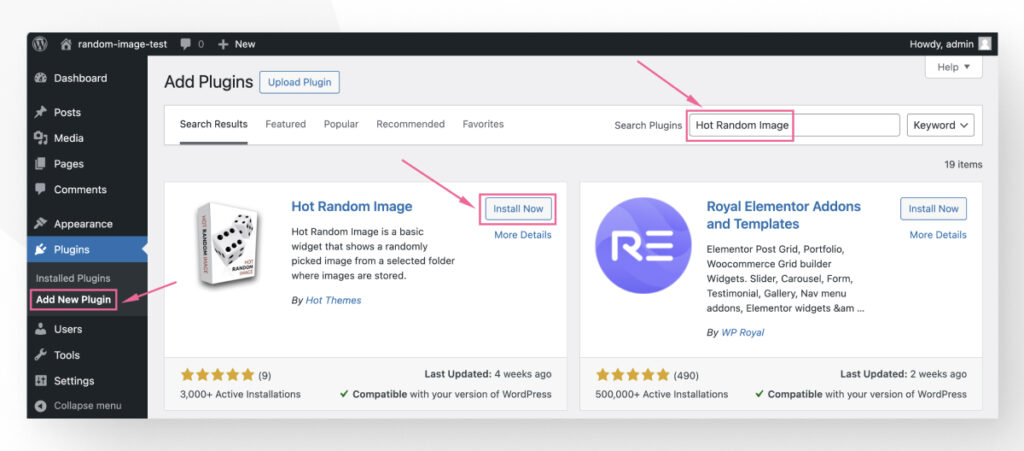
After installing and activating it, this plugin will not have a dedicated settings screen in the admin dashboard. Instead, you have three options to use it:
- A Gutenberg block
- A shortcode
- A widget
Let’s go through every option.
How to Use Hot Random Image’s Gutenberg Block
To use the block, go to any WordPress post or page and click on Add block. Search for the “Hot Random Image” block.
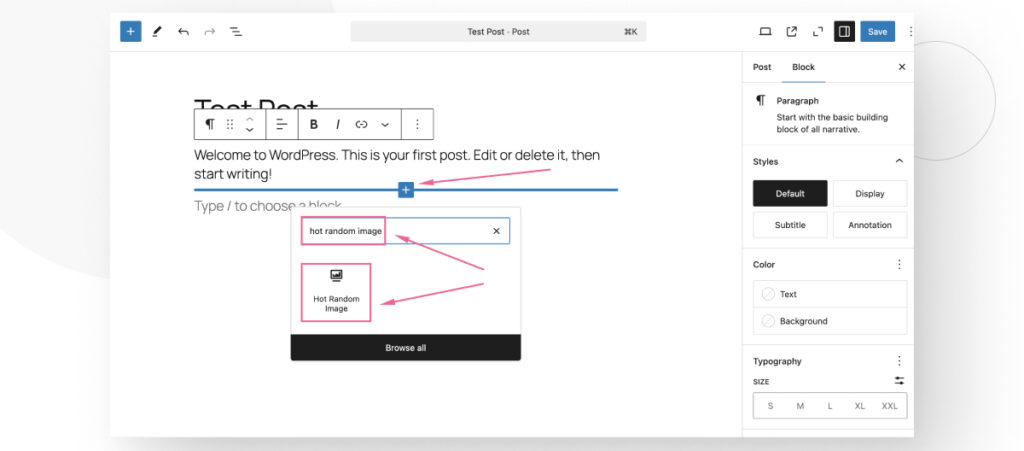
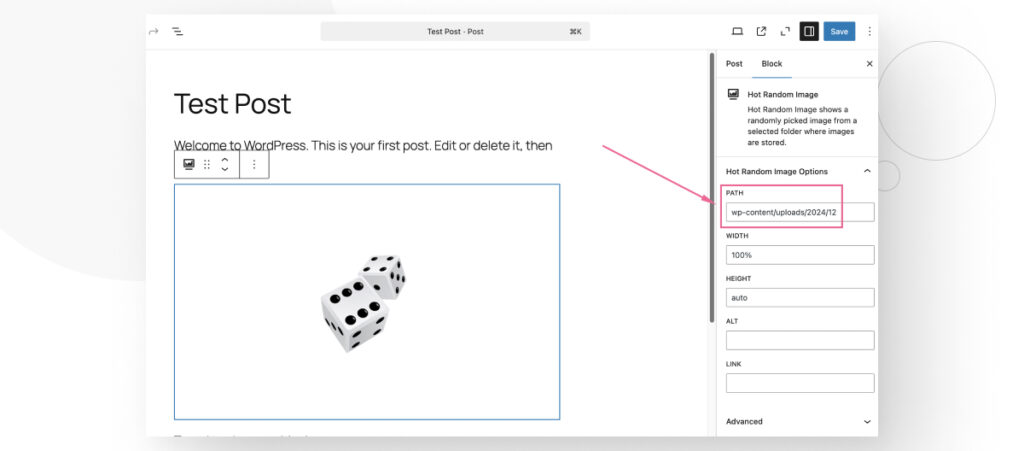
The new block will display a placeholder image.
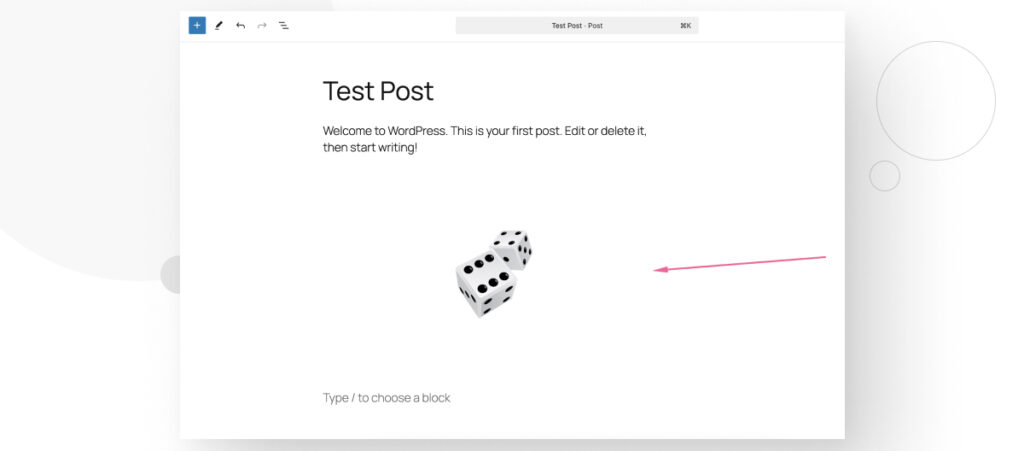
As of right now, the block is not doing anything because you need to configure a location within your WordPress installation from which the plugin will pull the images.
To do that, click on the block and use its settings on the right-hand sidebar. If you can’t see the settings, ensure you’re in the sidebar’s Block tab. You’ll need to provide a valid location for the Path setting.
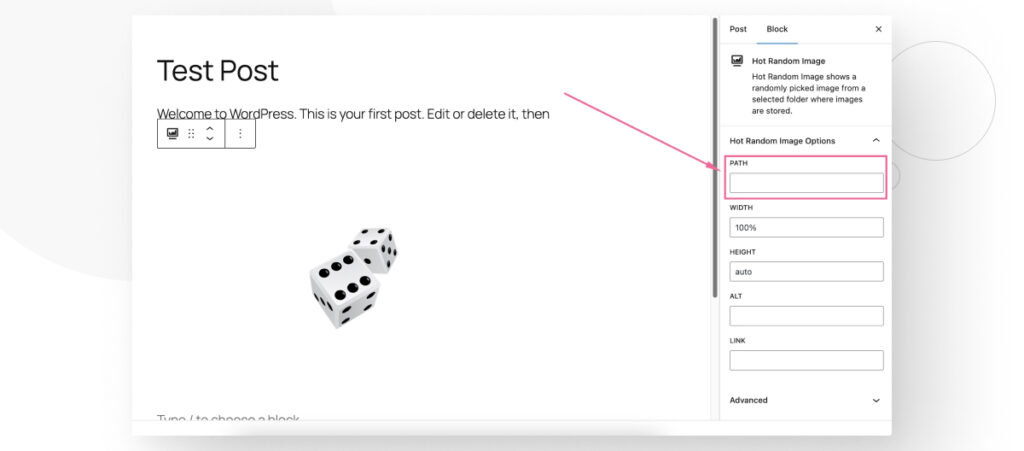
The location is relative to your WordPress installation’s root directory, so it should be something like wp-content/uploads/2024/12.
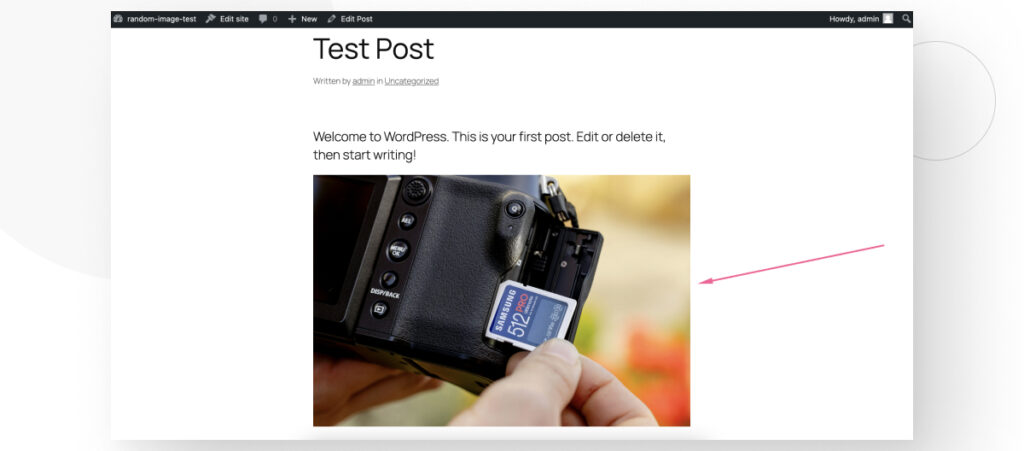
If you go to the live page after entering the folder’s location, you will see that the plugin works properly.
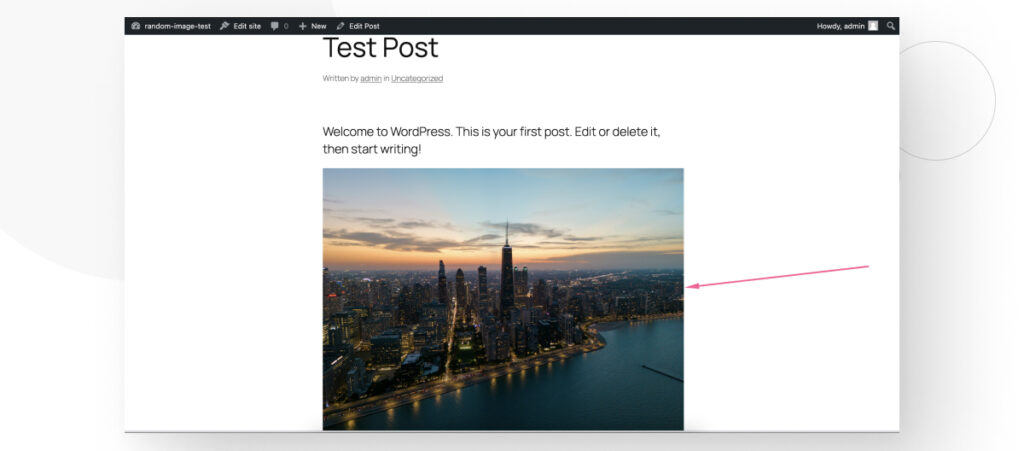
Upon refreshing the page, you will see a new image.
If you want to go further, you could connect to your WordPress site via FTP, cPanel, a file manager, or any other hosting control panel to create a new folder where you can place only the images you want the plugin to display, instead of every single image in a default folder.
For example, you could create a random-image-folder inside uploads and manually move specific images into it.
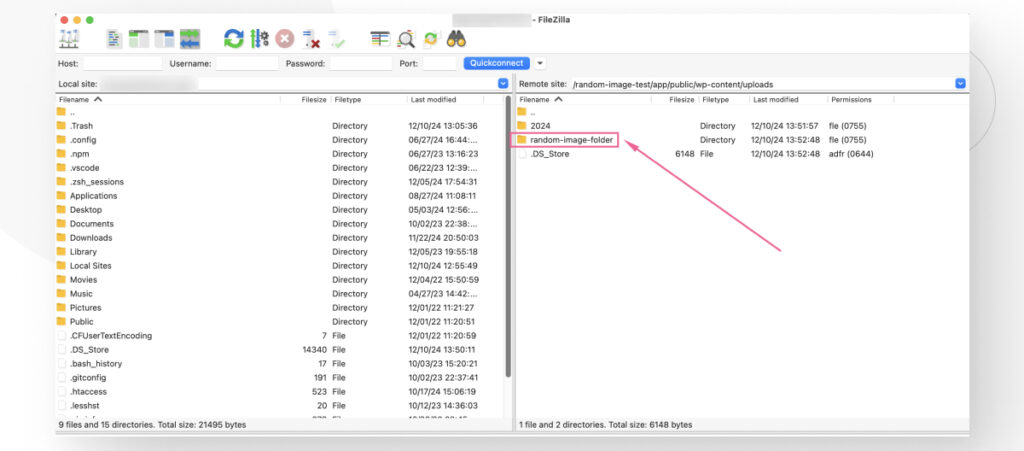
Then you would modify the block’s Path setting to be wp-content/uploads/random-image-folder.
This way, the block would display only images that come from a specific folder where you’ve placed all the images you want to display randomly.
How to Use Hot Random Image’s Shortcode
This method is similar to the first but involves using the Shortcode block rather than the custom block the plugin introduces.
Go to any WordPress post or page and click on Add block. Search for the “Shortcode” block. The shortcode to enter has the following syntax:
[randomimage path="images/random" width="100%" height="auto" alt="Random image" link="https://your-website.com/"]You can modify the width, height, alt, and link parameters as needed, but the path parameter needs to lead to a valid location within your WordPress installation. This location must contain the images you want to display randomly.
For example, you could enter the following shortcode to display every image uploaded in December 2024. Remember that the folder’s location is relative to the root of your WordPress installation.
[randomimage path="wp-content/uploads/2024/12" width="100%" height="auto" alt="Random images" link="https://your-website.com/"]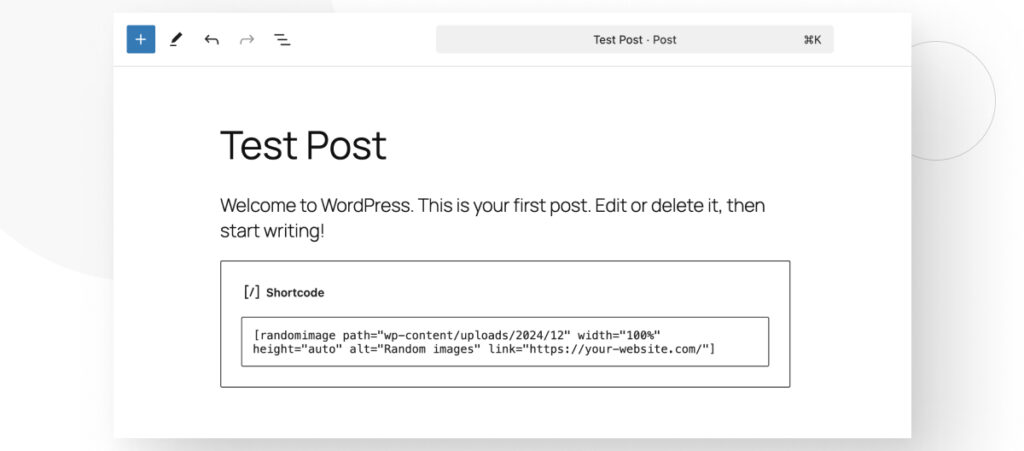
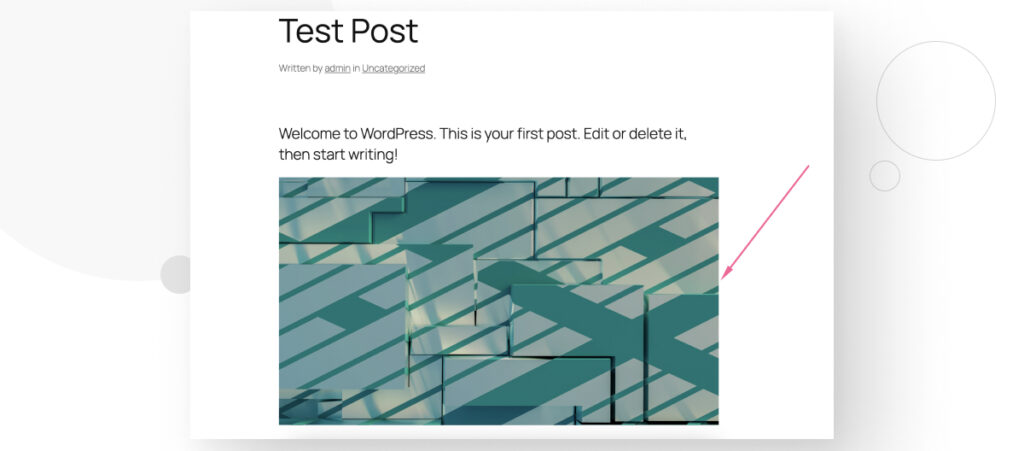
The shortcode will pull a random image from the selected folder.
How to Use Hot Random Image’s Widget
Finally, you can use Hot Random Image’s Widget to display random images. To do that, go to Appearance > Widgets.
Keep in mind that many themes, like the default WordPress themes, do not support widgets, so this method depends on your specific theme.
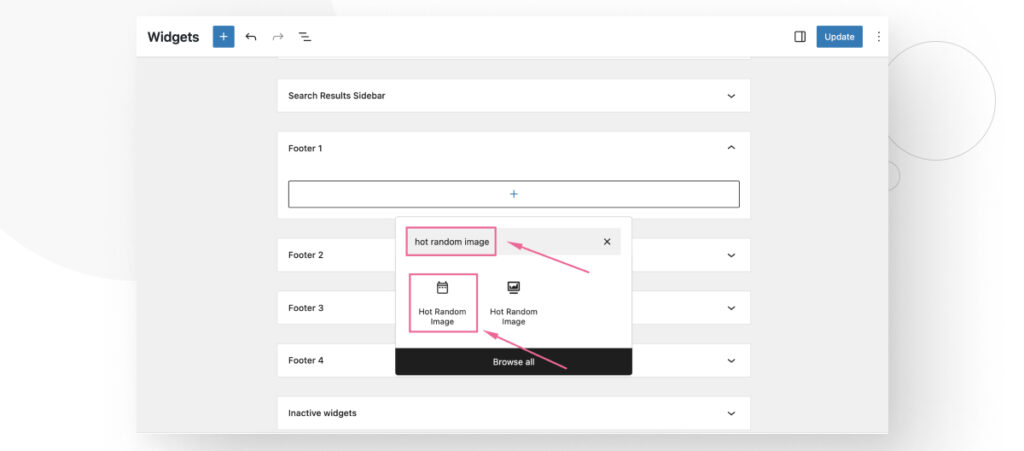
From the Widgets screen, you can select one of the areas of your site that supports widgets, such as your footer(s). Click on the Add block button and search for the “Hot Random Image” block.
In our case, we saw 2 results with the same name. It appears that the option that looks like a calendar is the widget, while the option whose icon is a computer screen is the Gutenberg block to use on the editor.
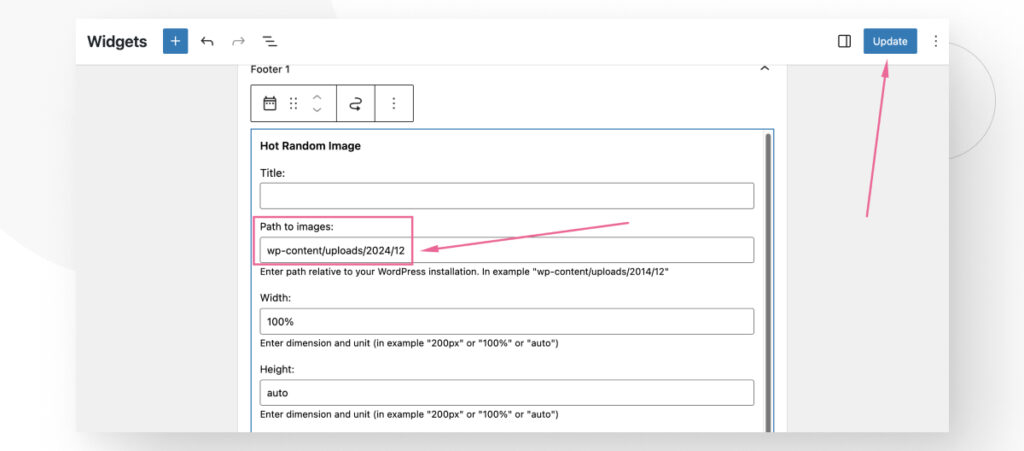
After adding the block, select a path relative to your WordPress installation. In our case, we entered wp-content/uploads/2024/12. You can choose any folder you like. After adding the path, click on Save.
Now go to your live site, and you should see the image in the location you set the block to. In our case, it appears in the site’s footer.
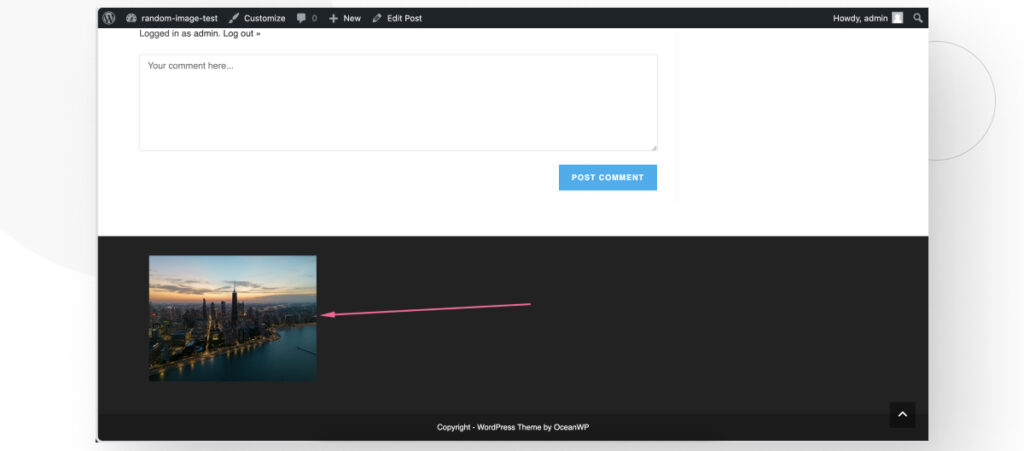
The location may be clunky, though, so you may need to perform some CSS editing to position the image in a more aesthetically balanced position.
Plugin 2: Display a Random Image on WordPress Using Image Refresh
Another plugin you can use to display random images on WordPress is Image Refresh. To install it, go to Plugins > Add New Plugin and search for “Image Refresh.” Install and activate it.
Since the plugin doesn’t get many downloads, you may need to scroll down a bit to find it.
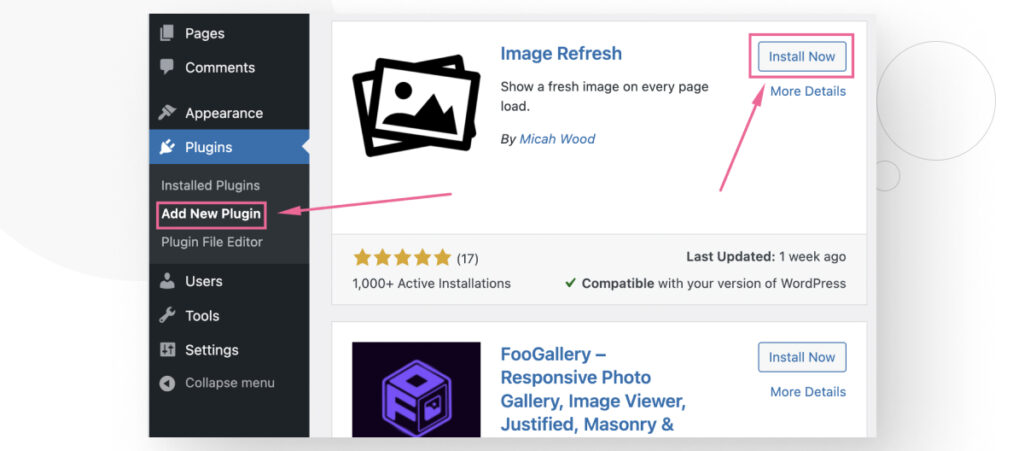
Similar to the previous plugin, Image Refresh has no settings page and works with a shortcode you can add to any post, page, or custom post. The shortcode has multiple parameters you can explore in the plugin’s frequently asked questions.
That said, this plugin’s default way of displaying random images is a bit awkward, so we’ll explain it first and then offer an alternative.
By default, all you have to do is enter the shortcode [mpress_image_refresh], and the plugin displays every image associated with the specific post or page where you entered the code.
So, go to any post or page and insert the Image block.
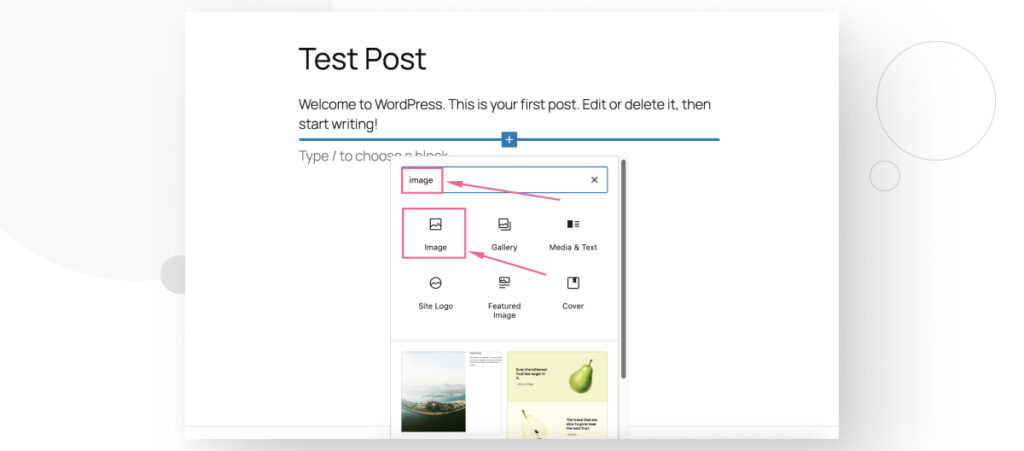
Once the block is in place, select the Media Library option.
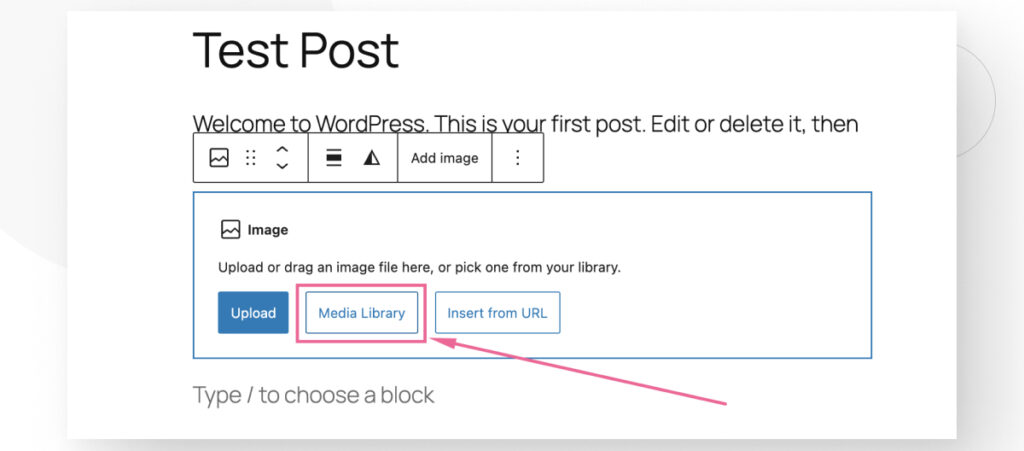
Once on the Media Library, go to the Upload file tab and click on Select Files.
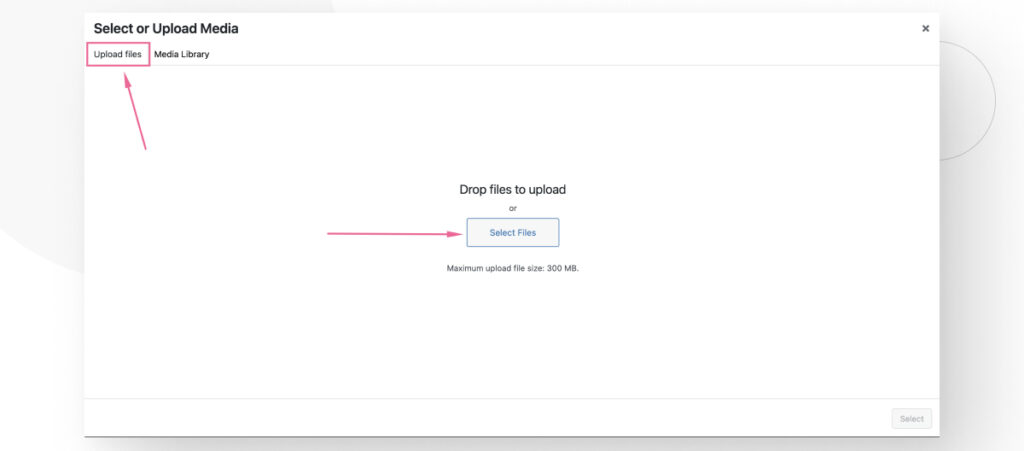
Select all the images you want to display randomly on this particular page or post. Every image you upload from this interface will be associated with this page or post.
You don’t even need to make any of these images part of your post’s content; they just need to be associated with it by being uploaded while on this post/page.
After you’ve uploaded the images, use the Shortcode block and enter the [mpress_image_refresh size=”medium”] code. You can avoid using the size parameter, but the images may end up too big for your post or page’s width.
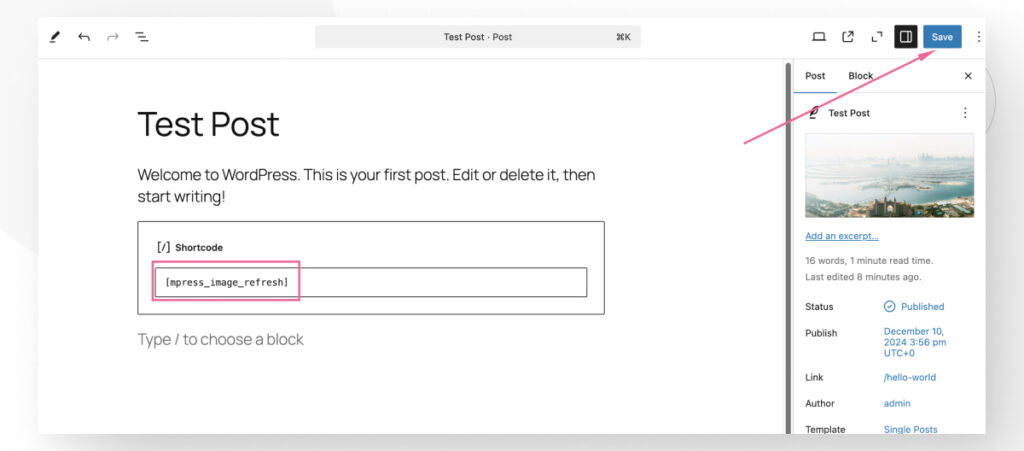
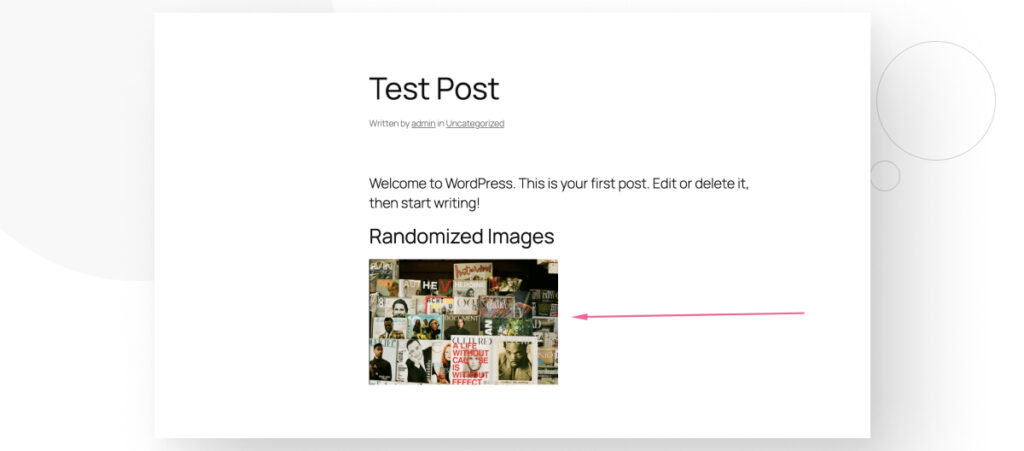
After saving the changes, your post should display a random image from all the images associated with this specific post or page. Reloading the page should lead to a new image appearing.
How to Select From a Pool of Images Using Image Refresh
If you prefer choosing images from a specific pool, rather than being limited to the images associated with a given post or page, this plugin’s shortcode allows you to do that.
First, you need to know the image ID of every image you want in the randomized pool. To do that, go to Media > Library. Click on any image you want to add to the pool.
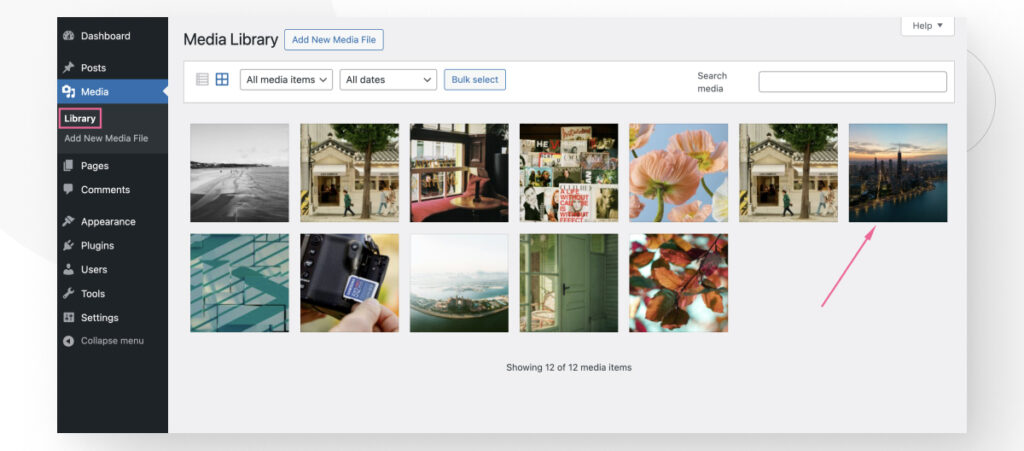
The last section of the URL identifies the ID of the image you’re looking at in the item=ID part. In this case, it’s 10.
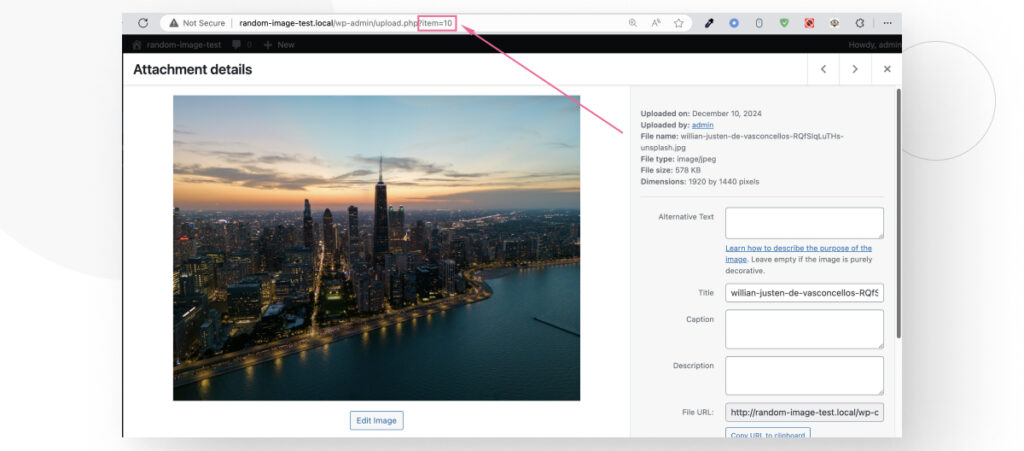
Take note of every image ID you want to add to the pool. Once you have every ID you want, return to your post or page and enter the following shortcode, adding your own image IDs.
Separate each ID with a comma and remember to set a size if the images are too big in the original size.
[mpress_image_refresh attachment="9, 10, 27" size="medium"]Now, the plugin will only display the images whose attachments you specified in the shortcode.
The Image Refresh plugin actually has several parameters you can play around with, allowing you to display random images in various controlled ways. Give them a try.
Start Displaying Random Images in WordPress
Displaying random images in WordPress is possible and requires only installing and using a plugin dedicated to this task.
These plugins allow you to display random images using shortcodes, widgets, or custom Gutenberg blocks. They let you select from every image on your site or from a pool of specific images to randomize, giving you some flexibility about what you want to display.
If you found this post useful, read our blog and developer resources for more insights and guides!
Related Articles

How to... / 8 min read
How to... / 8 min read
3 Ways to Allow Users to Change Text Size in WordPress
WordPress is very flexible, but it does not come with a default feature to allow users to change the text size. Even if your site has a text size that…
Read More
How to... / 5 min read
How to... / 5 min read
Can You Embed Systeme.io Forms in WordPress?
Yes, it’s possible to embed Systeme.io forms into WordPress. Systeme.io has built-in features that allow you to export your sales funnel forms to any website, including WordPress sites. However, there…
Read More
Behind the Canvas / 3 min read
Behind the Canvas / 3 min read
My Experience Improving Navbar Accessibility in a WordPress Project
Web accessibility is key in any WordPress development project. Navbar accessibility, in particular, can be a defining factor in helping people of different capabilities navigate sites effectively with only their…
Read More
Behind the Canvas / 4 min read
Behind the Canvas / 4 min read
Best Practices for Fetching Data in Next.js
Efficient data fetching is key to creating a smooth and fast user experience in Next.js apps. In this article, we’ll explore how our development team learned to optimize Next.js data…
Read More
Behind the Canvas / 5 min read
Behind the Canvas / 5 min read
How Interactive Animations Improve the User Experience in a WordPress Site Using Framer Motion and React
Interactive animations have become more prominent in website development in the past years, including WordPress environments. Tools like GSAP, React Spring, and Framer Motion help developers create more interactive and…
Read More