How to Embed H5P Content on WordPress in 3 Steps

If you use H5P often for your work or personal projects, you may wonder whether it is possible to embed H5P content on your WordPress site. Fortunately, the answer is “Yes.”
Educators and content creators get a lot out of H5P, an open-source tool that allows you to create interactive digital content. And while WordPress supports embedding H5P content via the Custom HTML block, we recommend using a plugin to embed your H5P into WordPress.
In this article, we’ll explain how to easily do it in 3 steps.
Key Takeaways
- WordPress supports embedding H5P by default with the Custom HTML block.
- However, using a dedicated plugin for managing H5P content is better.
- A dedicated H5P plugin lets you easily create, upload, manage, and embed H5P content on your WordPress website.
Can You Embed H5P Content on WordPress?
Yes, it’s possible to embed H5P content on WordPress. There are 2 main methods to do it:
- Using the Custom HTML block on Gutenberg and pasting the iframe embed code.
- Using the Interactive Content – H5P plugin to create and manage H5P content across your site.
In this post, we’ll focus on the second method.
The first method allows you to embed H5P on your site, but it will likely position the content awkwardly. For example, it may push your H5P content all the way to the left and make it look out of place in relation to the rest of your site.
Additionally, the first method only allows you to display content hosted externally, which makes it more vulnerable to becoming unavailable unexpectedly.
It is also generally poor etiquette to display content hosted on an external site, as it could be considered hotlinking, which is mostly frowned upon.
That’s why using the Interactive Content plugin is better. It allows you to create and manage all your H5P content from the admin dashboard and host it on your WordPress site.
How to Embed H5P Content on Your WordPress Site in 3 Steps
As mentioned above, we’ll use the Interactive Content – H5P plugin to create, upload, manage, and embed your H5P content. Let’s start.
Step 1: Download and Activate the Plugin
Go to Plugins > Add New Plugin on your admin dashboard and search for “Interactive Content – H5P.” Install it and activate it.

Step 2: Add New H5P Content (Create From Scratch or Upload)
Now that the plugin to manage H5P content is activated, go to H5P Content > Add New from your admin dashboard. You will be asked to agree to certain terms.
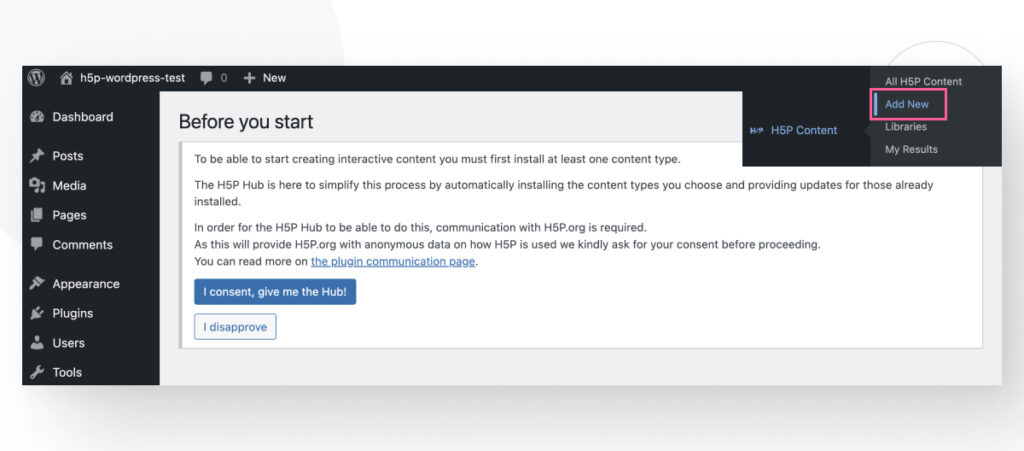
After agreeing to the terms, you can start creating or uploading H5P content. Let’s start with how to create content from scratch, and then we’ll explain how to upload existing content.
To create any given type of H5P content, search for it and select Get.
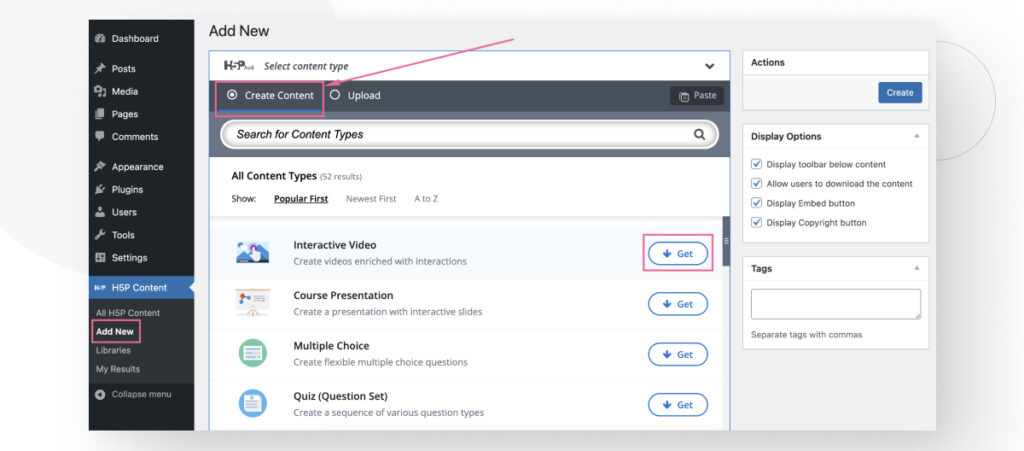
You will see more information about this type of content. Click the Install button in the bottom-right corner.

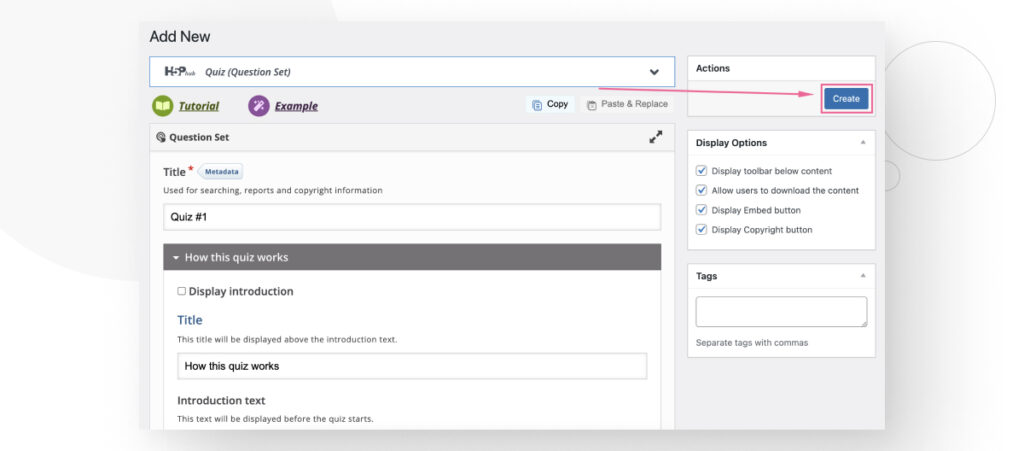
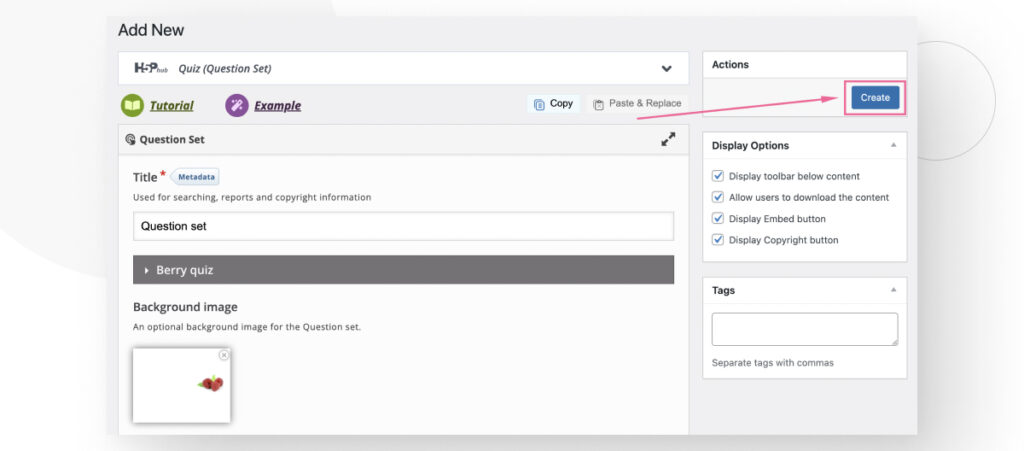
Now, you can start editing your content. You can use h5p.org’s Examples and Downloads to guide your creation process. Once your content is ready, click on Create in the top-right corner.
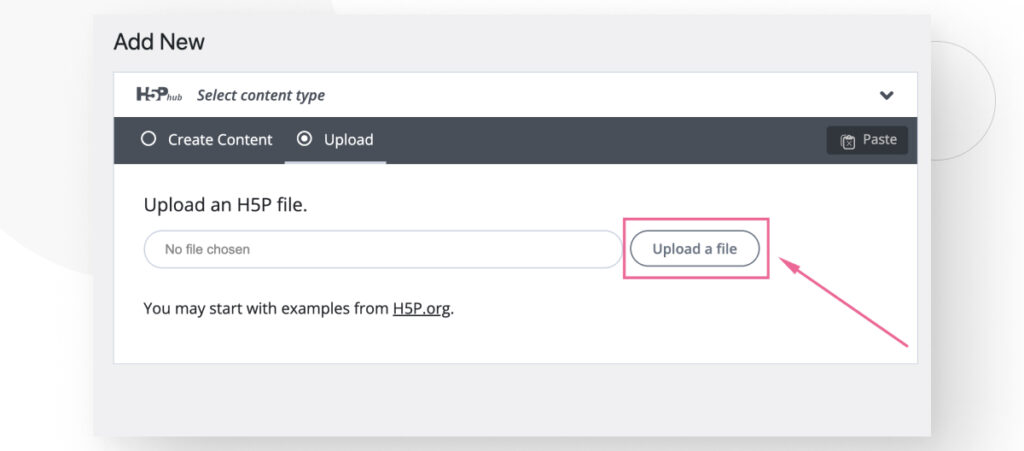
Alternatively, if you want to upload H5P content that is already finished, go back to H5P Content > Add New and click on the Upload tab. Click the Upload a file button.
Click on Use.
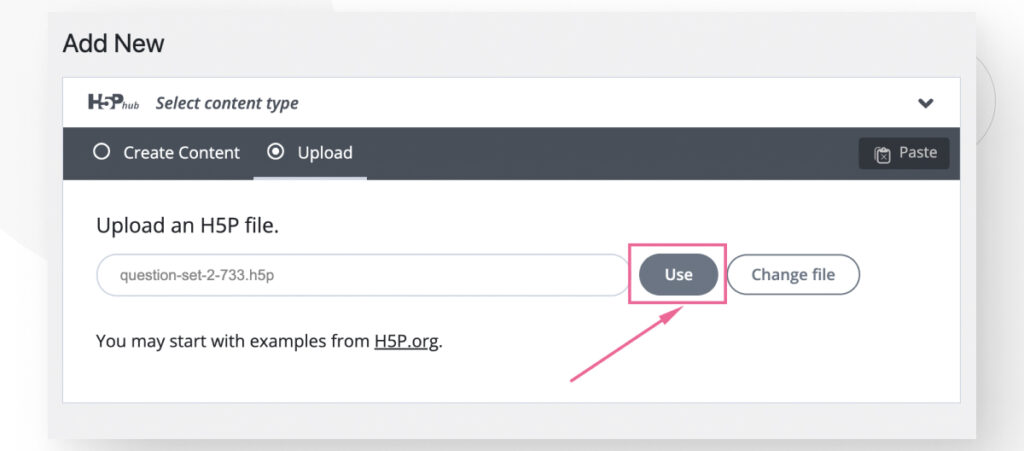
Now, you edit the content you just uploaded. Whether you edit it or not, click on Create to add it to your WordPress site.
Step 3: Embed the H5P Content Into Your WordPress Site
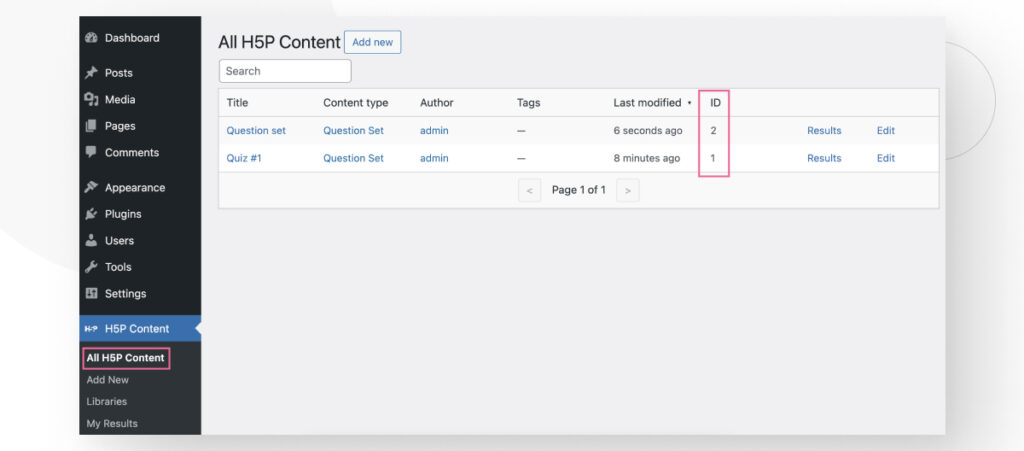
With your H5P content now hosted on your site, go to H5P Content > All H5P Content. You will see all the content you’ve created or uploaded. The important piece of information you need to embed it on your site is the ID field.
You will use it to display your H5P content anywhere on your site.
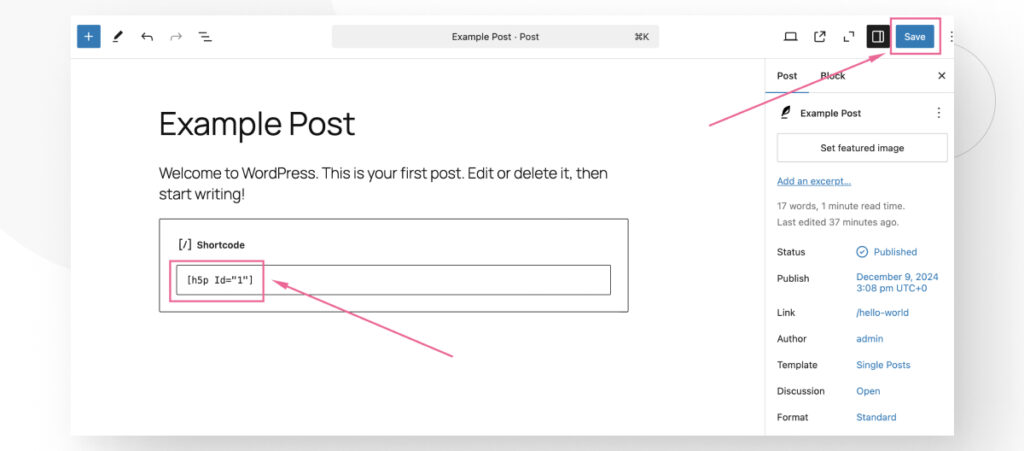
To embed your H5P, go to any page or post on your site. Click the Add block button and search for “Shortcode.”
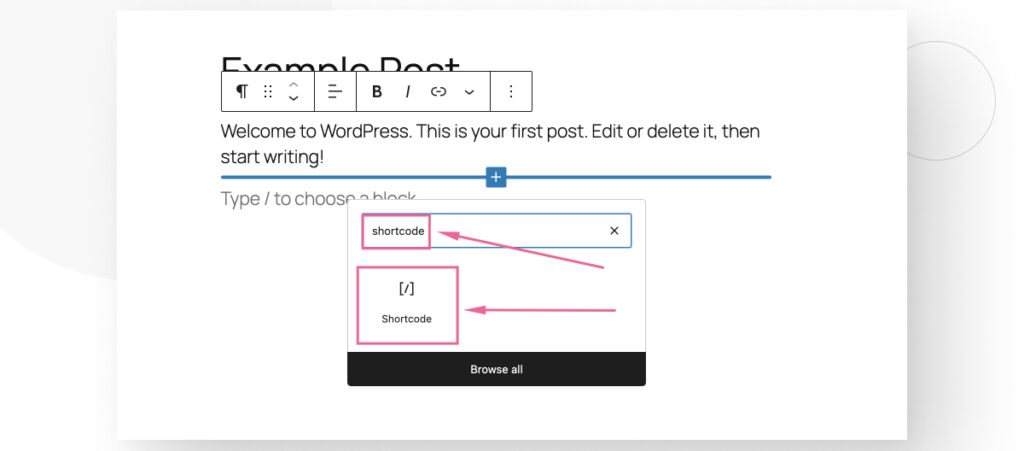
You will see a new block with a text box to input a new shortcode. Shortcodes are a simple method to add complicated coding logic to your site.
To add your H5P content as a shortcode, you’ll need to add the following code with your content’s corresponding ID field:
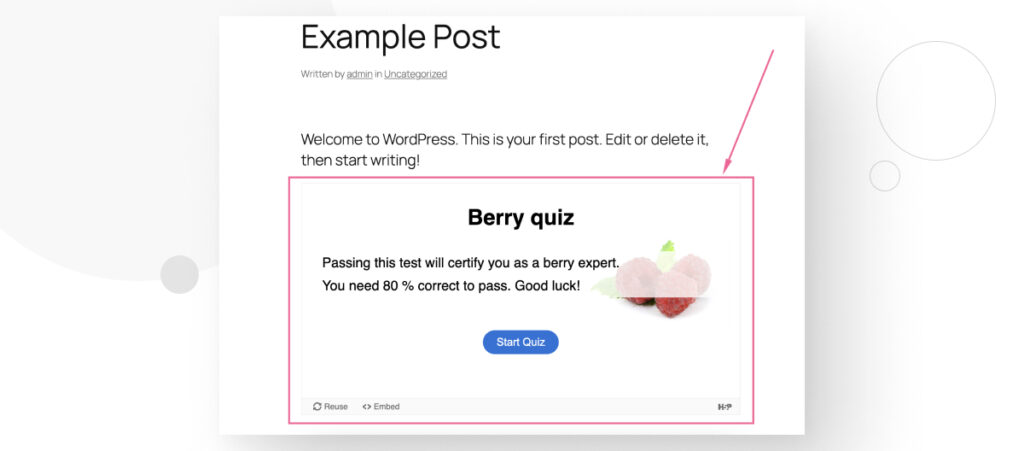
[h5p Id="your-ID-goes-here"]For example, let’s add an H5P quiz that corresponds to ID 1 like this: [h5p Id="1"]. After entering the code, Publish or Save your post or page.
Go to your live post or page to see the H5P content you just embedded.
Start to Embed H5P Content on Your WordPress Site
As you can see, embedding H5P code on your site is quite easy, giving you the opportunity to include more interactive interactive elements with little effort.
Hopefully, you can use the method in this post to easily add and manage H5P content on your site in the future.
If you found this post useful, read our blog and developer resources for more insights and guides!