
How to Fix the “Update Failed” Error in WordPress

Have you ever tried to hit Update on the Gutenberg editor and seen the “update failed” error on your WordPress site?
If that’s happened to you, this article is here to help you by breaking down what the “update failed” error means, the causes, and what you can do to fix it. Let’s get into it.
Key Takeaways
- The “update failed” error happens when your WordPress site has trouble leveraging its built-in APIs to communicate with the database.
- The causes for the “update failed” error range from poor internet connectivity to URL configuration issues and low PHP memory limits.
- You can fix the error by checking your internet connection, manually changing some WordPress configurations, increasing the PHP memory limit, or using the debug log.
What Causes the “Update Failed” Error in WordPress?
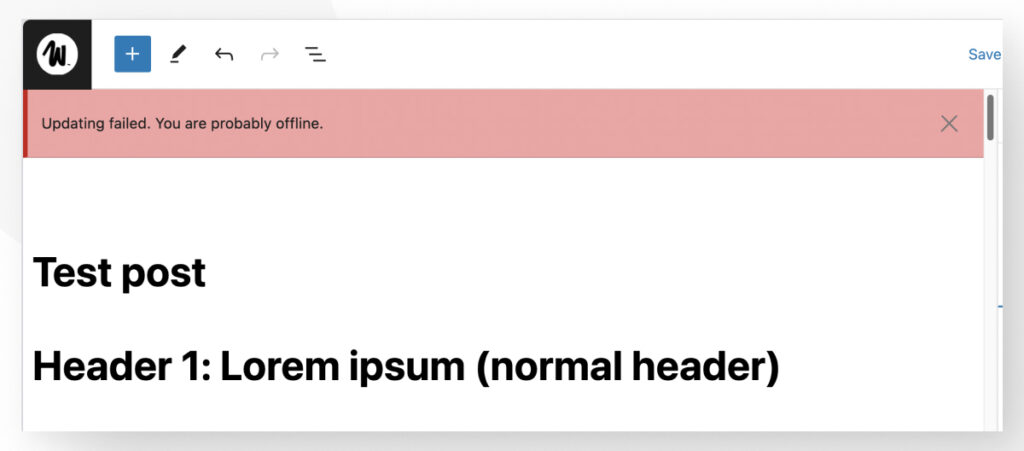
The “update failed” error appears as a red textbox at the top of the Gutenberg editor when trying to update your post or page. You will likely see the message, “Updating failed. You are probably offline.”
The “update failed” error occurs when WordPress is unable to connect with its database, preventing you from updating data in the database or requesting data from it.
Sometimes, this happens because your internet connection is unstable and WordPress can’t connect long enough to exchange information with the database.
Other times, one of your plugins may be causing an incompatibility that prevents WordPress from using its built-in REST APIs to communicate with the database.
How to Fix the “Update Failed” Error in WordPress: 8 Solutions
Since there are many reasons why the “update failed” error may appear, there are multiple potential solutions. Let’s work through the possible solutions, from the simplest to the most involved.
Important: Back up your site before making any major configuration changes, such as the ones we’ll explore in this article.
Solution #1: Check Your Internet Connection
Since a poor internet connection can prevent WordPress from accessing its database, the first step should be to confirm that your device is connected. Visit a few websites on other browser tabs to verify your connection.
If you’re not connected, do whatever’s necessary to reconnect.
If you’re connected, the issue isn’t the internet connection.
Solution #2: Check Your Site’s URL
Go to Settings > General. Check for the WordPress Address (URL) and Site Address (URL) text boxes. In most cases, they should be the same.
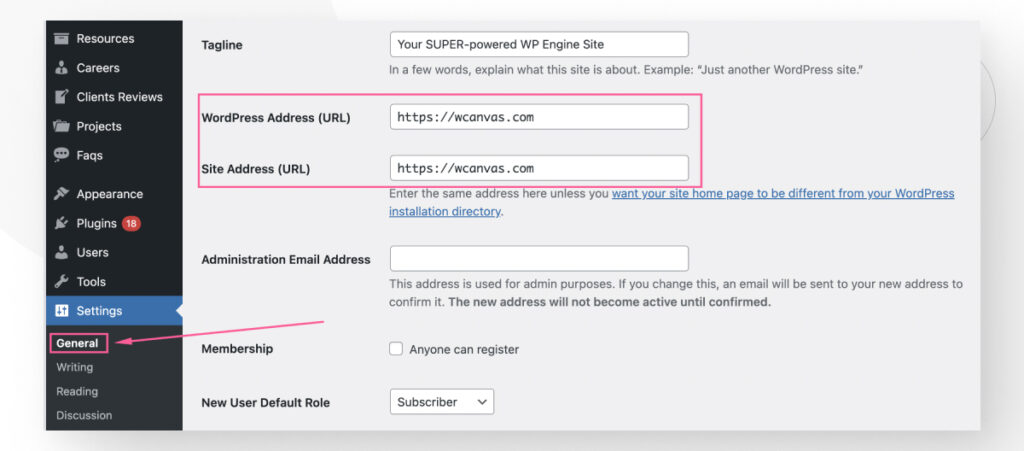
Unless you’ve accidentally modified the URLs recently, they should both be OK. If you see a discrepancy or an error in any URLs, fix it and try again.
If you’re connected to the internet and your URLs look like they should, consider troubleshooting with the other solutions in this article.
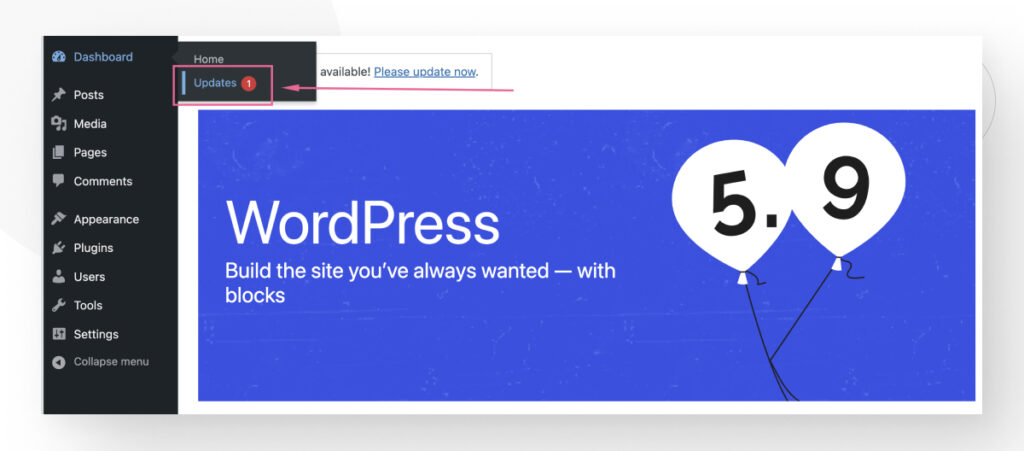
Solution #3: Update Your WordPress Software
In some cases, updating your WordPress software may resolve odd issues that lead to the “update failed” error.
If you have an update available, go to Dashboard > Updates.
Scroll down and click the Update to version… button.
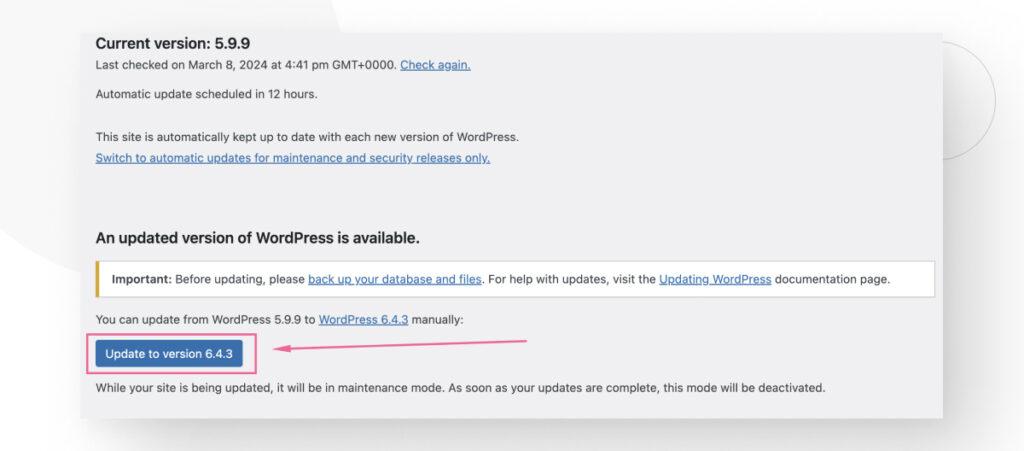
The update will take a few seconds, and then you’ll land in the About section of the version you just installed.
Solution #4: Disable Plugins and Reactivate
Sometimes, plugins can cause incompatibility issues that can lead to issues with the editor and other elements of your website.
Spotting these incompatibilities can be difficult because you never know which plugin may be causing the issue. The best way to confirm the culprit is to deactivate all plugins and reactivate them individually.
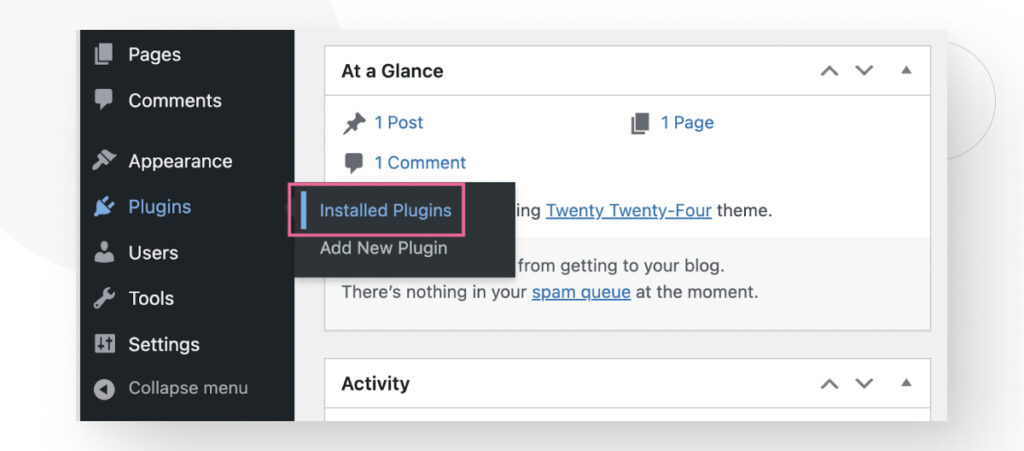
From the admin dashboard, go to Plugins > Installed Plugins.
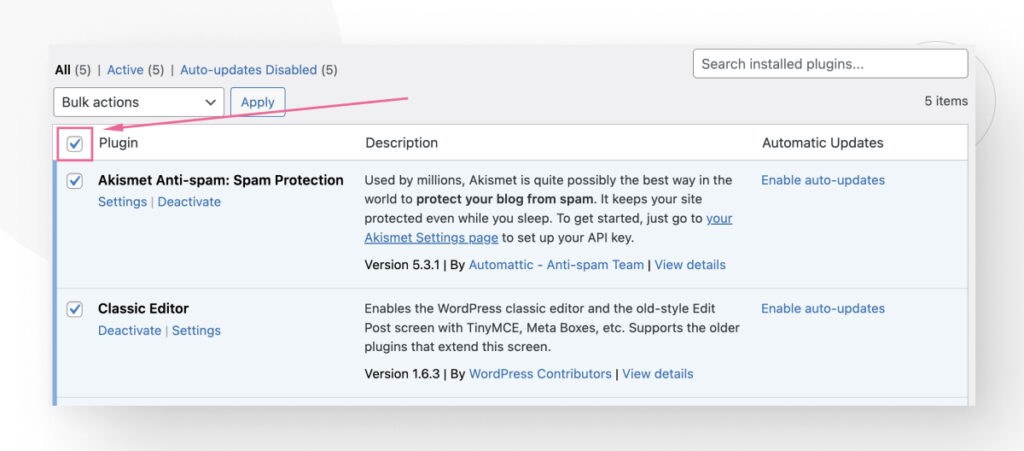
Click on the empty white box at the top to select all plugins.
Now go to the Bulk actions menu and select Deactivate.
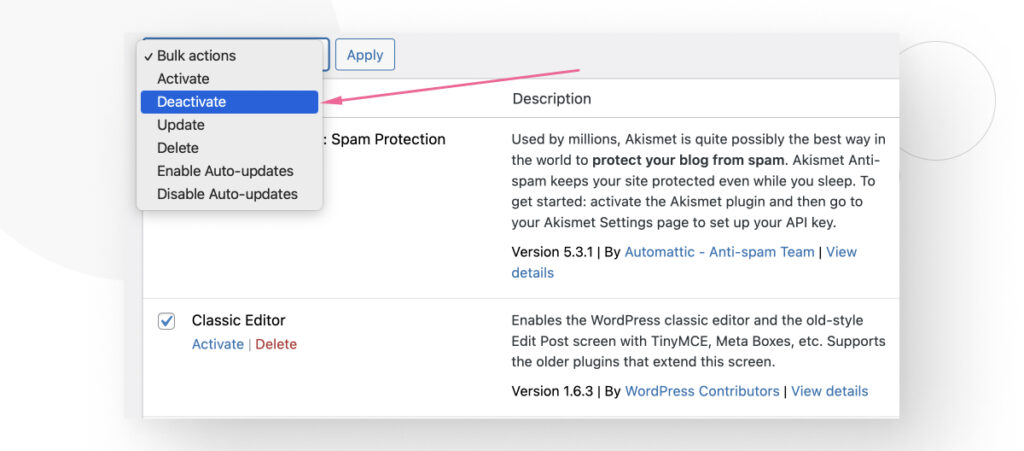
At this point, all plugins will be deactivated.
To test compatibility, activate each plugin individually. After activating a plugin, return to your editor and see if you can update your content.
If one of the plugins is the cause of the issue, at some point, you’ll activate a plugin that will prevent the editor from updating.
Once identified, you may explore the plugin’s settings to see if you can reconfigure it to solve the issue, contact the plugin developer to ask about it or switch to a similar plugin that doesn’t cause the “update failed” error.
Solution #5: Use the Classic Editor
You can use the classic editor as a temporary solution while you fix the problem. The classic editor doesn’t rely on WordPress’s APIs and is a temporary workaround.
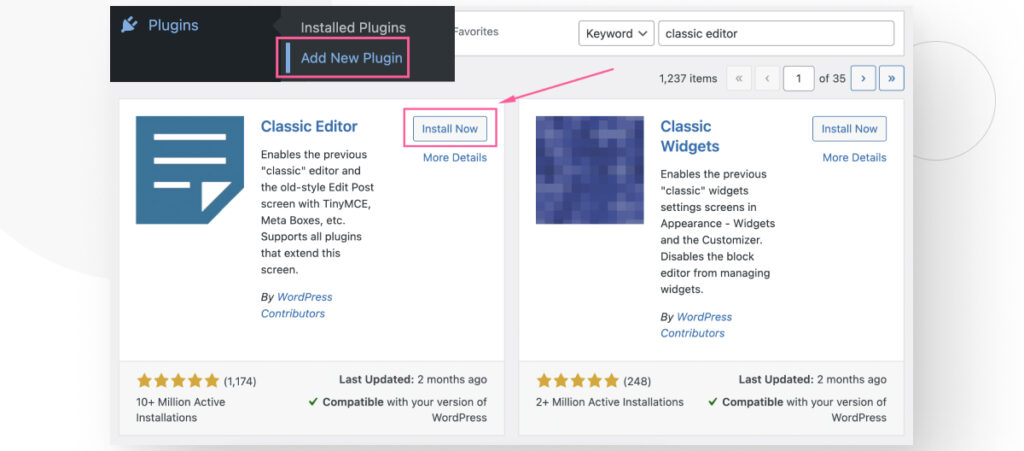
To install the Classic Editor plugin, go to Plugins > Add New Plugin. Type “classic editor” in the search box, click on Install Now, and then Activate.
Once the plugin is active, the Gutenberg interface will change, and you will edit posts using the older (classic) content interface WordPress used to have before version 5.0 in 2018.
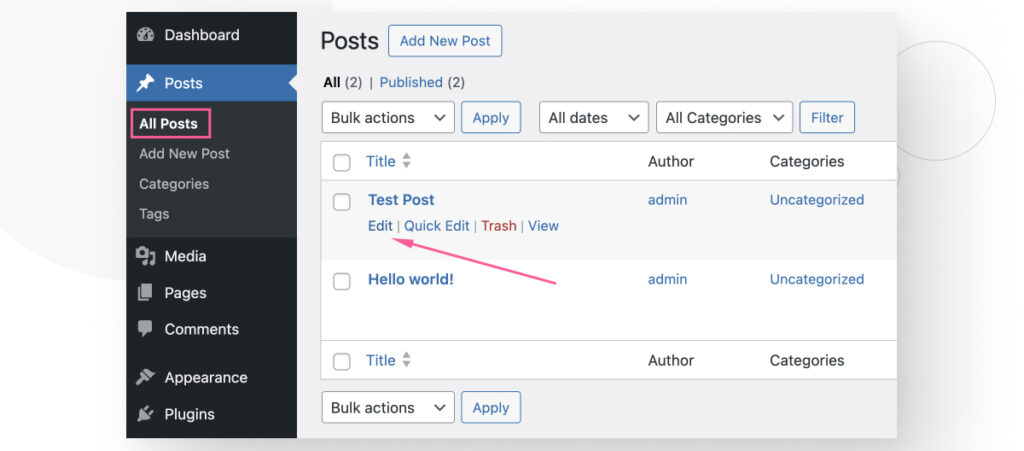
Go to Posts > All Posts and click Edit on any post you want to update.
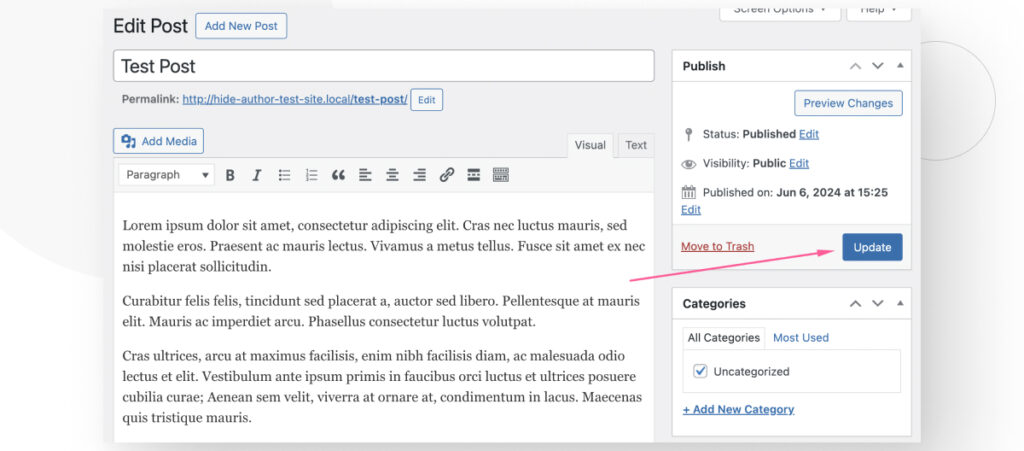
You should see the older interface. After editing your post, click Update, and your post’s content should be updated.
Solution #6: Use the Site Health Feature to Check the API’s Status
WordPress’s Site Health feature is a built-in tool for monitoring and improving website performance and security.
It provides insights and recommendations on various aspects of the site, including updates, security settings, and configuration issues.
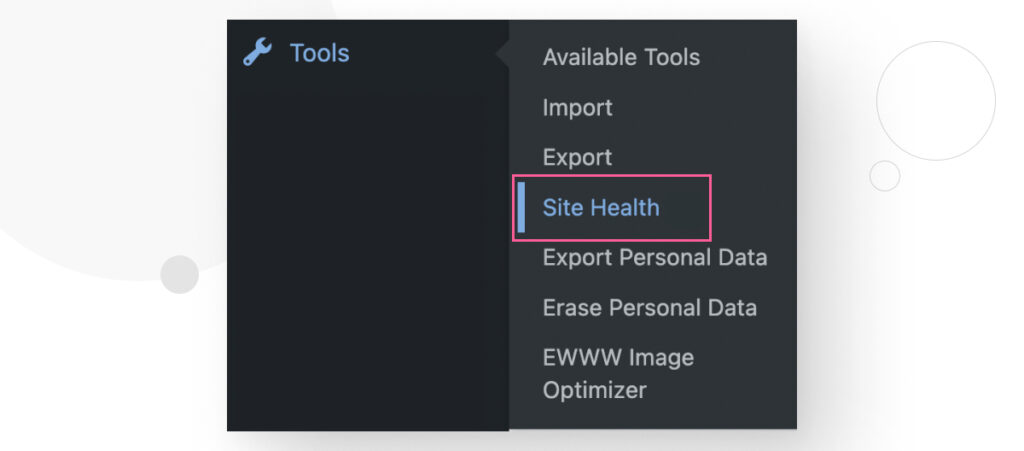
To access it, go to Tools > Site Health from the dashboard.
The Site Health screen provides an overview of the site’s overall health.
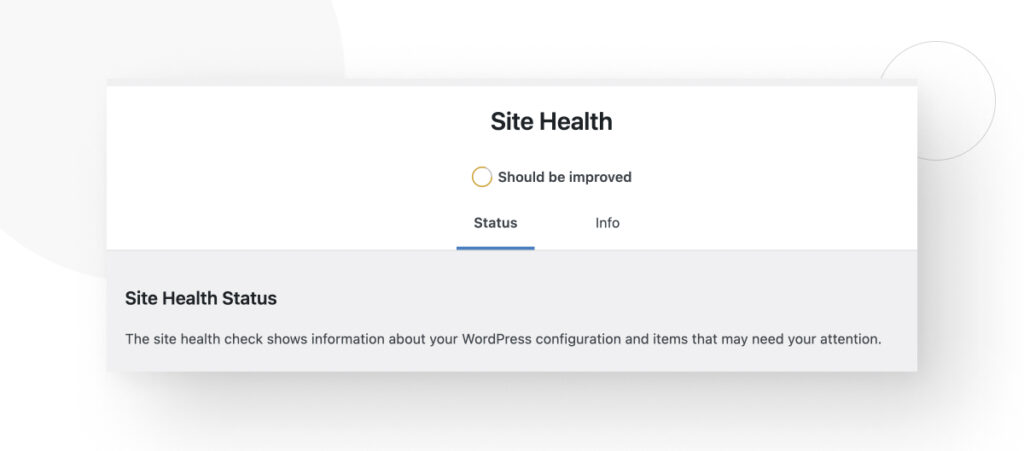
Scroll down and see if there are any notifications in the Recommended Improvements section.
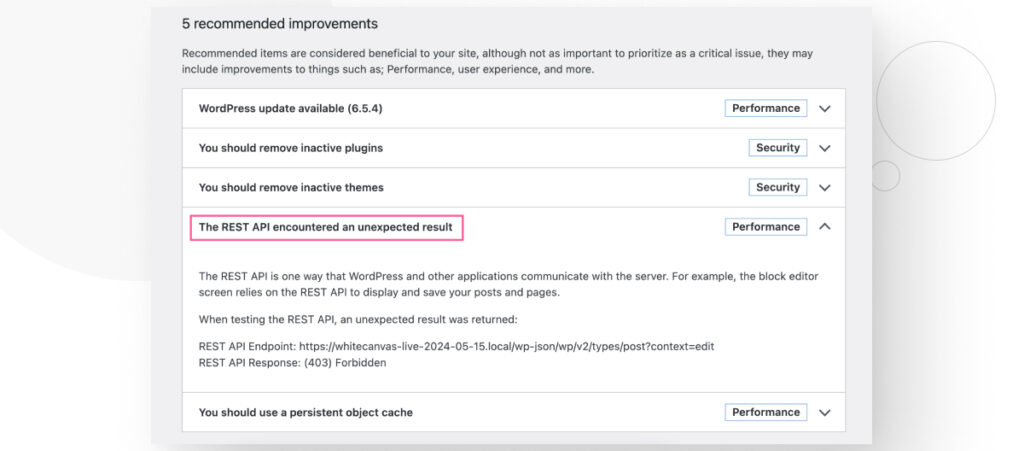
In this case, we have the error The REST API encountered an unexpected result.
Study the provided notices to see if you can find any clue about the cause of the issue. However, note that there are many possible reasons for REST API issues.
For example, one forum user faced the same problem and contacted their hosting provider.
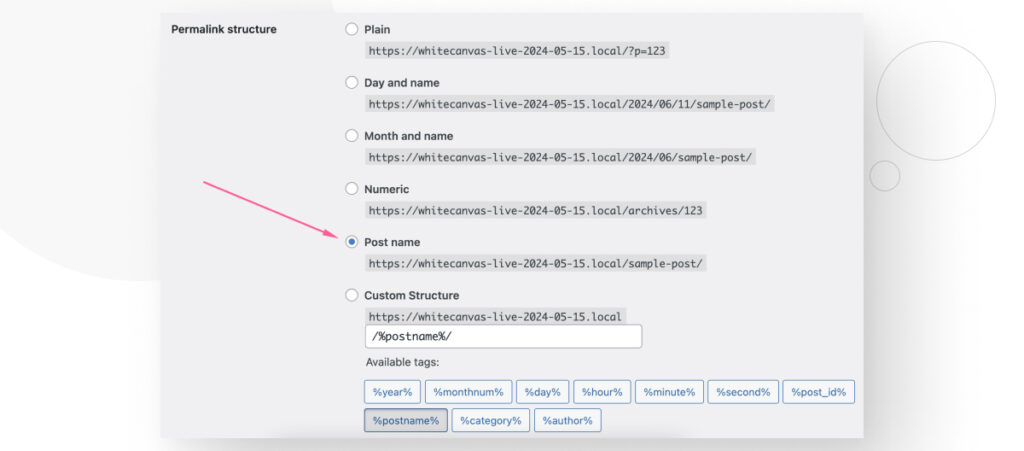
The hosting provider resolved the issue by going to Settings > Permalinks from the dashboard. The provider then changed the Permalink structure from Day and Name to Post Name, which fixed the issue.
Solution #7: Increase the PHP Memory Limit
If your WordPress site reaches its PHP memory limit during the updating and publishing processes, you may end up with an “update failed” error. To fix this problem, you can try increasing the PHP memory limit.
A low PHP memory limit is a common problem in relatively cheap hosting providers, which often offer limited resources.
To increase it, you’ll have to modify one line from the wp-config.php file.
To access it, use cPanel, FileZilla, or your local file manager to navigate to the WordPress core folder (the one with the wp-admin, wp-content, and wp-includes folders).
If you’re using cPanel, log into your account from your hosting provider’s dashboard or go to your-domain-name.com/cpanel. Go to the File Manager.
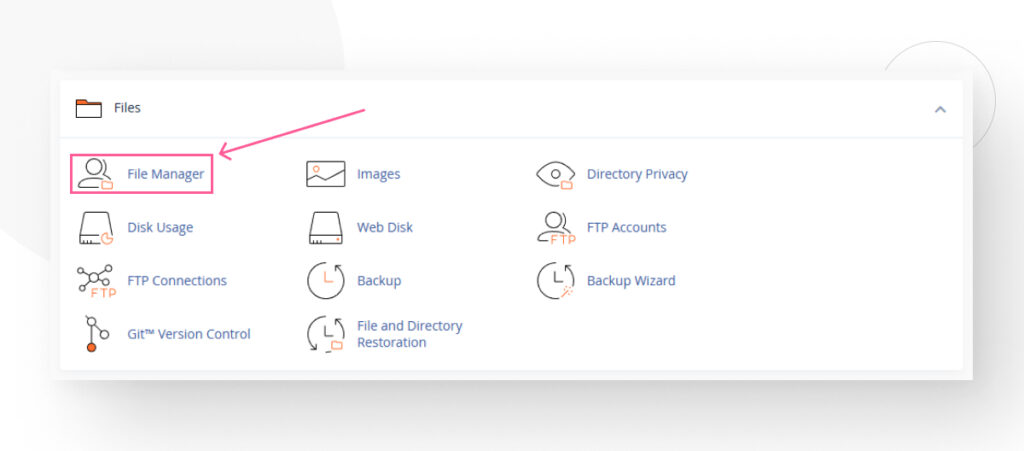
Click on the public_html folder.
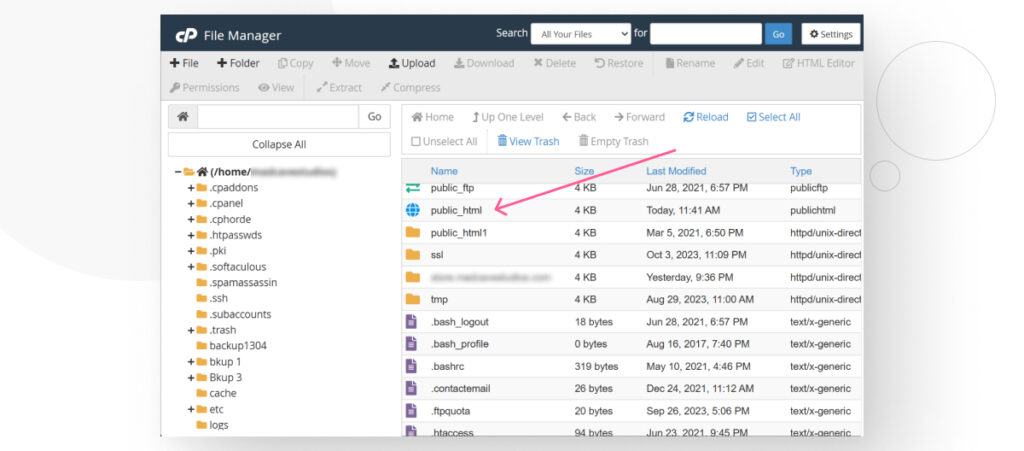
This is your core WordPress folder.
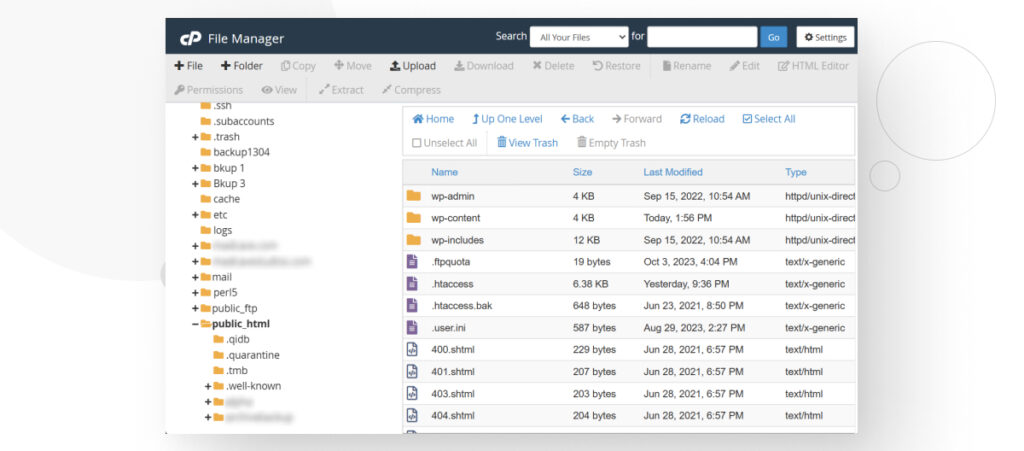
Right-click wp-config.php, and select View/Edit.
Once inside the file, use CTRL + F or CMD + F to search for WP_MEMORY_LIMIT. If you find it, it’ll look like this:
define('WP_MEMORY_LIMIT', '64M');Simply change 64M to 128M or 256M to increase your PHP memory limit. 128M should be enough for most sites, and 256M should be enough for sites that run resource-intensive plugins.
If you can’t find the line, you’ll simply have to copy and paste it. You must insert it above the line that says /* That's all, stop editing! Happy publishing. */, which is near the end of the file. It should look like this:
define('WP_MEMORY_LIMIT', '256M');
/* That's all, stop editing! Happy publishing. */
Solution #8: Use the Debug Log
The WordPress debug log is a tool for identifying and resolving issues within a WordPress site. It records errors, warnings, and notices generated by the WordPress core, themes, and plugins.
This log helps developers and site admins pinpoint the causes of problems by providing detailed information about what went wrong and where in the code the issue occurred.
The debug log is stored in a file named debug.log within the wp-content directory of the WordPress core.
To activate the debug log, go to the wp-config.php file in your root directory. Use an FTP client like FileZilla or a hosting control panel like cPanel to access it. Paste the following code into the wp-config.php file:
define( 'WP_DEBUG', true );
define( 'WP_DEBUG_LOG', true );
These two lines enable WordPress debugging mode and log all debugging information to the debug.log file.
To access the debug file, go to the wp-content folder on your WordPress core. Inside, you should be able to see the debug.log file.
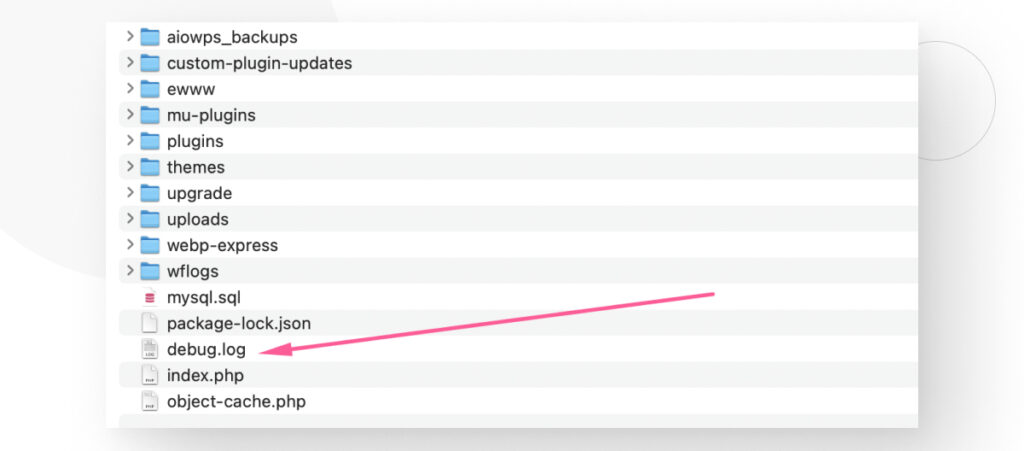
The file contains all the debugging information your site generates.

Use the debug information to pinpoint the problem and fix it or ask your hosting provider about it.
Fix the “Update Failed” WordPress Error Today
The “update failed” error happens when your WordPress site has trouble using its built-in APIs to exchange data with the database, resulting in issues when trying to update the content of your posts and pages.
This article explored 8 possible solutions to the problem, and we hope one of them will help you resolve the issue.
And if all else fails, consider contacting your hosting provider to see if they know how to fix the issue.
If you found this post useful, read our blog and resources for more insights and guides!
📬 Get WordPress updates to your inbox
Sign up for WC Blog updates and never miss a post!
Related Articles
How to Make a Subscriber Into an Admin on WordPress?

How to Grant Secure Access to a Not Live WordPress Site During Development

Do You Need a Web Developer to Build a WordPress Site?

How to Change the Bottom Padding Dimensions on WordPress Blocks