
How to Hide the Author Name in WordPress Blog Posts

WordPress gives you complete control over many elements of your website, including the visibility of the author name in your blog posts.
Whether it is because you want to hide the identity of a specific author or you’re working on a collaborative post with multiple authors, this article will show you how to remove the author from your blog posts.
Key Takeaways
- When you publish a post, WordPress shows the author’s name and other metadata by default.
- You can hide the author name from your blog posts using custom CSS, a plugin, or a generic author name.
Why Hide the Author Name in WordPress Blog Posts?
When you create a post, WordPress records and publishes metadata about it, such as the author name, publishing date, update dates, and custom fields like reading time.
Depending on the post, you may want to hide the author’s identity. Such cases include:
- Collaborative posts that involve multiple authors or a team effort, where it would be unfair to highlight one collaborator’s contribution without highlighting the collaboration of others.
- Regular contributors or guest posters who’d prefer to remain anonymous.
- You want to run an entirely anonymous blog.
Regardless of the reasons, here are the methods you can use to hide the author name from your WordPress blog posts.
How to Hide the Author Name in WordPress Blog Posts: 3 Methods
Method #1: Use a Generic Author Name
If all you want to do is hide the identity of the author of specific blog posts without actually removing the author field, you can easily create a generic user with the Author, Editor, or Contributor role and assign it as the author.
From the dashboard, go to Users > Add New User. The only required fields are the username and the email address. You can use the auto-generated password or click Generate to create a new one.
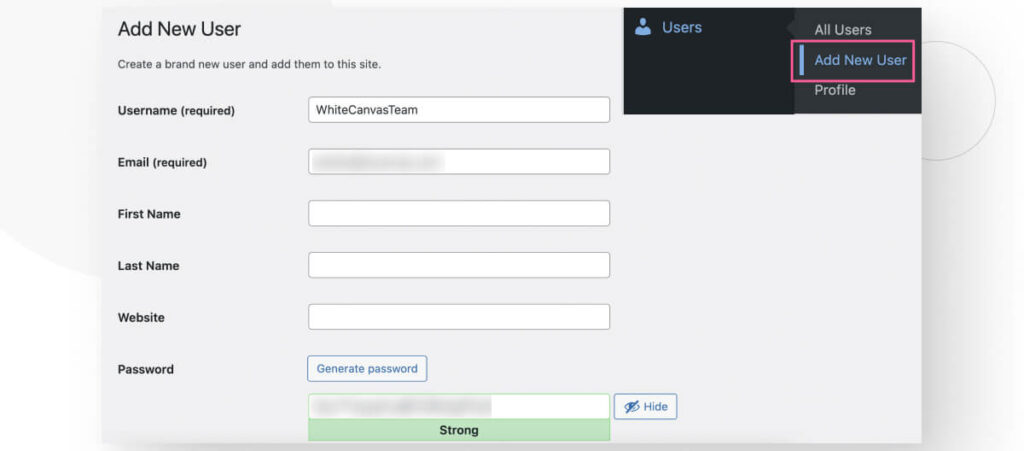
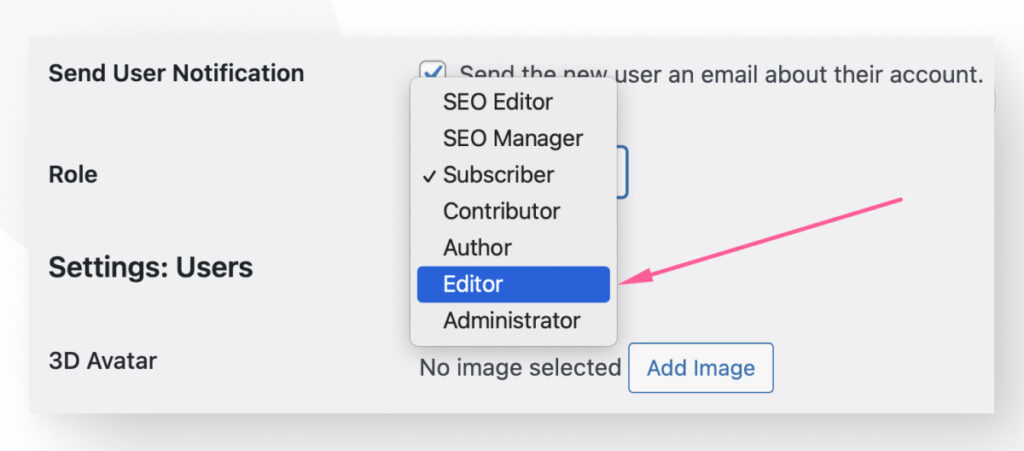
After filling in all required fields, scroll down to the Role section. Click on the dropdown menu and select Editor or whichever role you want to assign to the generic user. Remember that Contributors and Subscribers cannot publish posts on their own.
Scroll down and click Add New User to confirm the user creation.
With a new generic user, you can return to any post where you want to hide the author’s identity and click Edit.

In the Gutenberg editor, look for Author on the right-hand sidebar.
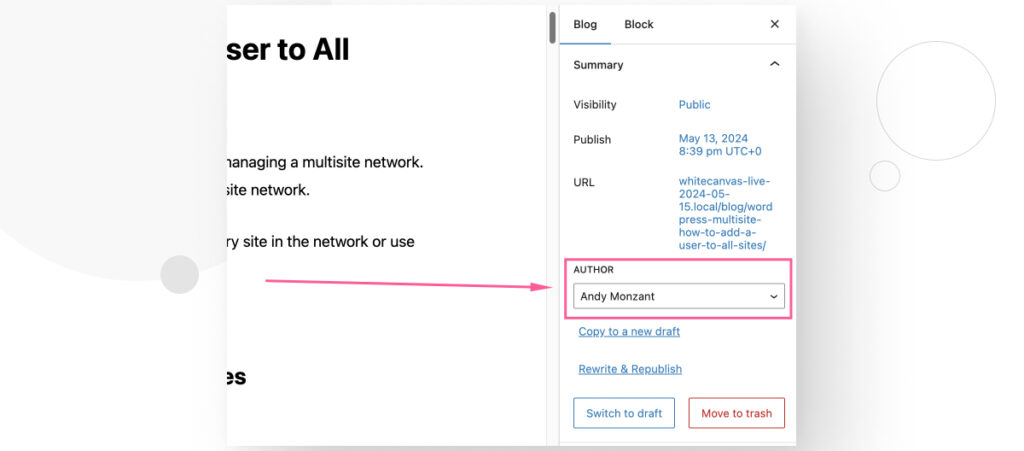
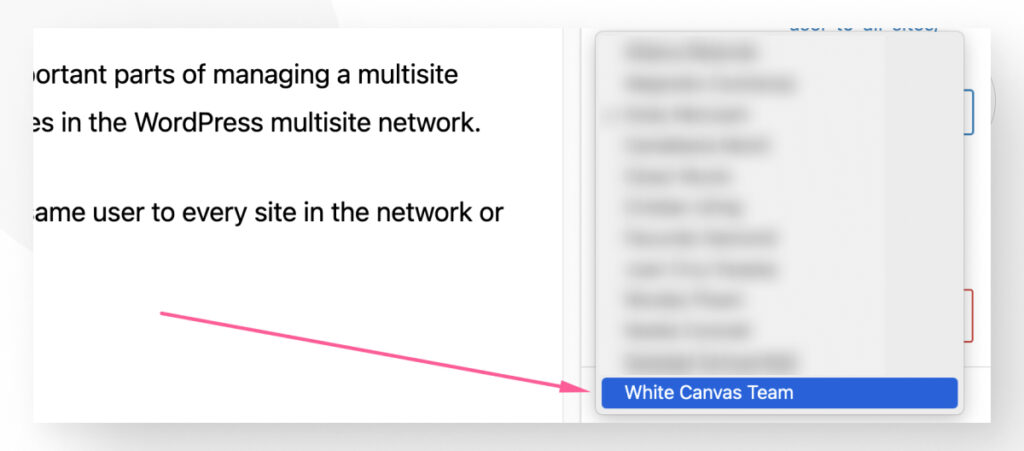
Select the newly created generic author and click on Update to update the post’s author on your live site.
If you check your live blog post, you should see the generic author’s username in the author box.
Method #2: Hide the Author Name With a Plugin for Removing or Hiding Metadata
If you don’t want only to hide the identity of the author but remove the author’s name field entirely from your blog posts, there are several plugins that help you remove it via CSS or PHP.
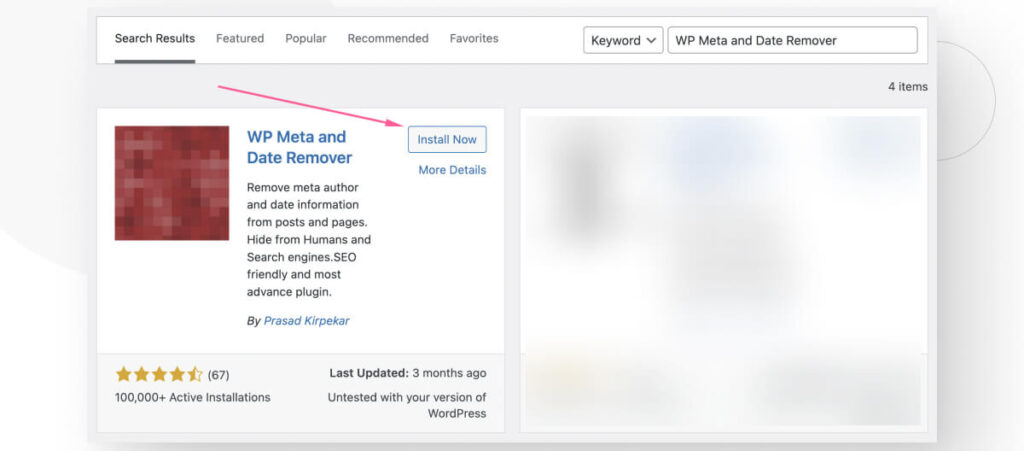
One of the most popular plugins for this is WP Meta and Date Remover.
Hide the Author Name With the WP Meta and Date Remover Plugin
Go to Plugins > Install New Plugin and search for “WP Meta and Date Remover.” Click Install Now and Activate.
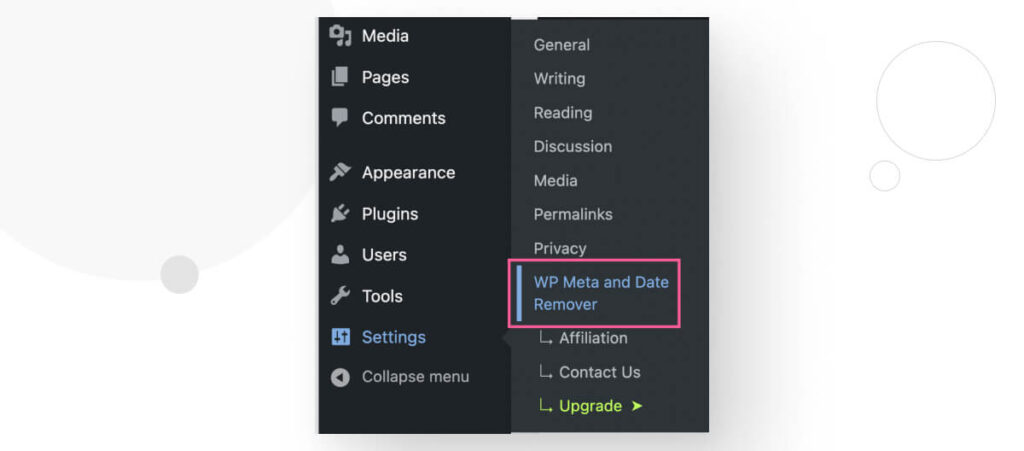
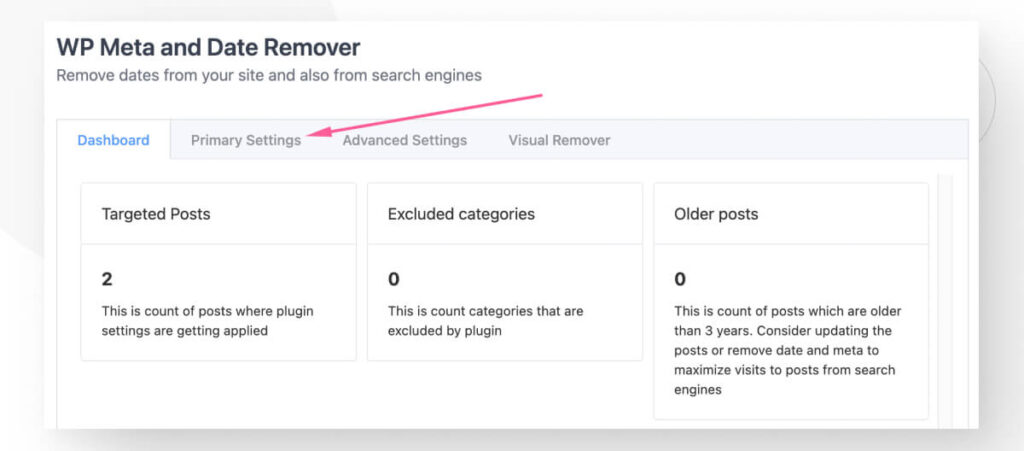
Once installed and active, go to Settings > WP Meta and Date Remover.
You will see the plugin’s main dashboard. Click on the Primary Settings tab.
By default, the plugin removes metadata by applying CSS and PHP code.
A small text box allows you to edit the CSS classes that will be targeted by this plugin. Use it if your author field uses a custom class name.
Activate or deactivate whichever method you prefer. You can also leave both methods on.
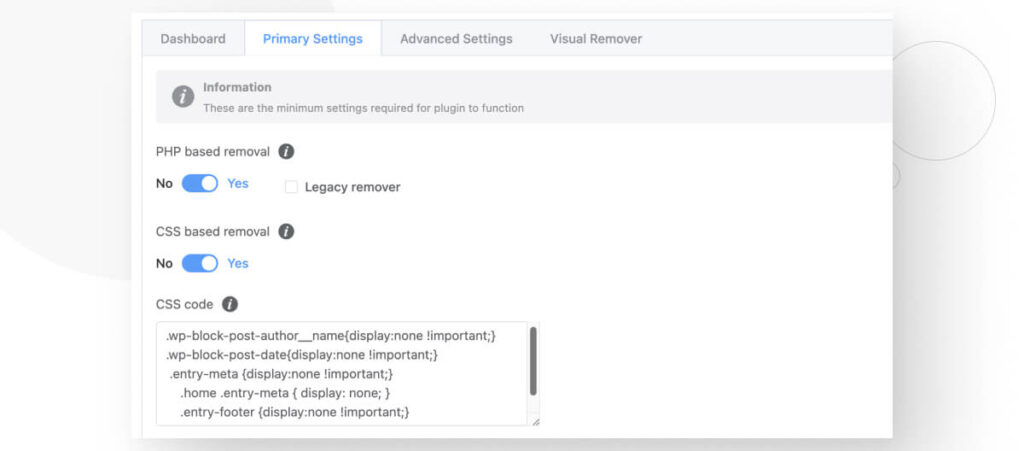
If you scroll down a little further, you will see the option to remove the author and publish date. Click Yes on Remove author, then click on Save Changes.

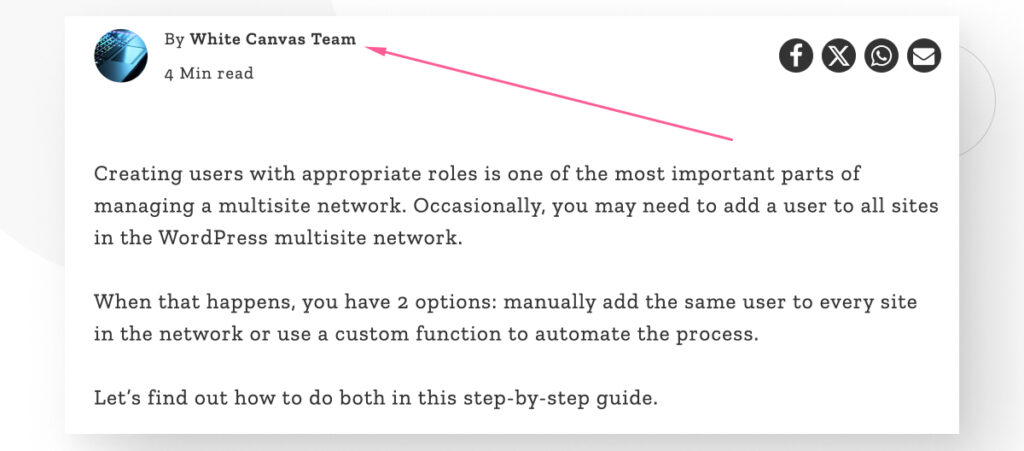
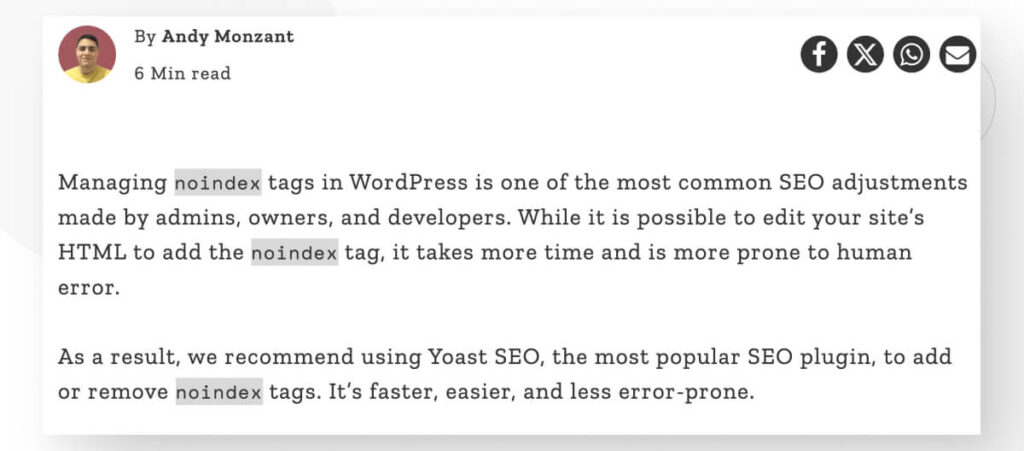
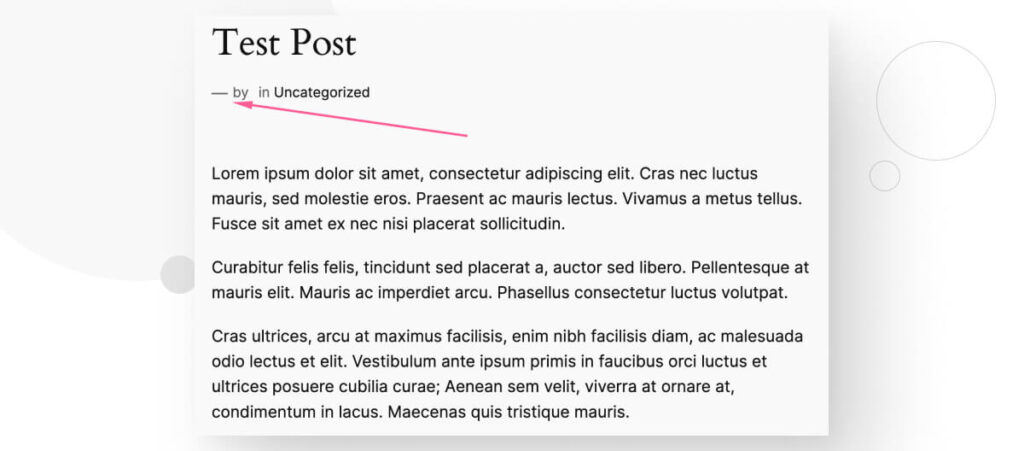
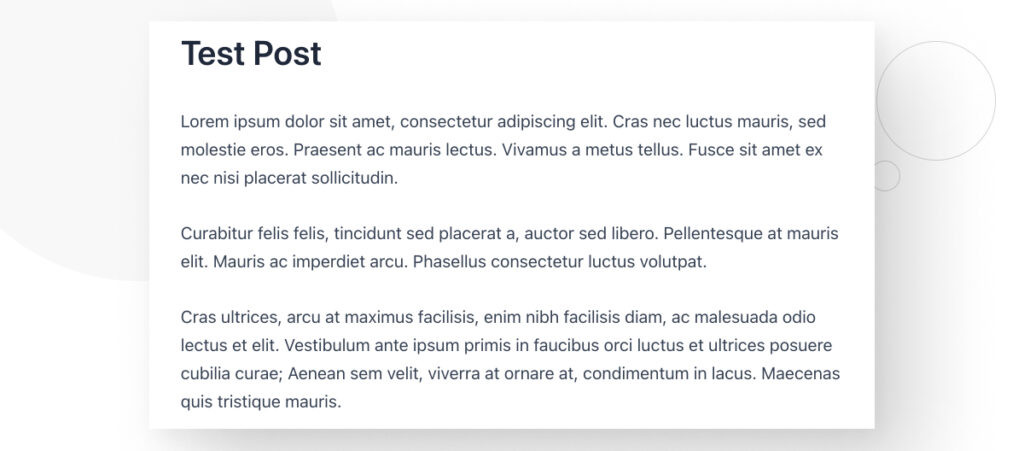
Here’s how our blog posts looked before activating WP Meta and Date Remover.
And here’s how it looks after activating it.
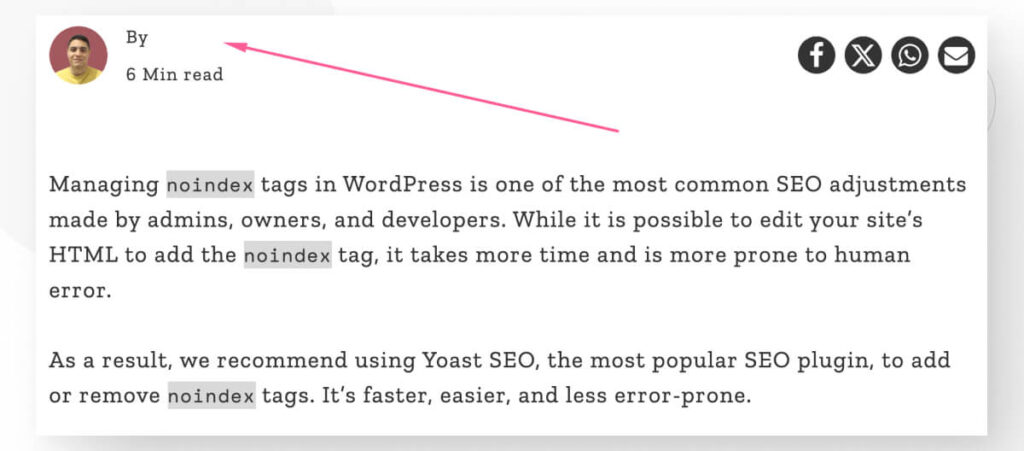
As you can see, the author’s name disappeared, but the “By” and profile picture remained.
That’s because we’re using a custom theme that displays metadata with a unique layout, and the WP Meta and Date Remover plugin can only remove the metadata without accounting for our custom design.
As a result, you should test how your site looks after removing the author name in a staging or development environment to determine whether it matches your layout.
On the other hand, here’s how it looks on a fresh WordPress installation using the Twenty Twenty-Four theme.
As you can see, it removed the author name and publish date but left the long dash separating those two pieces of metadata.
The bottom line is to experiment with this plugin and determine whether it matches your site’s layout, whether you need to modify it to match the lack of an author name, or whether other solutions suit you best.
Method #3: Hide the Author Name With CSS
If you want to hide the author’s name in your WordPress blog posts, you can always use custom CSS to hide it. Every element you see on a website belongs to an HTML class, and HTML classes can be modified with CSS. One such modification is hiding the contents of the class.
Even if you don’t know much about CSS, this process is pretty simple and shouldn’t be too difficult if you have basic computer skills.
Step 1: Identify the HTML Class You Will Target
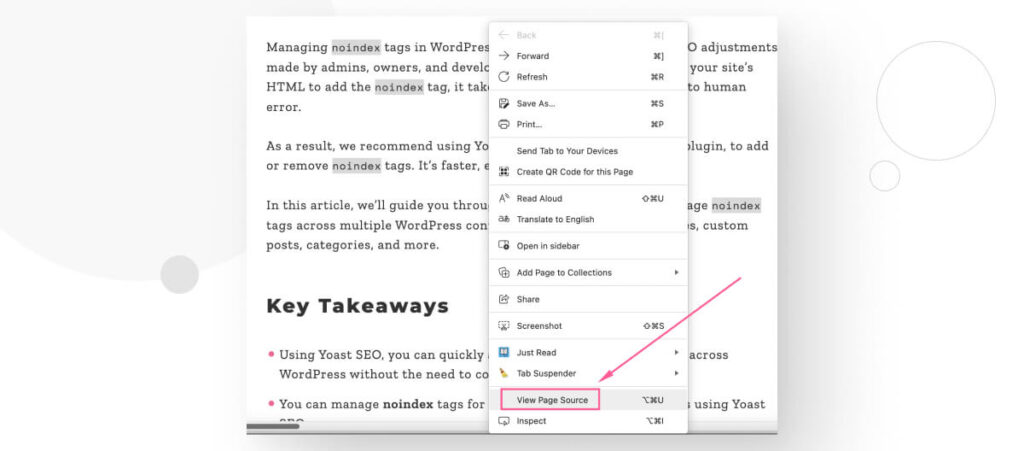
Start by going to any published blog post on your site. Right-click anywhere on the page and select View Page Source.
A new tab will open, showing the page’s HTML source code. Press CTRL + F or CMD + F and paste the author’s name into the search box. In this case, we are looking for “Andy Monzant.” Look for matches until you find your author’s name enclosed in HTML tags.
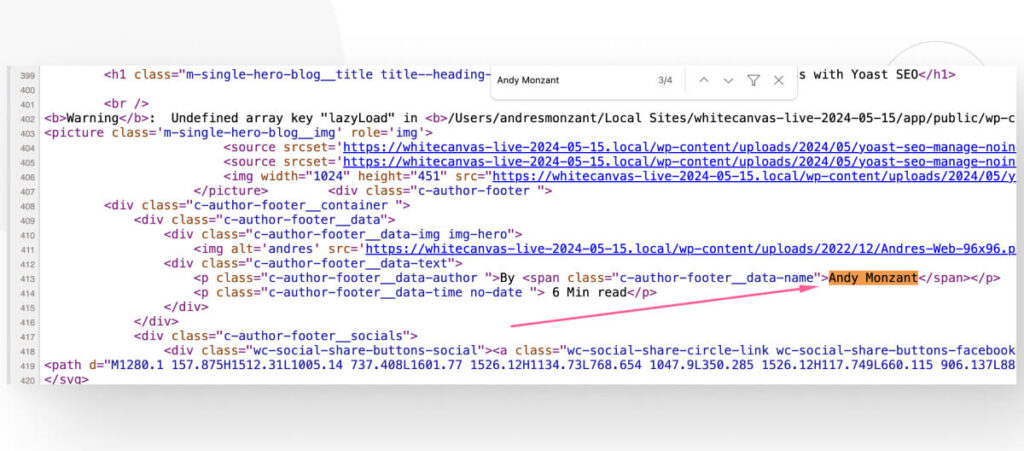
In our case, we found the following HTML code on line 413:
<p class="c-author-footer__data-author ">By <span class="c-author-footer__data-name">Andy Monzant</span></p>The author’s name belongs to the class c-author-footer__data-author (which encompasses the entire paragraph tag), but it also belongs to the more specific class c-author-footer__data-name. The class name will change depending on whether you’ve modified it with custom code, so yours will differ.
Step 2: Add the Custom CSS
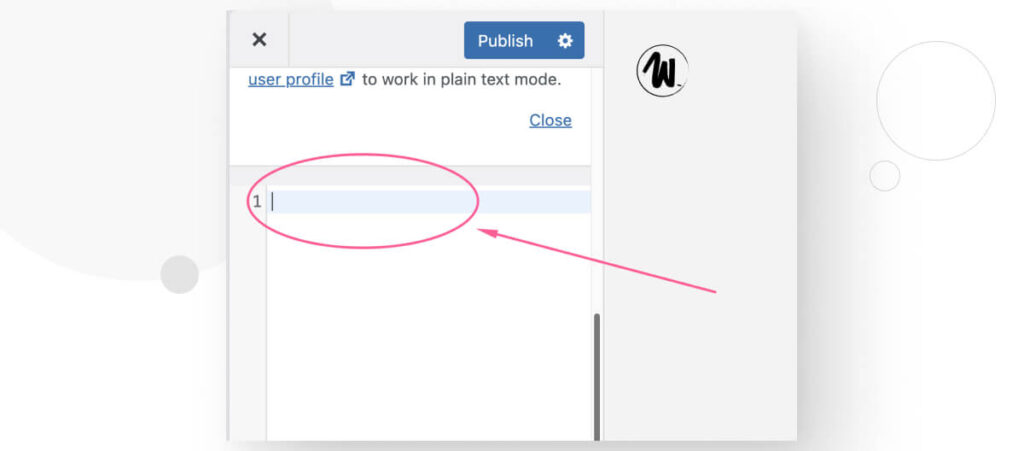
To add custom CSS, go to Appearance > Customize from the dashboard and click on Additional CSS.

Scroll down and you will see a text box to add custom CSS.
Add the following CSS snippet:
.your-class-name-goes-here
{display: none;}
Replace .your-class-name-goes-here with your actual class name (leave the period; that’s part of the CSS code). Now click on Publish.
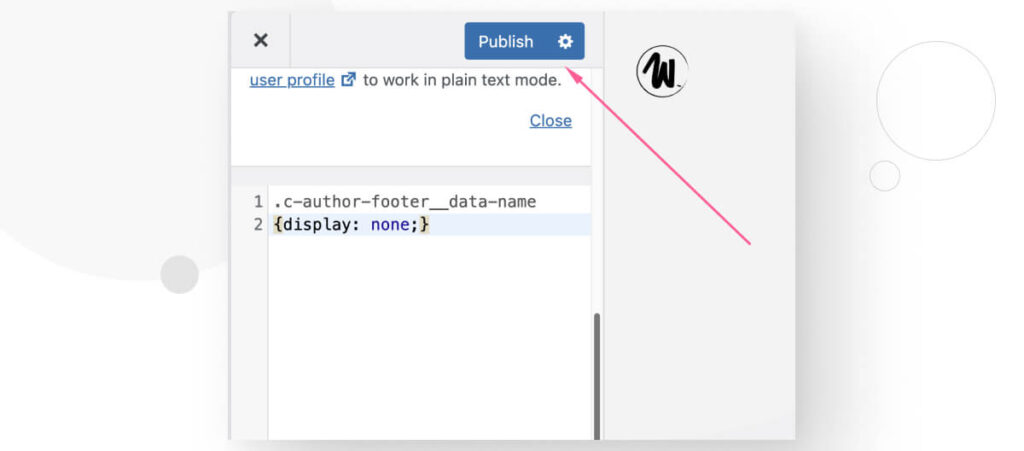
Return to any of your blog posts, and the author’s name should be gone.
Note that the author’s name is gone but the “By” line remains.
We can fix that by targeting the class that wraps both the author name and the “By” line. In our case, the relevant class is c-author-footer__data-author, but it will be different in your case.
Go back to Additional CSS and modify the code to target this class. Click Publish.
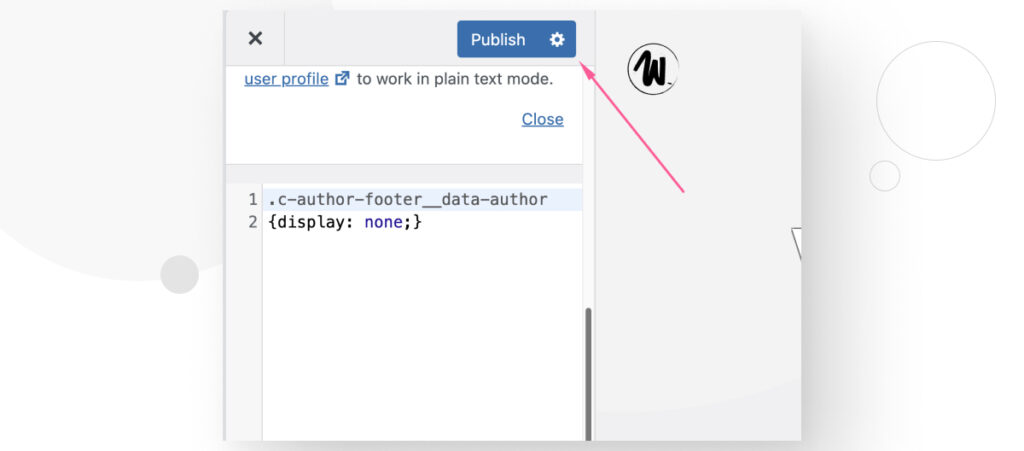
Now, the author’s name and the “By” line are gone.
Here’s what the before and after look like in a fresh installation using the Astra theme.
Before:
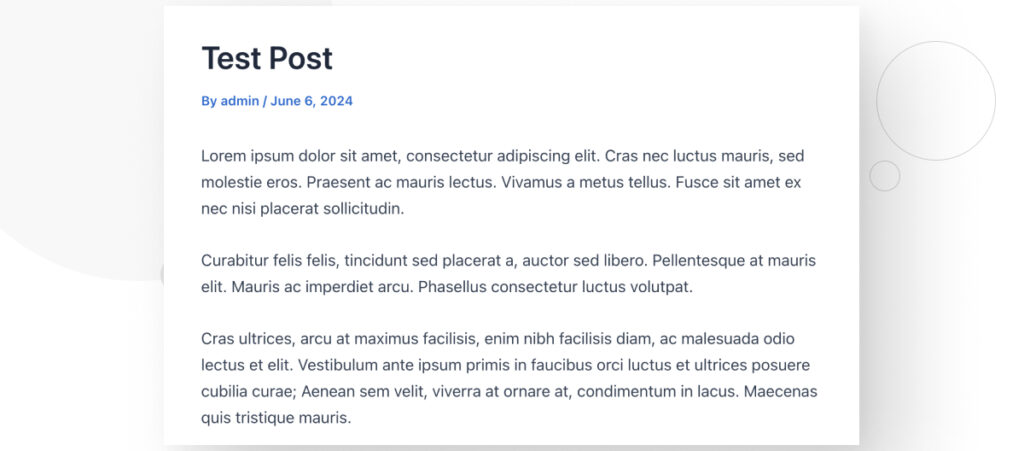
After:
Easily Hide the Author Name From Your WordPress Blog Posts
Sometimes, you may need to hide the author name from your WordPress blog posts. When that time comes, you now know the quickest and easiest methods to do it.
We hope this knowledge helps you have more control over your WordPress site. Happy editing!
If you found this post useful, read our blog and resources for more insights and guides!
📬 Get WordPress updates to your inbox
Sign up for WC Blog updates and never miss a post!
Related Articles

How to Make a Subscriber Into an Admin on WordPress?

How to Grant Secure Access to a Not Live WordPress Site During Development

Do You Need a Web Developer to Build a WordPress Site?

How to Change the Bottom Padding Dimensions on WordPress Blocks