2 best WordPress plugins for replacing old URLs after migration

Migrations are challenging for many reasons, and one of them is having to manage old URLs to ensure your users can access all the resources in your new location. Luckily, there are many plugins for replacing old URLs that’ll make your life easier by saving you hours of mindless work.
Let’s explore the two best plugins for replacing old URLs after migration and the three methods for redirecting them so your users don’t land on 404 pages when following old links. Let’s get into it!
Why do you need to replace old URLs after a migration?
URLs uniquely identify resources like images, individual pages, category pages, videos, or any other content hosted on your WordPress site. When you migrate your WordPress site, all these resources will change locations.
Therefore, the old URLs that used to identify them are no longer usable because they point to a location that doesn’t exist, leading to broken links.
Migrations often don’t automatically update all the old URLs, meaning you have to update them yourself to maintain functionality and a good user experience. You can update your URLs manually or use a plugin to automate the process.
Changing URLs manually is very time-consuming and prone to human error, so you should use plugins to make everything more efficient.
Note: Keep in mind that certain hosting services do this for you to a degree. Web hosts like WP Engine automatically update URLs if you move your site to different locations within the same ecosystem (as opposed to switching providers). Outside of these cases, however, you’ll have to do it yourself.
Benefits of replacing old URLs after migration
Replacing your URLs after a migration has multiple benefits, including the following:
- Ensuring users can access all your resources, which enhances user experience.
- Preventing broken links.
- Optimizing search engine indexing since search engines can crawl and index the correct URLs. This also preserves your site’s SEO.
2 plugins for replacing old URLs after a migration
Back up your site first. Before moving forward with any of these plugins, back up your site. Bulk-modifying URLs across your entire site can get tricky fast. You might break your site if you don’t fully understand what you’re doing. Creating backups helps you fall back on them if something goes wrong.
We repeat: make backups before attempting to update your URLs!
That said, let’s explore the best two plugins for updating and replacing URLs after a migration.
#1 Better Search Replace: Best overall
In our experience as a development agency, the Better Search Replace plugin is the best alternative for replacing old URLs after migrating your WordPress site. Better Search Replace is a plugin that lets you do much more than change URLs. It allows you to run search & replace operations on your entire database. But for migration purposes, we’ll use it to replace old URLs.
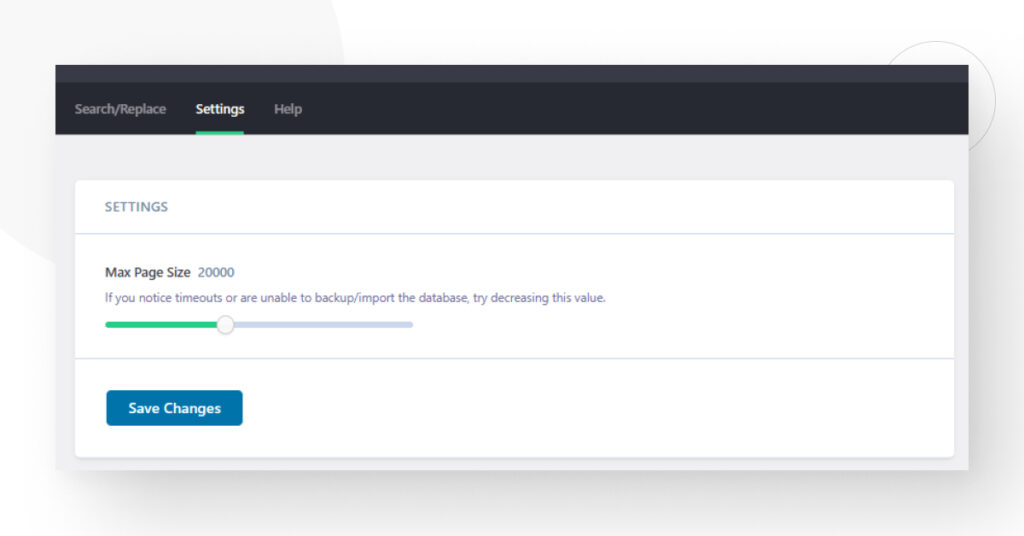
Once you’ve installed and activated it, go to Tools > Better Search Replace. The plugin only has one setting to tinker with, the “Max Page Size.” Reducing this value can be helpful if you experience timeouts or white screens while searching & replacing.
That said, all the action happens in the Search/Replace tab. Use the Search for and Replace with text boxes to modify URLs (or any text) across your site. Type the URL you want to search for and the URL you want to replace it with, then select the database table(s) where you want the plugin to perform the search & replace operation.
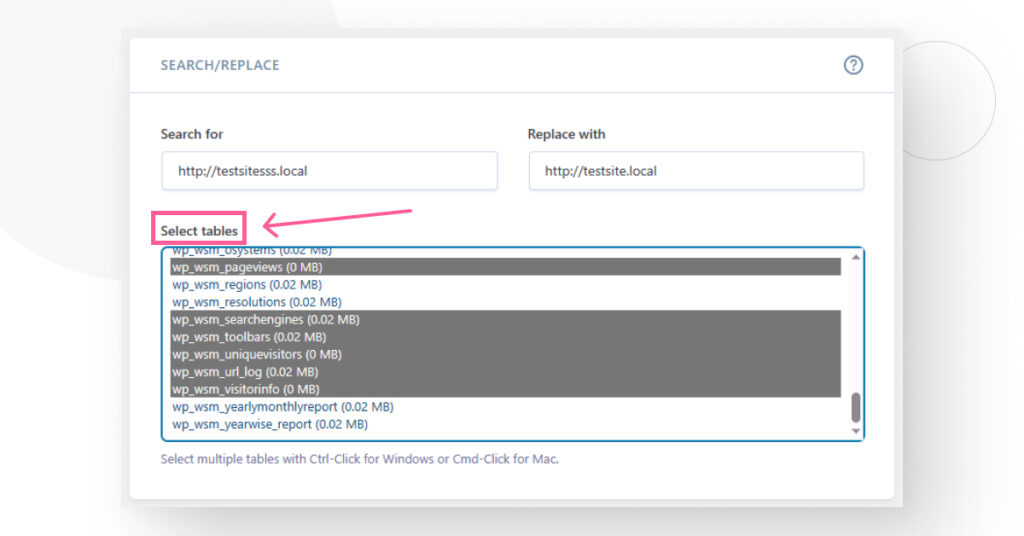
You can select one, multiple, or all tables. Use the Control, Command, or Shift keys while clicking to select multiple tables. Once you’ve selected the table(s) to search, go to the Additional Settings section below.
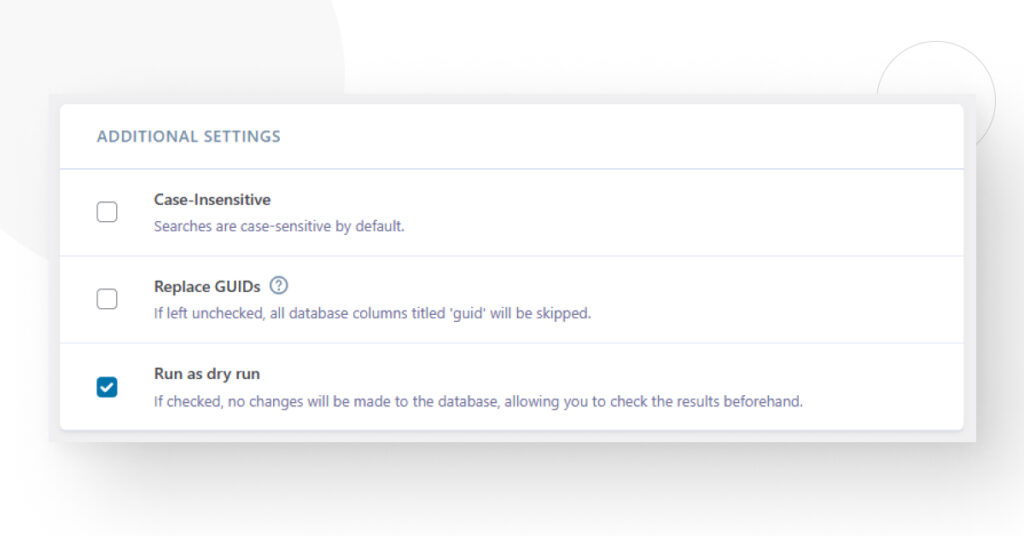
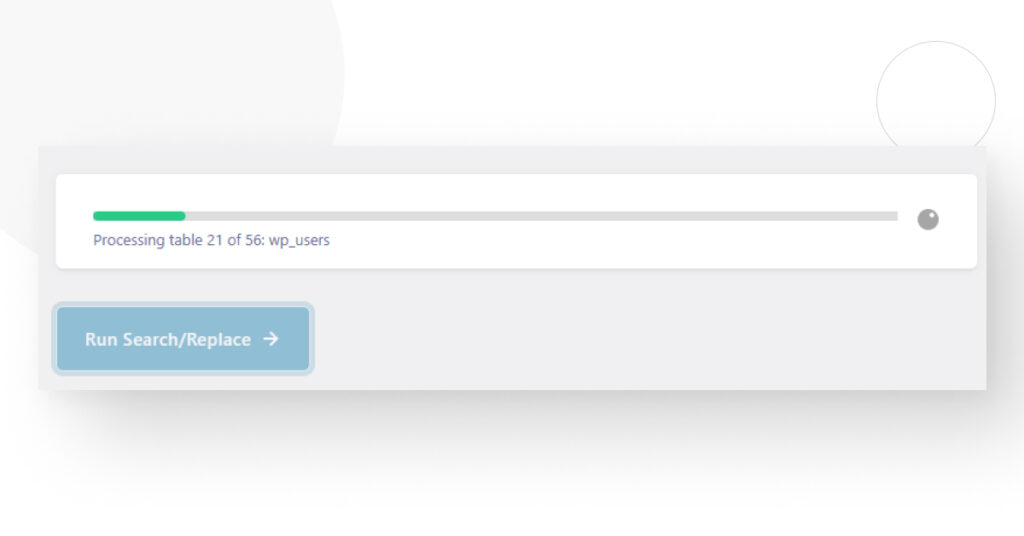
Here, you can determine whether you want the search to be case-sensitive, whether you want to overwrite database columns labeled “guid” (WordPress recommends that you do not overwrite them), and whether you want to avoid making changes to the database at first, giving you a chance to determine whether the changes were correct. Once the settings are how you want them, click the Run Search/Replace button.
You’ll get a message at the top of the Search/Replace tab with the results of the operation.
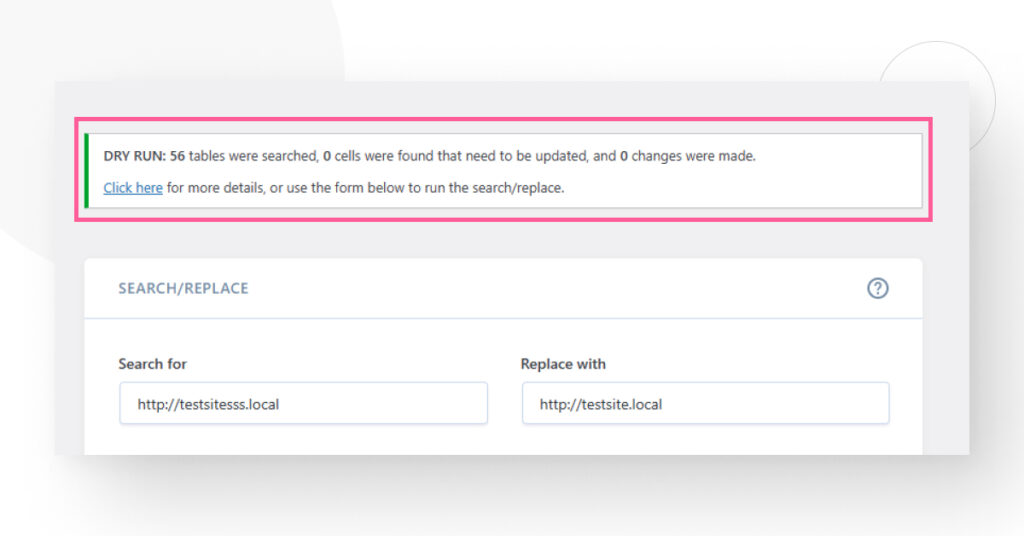
You can use this feature to replace every old URL in your newly-migrated site!
Pricing
The base functionality above is free, but a premium version called WP Migrate costs $49 to $219 per year across four paid plans. These plans feature advanced functions like previewing the results of the search & replace, matching content using regular expressions, and exporting/importing WordPress databases.
#2 Go Live Update URLs: Good alternative
Go Live Update URLs is an alternative to Better Search Replace.
Once installed and active, go to Tools > Go Live. The UI is as simple as in Better Search Replace. You have two main sections, WordPress core tables and Tables created by plugins.
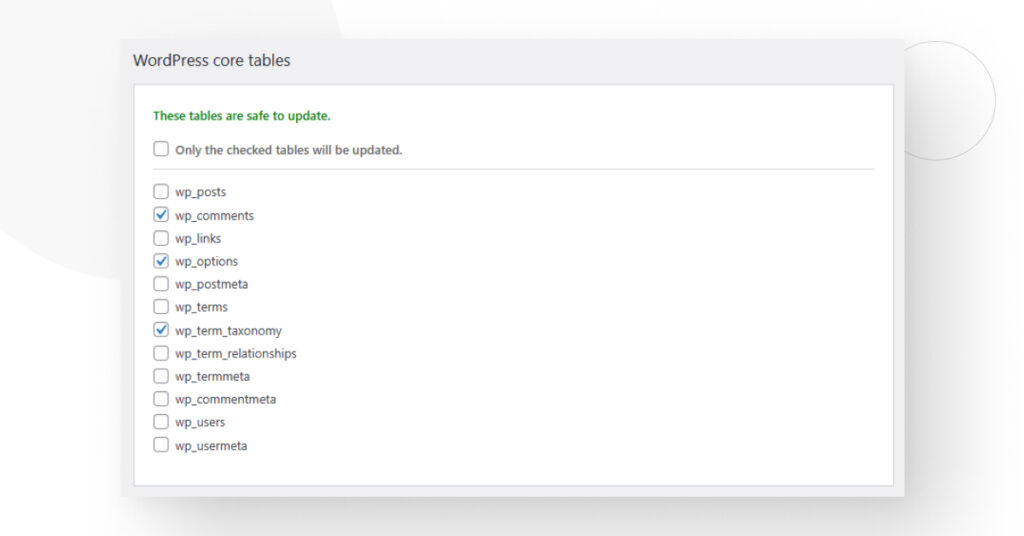
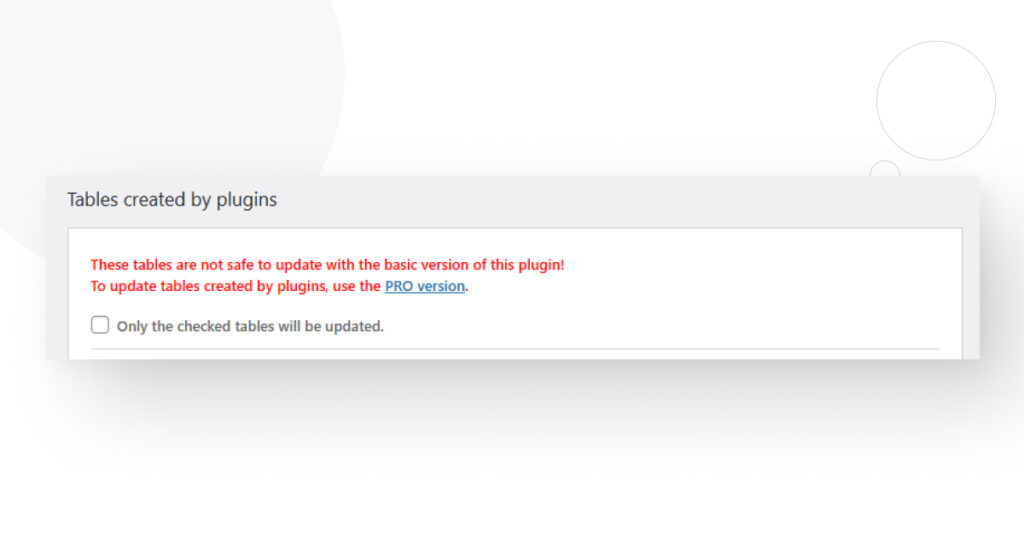
The names are self-explanatory. You can search and replace through the default tables your installation comes with and also tables added by plugins. However, the plugin warns you that changing plugin tables isn’t safe with the free version.
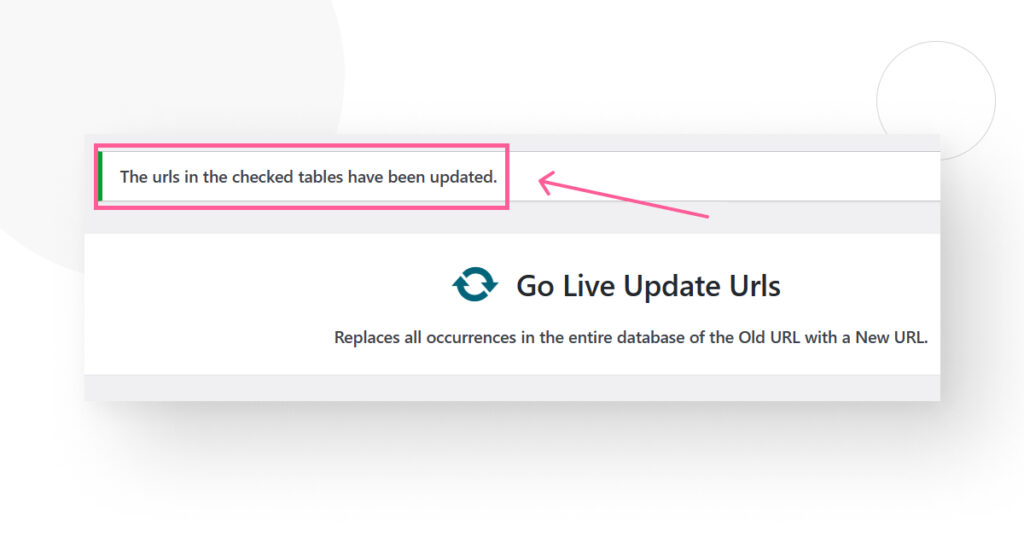
After choosing the tables, you want to search and replace through, type the Old URL and the New URL you want to replace it with. Then click on the Update URLs button.

You’ll get a confirmation message at the top of the page.
Repeat the process for every old URL you want to replace.
Pricing
The base functionality above is free, but you can buy a premium version for $47 per year or a one-time $137 payment for a lifetime license. It provides additional features like safely editing plugin tables, finding and fixing issues related to the new URL, and an efficient method for domain name changing.
What about redirecting old URLs?
While the first two plugins help you replace old URLs, they don’t allow you to redirect those old URLs to your new ones. This means old links leading to those old URLs (from social media, external blogs, etc.) will end up on a 404 error page.
You need to set up 301 redirects for all those old URLs. 301 redirects tell browsers that a web page was permanently moved to a new URL and to direct users to that new URL rather than the old one, where they’ll meet a 404 error.
You can set up redirects manually, with a plugin, or through your web host.
Setting up 301 redirects manually
You can manually set up redirects by editing the .htaccess file on Apache servers (back up the .htaccess file first). Add the following code snippet in the .htaccess file to set up a redirect:
Redirect 301 /old-page.html /new-page.html
On the other hand, if your web host uses Nginx or Windows/IIS servers, you’ll have to use a different method. However, manually setting up 301 redirects is as prone to human error as manually updating your old URLs. We don’t recommend it.
Setting up 301 redirects with a plugin
We don’t recommend setting up redirects with a plugin either, but it’s an easy solution that many opt for, so we’ll include it.
Many plugins set up 301 redirects. The most popular one is Redirection, but you can also use Safe Redirect Manager, 301 Redirects, or any other. Using Redirection for this example, once you’ve installed, activated, and set it up, go to Tools > Redirection. Go to the Redirects tab. This is the main redirection manager.
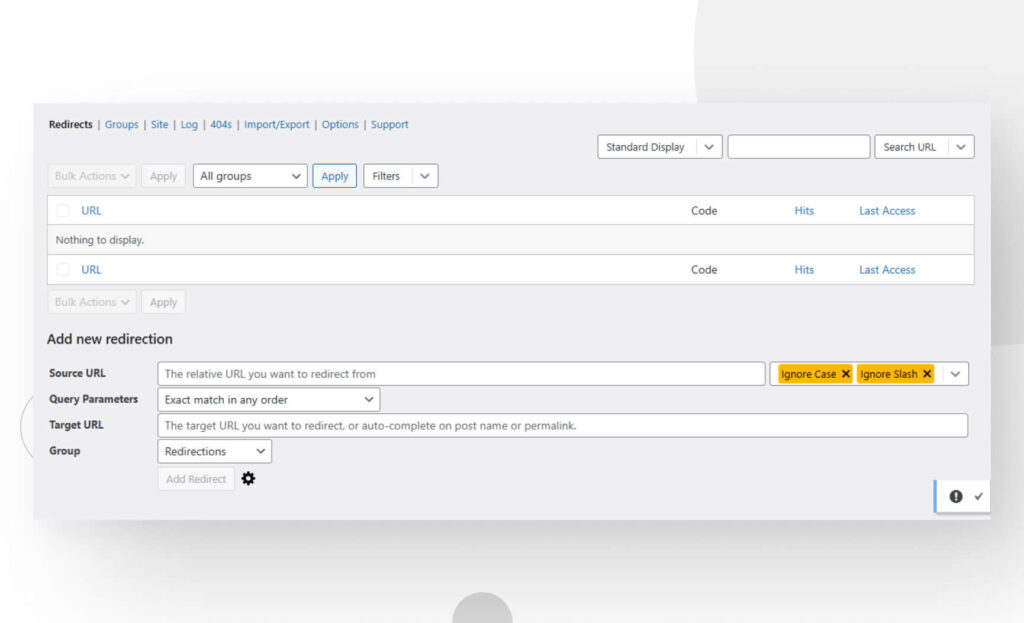
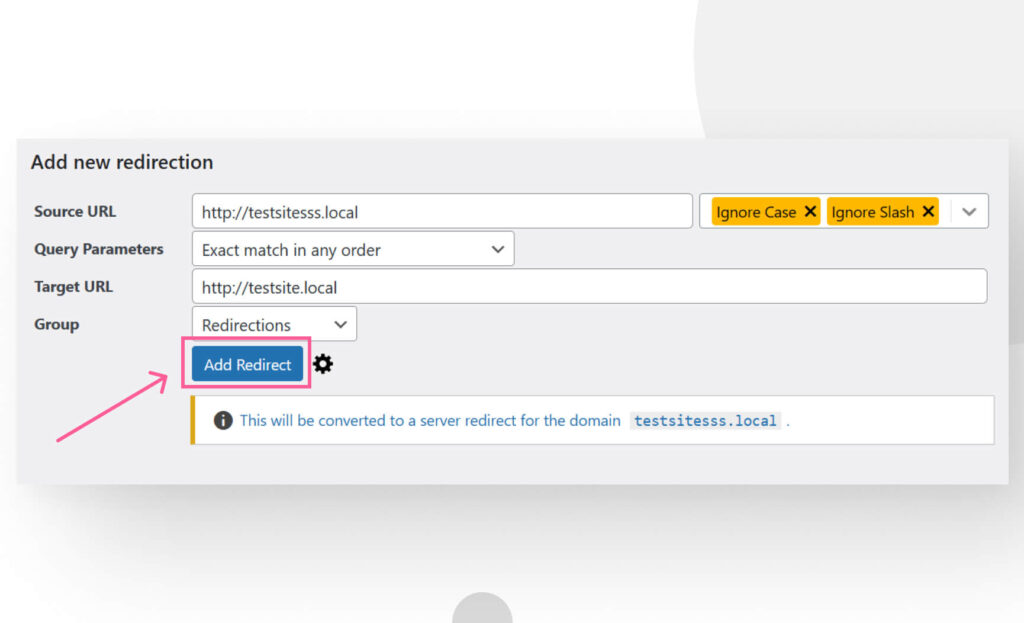
Go to Add new redirection and enter the Source URL (the old URL that leads to a 404 error) and the Target URL (the new URL you want to direct users to) like you would when replacing URLs. Input both URLs and click on the Add Redirect button.
Once you do, the redirect will appear at the top of the Redirects tab.
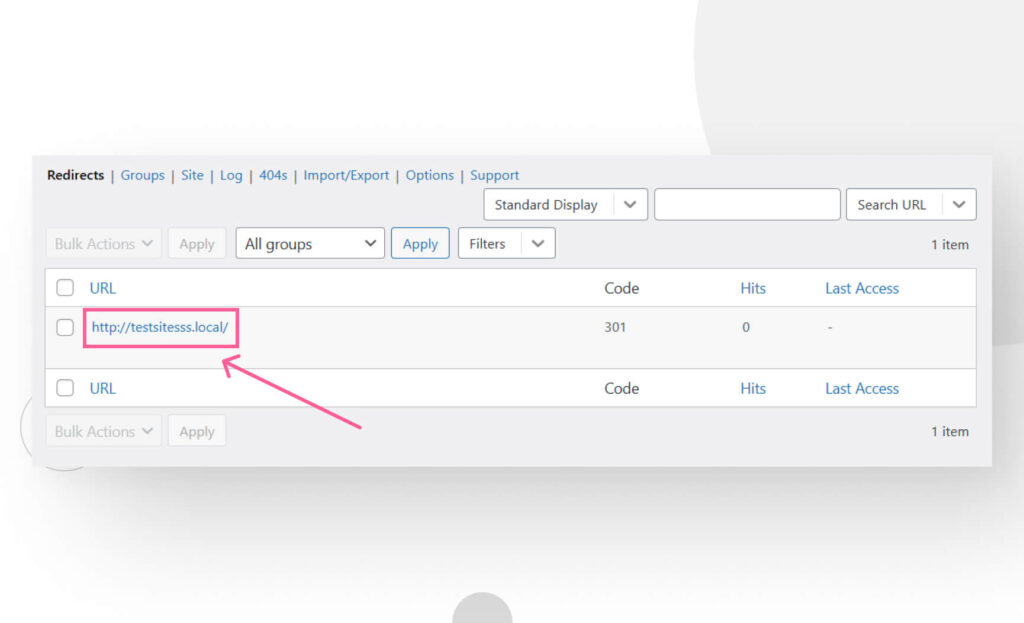
You’ll have to repeat the process for every URL you want to redirect.
Setting up 301 redirects with your web host
In our experience, this is the best method for setting up 301 redirects. Every web host has a different process for setting up redirections, but they’re all a matter of navigating through screens and adding a redirect rule.
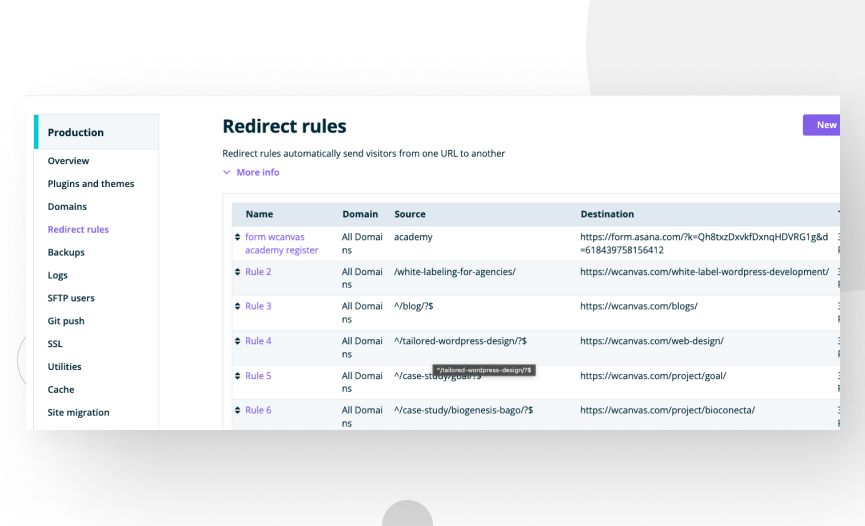
We’ll use WP Engine as an example. Log in and access the User Portal. Click on Redirect rules on the left-hand sidebar, then click the New redirect rule button. Configure your redirect and click on Save or Add another.
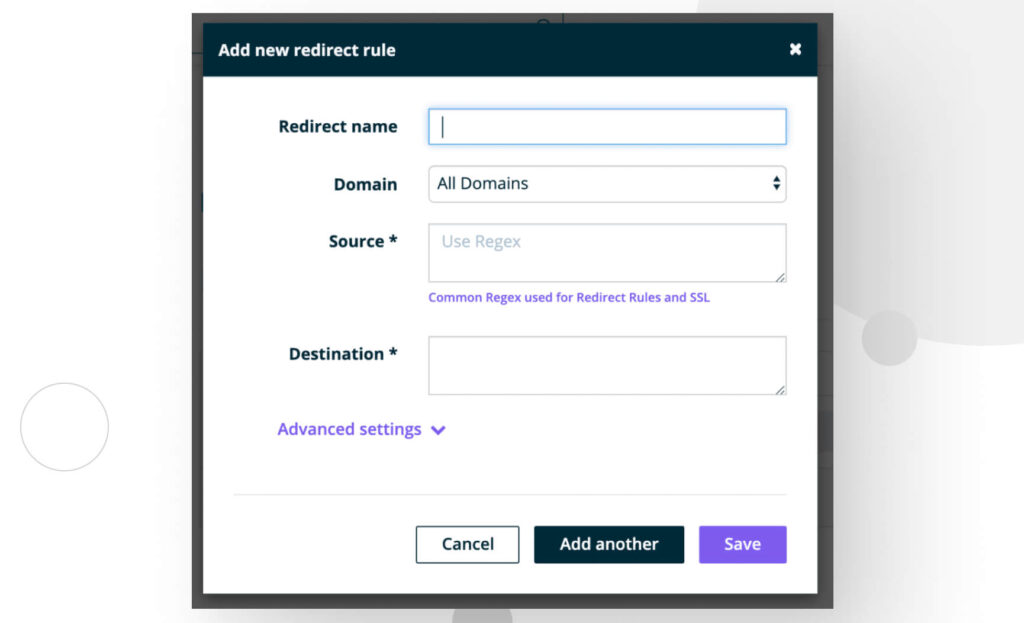
The fields you need to fill in are the following:
- Redirect name. A short descriptor for the redirect.
- Domain. The domain(s) where you want to apply this rule.
- Source. The old URL you want to redirect. If you want to redirect “http://your-domain.com/blog/post-157”, you have to input “^/blog/post-157/?$”. The “^” symbol means “start here,” and “?$” means “end here.” The domain name(s) are already applied in the Domain field. You don’t have to write it again. This field also supports regular expressions for matching multiple pages within a site’s subdirectory.
- Destination. The new URL you want users to access.
Keep in mind that WP Engine doesn’t recommend adding more than 1,000 redirect rules to the User Portal. If you need to add more than 1,000 redirect rules, WP Engine recommends using the Redirection plugin we explained above. Explore your web host’s redirection features and check for redirect rule limits like this one.
Replacing and redirecting old URLs is important
Replacing and redirecting old URLs is an essential part of maintaining a WordPress website after a migration. It ensures your users can access all resources (enhancing their experience), prevents broken links, and improves SEO.
We consider Better Search Replace the best plugin for replacing old links, with Go Live Update URLs as a good alternative. But after replacing them, you also need to preserve the old URLs and redirect them to the new ones to account for external and internal links that may still point to those old ones. Doing this will make your site’s migration smoother and more efficient!
For more WordPress guides and insights, read our blog!
📬 Get WordPress updates to your inbox
Sign up for WC Blog updates and never miss a post!