
How to a Add Font to Elementor in WordPress: 3 Methods

If you’ve been building with Elementor for a while, you may wonder how to add a new font to your WordPress site. Adding new, custom fonts can enhance your site’s visual appeal and branding while maintaining performance.
But if you’ve never added a font before, the process can seem challenging, especially if you don’t have much experience with plugins or editing WordPress files.
In this comprehensive guide, we’ll walk you through 3 methods to easily integrate custom fonts into your Elementor-powered WordPress site.
Key takeaways
- Elementor’s premium version has a native feature to upload custom fonts.
- Alternatively, you can add custom fonts in the free version if you use an additional plugin for adding the fonts.
- Finally, manually modifying your theme’s files lets you add new fonts regardless of your Elementor version.
How to Add Fonts to WordPress’s Elementor Plugin: 3 Methods
There are 3 ways to add custom fonts to a WordPress site you built with Elementor:
- Manually editing WordPress’s theme files.
- Using Elementor Pro’s native features to add custom fonts.
- Using an additional plugin to add fonts (free Elementor version).
As you can see, Elementor’s free version doesn’t support custom fonts. Still, you can easily work around this limitation with an extra plugin. An alternative to a plugin is adding a CSS code snippet into the theme files.
Lastly, if you have Elementor Pro, you can easily use its native features to add a new custom font.
Let’s explore each method step by step.
Important: Create a Backup Before Editing Your Site
Before making any changes to your site, you should always create a backup you can restore if anything goes wrong during the editing.
That said, let’s move on to the tutorial.
Method #1: Add Fonts to Elementor Pro
The Pro (paid) version of Elementor has the easiest process for adding new fonts.
Step 1: Add Your New Font
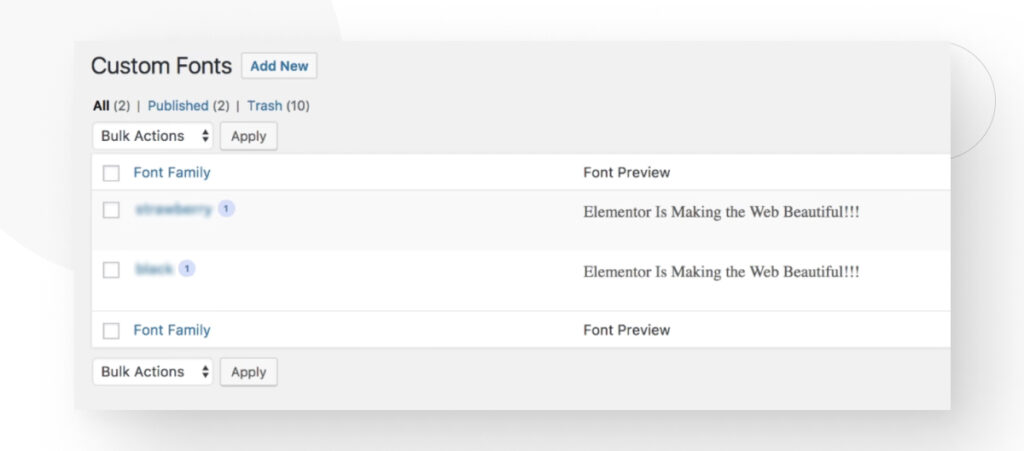
From the dashboard, go to Elementor > Custom Fonts.
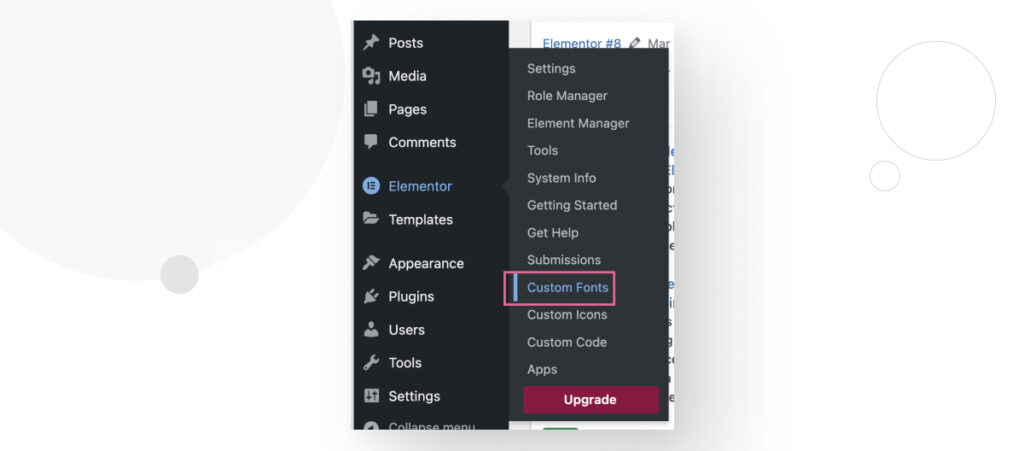
Click on Add New.
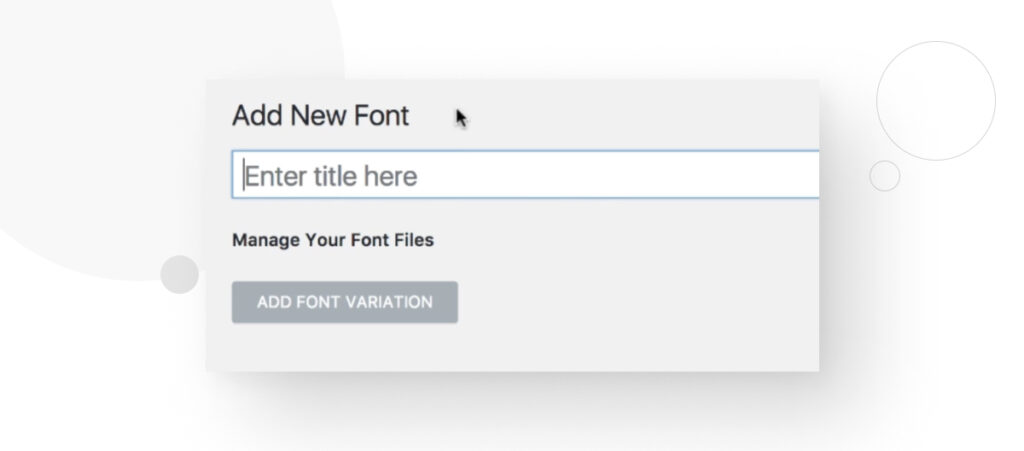
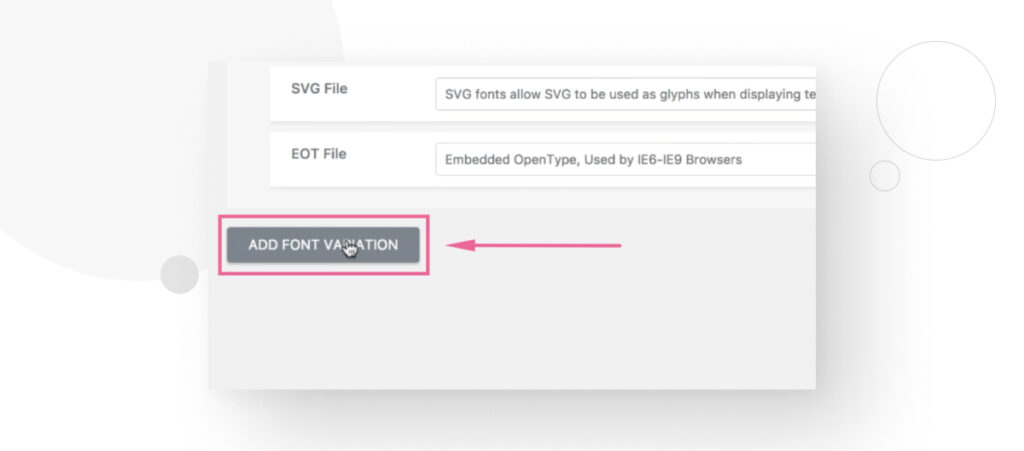
Step 2: Name Your New Font
In the following screen, add a name for your new font and click on Add Font Variation. It can be any name, but ensure you’ll remember the typeface it corresponds to.
Step 3: Upload Your New Font
Now you’ll be able to upload your new font in the 5 most popular formats. Click on Upload and choose the corresponding file for each format.
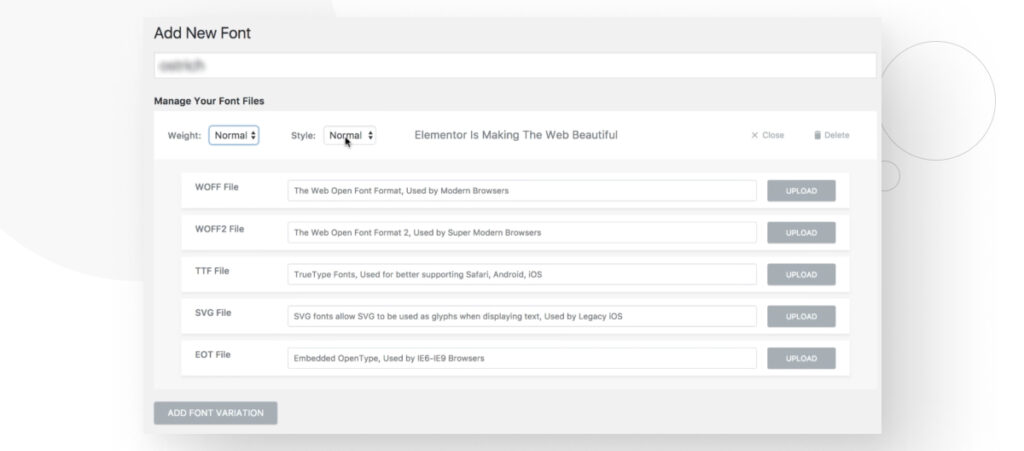
The available formats are:
- TrueType (TTF). TrueType fonts are widely used and supported on Windows and macOS.
- Web Open Font Format (WOFF). This format is specifically designed for use on the web, but it is effectively a TrueType font with additional compression and metadata. WOFF fonts are widely supported across modern web browsers.
- Web Open Font Format 2 (WOFF2). An improved version of WOFF that offers better compression and improved page performance.
- Embedded OpenType (EOT). Used primarily in older versions of Internet Explorer. They are less common now due to the popularity of WOFF and WOFF2.
- Scalable Vector Graphics (SVG). SVG fonts are part of the SVG specification. While they offer high-quality rendering at any size, their use as web fonts is less common due to larger file sizes and limited browser support.
If you don’t have a file for each format, that’s OK. Adding the WOFF, WOFF2 and TTF formats should be enough. Sometimes, even only 1 format can be enough, especially if it’s WOFF2, which is the best for performance.
Once you’ve uploaded a font, that’s it! Now, you can access the new font in the page builder.
Step 4: Add a Variation for Your New Font (Optional)
After adding your new font, you can continue adding variations to it.
Method #2: Add Fonts to Elementor With a Plugin (Free Version)
The free version of Elementor doesn’t support uploading custom fonts, so the method above won’t work.
If you go to Dashboard > Elementor > Custom Fonts, you’ll be met with a screen that tells you this feature exists only in the Pro version.

So, we need another solution. Here’s the step-by-step to the alternative using a plugin that helps you upload custom fonts.
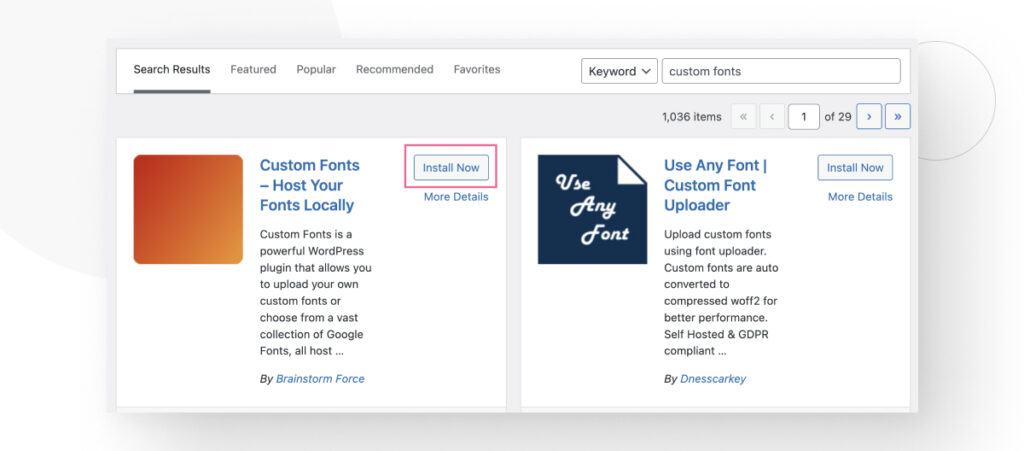
Step 1: Install a Custom Fonts Plugin
That solution comes in the form of a plugin for uploading custom forms, such as Custom Fonts or Use Any Font. For this tutorial, we’ll use Custom Fonts.
To install the plugin, go to Plugins > Add New Plugin. Input “custom fonts” in the search bar, then install and activate the “Custom Fonts – Host Your Own Fonts Locally” plugin.
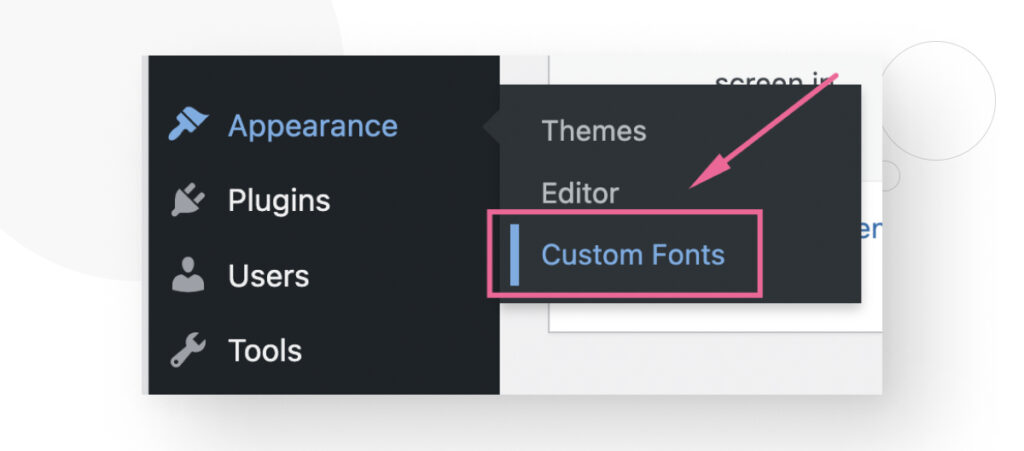
Step #2: Upload Your Custom Font
After installing the plugin, go to Dashboard > Appearance > Custom Fonts.
In the following screen, click on Add New Font.
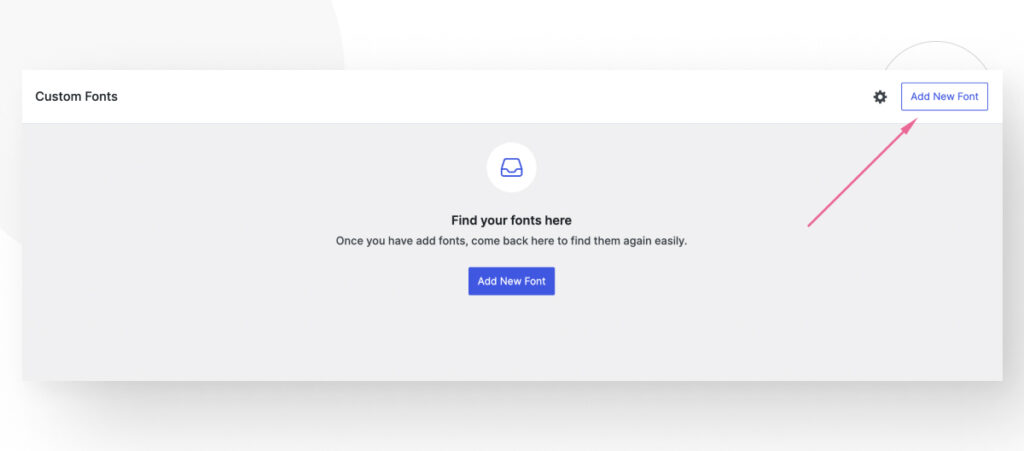
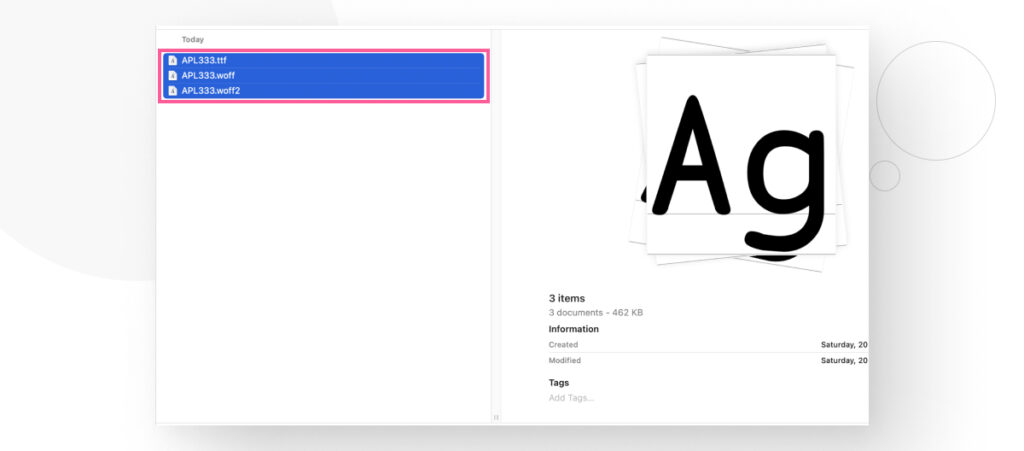
Now click on Choose File and upload your custom fonts.
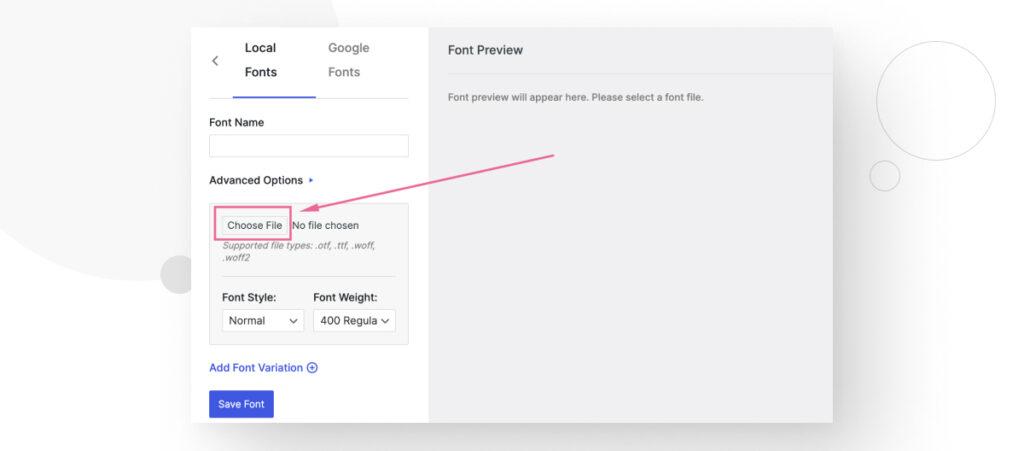
Upload every format available for the font you want to use, but keep in mind that Custom Fonts only supports OTF, TTF, WOFF, and WOFF2, so you won’t be able to use the EOT or SVG formats.
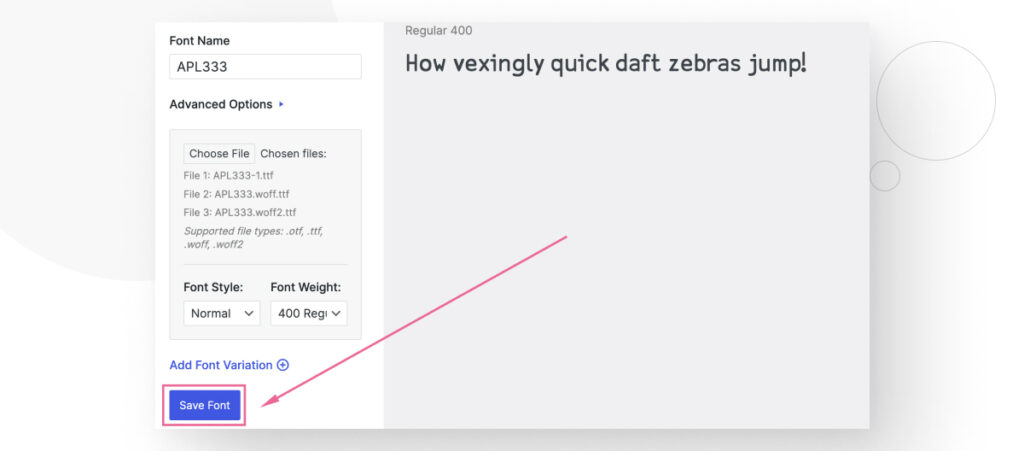
After uploading the files, name your font and click Save Font. You’ll see the message, “Variation added successfully.”
Step 3: Use Your Font
Your newly-added font is available!
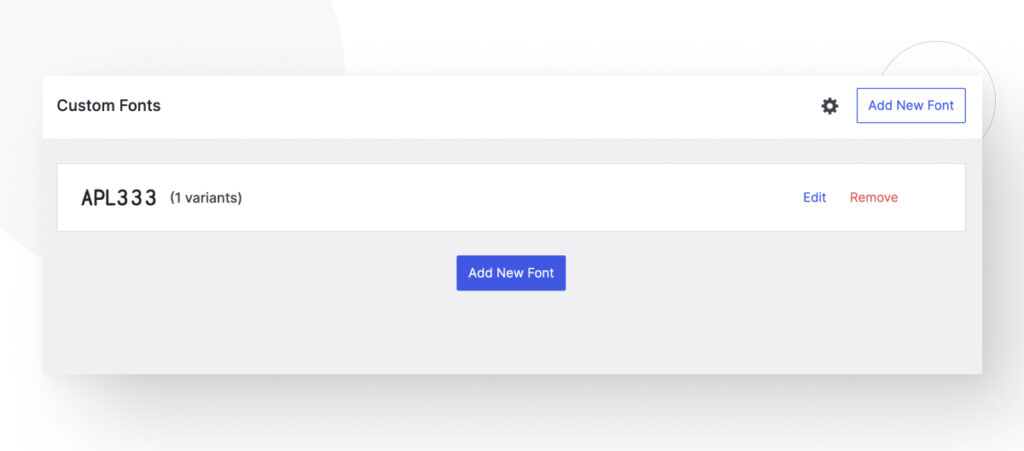
You can use it normally on Elementor now.
Method #3: Manually Add Fonts to Your WordPress Themes
The method that will work regardless of your Elementor version is manually adding fonts to your themes folder. If you haven’t delved into your WordPress core folders before, it can be challenging at first, but it works every time.
Here’s how you do it.
Step 1: Create a New “fonts” Folder
To create a new fonts folder, you’ll have to navigate to wp-content/themes/fonts. You can access your WordPress core files using an FTP client like FileZilla or a hosting control panel like cPanel. The process will be the same regardless of whether you use FTP or a control panel.
To log into your cPanel account or whichever other hosting control panel you have, do it from your hosting account’s dashboard or go to your-site.com/cpanel.
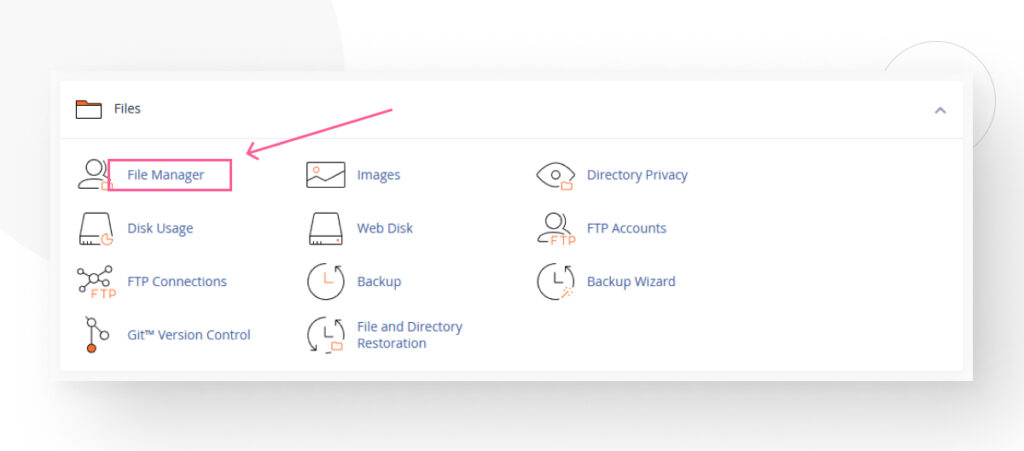
From the main dashboard, go to the Files section and click on File Manager.
On the following screen, go to the public_html directory. The public_html directory contains the core WordPress files, including the 3 main folders (wp-admin, wp-content, and wp-includes). In some cases, it won’t be named public_html. Instead, it’ll be /, root, public, root_html, or your website’s name.
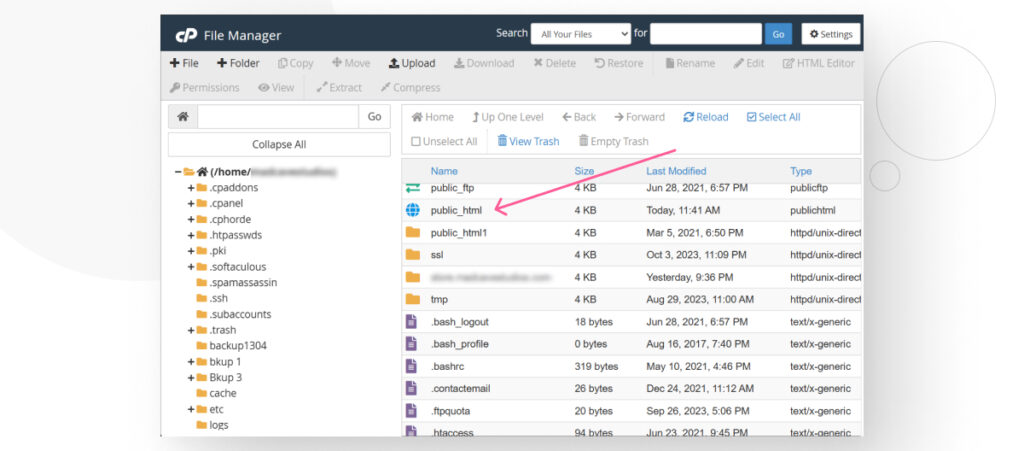
Once you enter public_html, you’ll see the 3 main WordPress folders. Access wp-content.

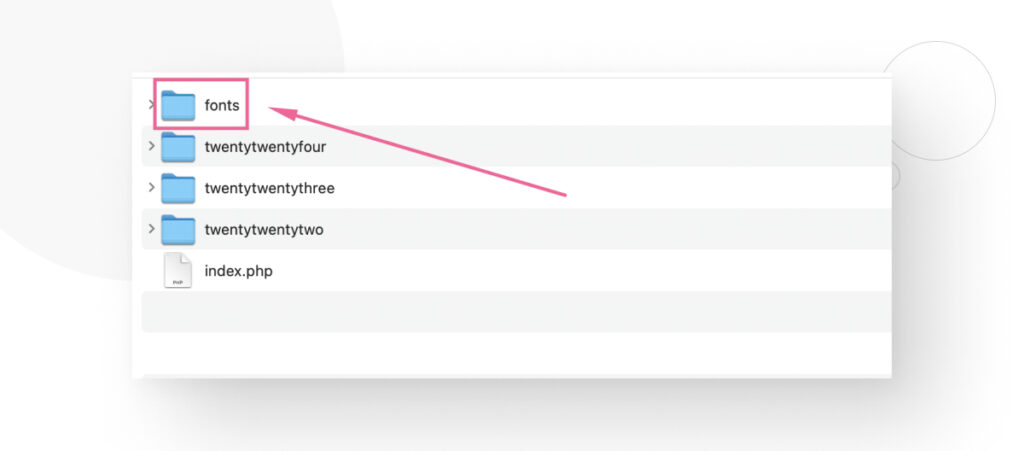
Once inside wp-content, go to the themes subfolder and create a new folder named fonts.
Step 2: Add the Font to the New “fonts” Folder
Simply drag your font files into the fonts folder.
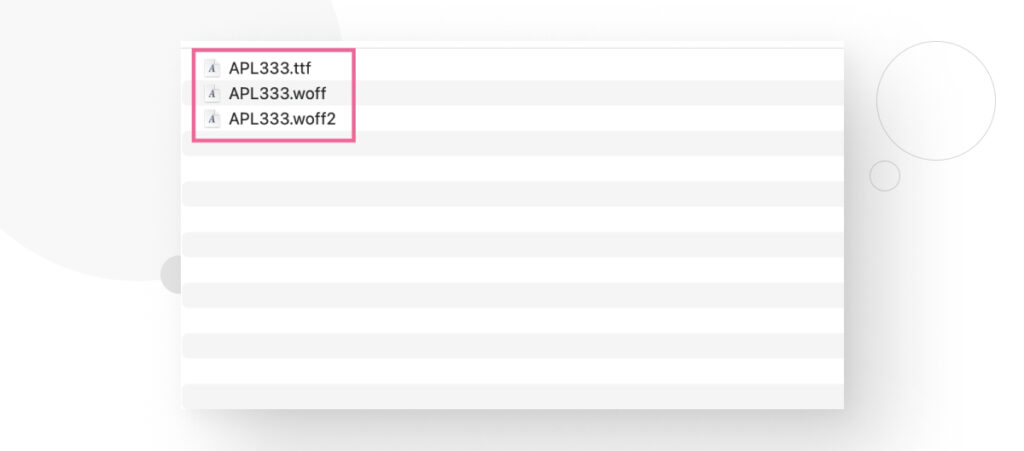
Ideally, you would upload all 5 file formats for each font you want to add, but if you upload at least the WOFF, WOOF2 and TTF formats, it works well, too.
Step 3: Add the Font to the Theme’s Stylesheet
Now that the font is part of your WordPress site, it’s time to add the font to your theme’s stylesheet to enable it. Navigate to wp-content/themes and access the theme you want to add the font to. Edit the style.css and add the following CSS snippet.
@font-face {
    font-family: 'your-new-font';
    src: url("/fonts/your-new-font.woff"), format("woff");
        url("/fonts/your-new-font.woff2") format("woff2");
        url("/fonts/your-new-font.format") format("ttf");
    font-weight: normal;
    font-style: normal;
}
Now, you can use your new font in the theme you added it to.
Remember that if you want to add features like bold, italics, and different weights, you’ll have to manually add those across every font you want to use them in.
Additionally, we recommend using a child theme to prevent an update from wiping out the custom CSS code you’ve added.
This method can be challenging for beginners, but it only requires basic computer skills and some dedication.
Where Can You Get Free Fonts for Your WordPress/Elementor Site?
Using custom fonts can enhance your site’s branding and readability, but not every project has hundreds or thousands of dollars to spend on fonts. Here are a few of the websites WordPress developers use to get free fonts:
- 1001 Fonts. This site offers 30,000+ free fonts.
- Font Squirrel. A vast collection of typefaces suitable for many different sites and apps.
- Google Fonts. Google provides an extensive database of over 600 fonts. Some of their fonts serve millions of websites.
- DaFont. It has 80.000+ fonts.
- FontSpace. Provides 120,000+ free, legally licensed fonts.
Adding Fonts to Your WordPress/Elementor Site Takes Only a Few Steps
As you can see, adding fonts to your Elementor site or WordPress, in general, can be very straightforward. Depending on the exact method, there can be a few extra steps (especially if you’re adding custom CSS code), but overall, the process involves uploading a font file or files to your site, naming it, and then adding some variation of it (optional).
Hopefully, now you can start uploading custom fonts to your Elementor site to make it more unique.
If you found this post useful, read our blog for more WordPress insights and guides!
📬 Get WordPress updates to your inbox
Sign up for WC Blog updates and never miss a post!
Related Articles

How to Make a Subscriber Into an Admin on WordPress?

How to Grant Secure Access to a Not Live WordPress Site During Development

Do You Need a Web Developer to Build a WordPress Site?

How to Change the Bottom Padding Dimensions on WordPress Blocks