
How to create a WordPress plugin in 5 steps
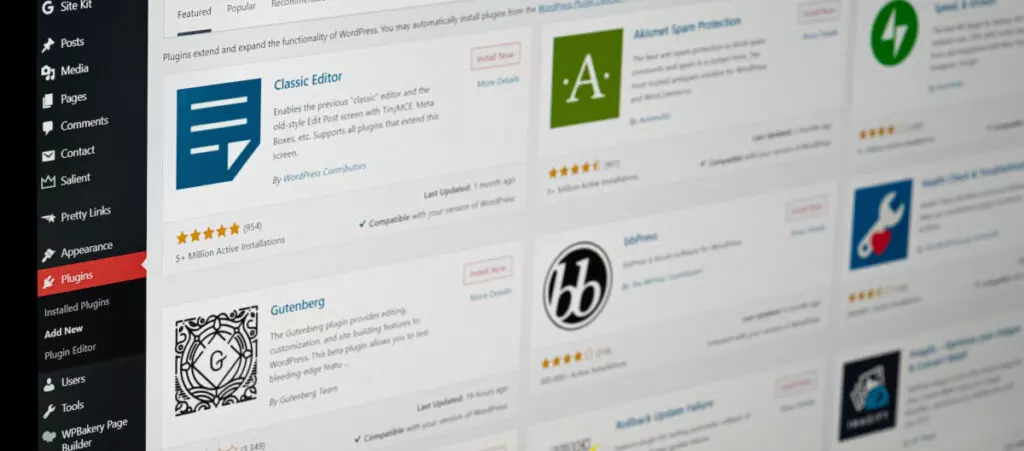
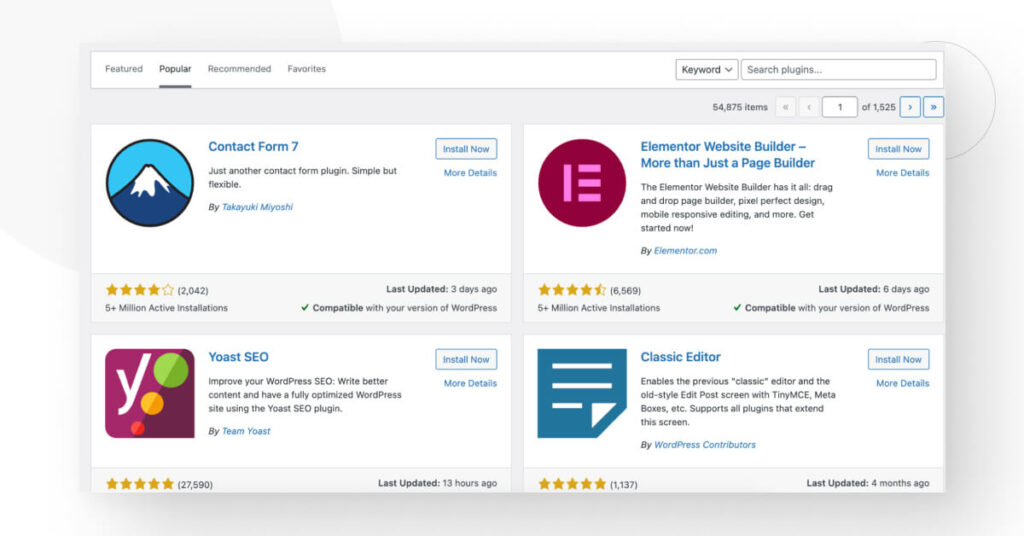
WordPress has over 54,000 plugins, some of which have millions of active installations. Regardless of where you stand on your WordPress developer journey, at some point you’ll wonder how to create a WordPress plugin.
They’re extremely useful, after all. Plugins can help you automate or improve upon native WordPress features or even create entirely new ones. But how do you create and install one on your site?
That’s the question we’ll be answering in this article. Keep reading to learn how to create a plugin in five steps.
What is a WordPress plugin?
Plugins are code packages that allow you to extend or modify your WordPress site’s functionality and features without changing the WordPress core, the codebase that powers the platform. While themes are code packages that modify your website’s appearance, plugins modify how it fundamentally works.
Plugins serve many different purposes, such as setting up sitemaps, building a site more user-friendly, improving your site’s security or SEO, adding social media sharing buttons, creating web forms, and much more.
As you can see, WordPress plugins solve needs that website owners and developers experience. They help customize and tailor your site to solve the problems it faces. But how do you develop a WordPress plugin?
Developing a plugin essentially comes down to coding PHP scripts that alter website behavior. As a result, you need at least basic PHP knowledge. Additionally, depending on your goals and the functions you’re trying to implement, you may also need to learn HTML, CSS, and JavaScript.
That may sound intimidating and time-consuming, and it can be. But that shouldn’t stop you from creating basic plugins to help you learn more about the platform on your journey to becoming a full-stack WordPress developer. Let’s walk through the steps of creating a simple plugin to show that, when you break down the process, it can be much more approachable than it seems at first.
How to create a basic WordPress plugin in 5 steps
Step 1: Get the necessary tools
You need only two software tools to create and test a WordPress plugin:
- A text editor to code your plugin. You can use Notepad on Windows or TextEdit on Mac, but we recommend using a dedicated code editor. Our developers use Visual Studio Code.
- A WordPress environment to test your plugin. It can be a local or an STG environment. We don’t recommend testing a plugin on your live site, even if you create a backup first.
With these tools, you can code and test your plugin before deploying it on a live WordPress site.
Step 2: Create the plugin folder and file
Create a new folder on your local machine or use an FTP client like FileZilla to browse your STG site’s folders and create a new folder. We created a new folder on Mac’s Finder app.
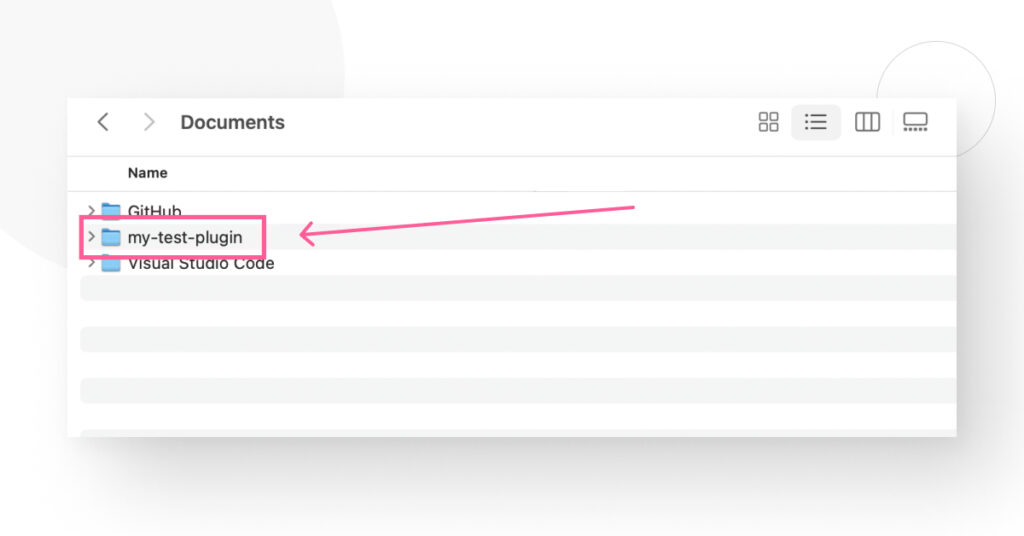
Now, create the PHP file to add the plugin’s code. Best practices suggest that the file should have the exact same name as the folder, followed by the .php extension. Therefore, we created a file called my-test-plugin.php and are ready to add the code using Visual Studio Code.
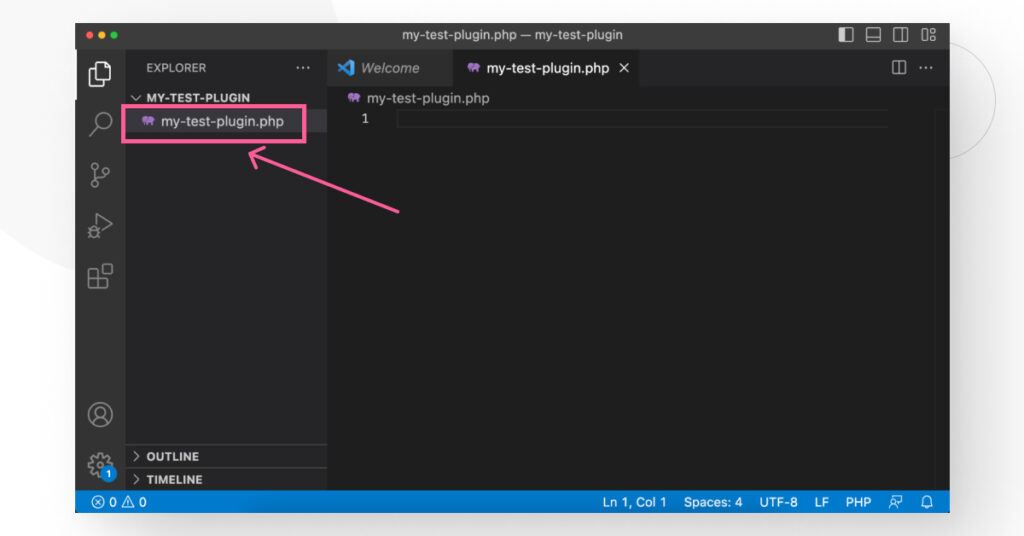
Remember that you can also use a plain text editor like Notepad or EditText. Still, we recommend Visual Studio Code or another code editor like Codespaces or Sublime Text.
Step 3: Code your plugin
Now it’s time to add the code to extend or modify your WordPress site’s functions. First, let’s add the plugin’s header, containing general information about it.
<?php

/**

* Plugin Name: my-test-plugin

* Plugin URI: https://wcanvas.com/

* Description: This is a test plugin.

* Version: 1.0

* Author: White Canvas

* Author URI: https://wcanvas.com/

**/
Edit this header to match your plugin’s data.
Technically, you could use this plugin as-is. You could upload it to your local/STG environment, and it would work… but it would do nothing. Let’s add code below the header to display a text message at the bottom of every blog post.
function wcanvas_read_our_blog($content) {

    // This line ensures the plugin only activates in individual posts.

    if ( is_single() ) {

    // Display a message at the bottom of the post.

    $content .= '<p class="read-our-blog">If you found this post useful, <a href="https://wcanvas.com/blogs/" title="White Canvas blog archive" target="_blank" rel="nofollow">read our blog</a> for more WordPress insights.</p>';

    }

    return $content;

}

add_filter('the_content', 'wcanvas_read_our_blog');
That’s it! This is your first plugin! You’ve created a plugin that adds text containing a link to the White Canvas blog (change the URL to link wherever you want) at the bottom of every post. Now let’s upload the plugin, activate it, and see it in action on your site.
Step 4: Test your plugin on your local or STG environment
Now it’s time to test your new plugin. To do that, you’ll have to:
- Compress your plugin’s folder.
- Upload your plugin to your local or STG environment.
- See your plugin in action.
Compress your plugin’s folder
On Mac, right-click your plugin’s folder and select “Compress [your folder’s name]”.
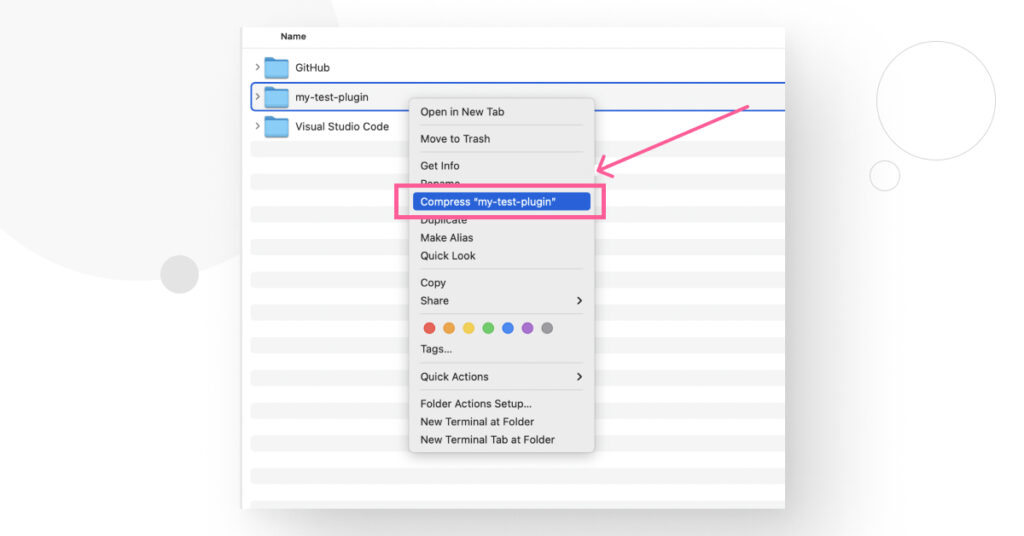
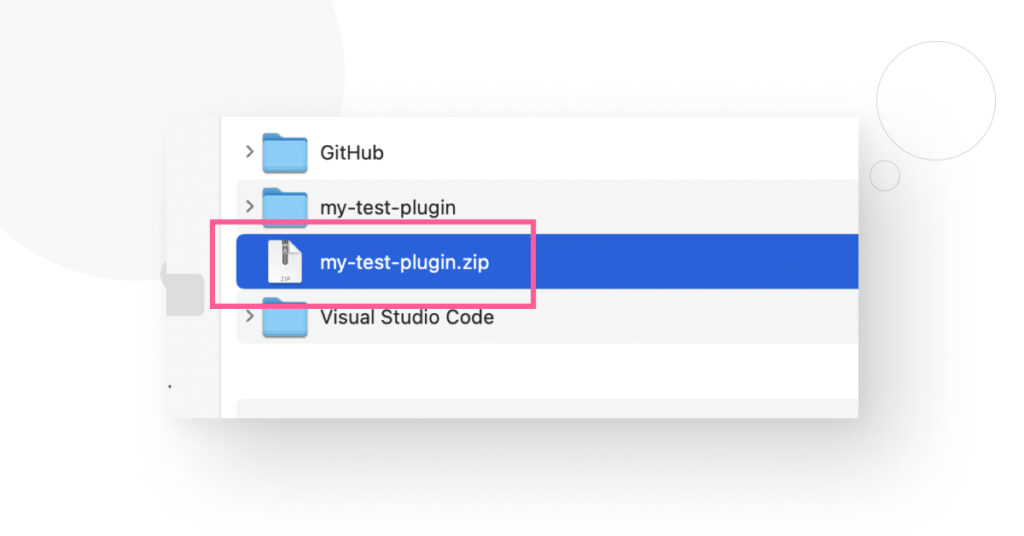
This will result in a .zip file you can upload into your WordPress site.
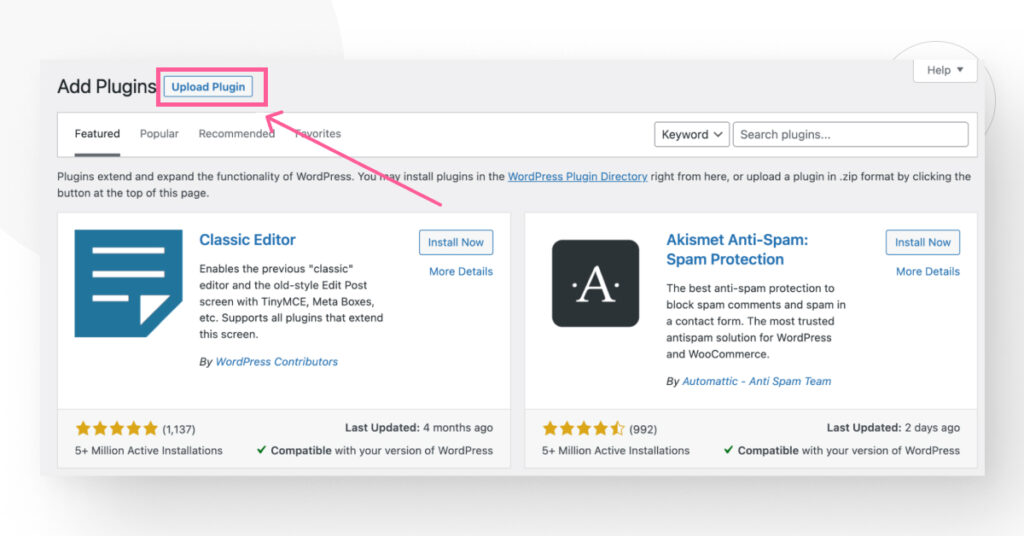
Upload your plugin into your WordPress environment
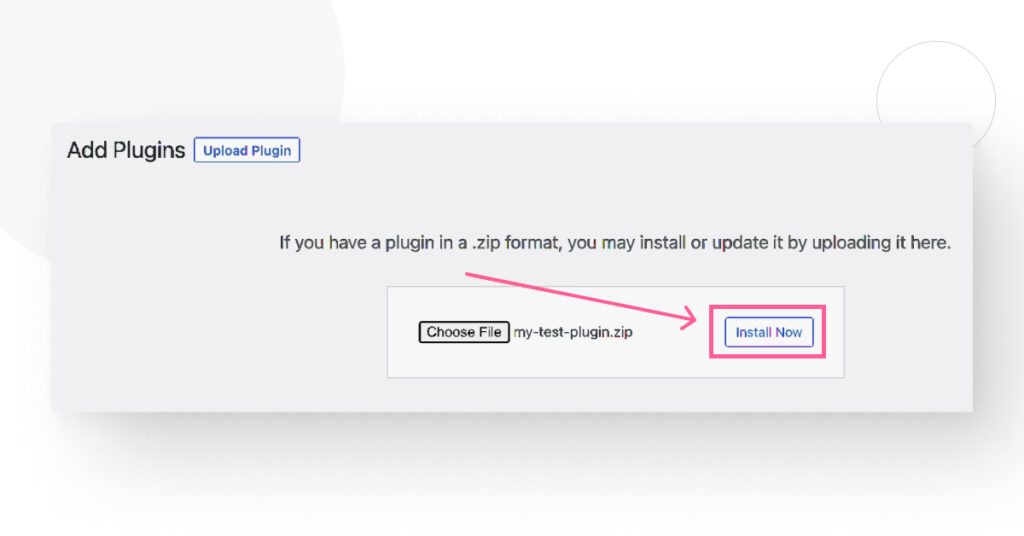
On the WordPress admin panel, go to Plugins > Add New. At the top, click on Upload Plugin.
Click on Choose File and browse to your plugin’s .zip file.
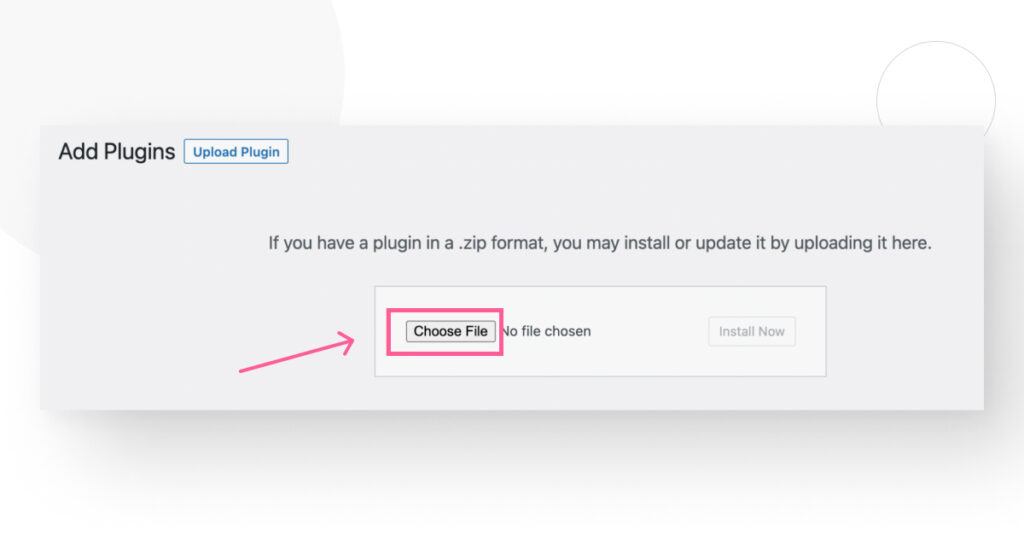
Then click on Install Now.
Click on Activate Plugin.
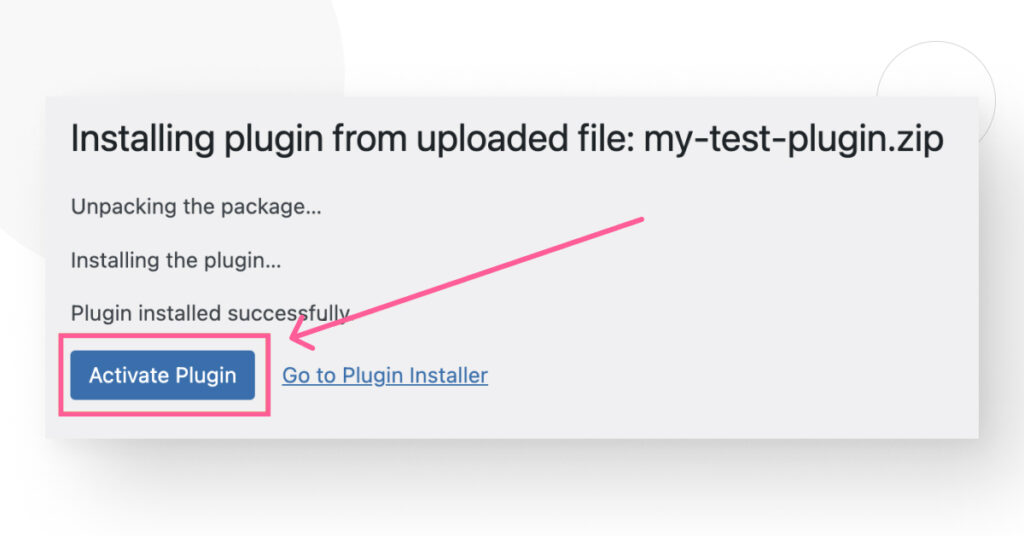
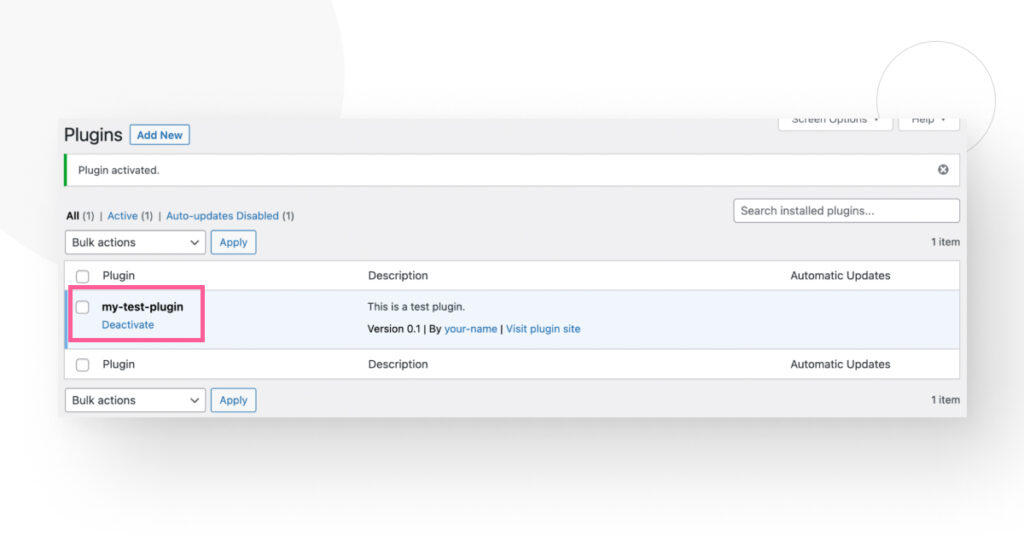
You’ll move to the Installed Plugins screen, where you’ll see your newly-created plugin.
See your plugin in action
This plugin should activate on the live version of every individual post (not on the backend editor). Go to any post and click Preview.

You should see the message in the PHP file at the bottom of the post!
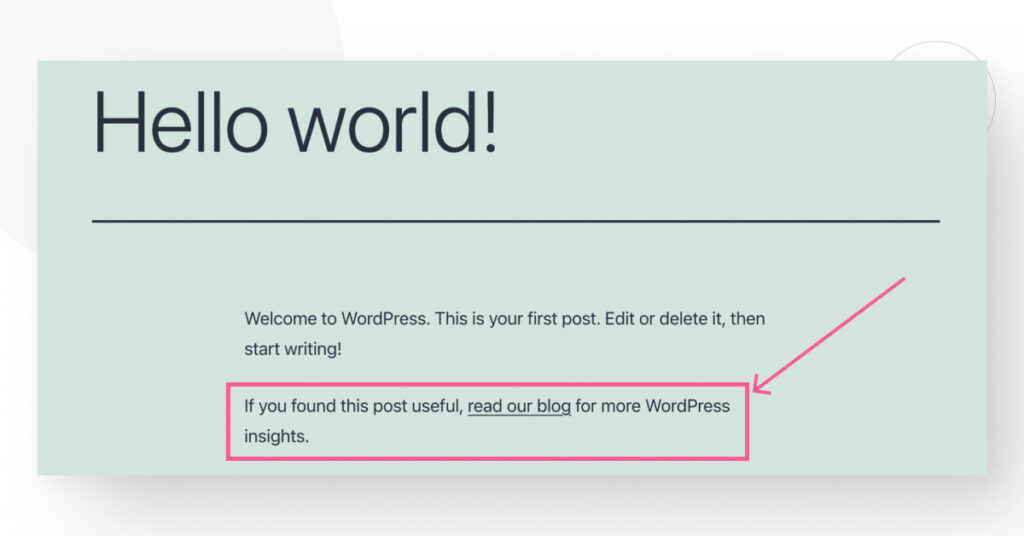
Success!
Step 5: Submit your plugin to the WordPress directory
Submitting your plugin lets other WordPress users download and install it on their sites, too. However, submitting your plugin and having it approved takes around 1 to 10 days (or more), depending on its complexity.
Furthermore, it has to adhere to WordPress’s plugin guidelines to ensure that it’s safe for users, doesn’t qualify as trialware, is stable, etc.
To start the process of submitting your plugin, click here.
Wrapping up
Creating a WordPress plugin involves basic computer skills and coding in PHP, HTML, CSS, and JavaScript. At its most basic, plugins are PHP files that modify or extend your site’s functionalities to solve problems and needs, like creating forms or adding social media sharing buttons.
The more complex plugins involve multiple programming languages and complicated functions. In this article, we walked you through the steps for coding a rudimentary plugin that simply displays a message at the bottom of every post. It serves as a good introduction to the fundamentals. As you advance through your WordPress developer journey, you can create more complex plugins that solve real needs!
If you found this article helpful, check out our blog for more WordPress guides and insights.
📬 Get WordPress updates to your inbox
Sign up for WC Blog updates and never miss a post!
Related Articles

How to Make a Subscriber Into an Admin on WordPress?

How to Grant Secure Access to a Not Live WordPress Site During Development

Do You Need a Web Developer to Build a WordPress Site?

How to Change the Bottom Padding Dimensions on WordPress Blocks