
How to set up a Yoast SEO sitemap in WordPress

Yoast SEO is the most popular SEO plugin. Among many other features, it helps you set up XML sitemaps, files that search engines use to crawl and index pages more efficiently. They allow you to structure your site’s content for engines to explore more intelligently, boosting your SEO score in the process. Harness the plugin’s features by setting up a Yoast SEO sitemap in WordPress.
This article explores the importance of XML sitemaps (or simply “sitemaps”), their benefits, how to set up yours using Yoast SEO, and how to submit it to Google Search Console.
What is an XML sitemap, and why do you need it?
An XML sitemap is an .xml file that lists a website’s URLs and provides additional metadata about each (last update, update frequency, relative importance, etc.). By providing information about the site’s content and structure, sitemaps improve search engine optimization (SEO).
But how? XML sitemaps increase your site’s crawlability and accessibility, helping search engines understand your site.
More specifically, search engine crawlers (also known as robots or web spiders) often discover posts and pages on your site by scouring the internet, browsing the code and content of every URL search they can find. These crawlers gather information about every site by exploring internal and external links, eventually indexing crawled pages to search results.
Search engines that support sitemaps, such as Google or Bing, use them to supplement their regular operations, allowing them to learn from the metadata they provide. While using a sitemap doesn’t guarantee your pages will rank in search results, it does help crawlers explore your site more intelligently.
Other benefits of sitemaps include the following:
- Establishing relevance. The metadata in the sitemap provides additional information about each URL, such as the last modification date, its relative importance, and any alternate language versions. With this information, search engines understand your content’s relevance better.
- Establishing priority and crawling frequency. Sitemaps may contain the update frequency of each or some URLs. This information guides search engines on which pages are more important and how often they should be crawled.
- Ensuring crawling and indexing on large pages. Admins for large websites, such as those with 500 pages or more, find ensuring all pages are internally linked more challenging. This may lead to search engines not crawling and indexing every page. The sitemap’s structure ensures they easily access and understand your entire website.
- Indexing for new websites. New websites have few or no external links leading to their pages. As a result, search engines have a harder time accessing their pages. The sitemap’s structure ensures easy access.
- Identifying errors. XML sitemaps can report errors and issues robots encounter while crawling your website. Regularly submitting updated websites helps you identify broken links, missing pages, and other problems that reduce search engine visibility.
How to set up a Yoast SEO sitemap in WordPress?
If you want to harness the SEO benefits of an XML sitemap, you’ll have to set it up on your WordPress site. Yoast SEO is the most popular SEO-related plugin and is pretty much a must at this point for many developers, so we’ll use it to create our XML sitemap. The process is straightforward, so you shouldn’t have any problem generating yours.
Create your Yoast SEO sitemap
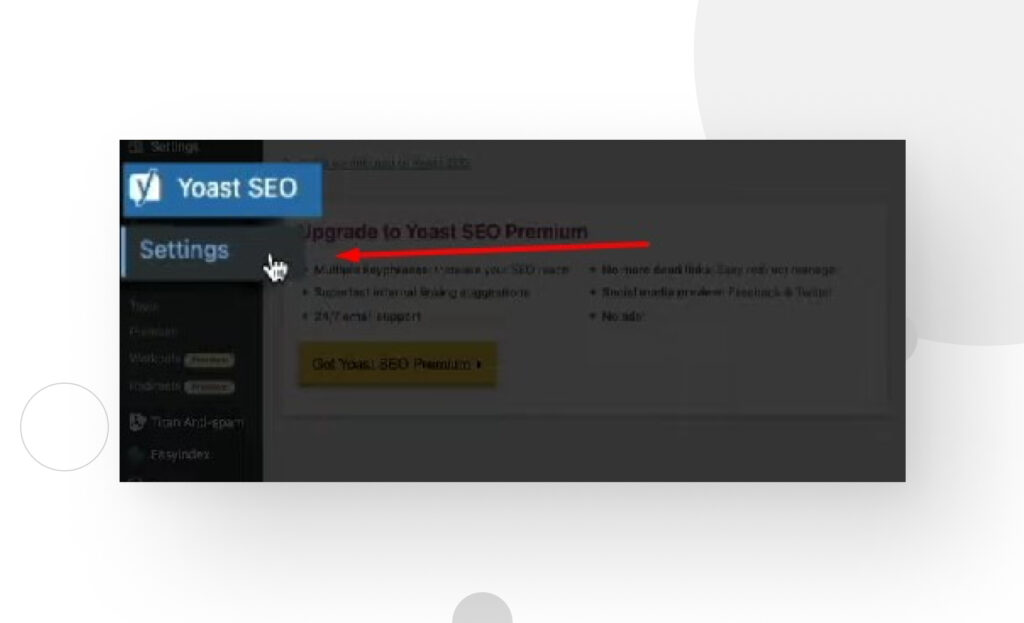
First, log in to your WordPress admin dashboard. Hover your pointer over the Yoast SEO logo on the left-hand sidebar and click General.
On the following screen, click on Settings, also on the left-hand sidebar.
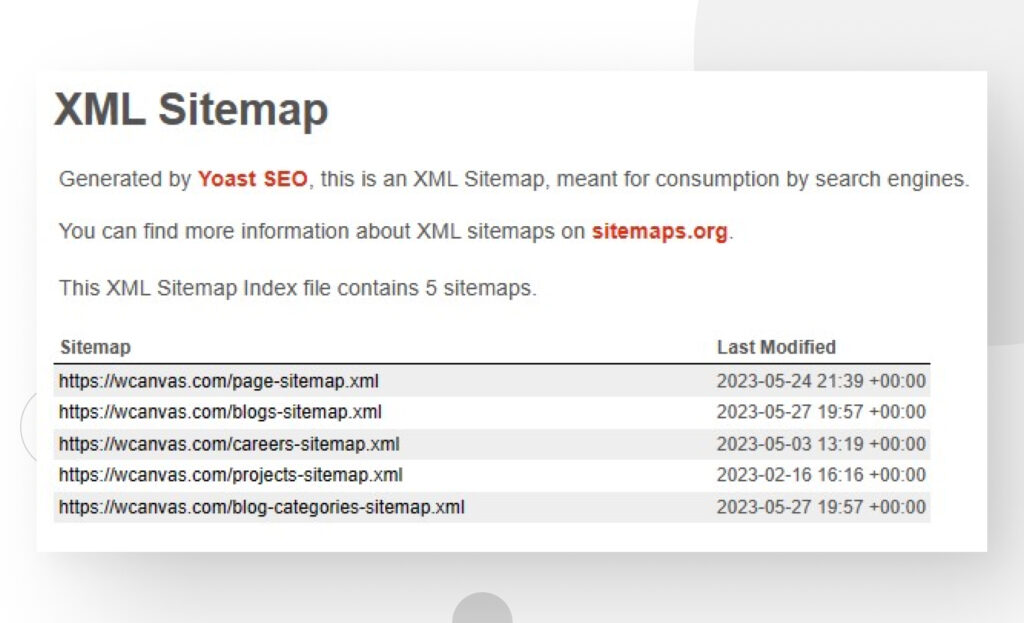
You’re now in the Site features section. Scroll down until you find the APIs subsection. Under APIs, you’ll see the XML Sitemaps option.

Click the Enable feature button, and the plugin automatically creates a sitemap! It should be located at:
your-domain.com/sitemap_index.xmlYour sitemap should look something like this:
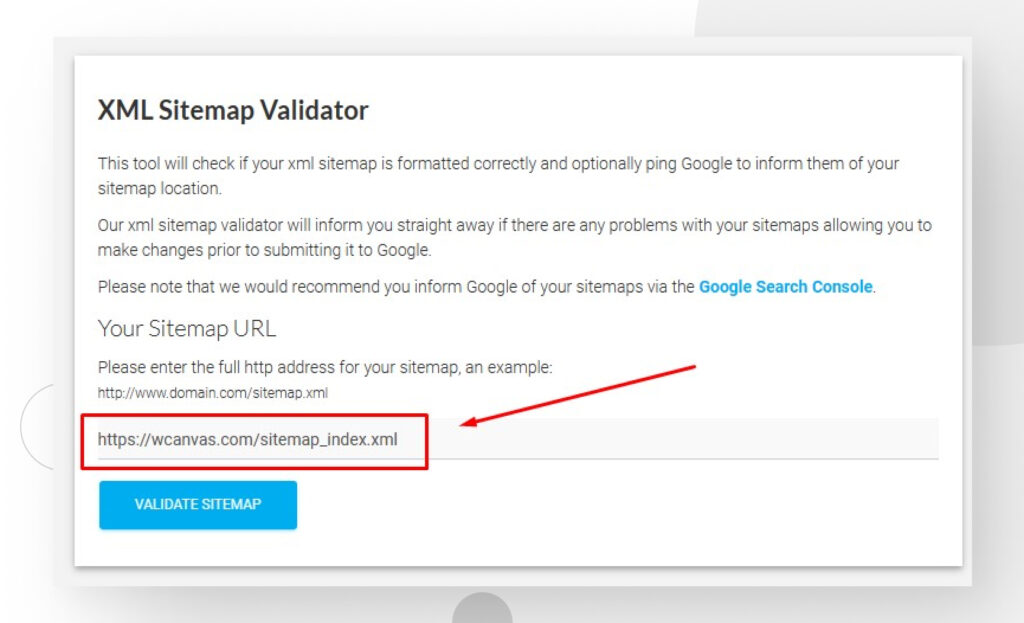
Validate your sitemap
Now that your sitemap exists, you should validate it. For that, go to XML-Sitemaps.com’s XML Sitemap Validator tool. Simply input your sitemap’s full URL in the text box and click on Validate Sitemap.
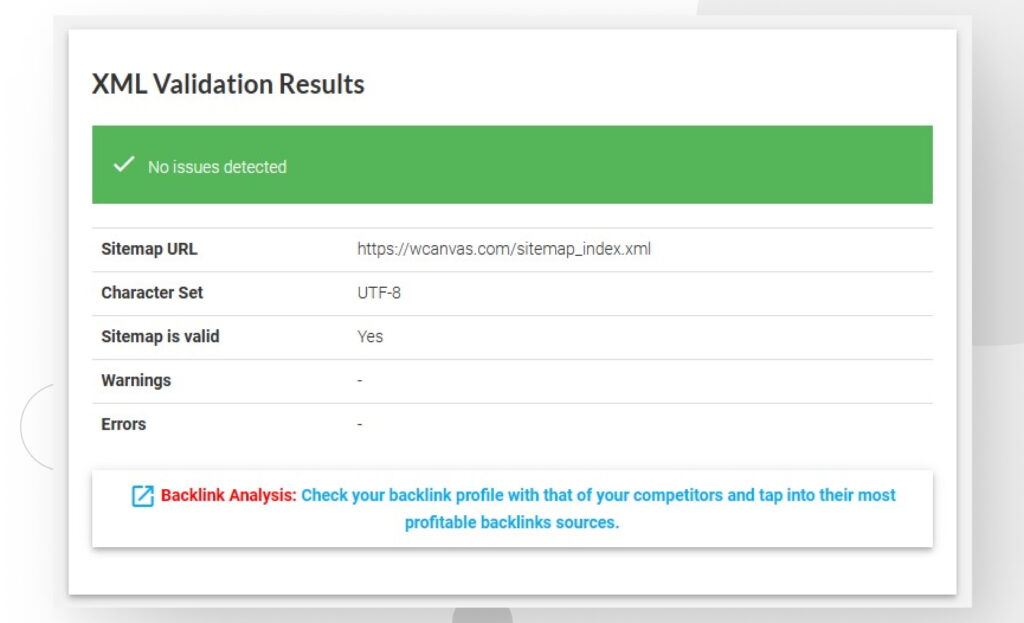
If the tool detects no issues with your sitemap, you’ll see the following screen:
Submit your sitemap to search engines
Once your sitemap is created and validated, you must submit it to search engines. Google is the most popular search engine, so most websites submit their sitemaps to Google Search Console.
Keep in mind that before submitting your sitemap to Google, you’ll have to integrate your site with Google Search Console, the platform you’ll actually submit your sitemap to. If you’ve never done this, follow these steps using Yoast SEO.
Once done, all you need is your sitemap’s URL, which (again) should be something like this:
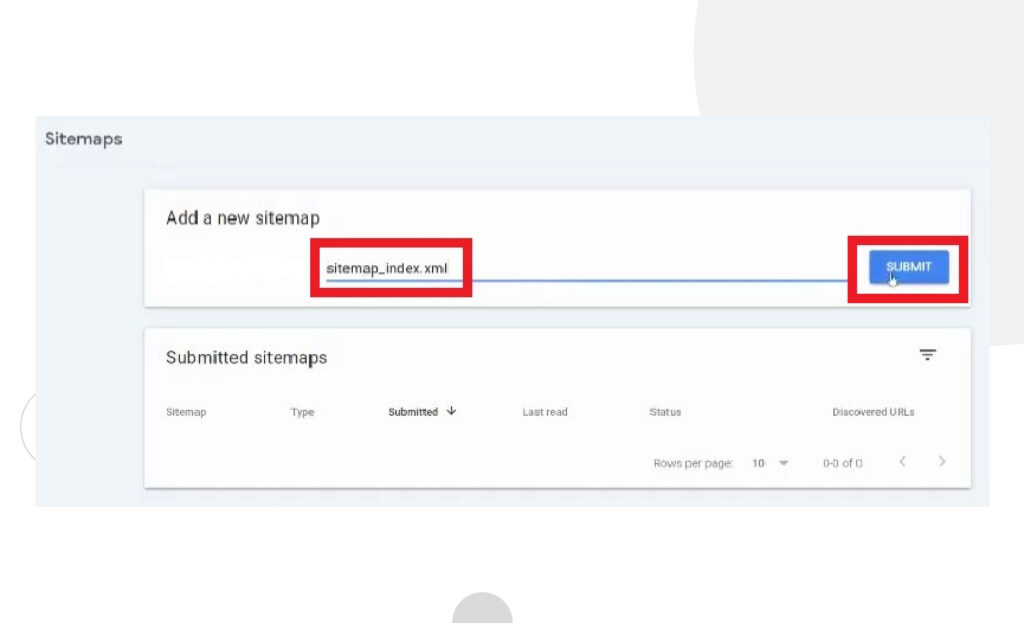
https://your-domain.com/sitemap_index.xmlCopy the sitemap_index.xml part of the URL and go to Google Search Console. On the left sidebar panel, click on Sitemap. On the Add a new sitemap section, paste the partial URL and click Submit.
Once done, you can check your site’s URLs’ crawl and indexing metrics in the Pages section. This report will give you detailed information about the status of each of your site’s pages. You’ll know which pages are indexed by search engines (in this case, Google), which are not, and which have been excluded or have issues, among other diagnostics.
Setting up your XML sitemap has many benefits
A sitemap is a tool to improve your site’s SEO, providing a structured list of crawlable pages. They can be especially beneficial for large websites where it can be challenging to ensure internal linking for all pages and posts or on new sites that crawlers can’t access through external links yet. Still, all websites benefit from them, and in this post, you learned how to create, validate, and submit your sitemap to Google Search Console.
If this post was helpful, check out our blog for more WordPress tips, guides, and insights!
📬 Get WordPress updates to your inbox
Sign up for WC Blog updates and never miss a post!