
How to Manage Noindex Tags in WordPress with Yoast SEO

Managing noindex tags in WordPress is one of the most common SEO adjustments made by admins, owners, and developers. While it is possible to edit your site’s HTML to add the noindex tag, it takes more time and is more prone to human error.
As a result, we recommend using Yoast SEO, the most popular SEO plugin, to add or remove noindex tags. It’s faster, easier, and less error-prone.
In this article, we’ll guide you through how to use Yoast SEO to manage noindex tags across multiple WordPress content types, including posts, pages, custom posts, categories, and more.
Key Takeaways
- Using Yoast SEO, you can quickly and easily manage noindex tags across WordPress without the need to code.
- You can manage noindex tags for every content type in WordPress using Yoast SEO.
What is the noindex Tag?
noindex is an HTML tag that tells search engine robots (“crawlers”) not to index a particular web page, preventing it from appearing in search results.
The noindex tag is related to the 3 primary functions search engines like Google and Bing perform: crawling, indexing, and ranking.
- Crawling is scouring the internet, going through the code and content of every URL search engine crawlers can find. A “crawler” or “web spider” is the software search engines use to crawl pages.
- Indexing is storing and organizing the content explored during the crawling process.
- Ranking is providing the most relevant content for the searcher’s query. What you see on search results is what the search engine ranked from most to least relevant for your query.
When a crawler indexes a web page (adding it to the index, an extensive database of crawled pages), it competes with other pages to rank in search results for specific keywords.
The noindex tag prevents that page from being added to the index, thus preventing it from appearing in search results.
Using Yoast SEO to Manage the noindex Tag
Yoast SEO is WordPress’s most popular search engine optimization (SEO) plugin. It offers a comprehensive suite of tools designed to improve SEO and one of its features is managing the noindex tag.
Using Yoast SEO, WordPress users can easily set and remove the noindex tag on individual pages, posts, categories, and custom post types. This ensures that search engines ignore content that site owners don’t want to display in search results.
Yoast SEO provides a user-friendly interface to adjust the noindex without directly editing the site’s HTML code. This makes it accessible for users without technical expertise and more convenient for WordPress developers.
Let’s figure out how to set and remove the noindex type in various content types using Yoast SEO.
How to Manage the noindex Tag in Various WordPress Post Types with Yoast SEO
Individual Pages or Posts
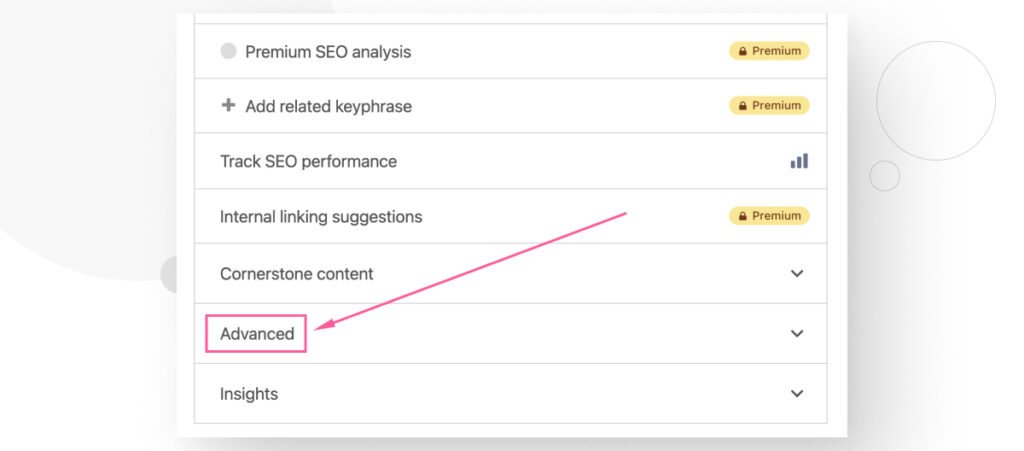
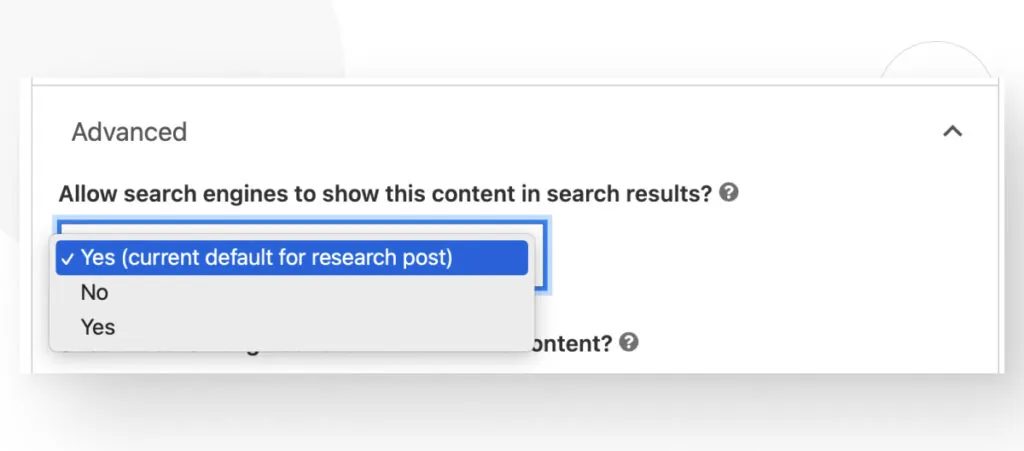
To apply a noindex tag using Yoast SEO settings, go to the post or page you want to keep off search results (the process is the same for pages and posts), scroll down, and click the Advanced tab.
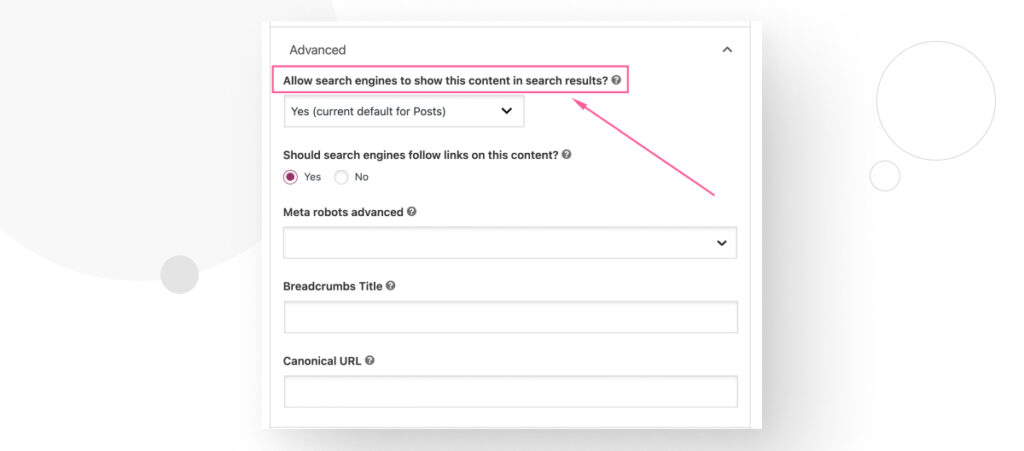
The Allow search engines to show this content in search results? option determines whether your post has a noindex tag.
Click on the dropdown menu and select Yes or No.
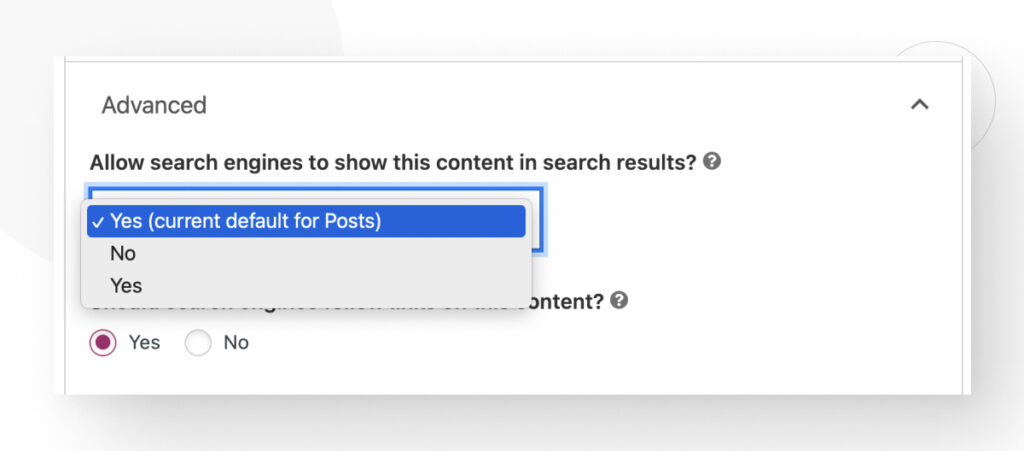
Yes means that your post or page will not have the noindex tag, because you are saying, “Yes, I want this content to appear in search results.”
No means your page or post will have the noindex tag and will not appear in search results.
Content Types
If you want to add or remove the noindex tag from all posts, pages, or the homepage, go to Yoast SEO > Settings in the dashboard’s left-hand sidebar.
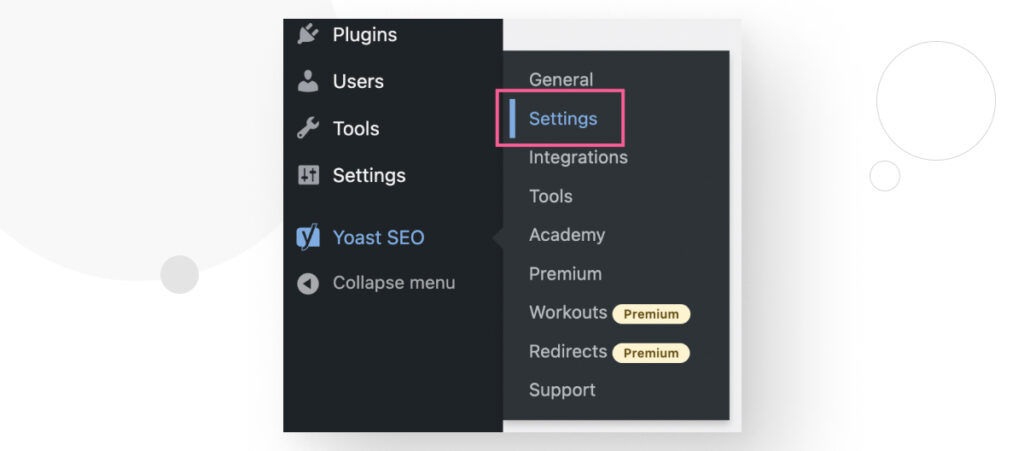
In Yoast’s sidebar, click on Pages, Posts, or Homepage.
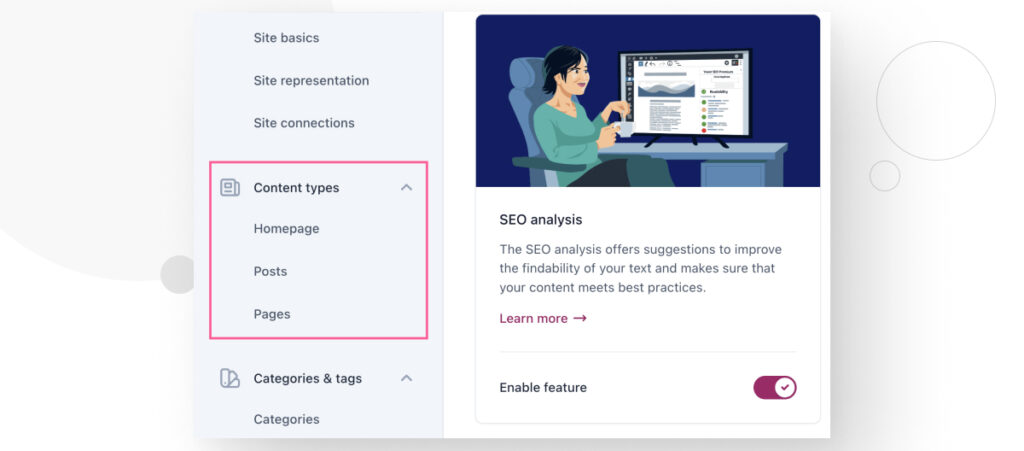
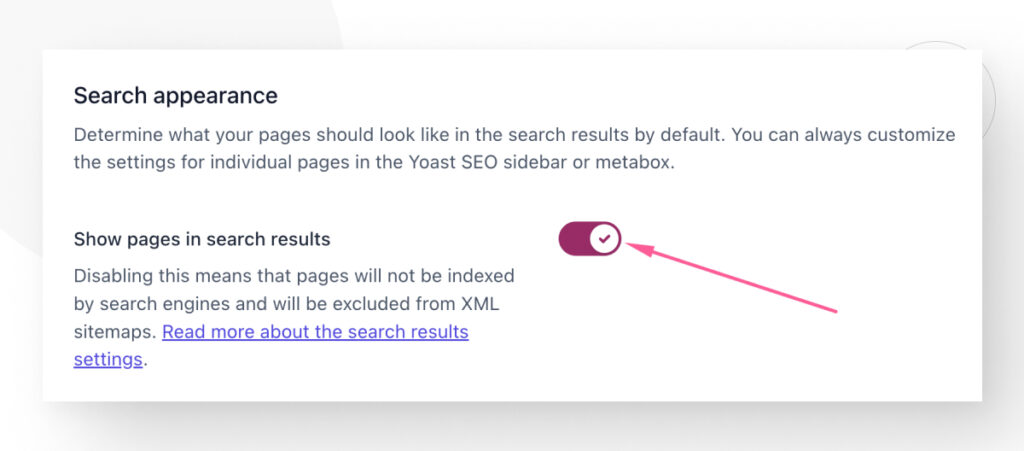
Go to the Show X in search results section and turn the slider on or off. Remember that if you do this, every post or page on (or your homepage) your site will either gain or lose the noindex tag, so use this setting carefully.
The process works the same for the homepage and posts.
Categories, Tags, and Other Taxonomies
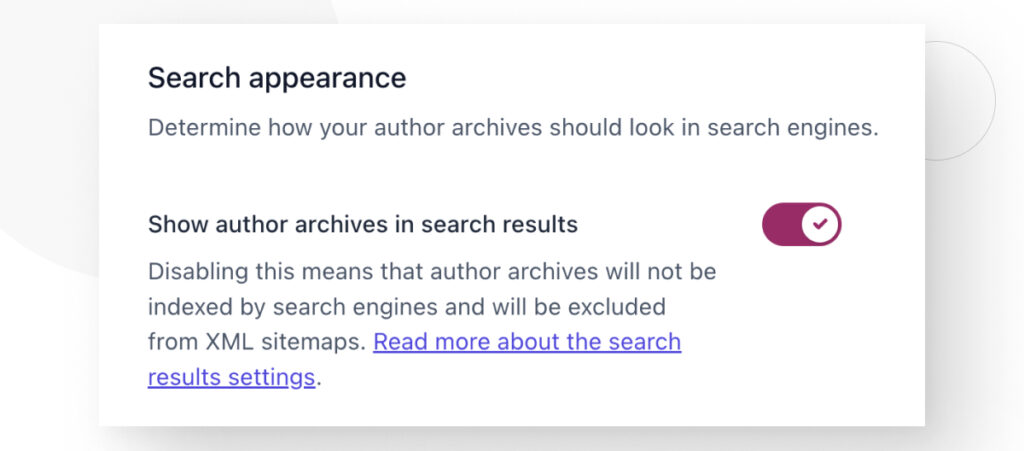
The same process works for categories, tags, author archives, date archives, format archives, special pages like the 404 page, and media pages.
Go to Yoast SEO > Settings on the dashboard’s left-hand sidebar. Turn the slider on or off to add or remove the noindex tag.
Keep in mind that the following taxonomies contain the noindex tag by default:
- Date archives.
- Format archives.
- The 404 page.
- Media pages.
Individual Custom Posts
Once you’ve created a custom post, the process for noindexing it is the same as for individual posts and pages. Access that custom post in Gutenberg, scroll down to the Advanced tab, and select Yes or No on the Allow search engine to show this content in search results? dropdown menu.
All Posts of a Specific Custom Post Type
If you want to noindex every post of a specific custom post type, you can add the following function to your theme’s functions.php file.
/**
 * Add noindex for custom post type "research"
 */
function yoast_research_no_index( $string = '' ) {
    $post_type = get_post_type();
    if ( $post_type ) {
        $post_type_data = get_post_type_object( $post_type );
        if ( 'research' === $post_type_data->rewrite['slug'] ) {
            $string = 'noindex';
        }
    }
    return $string;
}

add_filter( 'wpseo_robots', 'yoast_research_no_index', 999 );
This function hooks into Yoast SEO’s wpseo_robots filter, checks the current post type, and applies the noindex tag to every post labeled research.
Keep in mind that this function automatically applies the noindex tag to every post within a specific custom post type, so make backups and use it carefully.
Individual Author Pages
If you want a specific author’s page to not appear in search results, you can do so through WordPress’s built-in configurations. You don’t need Yoast SEO to do this, but we’re leaving it in this guide just in case.
On the dashboard, go to Users > All Users.
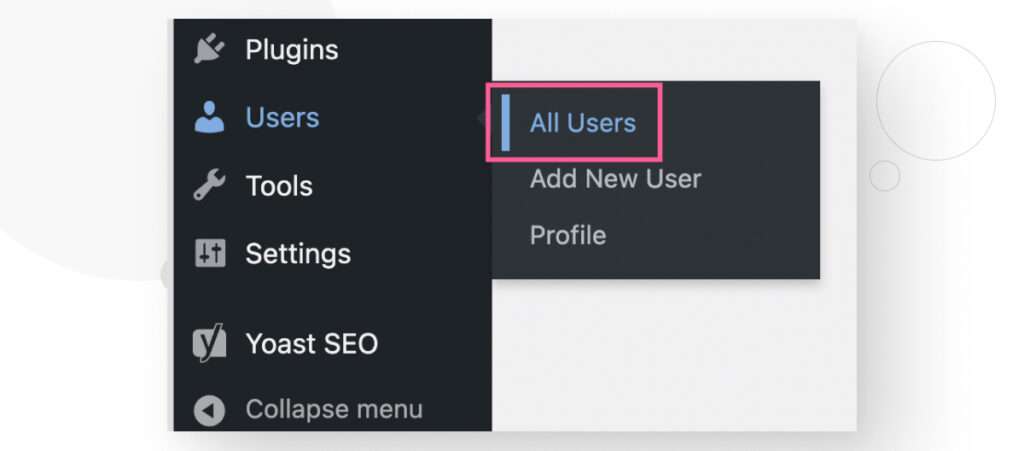
Click on the author whose page you don’t want to show in search results.

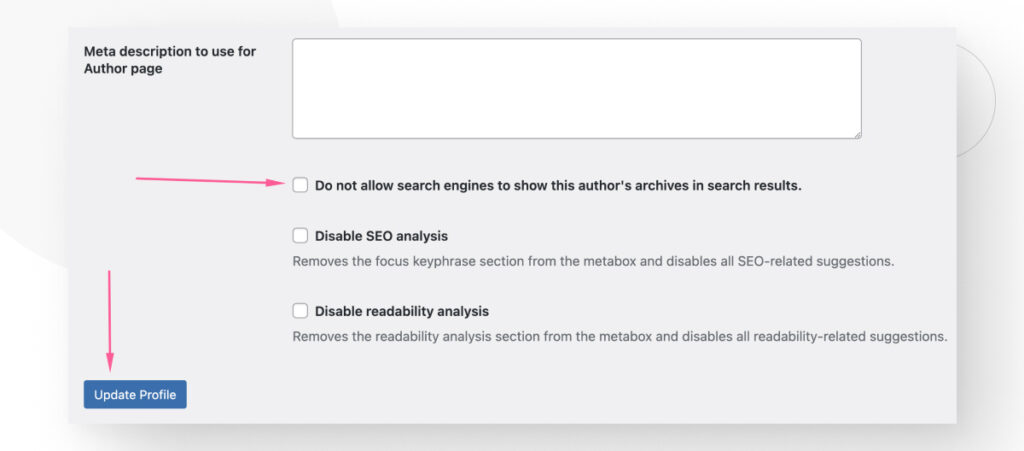
Scroll down and check Do not allow search engines to show this author’s archives in search results, then click on Update Profile.
Your Entire Site
Finally, you can also use WordPress’ built-in configurations to noindex your entire site.
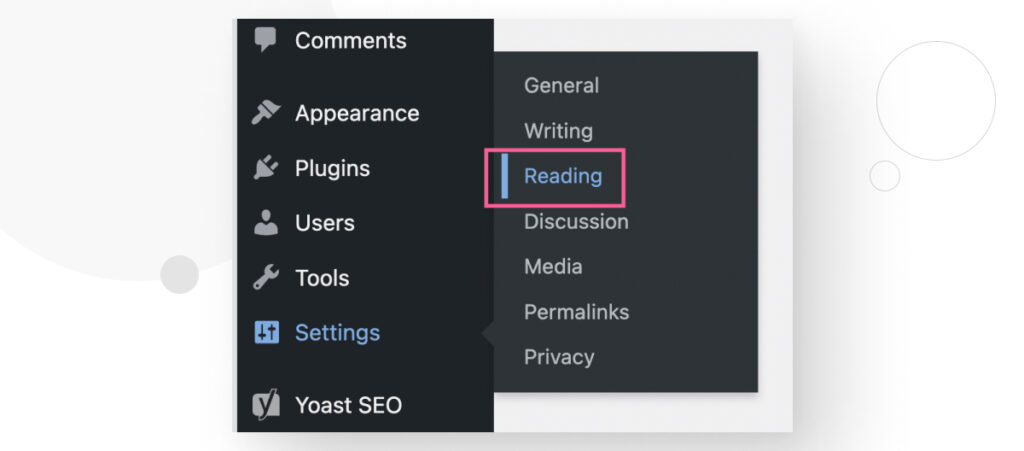
On the dashboard, go to Settings > Reading.
Scroll down and check Discourage search engines from indexing this site, then click on Save Changes.
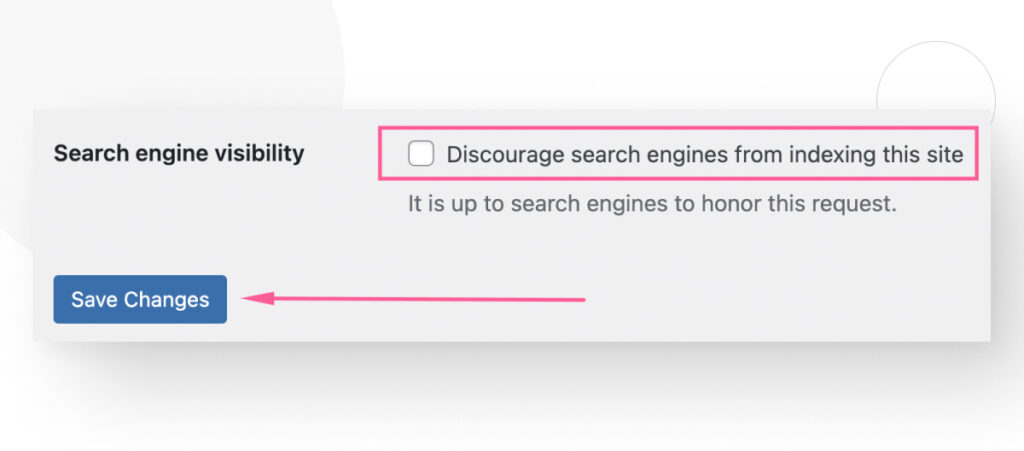
Keep in mind that this is more of a suggestion to search engines, and they may or may not abide by it.
Yoast SEO Lets You Easily Manage Manage noindex Tags in WordPress
Yoast SEO is the most popular SEO plugin for WordPress. It makes it very easy for site owners and developers to adjust the site’s SEO without writing code.
One of the most common adjustments owners, admins, and developers perform is setting or removing the noindex tag. In this article, we learned how to manage noindex tags across various content types and even your entire site.
Hopefully, you now know how to manage noindex tags and can start improving your site’s SEO. If you found this post useful, read our blog and resources for more insights and guides!
📬 Get WordPress updates to your inbox
Sign up for WC Blog updates and never miss a post!