
WordPress robots.txt guide: what it is and how to use it
The robots.txt file helps you optimize your WordPress site’s SEO rankings. Let’s explore what it is and how to enjoy its benefits.

If you are a developer or have experience working with websites, you’ve probably heard of a file called robots.txt.
robots.txt exists on most websites. It issues instructions for search engine crawlers like Google’s Googlebot to follow. This file determines which of your website’s URLs bots will crawl and index.
Learning to optimize your website’s robots.txt file is a great way to boost your website’s overall SEO rating. The best part is that you don’t need particularly deep web development knowledge to reap its benefits.
This article will act as an introduction to robots.txt. You’ll learn:
- What robots.txt is and the benefits of optimizing it.
- Where robots.txt is located in your WordPress installation.
- How to edit robots.txt.
- The commands you can issue in robots.txt.
- How to check if robots.txt is working as intended.
- The limitations of robots.txt.
Let’s dive in.
What is the robots.txt file?
robots.txt is a text file available in your website’s folders. From the robots.txt; you can issue commands that tell search engine crawlers which of your site’s resources they can access.
robots.txt allows you to specify which directories, subdirectories, URLs, or files you don’t want the search engines to crawl.
What are the benefits of editing WordPress’ robots.txt file?
The main reason to use and optimize robots.txt is to reap the SEO benefits. An optimized robots.txt file can boost your website’s overall SEO ranking.
If you don’t use robots.txt at all, bots can crawl and index every page from your website by default. This may be great for some, but most websites have at least some duplicate, empty, or other kinds of SEO-unfriendly content.
It’s good practice to prevent these pages from being crawled and from appearing in search results. However, robots.txt does not stop Google’s crawler (or any other) from displaying your website’s pages in search results. Even if you block a page from being crawled using robots.txt, it may still appear in search results if they are internally or externally linked.
If you want to avoid a page from appearing in search results, you need to both disallow it in robots.txt and manually prevent it from appearing in searches by using an SEO manager such as Yoast SEO.
Optimizing robots.txt will help web crawlers explore your website more efficiently, improving your site’s overall SEO.
Optimizing your robots.txt file improves your crawl budget
The crawl budget is the amount of time and resources a web crawler dedicates to your website. The higher the budget, the more URLs a web crawler will explore. The less budget, the fewer URLs it will explore.
Crawling and indexing cost time and computing power, both limited resources. As a result, you want web crawlers to explore only the pages you want to boost on search engines and to ignore all the pages you don’t want to boost.
Optimizing your robots.txt file will highlight high-quality content, reduce the visibility of low-quality content (in SEO terms), and prevent your server’s resources from being overwhelmed with too many requests.
Now that you know the basics of the robots.txt file, let’s move on to finding and editing it.
Where is WordPress’ robots.txt file? How do you access it?
WordPress automatically generates the robots.txt file. It is located in the root domain of your directory, and you can find it by entering your homepage and adding “/robots.txt” to the end of the URL. For example, https://wcanvas.com/robots.txt.
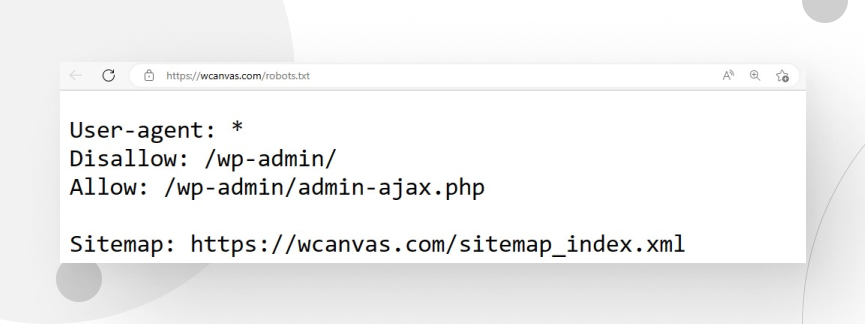
Important: You can only visualize robots.txt in this directory, not edit it.
How to edit and optimize robots.txt in WordPress?
There are various ways to edit the robots.txt file. Our developers always use one of two options: using the Yoast SEO plugin or creating a text file called “robots” and uploading it to WordPress’ root directory.
Using Yoast SEO
The simplest way to edit the robots.txt file is by using plugins. Our preferred plugin for this purpose is Yoast SEO. The process is quick and straightforward.
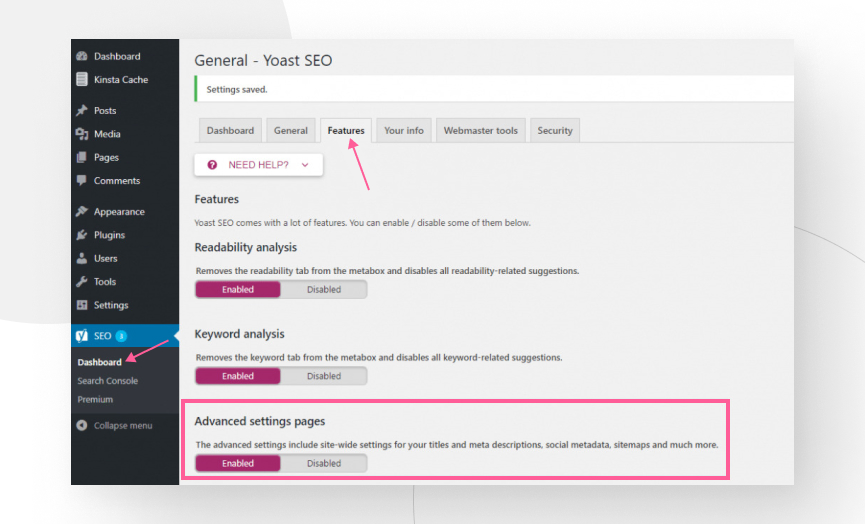
First, you must activate the plugin’s advanced features. You can do this through the admin panel: Yoast SEO → Features. Once in the features tab, enable the Advanced settings pages option.
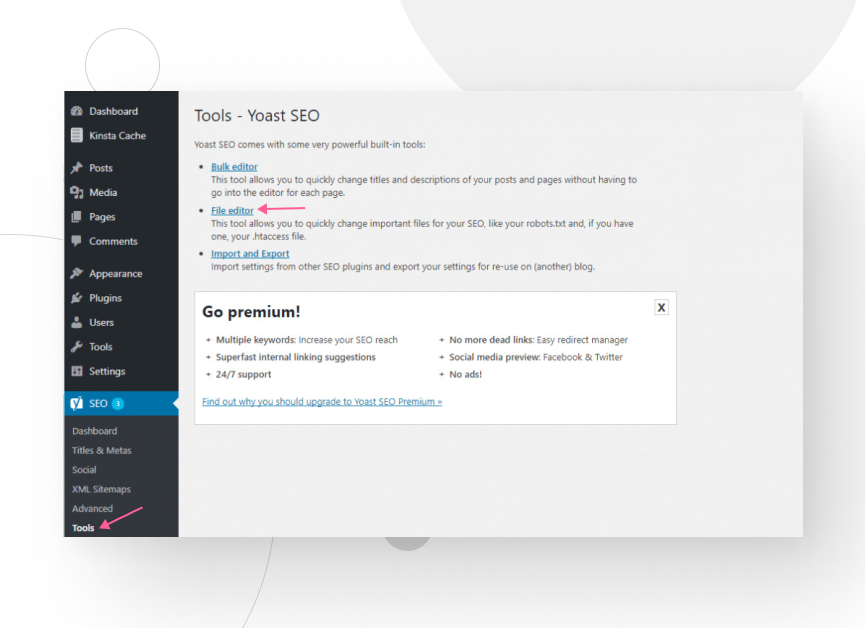
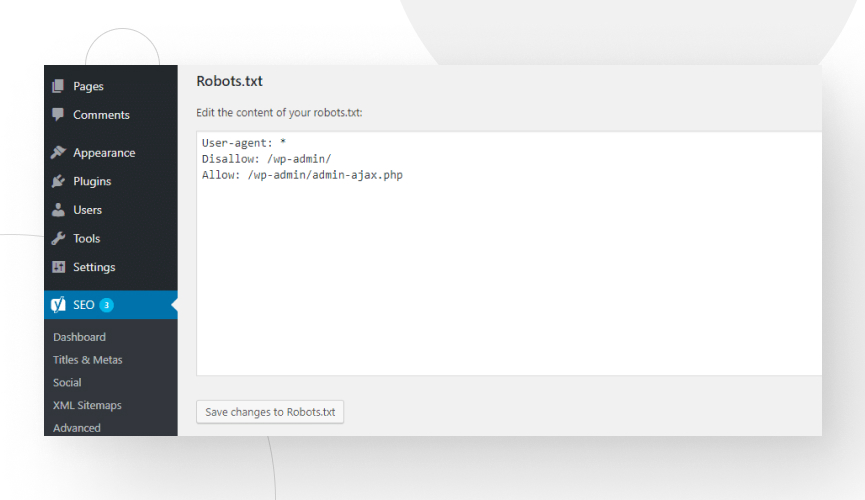
Once you’ve enabled advanced settings, go to Yoast SEO → Tools and click on File editor.
You’ll have the option to create a robots.txt file if you don’t already have one.
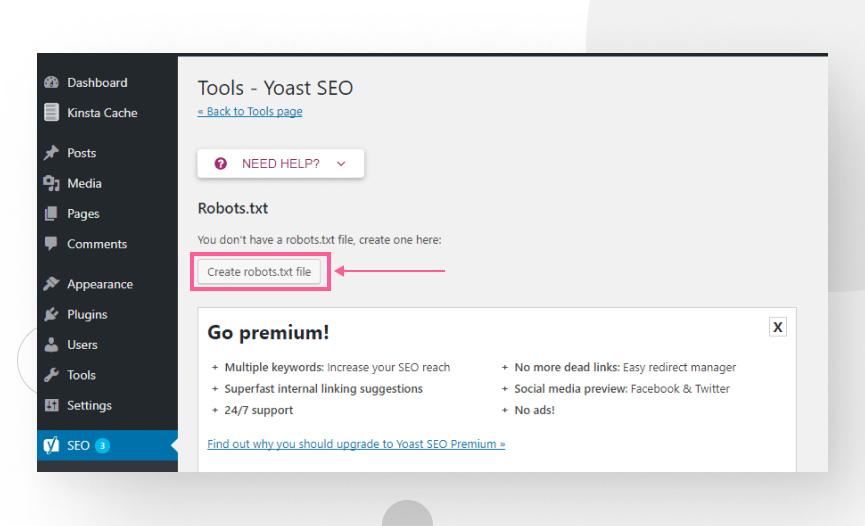
Now you can freely edit robots.txt and save the changes.
Create a “robots.txt” file and upload it to your WordPress root directory
In the rare cases when we haven’t had access to Yoast SEO, we’ve created a .txt file called “robots” and uploaded it into the WordPress installation’s root directory.
Open any text editor and create a file with the directives and syntax you want.
We’ve used two main methods to upload it: cPanel’s File Manager and FTP apps.
Uploading robots.txt using cPanel
- Access your cPanel File Manager and go to your WordPress installation’ directory, usually public_html.
- In the upper toolbar, click Upload, and the file will now be in the root directory.
Uploading robots.txt using FTP
- Connect to your website’s swebsite’sng an FTP app such as FileZilla.
- Navigate to your root directory (again, it’ll be public_html).
- Simply drag and drop the file into the root directory.
robots.txt commands
The robots.txt file issues instructions for the crawlers to know which parts of your site to crawl. The three main commands are:
- user-agent: refers to the search engines’ roengines’rawler. The goal of your robots.txt commands is to direct these crawlers. You can issue commands directed at specific crawlers or every crawler.
- disallow: tells the user agent not to access, crawl, or index a particular URL, directory, or subdirectory.
- allow: opposed to disallowing. Indicates that the content should be accessed, crawled, and indexed.
Remember that the allow and disallow commands will only apply to the user agent specified in the line above them. Several disallow lines can be included for each user agent.
Most used commands in robots.txt
Indications for a specific bot:
User-agent: [bot name]

//Example
User-agent: Googlebot
Indications to all bots:
User-agent: *Add an asterisk (*). Any command under this line applies to every crawler that follows links on your website.
Allow full access to all crawlers:
User-agent: *

Disallow:
Differently to do this would be not to use the robots.txt file or leave it empty.
Block the entire website from being crawled and indexed using a “/”:
Disallow: /Block a directory and its contents:
Disallow: /directory_name_here/Disallow a specific webpage:
Disallow: /page_address_hereBlock all images on the website:
User-agent: *

Disallow: /
Block a specific image:
User-agent: Googlebot-Image

Disallow: /image/secret.jpeg
Disallow a specific file type:
User-agent: *

Disallow: /*.png$
No .png images will be crawled and indexed.
Block a character sequence using an asterisk:
User-agent:

Disallow: /secret-directory*/
Block URLs ending in a specific set of characters by adding the “$” symbol at the end:
User-agent: *

Disallow: /*.pdf
Disallow a specific bot:
User-agent: [bot name]

Disallow: /
Allow crawling for a specific bot while blocking all others:
User-agent: [bot name]

Disallow:

User-agent: *

Disallow: /
How to check if my robots.txt file is working correctly for Google?
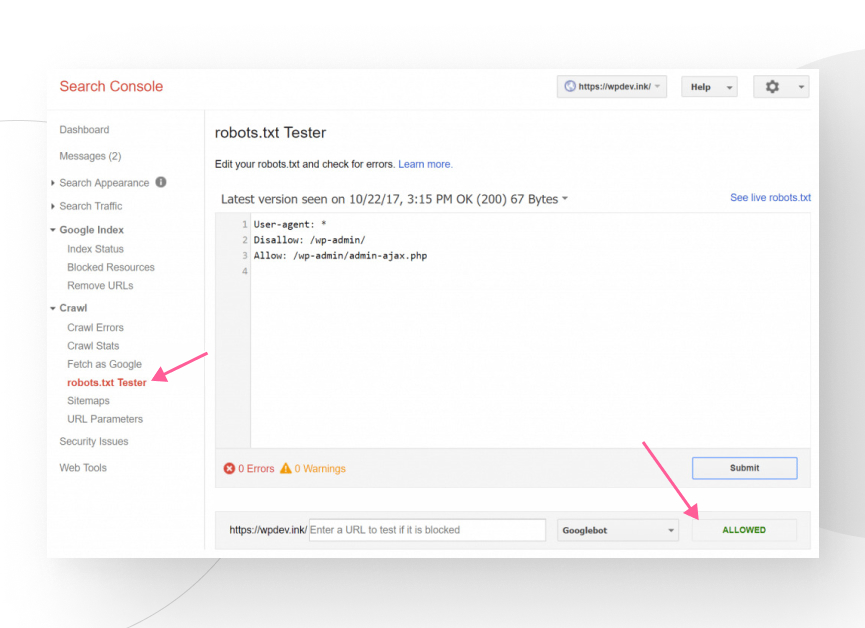
You can check whether your file is set up correctly by using the robots.txt test tool in Google Search Console. With this test, you can see how Googlebot will read it, allowing you to detect potential errors.
To use the tool, go to Crawl > robots.txt Tester on the left-hand panel of Google Search Console. Enter the URLs you want to test in the bar at the bottom.
It will show you two results: Allowed (the URL is not blocked) or Blocked (and indicate the command blocking the URL).
Limitations of the robots.txt file
Although this file can be handy for you, it also has some limitations you should be aware of.
- This file does not guarantee that Google won’t index blocked content search engines discover web pages through links. If there are internal links to the blocked pages, bots will likely crawl and index them anyway. You should block indexing by including a noindex tag or protecting the page with a password to prevent indexing.
- Different crawlers interpret robots.txt syntax in different ways. Most of the attention goes to Google since it’s overwhelmingly popular. Still, you may need to explore how other search engines interact with robots.txt to optimize it for the most engines possible.
- Some crawlers may not even follow the commands in robots.txt at all.
Conclusions
If you have specific content you want crawlers to avoid or exclude from search results, it is worth setting up the appropriate commands in your website’s robots.txt file.
The ultimate benefit of optimizing your robots.txt file is improving your website’s crawl budget. By preventing bots from crawling and indexing specific posts and pages, you ensure search engines have enough resources for all the pages you want to boost.
Finally, remember that while (most) crawlers will follow your file’s indications, this doesn’t guarantee that the content can’t be indexed by other means. If you want a specific page off search results, use the noindex tag instead.
If you found this article helpful, check out our blog for more WordPress insights and guides.
📬 Get WordPress updates to your inbox
Sign up for WC Blog updates and never miss a post!