As many headless WordPress developers know, improving your frontend site’s SEO is very challenging when using certain frontend frameworks, such as React. But in this day and age, SEO is an essential element of web development. One you cannot ignore. So there has to be a solution, right?
Fortunately, there are many solutions to the SEO challenges headless WordPress sites face. This article focuses on one of them: making the most popular SEO plugin, Yoast SEO, compatible with a headless WordPress implementation that uses a GraphQL API and Next.js for the frontend site.
When you’re done, you’ll have the tools to get the best of the headless architecture’s flexibility and the monolithic architecture’s SEO features. Let’s get into it!
How is SEO different in headless WordPress implementations?
A headless CMS separates the front and the backend, allowing greater flexibility in delivering content to multiple platforms and devices through modern frontend frameworks, while the CMS acts as the backend for the website. WordPress entered the headless market relatively recently but is already being adopted, with new frameworks and plugins that streamline headless WordPress implementations increasingly popping up.
Separating the WordPress front and backend not only provides greater flexibility but also leads to some significant changes in how developers manage search engine optimization (SEO). WordPress has historically been a very SEO-friendly CMS, and developers naturally want to preserve that, but the segregated approach presents some challenges, such as:
- Ensuring the schema, metadata, and URL structure persists from the backend to the frontend.
- Validating the content is mobile-friendly.
- Ensuring new content updates the XML sitemap automatically.
- Implementing solutions to increase speed and enhance performance.
Navigating these and other challenges is key to harnessing the benefits of headless WordPress without sacrificing WordPress’ historically high SEO-friendliness. Let’s explore why we choose Next.js as the frontend framework that provides the best SEO functionality for your headless WordPress project.
Why use Next.js as an SEO-focused frontend framework for headless WordPress?
In our developers’ experience, Next.js is the best frontend framework to boost SEO in a headless WordPress project.
Next.js is a React framework that offers excellent SEO capabilities. Its main selling point in terms of SEO is that it supports server-side rendering (SSR). With SSR, servers generate HTML content and send a fully rendered page to the client (browser) for display. Since search engine crawlers easily access and understand pre-rendered HTML (as opposed to dynamically generating it), they index the content more effectively, improving search rankings.
In addition to SSR, Next.js supports meta tags. Meta tags are code snippets that tell search engines what a specific page is about and how they should display it in search results pages. They also inform browsers how to display the page itself to visitors. You can use the following component to append meta tags to the page’s <head> section:
import Head from 'next/head'Now you can insert new tags into the page’s HTML, such as:
const Example = () => {

  return (

    <div>

      <Head>

        <title>Yoast SEO for headless WordPress with GraphQL and Next.js</title>

        <meta name="description" content="Generated by Create Next App" />

        <link rel="icon" href="/favicon.ico" />

      </Head>

    </div>

  )

}
Your page’s SEO will improve by using the most relevant tags for search results: title, description, robots, refresh redirect, charset, and viewport.
Next.js also provides native tracking for essential SEO stats such as First Contentful Paint (FCP) and Largest Contentful Paint (LCP) by creating a custom App component and defining a reportWebVitals function:
export function reportWebVitals(metric) {

  console.log(metric)

}
In addition to these and other SEO features, Next.js is the basis of Faust.js, a headless WordPress framework created by WP Engine. Given Faust’s rising adoption and popularity among headless WordPress developers, it makes sense to familiarize yourself with Next.js to take full advantage of its capabilities.
How to set up Yoast SEO for headless WordPress using GraphQL and Next.js
Now let’s move on to setting up Yoast SEO on your headless WordPress installation, step by step.
Step 1: Install the necessary plugins
You’ll need three WordPress plugins to set up Yoast SEO using GraphQL and Next.js:
- Yoast SEO. The premiere SEO plugin for WordPress.
- WPGraphQL. The plugin that provides an extendable GraphQL schema and API for any WordPress site.
- WPGraphQL Yoast SEO Addon. The plugin to support Yoast SEO while using WPGraphQL.
Step 2: Set the frontend site’s URL
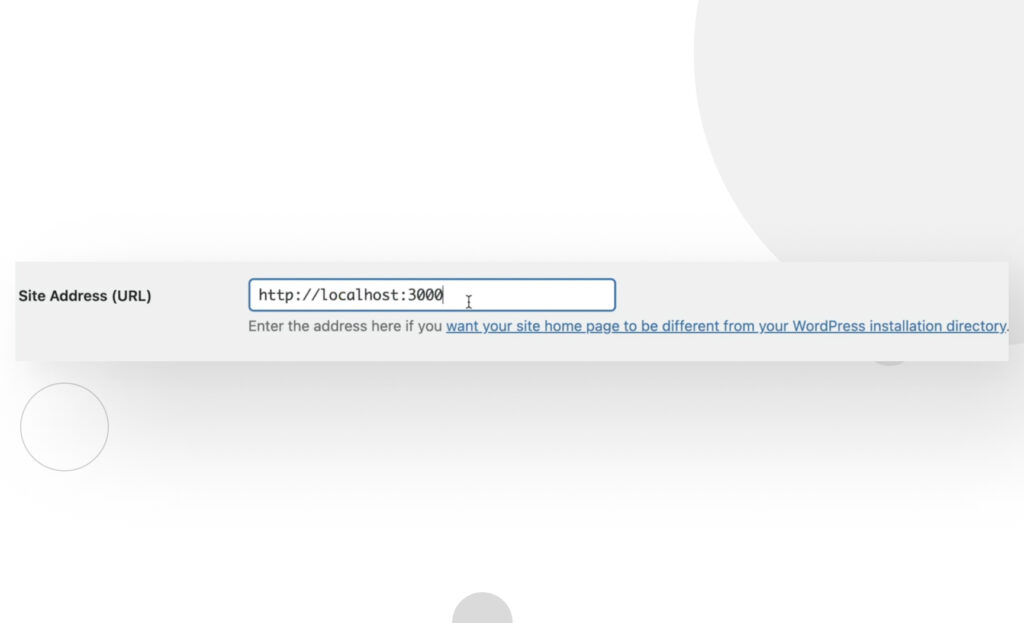
For the Next.js frontend site to reflect the changes you’ll perform using Yoast SEO, you must link it to your WordPress backend. To do that, go to your admin dashboard, then to Settings > General to access the General Settings. Go to the Site Address (URL) and paste the frontend site’s URL.
In this case, we use the default development server port Next.js spins off of, “http://localhost:3000”. You can also paste the URL for a live website.
Step 3: Confirm Yoast SEO is active and working
Go to any post or page and click on Edit. Once in the editor interface, confirm you can access the Yoast SEO sidebar and scroll down to confirm you can interact with the Yoast SEO settings.
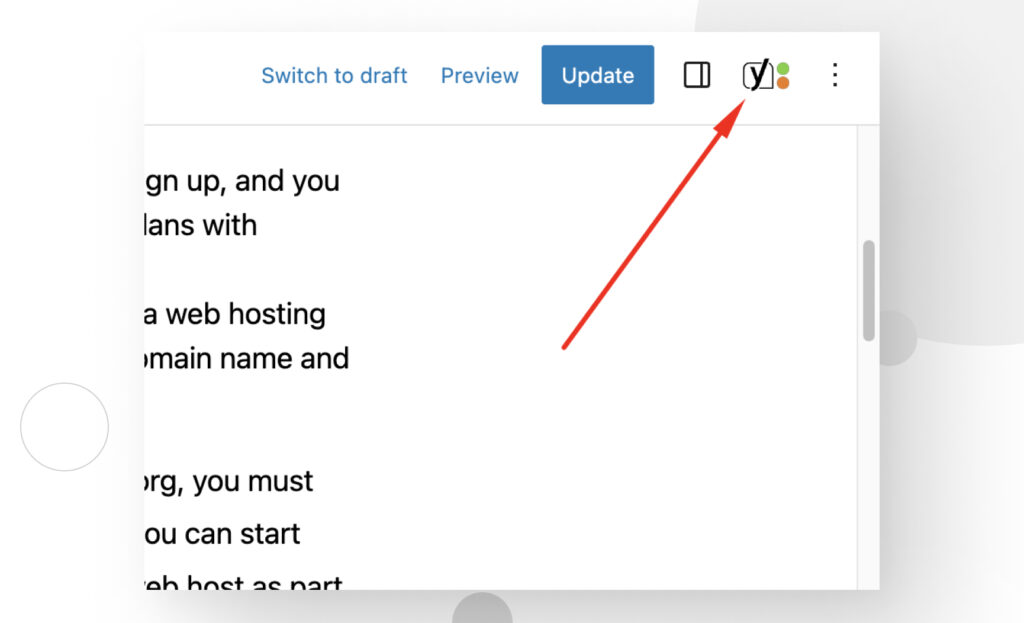
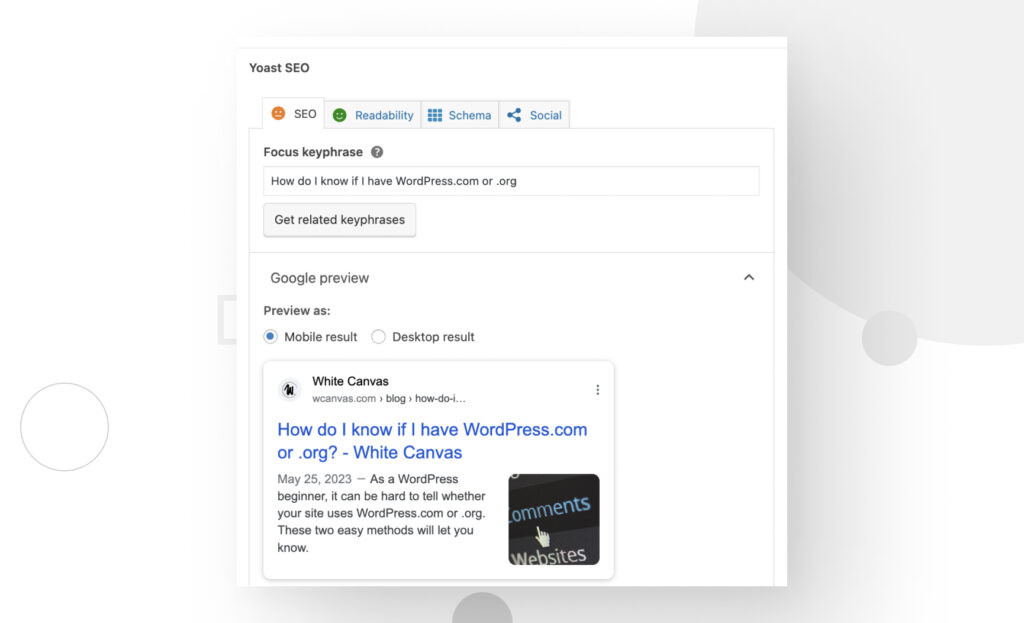
Once you’ve confirmed Yoast SEO works, it’s time to experiment with the GraphiQL IDE’s SEO field.
Step 4: Expose the SEO metadata in the GraphiQL IDE
From the admin dashboard sidebar, go to GraphQL > GraphiQL IDE. You’ll be met with this screen. Use the Query Composer to add fields, including the SEO field.
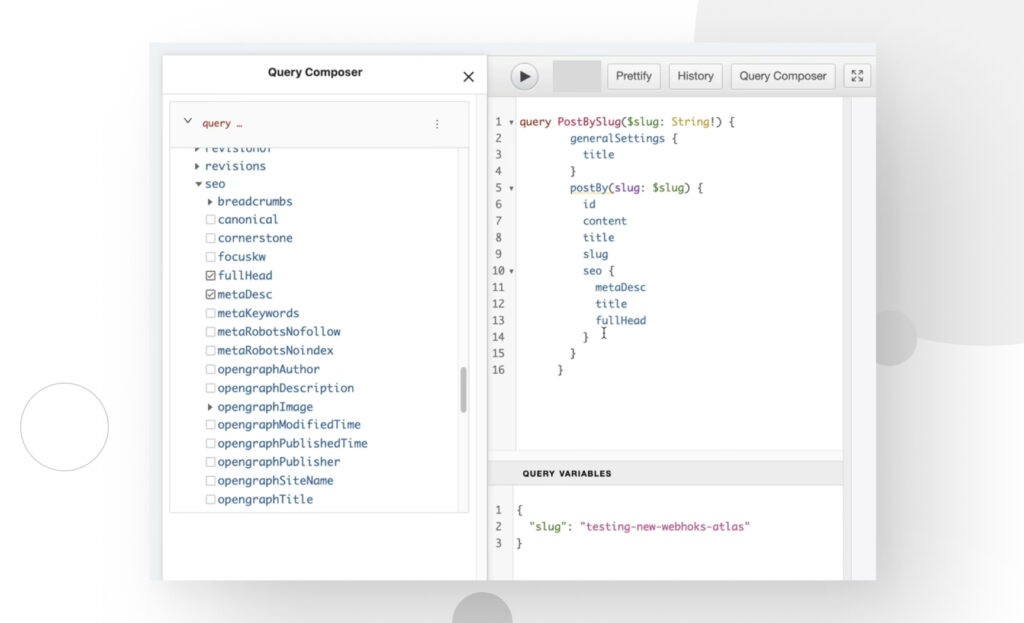
The WPGraphQL Yoast SEO Addon plugin makes it really easy to expose and query for the SEO data in the WordPress WPGraphQL schema. You can expose the SEO field in the GraphiQL IDE and ask for the specific data we want back. In this case, we’ll use the following query to request the SEO meta description, title, and full head of a specific WordPress page:
query PostBySlug($slug: String!): {

    generalSettings {

        title

    }

    postBy(slug: $slug) {

        id

        content

        title

        slug

        seo {

            metaDesc

            title

            fullHead

        }

    }

}
We’ll use an individual post or page’s slug as the query variable:
{

    slug: "your-slug-goes-here"

}
As a reminder, the WordPress slug is the text after your domain name, which identifies specific pages in your site (except for the home page). By creating a query where we request detailed SEO-related information and using a post or page’s slug as the query variable, we’re requesting the SEO information for a specific page or post.
If you click on Play, you should receive the SEO information you requested:
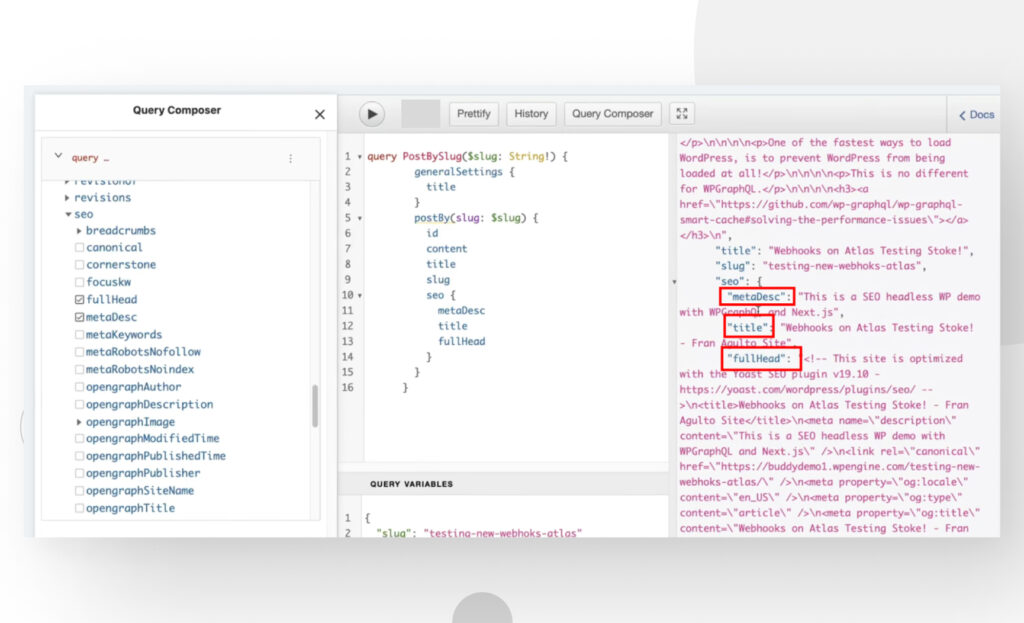
By this point, we’ve converted our WordPress installation into a GraphQL server ready to provide content to our Next.js implementation, with the added benefit of delivering SEO metadata. Our next step will be to use Next.js to consume SEO data, turn it into HTML, and improve how search engines index our frontend site.
Step 5: Consume the SEO data from your frontend website
For this step, you’ll need to use your own Next.js project or clone a demo from a repository. If you don’t currently have a project, you can clone this Next.js demo by WP Engine developer Francis Agulto.
Open the repository in Visual Studio Code, and from the project’s root, go to “pages / [slug].js”. “[slug].js” is the dynamic routes file for the single post details pages. If you’re using the cloned repository, search for the getStaticProps function and paste the following code over it, or create a new getStaticProps function if you’re using your own project:
export async function getStaticProps({ params }) {

  const GET_POST = gql`

    query PostBySlug($id: ID!) {

      post(id: $id, idType: SLUG) {

        title

        content

        date

        seo {

          metaDesc

          fullHead

          title

        }

        author {

          node {

            firstName

            lastName

          }

        }

      }

    }

  `;
As you can see, we’re pulling the SEO meta description, full head, and title, the same data we queried in the earlier step. Now all that’s left is showing it on our Next.js site by adding it to our Next.js variable in Next.js and destructuring it so we can add it to our JSX. To do that, copy the following code at the top of your [slug].js file:
import { client } from "../lib/apollo";

import { gql } from "@apollo/client";

import Head from "next/head";

export default function SlugPage({ post }) {

  const { seo } = post;

  return (

    <div>

      <Head>

        <title>{seo.title}</title>

        <meta name="description" content={seo.metaDesc} />

        <link rel="icon" href="/favicon.ico" />

      </Head>
By doing this, we’re destructuring the SEO properties into the post and adding them to our Next.js head tag with the help of next/head. If you inspect your frontend page, you should see the properties you requested as part of the HTML <head> tag!
You can use this method to add additional SEO properties to your website and improve its search engine rankings.
Improve your headless WordPress website’s SEO using Next.js and GraphQL
Transitioning to a headless WordPress implementation opens up new opportunities for content delivery but comes with a few unique challenges for maintaining SEO. Fortunately, there are various solutions for those challenges, one being the combination of GraphQL and Next.js.
Next.js offers server-side rendering (SSR) capabilities, meta tags, and other SEO-boosting features, making it a great alternative for WordPress developers dipping their toes into headless waters. By following the steps in this article, you’ll incorporate Yoast SEO into your GraphQL-powered WordPress backend and make the most out of Next.js’s SEO potential.
Check out our blog for more guides, tips, and WordPress insights.
Related Articles

WordPress SEO / 3 min read
WordPress SEO / 3 min read
How to Disable Google Indexing on a WordPress Site
Whether you want your invite-only website to stay private or you’re testing your web development skills and want to avoid traffic, there are various reasons for wanting to disable Google…
Read More
WordPress SEO / 12 min read
WordPress SEO / 12 min read
What Is a WordPress SEO Consultant?
A WordPress SEO consultant is a WordPress agency that specializes in optimizing your website's search engine optimization to help you drive more organic traffic to your site and become more…
Read More
How to... / 11 min read
How to... / 11 min read
How to Set Up and Use Link Whisper in WordPress
Link Whisper is a WordPress plugin that makes building internal links easier and faster by providing AI-powered suggestions based on a site-wide scan of your content. In this article, we’ll…
Read More
How to... / 6 min read
How to... / 6 min read
How to Manage Noindex Tags in WordPress with Yoast SEO
Managing noindex tags in WordPress is one of the most common SEO adjustments made by admins, owners, and developers. While it is possible to edit your site's HTML to add…
Read More
How to... / 5 min read
How to... / 5 min read
How to set up a Yoast SEO sitemap in WordPress
Yoast SEO is the most popular SEO plugin. Among many other features, it helps you set up XML sitemaps, files that search engines use to crawl and index pages more…
Read More
